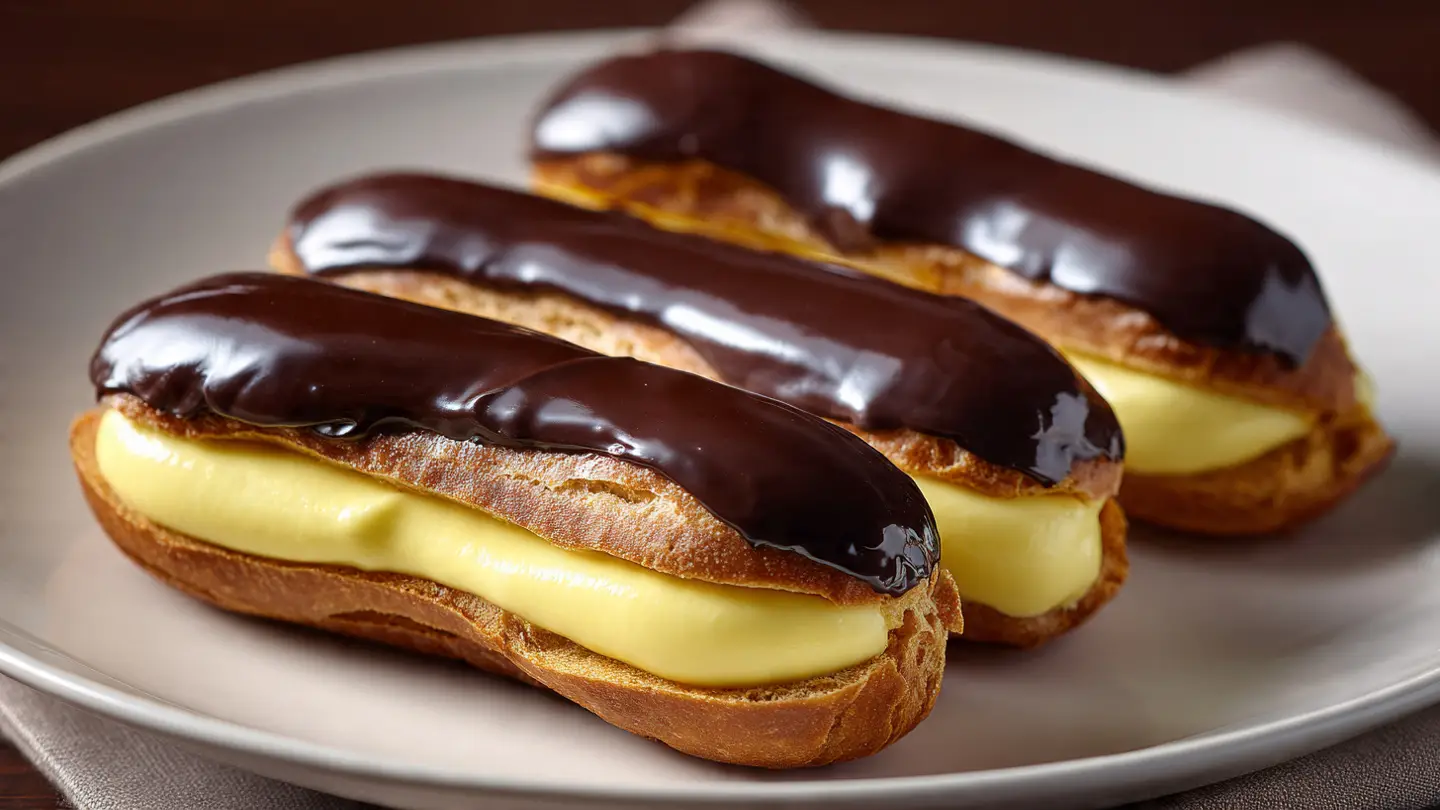
Elegant Chocolate Eclairs with Pastry Cream
Making eclairs always seemed like a big secret to me. I used to look at them in bakery windows and think they were too hard to make. The shells look so light and the cream is so smooth. I finally tried making them in my own kitchen and found out a great secret. They are not as hard as they look! You just need to follow some simple rules and take your time.
In this post, I will show you how to make real chocolate eclairs. We will make the flaky dough, the sweet vanilla cream, and the shiny chocolate top. You do not need fancy tools or a chef hat to get this right. We will walk through every part of the process so your eclairs come out looking and tasting great. I promise it is a lot of fun to see them puff up in the oven.
Ready to bake something special today? Let’s get our bowls and spoons ready to go.
Recipe Quick Info
- Prep Time: 45 minutes
- Cook Time: 35 minutes
- Servings: 12 eclairs
- Difficulty: Medium
The Basics of Choux Pastry
The shell of an eclair is made from a special dough called choux pastry. It is different from cake batter or bread dough. You cook it on the stove first. This helps the dough hold onto steam. When you put it in the hot oven, that steam makes the dough pop up. This leaves a big empty space in the middle for our cream. It is like magic in the kitchen!
I remember the first time I made these. I did not cook the dough long enough on the stove. My eclairs came out flat and sad like little pancakes. I learned that you have to see a thin film on the bottom of the pot. That tells you the flour is cooked and the water is gone. Now, I always look for that sign so my shells are nice and tall.
What You Need for the Shells

To make the shells, you need simple things from your pantry. You will need water, milk, butter, flour, sugar, salt, and eggs. I like using a mix of water and milk. The milk makes the shells brown nicely and the water keeps them crisp. IMO, using only milk makes them too soft. You want that crunch when you bite into the eclair. Make sure your eggs are at room temperature before you start.
The flour should be all-purpose flour. You do not need special bread flour for this. The butter should be cut into small pieces so it melts fast. If the butter takes too long to melt, too much water will boil away. This can mess up the recipe. Keep everything measured and ready before you turn on the stove. This makes the job much easier and less stressful.
Mixing and Cooking the Dough

Put the water, milk, butter, sugar, and salt in a pot. Turn the heat to medium and wait for it to boil. As soon as it boils, dump all the flour in at once. Use a wooden spoon to stir it fast. It will look messy at first, but keep going! It will soon turn into a big ball of dough. Keep stirring and cooking it for about two minutes. You want to see that thin skin on the bottom of the pot I talked about earlier.
Move the dough to a bowl and let it cool for a few minutes. You do not want to cook the eggs when you add them. Add the eggs one at a time. Stir each egg in until it is totally gone before adding the next one. The dough will look like it is falling apart, but it will come back together. By the last egg, the dough should be shiny and thick. It should hang off your spoon in a V-shape.
Piping and Baking Your Shells

Put your dough into a bag with a large round tip. Line a tray with parchment paper. Pipe long lines about four inches long. Leave space between them because they will grow a lot! If the ends have little spikes, wet your finger with water and press them down. This keeps them from burning in the oven. I once forgot to do this and the tips of my eclairs looked like little charcoal bits!
Bake them at a high heat first to make them puff. Then turn the heat down to let them get dry and hard. Do not open the oven door while they bake. If you let the cold air in, they might collapse. Once they are done, poke a tiny hole in the end of each one. This lets the steam out so they stay crispy. Let them cool completely on a wire rack before you try to fill them.
The Heart of the Eclair: Vanilla Pastry Cream
The filling is what makes an eclair taste like a dream. We call it pastry cream, but it is really a thick, rich custard. It tastes like vanilla and butter. Making it is a lot like making pudding on the stove. You have to watch it closely so it does not burn or get lumps. If you get lumps, do not worry! You can just push it through a sifter to make it smooth again.
I love using real vanilla bean if I have it, but vanilla extract works just as well for every day. The key is to let the cream get very cold in the fridge. Cold cream is easier to pipe and stays inside the eclair. If you try to fill them while the cream is warm, it will just run out and make a big mess. Trust me, I have tried to rush it and it never ends well.
Ingredients for the Cream

For the cream, you need milk, egg yolks, sugar, cornstarch, butter, and vanilla. The egg yolks make it rich and yellow. The cornstarch helps it get thick so it does not flow like soup. I suggest using whole milk for the best taste. 1% milk works too, but it won’t be as creamy. This part of the recipe is very sweet and balances the plain shells perfectly.
- 2 cups whole milk
- 1/2 cup sugar
- 4 large egg yolks
- 1/4 cup cornstarch
- 2 tablespoons butter
- 1 tablespoon vanilla extract
Make sure you have a bowl ready with a piece of plastic wrap. You will need to cover the cream as soon as it is done. This stops a weird skin from forming on top. Nobody likes a chewy skin in their soft cream!
How to Cook the Custard

Heat the milk in a pot until it just starts to bubble. While that heats up, whisk the egg yolks, sugar, and cornstarch in a bowl. Now comes the tricky part called tempering. Pour a little bit of the hot milk into the egg bowl while you whisk fast. This warms the eggs up slowly so they do not scramble. After you add about half the milk, pour the whole egg mix back into the pot with the rest of the milk.
Keep whisking over medium heat. It will go from liquid to thick very fast. Once it starts to bubble, keep whisking for one more minute. This cooks out the taste of the starch. Take it off the heat and stir in the butter and vanilla. Pour it into your bowl and cover it with plastic. The plastic should touch the top of the cream. Put it in the fridge for at least two hours. It needs to be totally cold before use.
Filling the Shells

Once your shells are cool and your cream is cold, it is time to put them together. You can do this in two ways. You can cut the shells in half like a sandwich and spoon the cream in. Or, you can use a small tip on a pastry bag to poke a hole in the bottom and squeeze the cream inside. I think the second way looks more professional, but the sandwich way is much easier for beginners.
If you use the piping bag, you should feel the eclair get heavy in your hand. That means it is full. Be careful not to squeeze too hard or the shell might pop! Fill them right before you want to eat them or a few hours before. If they sit in the fridge for a whole day filled with cream, the shells will get soft. They still taste good, but they lose that nice crunch.
The Final Touch: Chocolate Glaze
An eclair is not finished without that shiny chocolate top. This is the part that everyone sees first. It needs to be dark, sweet, and smooth. We use a simple ganache for this. A ganache is just a mix of chocolate and heavy cream. It is very easy to make but looks very fancy. It hides any bumps on the top of your shells too!
When I first started, I used chocolate chips and they worked okay. But FYI, using a good bar of dark chocolate makes a big difference. It melts better and stays shinier. If your glaze gets too thick while you are working, just pop it in the microwave for five seconds. It will thin right back out. You want it to be thin enough to dip but thick enough to stay on the eclair.
Making the Chocolate Ganache

You only need two main things: chocolate and heavy cream. Chop the chocolate into very small pieces. Put it in a bowl. Heat the cream until it just starts to simmer. Pour the hot cream over the chocolate and let it sit for five minutes. Do not touch it! Let the heat do the work. After five minutes, stir it slowly from the middle until it is dark and glossy.
If you want it to be extra shiny, you can add a tiny bit of corn syrup or butter. This is a pro tip that makes the eclairs look like they came from a high-end shop. Make sure the glaze is warm when you dip. If it is too cold, it will be lumpy. If it is too hot, it will just run off the sides. It should feel like thick syrup.
Dipping the Eclairs

Hold the filled eclair upside down. Dip the top into the chocolate. Lift it up and let the extra chocolate drip off. You can use your finger to wipe the edges if it looks messy. Turn it right side up and put it on a tray. The glaze will set as it sits. If you are feeling extra fancy, you can sprinkle some nuts or white chocolate lines on top before it dries.
I like to let mine sit for about twenty minutes after dipping. This gives the chocolate time to firm up so it does not smear when someone picks it up. These look so beautiful when they are all lined up on a plate. It is hard not to eat one right away! But waiting just a little bit makes them much better to handle and serve.
Storage and Make-Ahead Tips
- Fridge: Keep filled eclairs in a box in the fridge for up to 2 days.
- Freezer: You can freeze the empty shells for up to a month. Just crisp them in the oven before filling.
- Make Ahead: Make the pastry cream a day early to save time.
Common Mistakes to Avoid

The biggest mistake is opening the oven too soon. It is so tempting to peek, but don’t do it! Another mistake is adding the eggs too fast. If the dough gets too runny, you cannot fix it. You have to start over. Always add eggs one by one and check the thickness. The dough should stay in place when you pipe it. If it spreads out into a puddle, it is too thin.
Also, make sure your flour is fresh. Old flour can sometimes act weird with moisture. And don’t forget the salt! Even though this is a dessert, a little salt makes the chocolate and vanilla taste much stronger. If your shells are soft after they cool, you can put them back in a warm oven for five minutes to dry them out. This is a quick fix that saves the day many times.
How to Answer Your Baking Questions
Why did my eclairs fall flat?
They usually fall because the oven was opened too soon or they didn’t bake long enough. The steam inside needs time to turn into a solid wall.
Can I use a different filling?
Yes! You can use whipped cream or even chocolate pudding. Pastry cream is the classic choice, but feel free to be creative with what you have.
My pastry cream is lumpy, what do I do?
Don’t throw it out! Just pour it through a fine-mesh strainer. This will catch all the lumps and leave you with smooth cream.
Do I have to use a piping bag?
If you don’t have one, use a gallon-sized plastic bag. Cut a hole in the corner. It works just as well for the dough and the filling.
How do I keep them crispy?
Store them in an airtight container in the fridge. For the best crunch, fill and eat them within a few hours of baking the shells.
Enjoy Your Homemade Treats
You did it! You made real French eclairs at home. It takes a few steps, but the result is so worth it. These are perfect for parties or just a special snack on the weekend. Now that you know the steps, you can try different flavors like coffee or strawberry. Baking is all about practice and having fun. Enjoy every bite of your fancy chocolate eclairs!