Easy Strawberry Rhubarb Pie for Beginners
Making a pie for the first time can feel scary. I used to think I would mess it up every single time. My first pie was a big mess because I forgot to add sugar! It tasted like sour grass. But after many tries, I learned that a good pie is actually quite simple. You just need some fresh fruit and a bit of patience.
Today, I will show you how to make a strawberry rhubarb pie. This pie is a mix of sweet berries and tart green stalks. It is the best treat for a sunny day. You will learn how to mix the fruit, fill the crust, and bake it until it glows like gold. Let us get your kitchen ready for some baking fun.
Check out the steps below to start your baking adventure!
Getting Ready for Your First Pie
Before you start, you need to know why this pie works. The rhubarb is very sour, but the strawberries are very sweet. When they cook together, they make a perfect team. It is like a party in your mouth where everyone is invited. I love making this in the spring when the rhubarb is bright red and fresh.
You do not need to be a pro to make this work. Even if your crust looks a bit bumpy, it will still taste great. My kitchen often gets covered in flour when I bake, and that is okay. Cleaning up is part of the fun. Just make sure you have a clear spot on your counter to roll out your dough. If you feel nervous, just take a deep breath and keep going. FYI, even the best bakers have bad days!
Gather Your Pie Tools

You need a few simple tools to make a great pie. First, find a 9-inch pie dish. I like glass ones because you can see if the bottom is brown. You will also need a big bowl for the fruit and a medium bowl for the crust bits. A rolling pin is a must-have for flattening the dough. If you do not have one, a clean wine bottle can work in a pinch. I learned that trick from my aunt when I was 10 years old.
Measuring cups and spoons are very important. Baking is a bit like a science project. You want to get the amounts just right so the pie is not too runny. A sharp knife will help you chop the rhubarb and slice the strawberries. Keep a towel nearby to wipe your hands. Flour can get everywhere very fast! Having everything ready before you start makes the job much easier and less stressful.
The Best Ingredients to Use

The secret to a yummy pie is fresh fruit. Look for strawberries that are red all the way to the top. They should smell sweet like candy. For the rhubarb, look for stalks that are firm and crisp. If they feel soft or bendy, they are too old. I once used old rhubarb and the pie turned out very mushy. It was not my best work! Fresh stalks make the pie hold its shape better.
- Fresh red strawberries
- Crisp rhubarb stalks
- White sugar for sweetness
- Cornstarch to thicken the juice
- A little bit of lemon juice
- Butter for a rich taste
You also need flour and salt for the crust. If you are in a big hurry, you can buy a pre-made crust at the store. I won’t tell anyone! But making it yourself feels very special. IMO, home-made crust always tastes more like butter. If you use frozen berries, make sure to thaw them and drain the extra water first. If you don’t, your pie might turn into a soup. No one wants a soup pie!
Recipe Quick Info
- Prep Time: 30 minutes
- Cook Time: 50 minutes
- Servings: 8 people
- Difficulty: Easy
How to Prepare the Fruit

First, wash your fruit well in cold water. Cut the green tops off the strawberries and slice them in half. If the berries are huge, cut them into four pieces. For the rhubarb, cut off the leaves and the very ends. Never eat rhubarb leaves because they can make you sick! Slice the stalks into small pieces about the size of a grape. This helps them cook at the same speed as the berries.
Put all the fruit into your big bowl. Sprinkle the sugar and cornstarch over the top. The sugar makes it sweet, and the cornstarch keeps the juice from running all over the plate. Add a tiny splash of lemon juice to make the flavors pop. Mix it all gently with a big spoon. Let the bowl sit for about 10 minutes. You will see the fruit start to get shiny as the sugar melts. This is a great time to preheat your oven.
Rolling Out the Pie Crust

Dust your counter with a little bit of flour so the dough does not stick. Take your cold dough and press it into a flat circle with your hands. Use your rolling pin to push from the middle out to the edges. Do not push too hard! Turn the dough a little bit after every roll. This keeps it in a nice circle shape. If it starts to stick, just add a tiny bit more flour under it.
You want the circle to be bigger than your pie dish. When it is big enough, carefully lift it and place it in the dish. Let the dough slump down into the corners. Do not pull it or it might shrink while it bakes. Trim the extra dough off the edges with your knife or scissors. Leave about an inch of extra dough hanging over so you can fold it. This makes a pretty edge that holds the juice inside.
Filling and Sealing Your Pie

Pour all that yummy fruit into the bottom crust. Use your spoon to spread it out so it is level. If there is a lot of juice at the bottom of the bowl, pour that in too! Now, take small pieces of cold butter and drop them on top of the fruit. This makes the filling taste very rich and smooth. It is a small step, but it makes a huge difference in how the pie feels when you eat it.
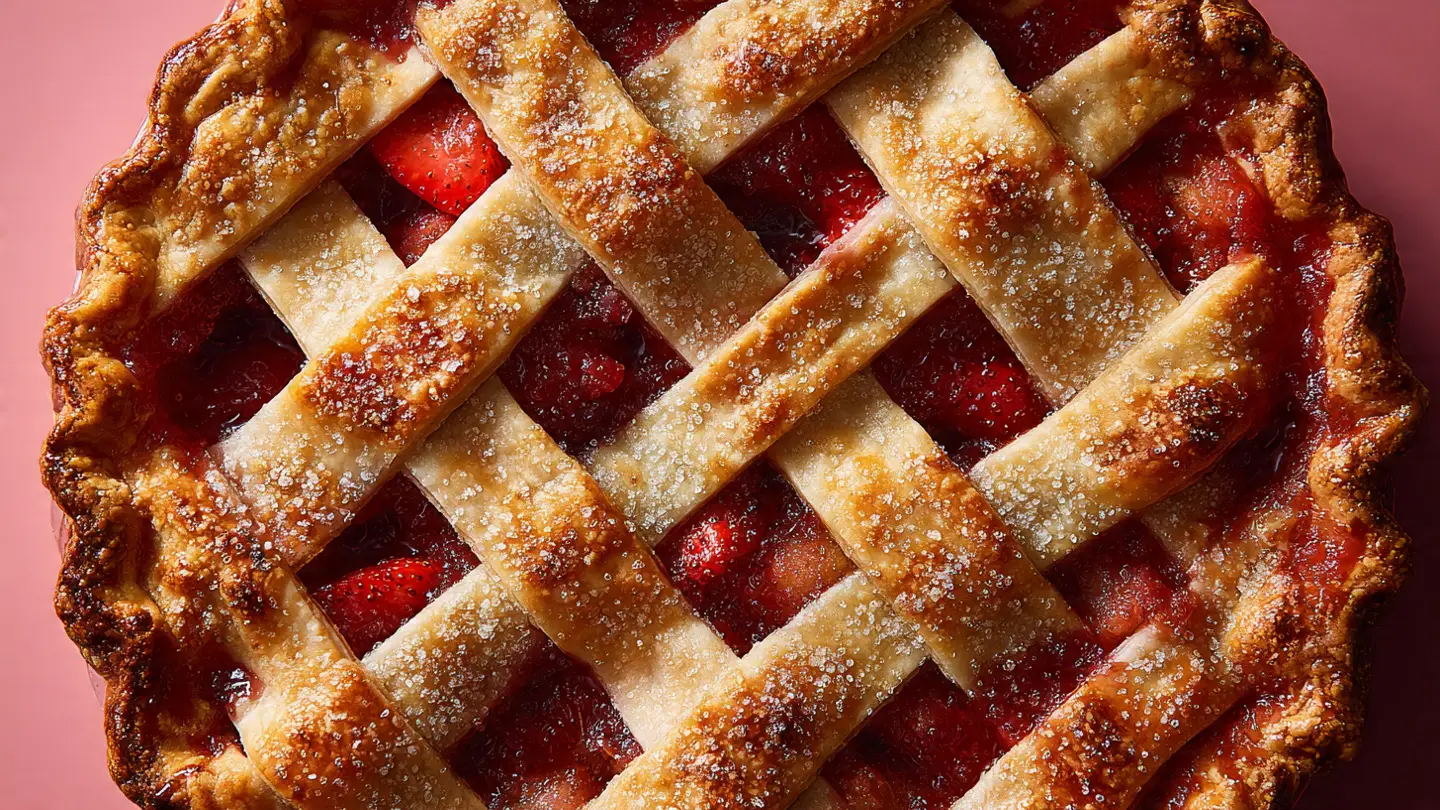
Now you can put the top crust on. You can just put a whole circle of dough on top and poke holes in it. The holes let the steam out so the pie does not explode! Or, you can cut the dough into strips and weave them like a basket. This is called a lattice. It looks fancy, but it is just like playing with paper strips in school. Pinch the edges of the top and bottom crust together to seal the pie shut.
Baking to Golden Perfection

Put your pie in the oven. I like to put a baking sheet under the pie dish. This catches any juice that might bubble over. If the juice hits the bottom of your oven, it will smoke and smell bad. I learned that the hard way! The pie needs to bake until the crust looks like a golden sunset. You should also see the red fruit juice bubbling through the holes in the top.
If the edges of your crust start to look too dark, you can cover them with a little bit of tin foil. This stops them from burning while the middle finishes cooking. Every oven is a bit different, so keep an eye on it after about 40 minutes. When it looks perfect, take it out and set it on a wire rack. This is the hardest part because the pie smells amazing, but you have to wait for it to cool down.
Why You Must Wait to Eat

I know you want to eat the pie right away. It smells like heaven! But if you cut it while it is hot, the juice will run everywhere. It will be a big puddle on your plate. If you wait about two hours, the juice will thicken up. This makes the pie easy to slice. A cool pie also tastes more like the fruit and less like just heat. Waiting is a test of your strength, but it is worth it.
Once the pie is cool, you can serve it with a big scoop of vanilla ice cream. The cold ice cream melts into the warm fruit and tastes so good. You can also use whipped cream if you like that better. This pie is great for a birthday or a picnic. Everyone will be so impressed that you made it from scratch. You did a great job, and now you get to enjoy the sweet rewards of your hard work!
Pro Baking Tips
- Keep it Cold: Always use cold butter for the crust to make it flaky.
- Don’t Over-mix: If you mix the dough too much, it gets tough like bread.
- Sugar Test: Taste a strawberry. If it is sour, add two extra spoons of sugar.
Storing Your Leftovers

If you have pie left over, you are lucky! It makes a great breakfast the next day. You can leave the pie on the counter for about two days. Just cover it with some plastic wrap or a clean towel. This keeps the flies away and keeps the crust from getting too dry. If your house is very warm, you might want to put it in the fridge so the fruit stays fresh.
In the fridge, the pie will stay good for about four or five days. The crust might get a little soft, but it will still taste yummy. You can warm up a slice in the microwave for 20 seconds to make it taste fresh again. I love eating cold pie straight from the fridge in the middle of the night. It is my favorite secret snack! Just make sure to wrap it tight so it does not smell like the onions in your fridge.
Common Questions About Pie
Can I use frozen rhubarb?
Yes! Just let it thaw and pat it dry with a paper towel. This keeps the pie from getting too watery when it bakes.
What if I don’t have cornstarch?
You can use flour instead. Use two spoons of flour for every one spoon of cornstarch. It helps the juice get thick.
How do I stop the bottom from being soggy?
Bake the pie on the lowest rack in your oven. The heat from the bottom will crisp up the crust nicely.
Is rhubarb safe for kids to eat?
The stalks are safe and tasty when cooked with sugar. Just never eat the leaves because they are not safe for anyone.
Can I make this pie without a top crust?
Sure! You can make a crumble top with oats, butter, and brown sugar. It is very easy and tastes like a giant cookie.
Happy Baking Success
You now know how to make a classic strawberry rhubarb pie. It is a wonderful skill to have. Baking is about sharing love with your friends and family. Even if your first pie is not perfect, keep trying. The most important thing is that you had fun and learned something new in your kitchen today. Enjoy your pie!