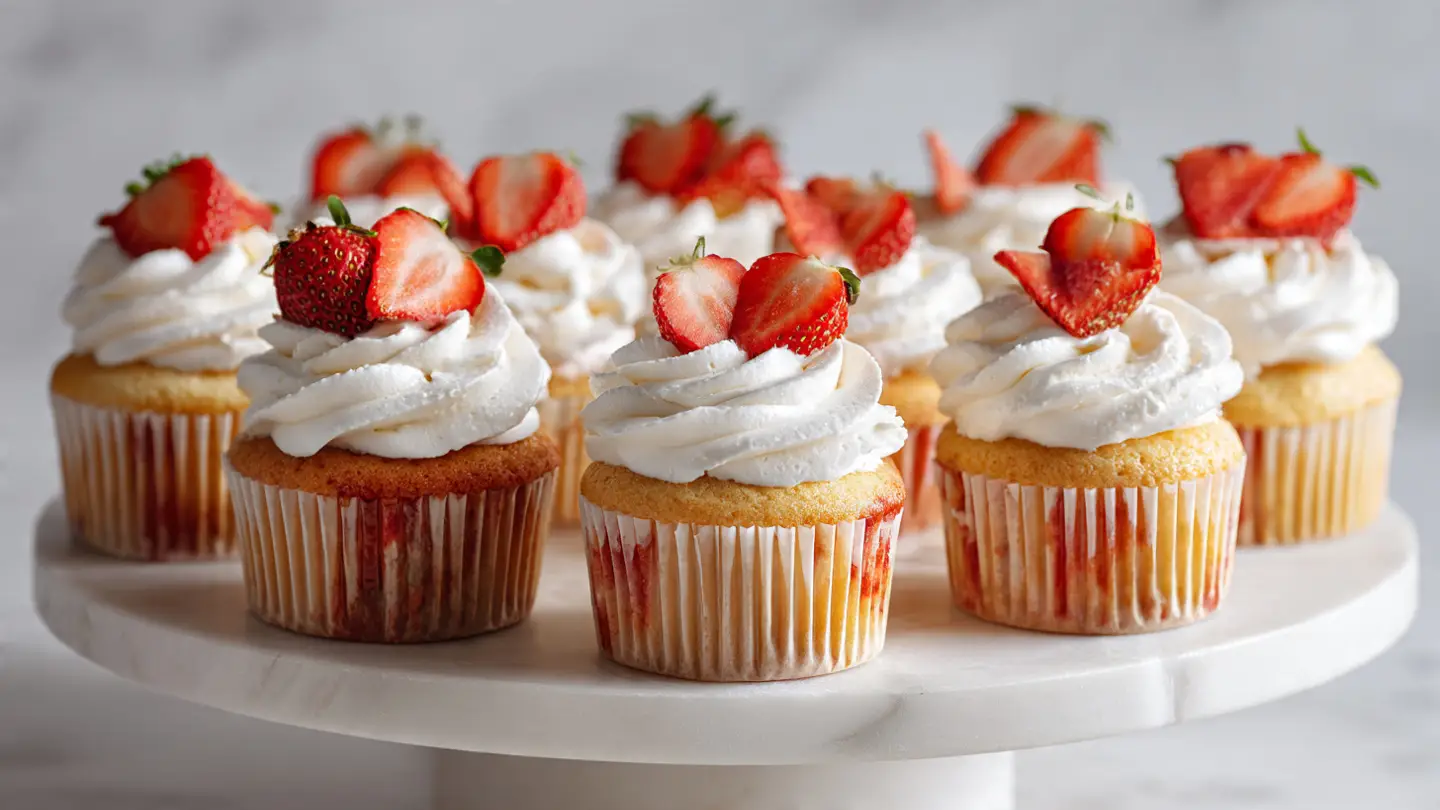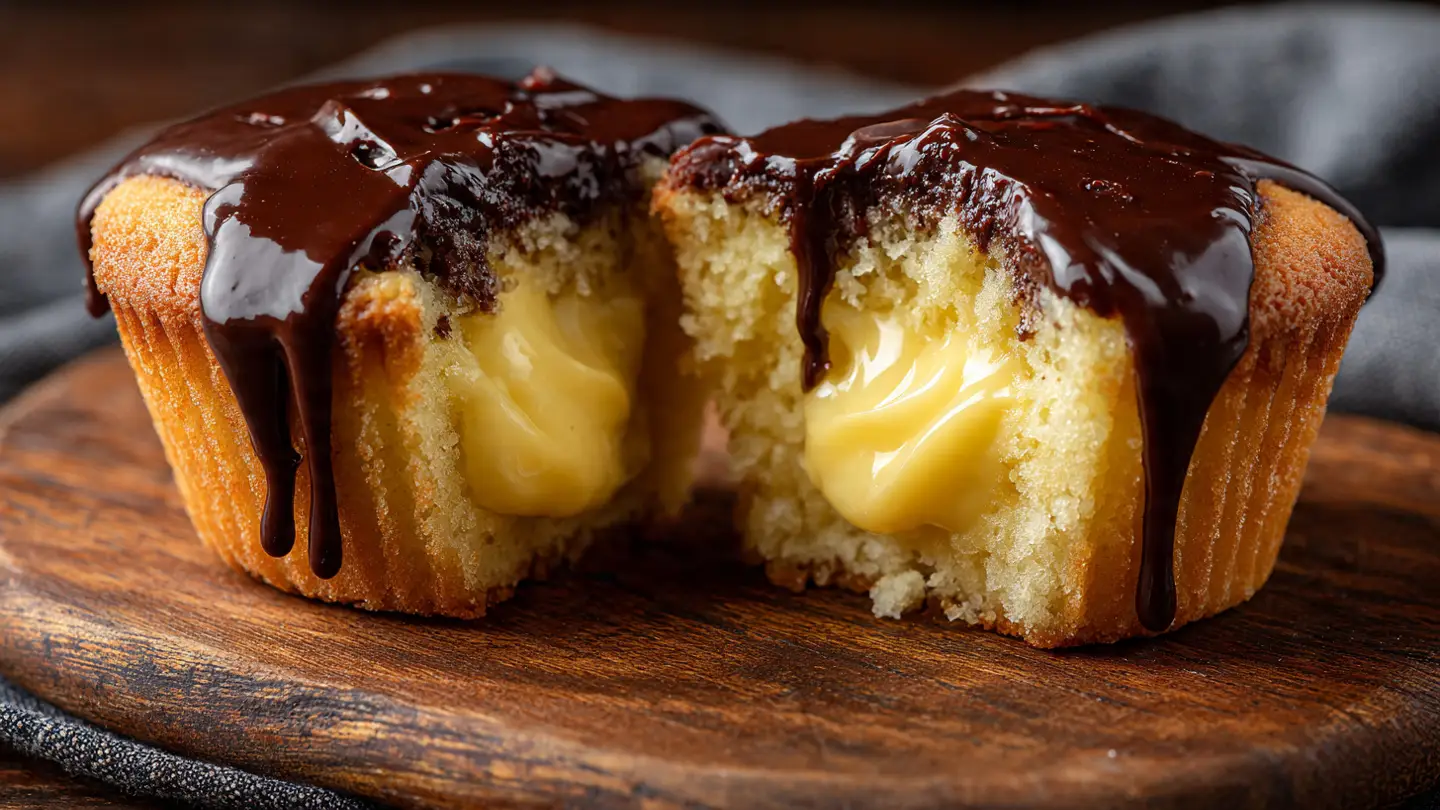
Mini Boston Cream Pie Cupcakes with Custard Filling
Do you love the taste of a classic Boston Cream Pie but want something easier to eat? These mini treats are the answer. They look like fancy cupcakes but taste just like the famous cake. You get soft yellow cake, creamy vanilla custard, and thick chocolate all in one bite. They are perfect for birthdays, school snacks, or just a sweet treat after dinner.
In this post, I will show you every step to make these from scratch. We will bake the cake, cook the custard, and dip them in chocolate. I promise it is not as hard as it sounds. Even if you are new to baking, you can do this. I have made these many times and learned a few tricks along the way to make sure they come out great every time.
Want to see how easy it is to make these little cakes? Let’s get started!
Why You Will Love These Tiny Cakes
These cupcakes are special because they are a complete dessert in a small package. A real Boston Cream Pie is actually a cake with custard inside and chocolate on top. Cutting a whole cake can be messy. With these cupcakes, everyone gets their own perfect portion. You do not even need a fork! They are great for kids because they fit right in their hands. Plus, they look so pretty on a dessert table.
I remember the first time I made these for a family party. I was worried the custard would leak out or the chocolate would be too runny. But once I figured out the right steps, they became my most requested dessert. These cupcakes stay moist and the filling is like a little surprise in the middle. They are a big hit with anyone who likes creamy, chocolatey sweets. FYI, these go really fast, so you might want to make a double batch.
What You Need to Buy

To make these cupcakes, you need basic baking items. You probably have most of them in your pantry already. For the cake part, you need all-purpose flour, granulated sugar, baking powder, and a little bit of salt. You also need unsalted butter at room temperature, two large eggs, and some whole milk. Do not forget the vanilla extract! This gives the cake that classic bakery smell and taste.
For the custard filling, you will need more milk, sugar, and egg yolks. Cornstarch is very important here because it helps the custard get thick. Without it, your filling will be like soup! You also need a little more butter and vanilla to make it extra smooth. For the chocolate top, you just need semi-sweet chocolate chips and some heavy cream. High-quality chocolate makes a big difference, but regular store chips work just fine too.
Getting the Custard Ready

The custard needs time to cool down, so I always make it first. If you put hot custard into a cupcake, it will turn the cake into mush. In a small pot, whisk your egg yolks and sugar until they look light and creamy. Then, stir in the cornstarch. Slowly pour in the milk while you whisk. You want to do this over medium heat so it does not burn on the bottom of the pot. Keep stirring the whole time!
Once the mixture starts to bubble, it will get thick very quickly. This is the fun part! Take it off the heat and stir in the butter and vanilla. I learned a lesson the hard way: always strain your custard through a mesh sieve. This removes any tiny bits of cooked egg. It makes the filling feel like silk in your mouth. Put the custard in a bowl and press plastic wrap right on top of the surface. This stops a weird skin from forming while it cools in the fridge.
Mixing the Perfect Cake Batter

Now it is time for the cake. Start by beating your soft butter and sugar together until the mix looks fluffy. This usually takes about three minutes. Add the eggs one at a time and mix well after each one. In a separate bowl, whisk your flour, baking powder, and salt. Then, add half the dry ingredients to the butter mix, pour in the milk and vanilla, and finish with the rest of the flour. Do not overmix the batter! If you mix it too much, the cupcakes will be tough like bread instead of soft like cake.
I use a standard cupcake tin with paper liners. Fill each liner about two-thirds full. This gives the cupcakes room to rise without spilling over the edges. Bake them at 350 degrees for about 18 to 20 minutes. You can tell they are done when you poke a toothpick in the center and it comes out clean. Let them cool completely in the pan before you even think about filling them. Hot cakes are too fragile to work with.
Recipe Quick Info
- Prep Time: 40 minutes
- Cook Time: 20 minutes
- Servings: 12 cupcakes
- Difficulty: Medium
How to Fill the Cupcakes

This is the part that makes these cupcakes special. Once the cakes are cool, you need to make a hole in the middle. You can use a small knife or even a cupcake corer if you have one. Just cut a circle about an inch deep and pull out the cake piece. Don’t throw those cake scraps away! They are great for snacking on while you work. I usually eat them right then and there. Just be careful not to cut all the way to the bottom of the cupcake.
Take your cold custard out of the fridge and give it a quick stir. Put the custard into a piping bag or a plastic sandwich bag with the corner cut off. Squeeze the custard into the hole of each cupcake until it is level with the top. Some people like to put the little piece of cake back on top, but I find it easier to just leave it open. The chocolate glaze will cover the hole perfectly later. Just make sure the custard isn’t overflowing, or the chocolate will slide right off.
Making the Chocolate Ganache

The chocolate top is called a ganache. It sounds fancy but it is just two ingredients. You need heavy cream and chocolate chips. Heat the cream in a small pot until it just starts to simmer. Do not let it boil over! Pour the hot cream over your chocolate chips in a bowl. Let it sit for five minutes without touching it. This lets the chocolate melt evenly. After five minutes, stir it slowly until it is shiny and smooth. It should look like dark silk.
Let the chocolate cool for a few minutes so it gets a bit thicker. If it is too hot, it will run down the sides of your cupcakes and make a mess. Once it is the right thickness, take a filled cupcake and dip the top right into the chocolate. Give it a little twist and lift it up. The chocolate will settle into a beautiful, smooth layer that covers the custard filling. It looks so professional! Set them on a tray so the chocolate can harden. IMO, this is the most satisfying part of the whole process.
Step by Step Instructions

Let’s recap the steps so you have a clear plan. Baking can feel like a lot of work, but if you follow this order, it is very easy. First, make the custard and let it chill. Second, bake the cupcakes and let them cool. Third, cut the holes and fill them. Fourth, make the glaze and dip. Doing it in this order ensures everything is at the right temperature when you put it all together. Here is the list of steps to follow:
- Make the custard by cooking milk, sugar, yolks, and cornstarch until thick.
- Add butter and vanilla to the custard, strain it, and chill in the fridge.
- Bake the cupcakes for 20 minutes at 350 degrees.
- Cool cupcakes fully on a wire rack.
- Remove the centers of the cupcakes using a knife.
- Pipe the cold custard into the cupcakes.
- Heat cream and pour over chocolate chips to make the glaze.
- Dip the tops of the cupcakes into the glaze and let them set.
Tips for Success and Variations

If you are in a rush, you can cheat a little bit. Instead of making custard from scratch, you can use instant vanilla pudding. Just use less milk than the box says so it stays thick. For the cake, a boxed yellow cake mix works well too! I prefer the taste of homemade, but sometimes we just don’t have the time. Another tip is to make sure your eggs and butter for the cake are not cold. Room temperature ingredients mix together much better and make the cake fluffier.
One mistake I made once was using milk instead of heavy cream for the chocolate. Milk does not make the glaze thick enough, and it just soaked into the cake. Stick with heavy cream for that perfect shiny top. If you want to change things up, try using white chocolate for the glaze or adding a little coconut extract to the custard. You can also store these in the fridge for up to three days. They actually taste even better the second day because the flavors have time to meld together.
Pro Baker Tip
- Temperature Control: Never fill a warm cupcake with cold custard. The cake will get soggy and fall apart. Wait until everything is room temperature or cold!
How to Serve and Store

These cupcakes look best when served on a simple white plate or a pretty cake stand. Since they have custard and cream, you must keep them in the fridge. If they sit out on a hot day, the custard can go bad or the chocolate can melt. I like to take them out of the fridge about 15 minutes before eating. This lets the cake soften up a little bit while the custard stays nice and cool. They are the perfect size for a party treat because guests can grab one and keep mingling.
If you have leftovers, put them in a container with a tight lid. Do not stack them! If you put one cupcake on top of another, the chocolate will stick and pull the top off the bottom one. If you want to make these ahead of time, you can bake the cakes and make the custard the day before. Just wait to assemble and dip them until the day you want to serve them. This keeps the cake tasting fresh and prevents any sogginess. Your friends will think you bought these at a fancy bakery!
Common Questions About These Cupcakes
Can I freeze these cupcakes?
You can freeze the plain cake, but do not freeze them once they are filled. Custard gets a weird texture when it thaws. It is best to eat them fresh or from the fridge.
What if my custard is too runny?
If it is thin, you might not have cooked it long enough. You can put it back on the heat and add a tiny bit more cornstarch mixed with water. It should be thick like pudding.
Do I have to use heavy cream for the glaze?
Yes, heavy cream is best. It has enough fat to make the chocolate thick and shiny. Milk or half-and-half will make the glaze too thin and it won’t set right.
Can I use a different flavor of cake?
Traditional Boston Cream Pie uses yellow cake, but chocolate cake is also very good! You can use whatever cake flavor you like most with vanilla and chocolate.
How do I keep the liners from sticking?
Use high-quality paper liners or spray the inside of the liners with a little bit of non-stick oil. Also, let the cupcakes cool completely before peeling the paper off.
Time to Enjoy Your Treats
You now know how to make amazing mini Boston Cream Pie cupcakes. They have a soft cake, creamy center, and rich chocolate top. This simple recipe will make you feel like a pro baker and your family will love every single bite!