Vanilla Chantilly Cake
I love a cake that feels like a cloud. This Vanilla Chantilly Cake is exactly that. It is light, soft, and not too sweet. Many people think fancy cakes are hard to make at home. I used to think that too. But once I learned the secret of Chantilly cream, everything changed. This cake is perfect for birthdays, holidays, or just a sunny afternoon. It looks like it came from a high-end bakery, but you can make it in your own kitchen with simple tools.
In this post, I will show you how to bake the sponge and whip the cream. You will learn how to stack the layers so they do not slide. We will use fresh fruit to make it look beautiful. This recipe is great for beginners because I explain every step clearly. I want you to feel proud when you put this cake on the table. It is much better than a box mix, and the taste is much fresher.
Ready to get baking? Let’s grab our aprons and start making something delicious together.
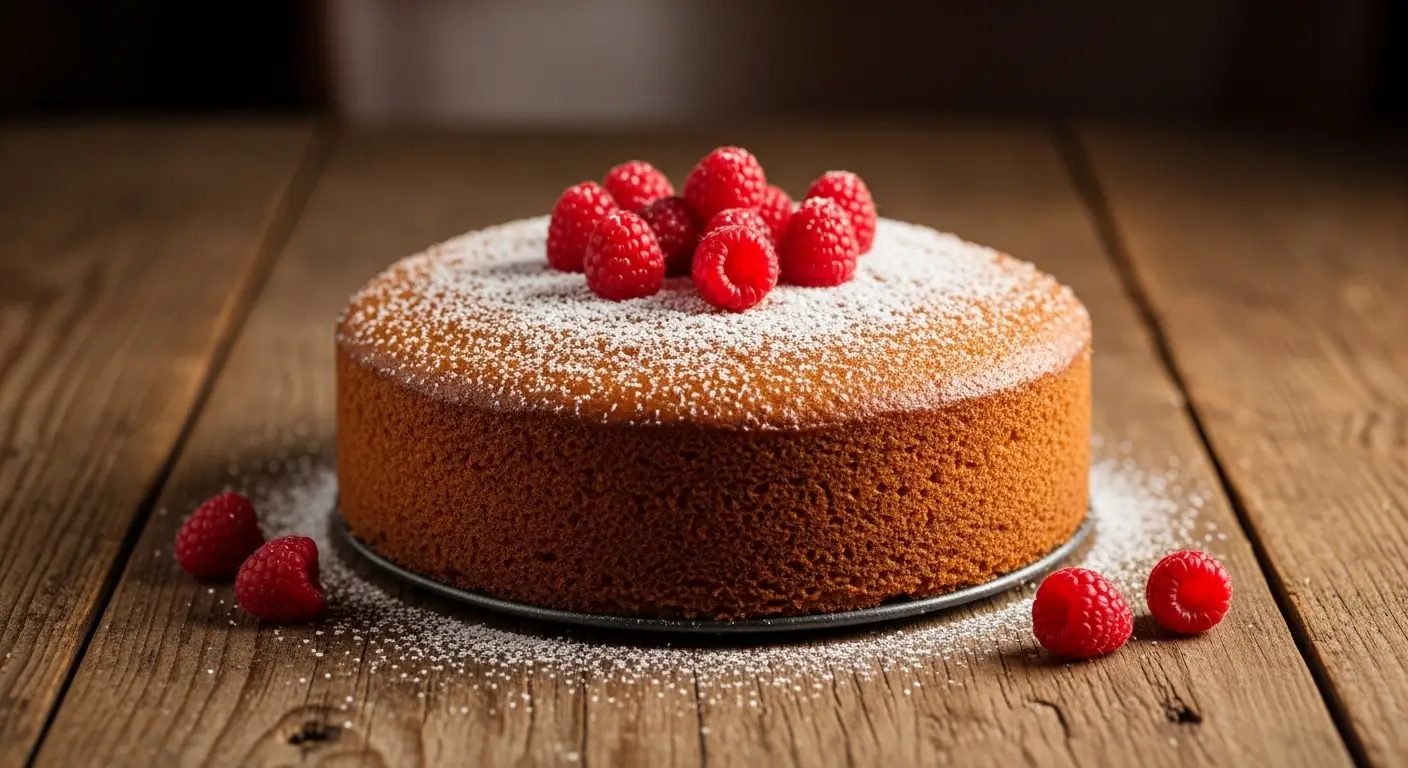
The Magic of a Light Sponge Cake
The base of a great Chantilly cake is the sponge. It needs to be airy so it can soak up a little bit of moisture without getting soggy. If the cake is too heavy, the light cream will just squish out the sides. I like to use a method that beats a lot of air into the eggs. This air is what makes the cake rise and stay fluffy. It is a very satisfying process to watch the batter grow in the bowl.
Some people worry about their cakes being dry. To fix this, we use a simple syrup. This is just sugar and water boiled together. We brush it on the cake layers. It keeps the cake moist for days. IMO, this is the most important step that many home bakers skip. It makes a huge difference in how the cake feels when you take a bite.
Gathering Your Cake Ingredients

You need a few basic things to start. For the cake, grab some all-purpose flour, granulated sugar, and large eggs. Make sure your eggs are at room temperature. Cold eggs do not whip up as well as warm ones. You also need unsalted butter. I prefer unsalted so I can control the salt myself. A little bit of salt actually makes the vanilla taste stronger. Do not forget the baking powder to help it rise.
- 2 cups all-purpose flour
- 1.5 cups granulated sugar
- 4 large eggs (room temperature)
- 1/2 cup unsalted butter, melted and cooled
- 1 cup whole milk
- 2 teaspoons baking powder
- 1 teaspoon salt
- 2 tablespoons pure vanilla extract
The vanilla is the star here. If you can, use a high-quality vanilla extract or even vanilla bean paste. You will see tiny black specks in the cake, which looks very fancy. I once used cheap imitation vanilla, and the cake tasted like candy instead of real cream. It was a big lesson for me. Good ingredients make a good cake.
Mixing the Perfect Batter

First, turn your oven to 350°F. Line two 8-inch cake pans with parchment paper. This stops the cake from sticking. In a big bowl, whisk the flour, baking powder, and salt. Set that aside. Now, use a mixer to beat the eggs and sugar. You want to beat them for about five minutes. The mix should look pale and thick. It should look like melted marshmallows. This is where all that lovely air comes from.
- Beat eggs and sugar until thick and pale.
- Slowly add the melted butter and vanilla.
- Mix in the milk on low speed.
- Gently fold in the dry ingredients by hand.
When you add the flour, be very gentle. If you mix too hard, you will pop all the bubbles you just made. Use a spatula and move it in a big circle, cutting through the middle. This is called folding. Stop as soon as you see no more white streaks of flour. Over-mixing leads to a tough cake, and nobody wants a chewy sponge! It should be light and pour easily into your pans.
Baking to Golden Perfection

Put your pans in the center of the oven. Bake them for about 25 to 30 minutes. You will know they are done when a toothpick comes out clean. The tops should spring back when you touch them lightly with your finger. Try not to open the oven door too early. If you do, the cold air might make the middle of the cake sink. I learned that the hard way during a rainy afternoon bake!
Let the cakes cool in the pans for ten minutes. Then, turn them out onto a wire rack. They must be completely cool before you add the cream. If the cake is even a little bit warm, the Chantilly cream will melt and turn into a puddle. This takes patience, but it is worth the wait. While they cool, you can start preparing the fruit and the special cream filling.
Recipe Quick Info
- Prep Time: 30 minutes
- Cook Time: 30 minutes
- Servings: 10 people
- Difficulty: Medium
The Art of Chantilly Cream and Assembly
Now comes the best part. Chantilly cream is not just regular whipped cream. It has a bit of extra sugar and a lot of vanilla. Some people add a little bit of mascarpone cheese or cream cheese to make it stable. This helps the cake hold its shape for a long time. Without it, the cream might get soft and runny after an hour. I like using a tiny bit of cream cheese because it adds a nice tang that cuts through the sugar.
Assembling the cake is like building a tower. You want it to be straight and tall. We will use fresh berries like strawberries, raspberries, and blueberries. They add color and a fresh taste. Make sure your berries are dry after you wash them. If they are wet, the water will bleed into the white cream and make it look messy. FYI, a paper towel is your best friend here.
Making the Stable Chantilly Cream

To make the cream, you need cold heavy whipping cream. It must be very cold! If the cream is warm, it will not trap air. Put your bowl and whisk in the freezer for ten minutes before you start. This is a pro tip that makes the cream whip up much faster. I always do this when I want the fluffiest results possible.
- 2 cups heavy whipping cream (very cold)
- 1/2 cup powdered sugar
- 1 teaspoon vanilla bean paste
- 4 oz cream cheese, softened (optional for stability)
Start by beating the softened cream cheese with the sugar until smooth. Then, slowly pour in the heavy cream while the mixer is running. Turn the speed up to medium-high. Watch it closely! It goes from soft peaks to stiff peaks very fast. If you over-beat it, it will turn into butter. You want it to look like thick, fluffy clouds that stay on the whisk when you lift it up. It should look smooth and shiny.
Stacking the Cake Layers

Take your cooled cake layers. If they have a hump on top, use a long knife to slice it off so they are flat. Place the first layer on a plate. Brush it with some simple syrup. This makes it taste like it came from a shop. Spread a thick layer of the Chantilly cream over the top. Use a flat tool to make it even. Now, press your sliced berries into the cream. This keeps them from rolling around.
Put the second cake layer on top, bottom-side up. This gives you a perfectly flat top for the cake. Press down very gently to make sure it sticks. If you see cream coming out the sides, just use your knife to smooth it around the edges. This is called a crumb coat. It helps hold everything together before you put on the final layer of frosting. It might look messy now, but it will look great soon.
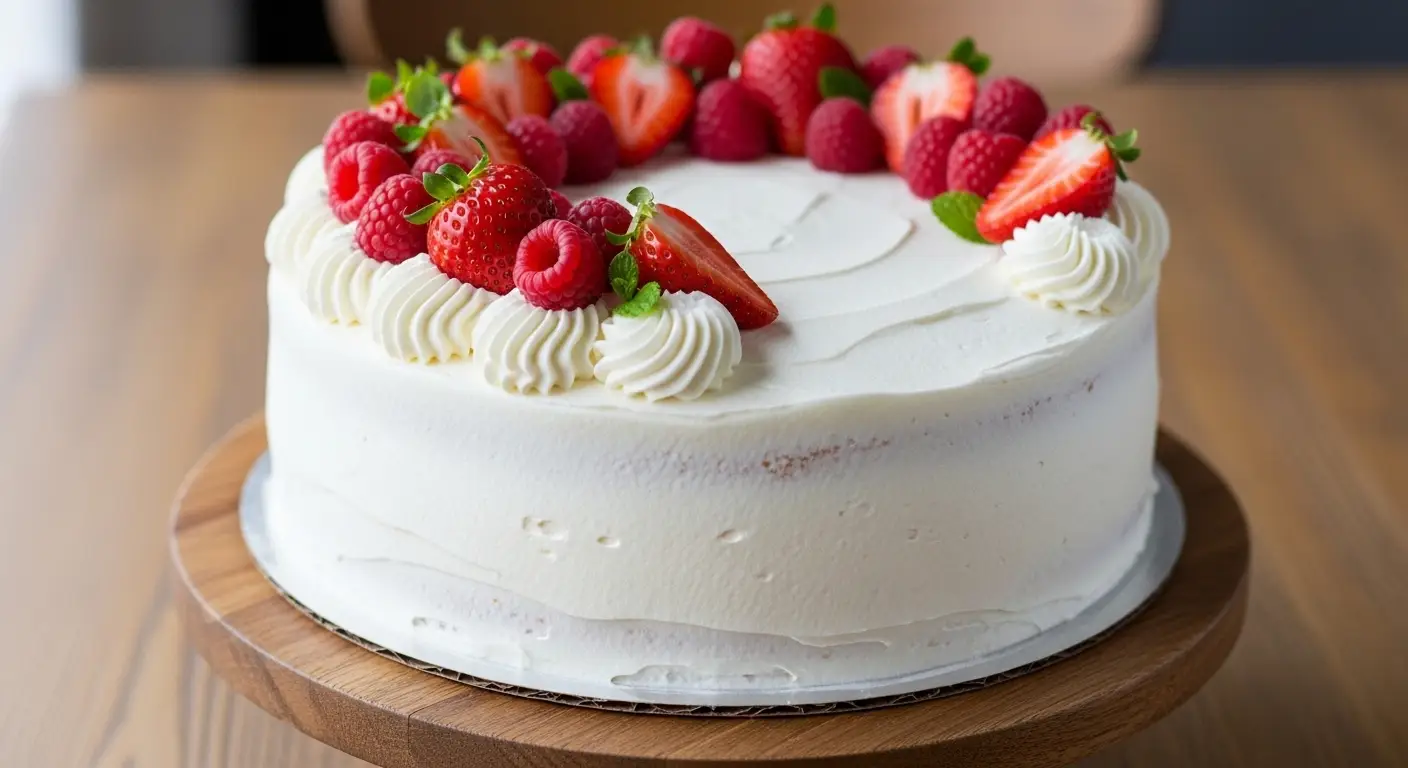
Decorating with Fresh Berries

Now cover the whole cake with the rest of the cream. You can make it look smooth or leave some swirls for a rustic look. I like the swirls because they look more homemade and friendly. Once the cake is covered, pile the fresh berries on top. You can arrange them in a pattern or just heap them in the middle. A light dusting of powdered sugar at the end makes it look like magic.
Pro Decorating Tips
- Dry Berries: Always pat fruit dry so the colors do not run into the cream.
- Cold Tools: Chill your metal bowl before whipping cream for better volume.
- Flat Tops: Flip your cake upside down for the top layer to get a crisp edge.
This cake is best eaten on the same day. However, it will stay good in the fridge for up to two days. The fruit might get a little soft, but the flavor will still be amazing. Make sure to keep it in a cake carrier so it does not pick up any smells from the fridge. No one wants a vanilla cake that tastes like onions! This cake is a crowd-pleaser every single time I make it.
Common Questions About Chantilly Cake
Can I use frozen berries?
I do not recommend frozen berries. They release too much juice as they thaw. This will turn your beautiful white cream into a purple mess. Stick to fresh fruit for this recipe.
Why did my cream turn into liquid?
This usually happens if the cream was not cold enough or the cake was still warm. Make sure everything is chilled. If it still happens, you might have under-whipped it.
Can I make the cake layers ahead of time?
Yes! You can bake the sponge cakes one day early. Wrap them tightly in plastic wrap and keep them at room temperature. Do not frost them until you are ready to serve.
What if I don’t have a stand mixer?
A hand mixer works just as well. It might take a few extra minutes to get the eggs fluffy, but the result will be the same. Just be patient with the whipping steps.
Final Thoughts on This Sweet Treat
Baking a Vanilla Chantilly Cake is a wonderful way to show someone you care. It uses simple ingredients to make something that feels very special. Remember to keep your cream cold and your cake layers flat. Don’t worry if it isn’t perfect the first time. The taste will still be incredible. I hope you enjoy every bite of this light and fruity dessert. It is truly my favorite way to celebrate any occasion with a bit of sweetness.