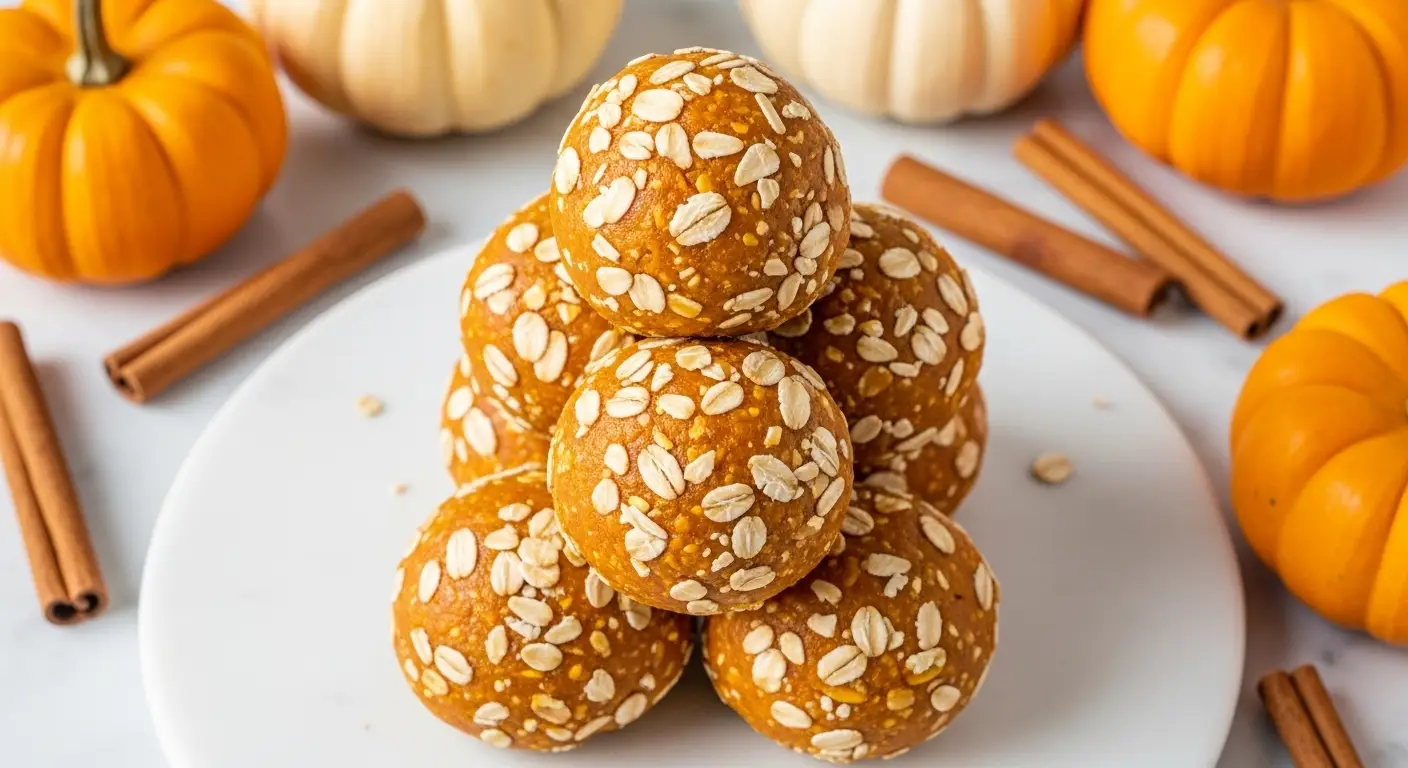
Homemade Peanut Butter Oatmeal Balls for On The Go Energy
Are you looking for a snack that tastes like a treat but keeps you full? These peanut butter oatmeal balls are the answer. They are sweet, chewy, and very easy to make in your own kitchen.
I will show you how to mix these up in just ten minutes. You do not even need to turn on your oven. This recipe is perfect for kids and adults who need a quick bite during a long day.
You will learn the best way to roll them and how to keep them fresh for a whole week. Let us get started on this simple snack together!
Make these today to save time tomorrow.
Why This Snack Is Great for Everyone
Life gets very busy sometimes. You might be running to school or going to a sports game. Often, we grab a bag of chips because it is fast. But chips do not help our bodies feel good for long. These oatmeal balls give you real energy that lasts.
I love making these because they use things I already have in my pantry. You probably have oats and peanut butter right now. Mixing them together feels like a fun science project. Plus, they taste just like a soft cookie but without all the extra sugar. They are small enough to fit in a lunch box or a gym bag easily.
What You Need From Your Pantry

You only need a few simple things to make this recipe. The main part is rolled oats. Do not use the kind of oats that come in a tiny paper bag for the microwave. Those are too thin. You want the big, flat oats that look like little circles. They hold their shape better when you mix them with wet things.
Next, you need creamy peanut butter. This acts like the glue for the whole snack. If your peanut butter is very dry at the bottom of the jar, it might be hard to stir. Use a fresh jar if you can. You also need honey to make it sweet. Honey is sticky and helps the balls stay round. If you do not like honey, you can use maple syrup instead. Both work very well.
I also like to add a few fun things. Mini chocolate chips are a great choice. They are tiny, so they spread out and give you a little chocolate in every bite. Some people add flax seeds or chia seeds for extra crunch. It makes the snack feel more special. FYI, you can skip the seeds if you do not have them. The recipe will still work perfectly without them.
- 2 cups of old-fashioned rolled oats
- 1 cup of creamy peanut butter
- 1/2 cup of honey or maple syrup
- 1/2 cup of mini chocolate chips
- 1/4 cup of ground flax seeds (optional)
- 1 teaspoon of vanilla extract
- A pinch of salt
How to Mix Your Dough

Start by getting a big bowl. You want a bowl that is larger than you think you need. This gives you room to stir without making a mess on your counter. Put the oats and the flax seeds in first. Use a spoon to give them a quick toss so they are mixed up. This helps the seeds get everywhere instead of staying in one big clump.
Now, add your peanut butter and honey. It helps if the peanut butter is at room temperature. If it is cold from the fridge, it will be very stiff. I once tried to mix cold peanut butter and it was like trying to stir a rock! If yours is cold, put it in a microwave-safe bowl for ten seconds. That will make it soft and easy to pour into the oats.
Add your vanilla and salt next. The salt is very important. It might seem strange to add salt to a sweet snack, but it makes the peanut butter taste better. Finally, fold in the chocolate chips. Stir everything until you do not see any dry white oats anymore. Everything should look brown and sticky. If it looks too dry, add one more spoonful of peanut butter.
Recipe Quick Info
- Prep Time: 15 minutes
- Cook Time: 0 minutes
- Servings: 20 balls
- Difficulty: Easy
Rolling the Perfect Energy Balls

This part is the most fun, but it can be messy. You want to take a small scoop of the dough. A tablespoon is a good size to use. Put the dough in the palm of your hand. Press it together firmly before you start rolling. If you just roll it lightly, it might fall apart. You have to squeeze it a little bit first to make sure the oats stick to the peanut butter.
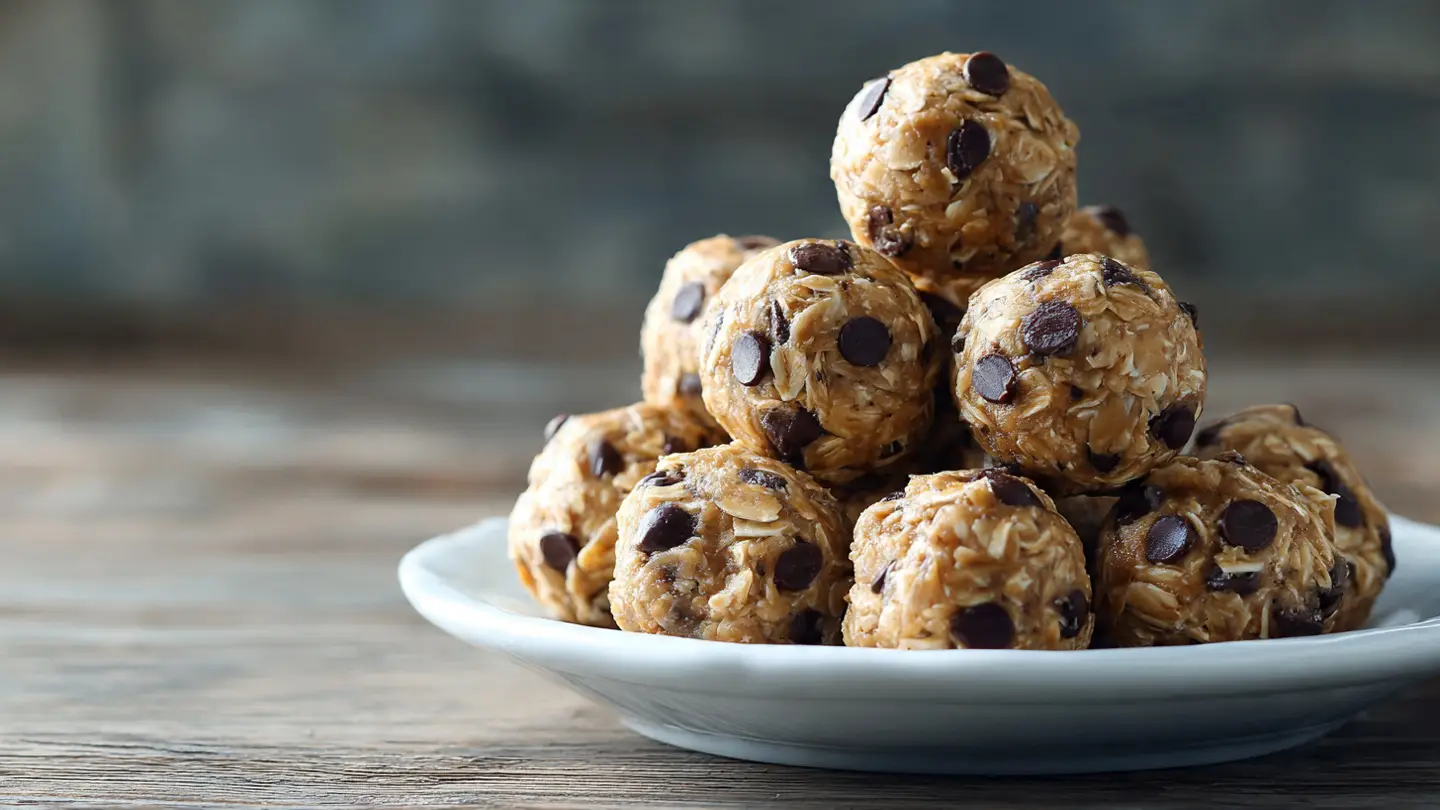
Roll the dough between your hands until it looks like a small ball. It should be about the size of a golf ball. Place each ball on a tray lined with wax paper or parchment paper. This stops them from sticking to the tray. If the dough starts sticking to your hands too much, wash your hands and leave them a little damp. The water helps the dough slide off your skin.
Once you have rolled all the balls, you are not done yet! They are very soft right now. If you try to eat them immediately, they might squash in your fingers. Put the tray in the fridge for at least thirty minutes. The cold makes the honey and peanut butter get firm. This keeps the balls in a perfect round shape so you can pack them in bags later.
Tips for the Best Results

I have made these many times and learned a few tricks. One big tip is to check your oats. If you use “steel cut” oats, this recipe will not work. Steel cut oats are very hard and are meant to be cooked in boiling water for a long time. They will hurt your teeth if you try to eat them raw in these balls. Stick to rolled oats for the best chew.
Another thing to watch is the honey. Some honey is very thin, and some is thick. If your mixture feels too wet to roll, put the whole bowl in the fridge for twenty minutes before you start rolling. This makes the dough less sticky. It is much easier to handle when it is cold. I learned this the hard way after getting honey all over my kitchen floor once!
You should also make sure your chocolate chips are small. Large chocolate chips are heavy. They often fall out of the balls while you are rolling them. Mini chips are light and stay inside the dough much better. If you only have big chips, you can chop them up with a knife before adding them to the bowl. This makes them easier to mix.
Pro Kitchen Tips
- Wet Hands: Keep a small bowl of water nearby to dip your fingers in if the dough sticks.
- Scoop Tool: Use a small ice cream scoop to make every ball the exact same size.
- Freshness: Store them in the back of the fridge where it is coldest to keep them firm.
Fun Ways to Change the Flavor

You do not have to follow the recipe exactly every time. Once you know the basics, you can change things up. If you do not like peanut butter, you can use almond butter or sunflower seed butter. Sunflower butter is great if you need to take these to a school that does not allow nuts. It tastes a little different but still holds the oats together well.
You can also change the mix-ins. Instead of chocolate chips, try using dried cranberries or raisins. This makes them taste like oatmeal raisin cookies. Some people like to add a little cinnamon for a warm flavor. You could even roll the finished balls in shredded coconut to make them look like tiny snowballs. This adds a nice texture to the outside.
If you want them to be more like a dessert, try using white chocolate chips and dried blueberries. It tastes like a muffin! Just remember to keep the amounts the same. If you add too many dry things, you might need a little more honey to keep it all sticky. IMO, the classic peanut butter and chocolate version is the best, but it is fun to try new things.
How to Store Your Snacks

Since these have no preservatives, you need to store them correctly. They should stay in the fridge. If you leave them on the counter on a hot day, the peanut butter will get soft and they might get messy. I put mine in a plastic container with a lid. They will stay fresh and yummy for up to seven days this way.
If you want to make a huge batch, you can even put them in the freezer. They freeze very well! I like to put them in a freezer bag and squeeze out all the air. They can stay in the freezer for three months. When you want one, just take it out and let it sit for five minutes. It will be ready to eat and very refreshing on a warm day.
For people who take these to work or school, I suggest using a small reusable bag. Put two or three balls in the bag in the morning. By the time you are ready for a snack at noon, they will be the perfect temperature. They are very sturdy and won’t crumble easily in your bag like a granola bar might. This makes them the ultimate on-the-go fuel.
Make This Recipe Today
Cooking at home does not have to be hard or take all day. These oatmeal balls are proof that simple ingredients can make something amazing. You get to control what goes into your food, which is always a good thing. No weird chemicals or hidden sugars here! Just good food that gives you energy.
I hope you have fun making these. It is a great way to spend a few minutes in the kitchen, and the reward is a delicious snack for the whole week. Whether you are sharing them with friends or keeping them all for yourself, they are sure to be a hit. Don’t forget to try different toppings to find your favorite combo!
Common Questions About Oatmeal Balls
Can I use quick oats instead of rolled oats?
Yes, you can. The texture will be much softer and less chewy. They might be a bit more mushy, but they will still taste good and hold their shape.
What if I am allergic to honey?
You can use maple syrup or agave nectar. Both are liquid sweeteners that are very sticky. They work just as well as honey to hold the balls together.
Do I have to keep them in the fridge?
It is best to keep them cold. They stay firm and fresh much longer. If they stay at room temperature too long, they can get very soft and sticky.
Are these snacks okay for toddlers?
Yes, but make sure to roll them into very small bites. Always watch young children while they eat to make sure they chew the oats well before swallowing.
Start Rolling Your Snacks
Making your own snacks saves money and helps you eat better. These peanut butter oatmeal balls are the perfect mix of sweet and healthy. Once you try one, you will never want to buy expensive bars from the store again. Enjoy your easy treat!