Starbucks Lemon Loaf
Do you love the bright yellow cake at the Starbucks counter? I sure do. It is one of my favorite treats to grab with a cold drink. The cake is always very soft and tastes like real lemons. But buying a slice every day gets very expensive. I decided I wanted to make it in my own kitchen so I could have a whole loaf whenever I wanted. It took me a few tries to get the texture just right, but I finally did it. This recipe will show you how to make a lemon loaf that tastes even better than the one from the store.
Making this cake is very simple and fun. You do not need any fancy tools or hard-to-find items. Most of the things you need are likely in your pantry right now. I will walk you through every step so your cake turns out tall, moist, and full of flavor. By the time we are done, your house will smell like a lemon grove. You are going to learn how to mix the batter correctly and how to make that famous thick white icing that sits on top. Let us get started on this baking project together!
Want to save money and impress your friends? This is the perfect recipe to try this weekend.
Gathering Your Baking Supplies
Before you turn on the oven, you need to make sure you have everything ready. Baking is like a science project. If you miss one thing, the cake might not rise or it might taste funny. I like to put all my ingredients on the counter first. This helps me stay organized and avoid mistakes. For this cake, we want a very specific texture. It should be dense but not heavy. It needs to be moist but not oily. Using the right ingredients makes a huge difference in how the final loaf feels in your mouth.
I remember one time I tried to use bottled lemon juice instead of fresh lemons. It was a big mistake. The cake tasted like floor cleaner! I learned my lesson that day. Always use fresh lemons for the best taste. You also want to make sure your eggs and butter are not too cold. If they are cold, they will not mix well with the sugar. Take them out of the fridge an hour before you start. This small step helps the cake stay smooth and fluffy. Let us look at what you need to put on your shopping list.
The Ingredients You Will Need

To make this delicious loaf, you need a mix of wet and dry items. Each one has a job to do. The flour gives the cake its shape. The sugar makes it sweet. The lemons give it that zing we all love. Here is exactly what you should gather before you begin mixing your batter.
- 1 ½ cups of all-purpose flour
- ½ teaspoon of baking soda
- ½ teaspoon of baking powder
- ½ teaspoon of salt
- 3 large eggs (room temperature)
- 1 cup of granulated sugar
- 2 tablespoons of softened butter
- 1 teaspoon of vanilla extract
- 1 teaspoon of lemon extract (this is the secret for that strong flavor)
- ⅓ cup of fresh lemon juice
- ½ cup of vegetable oil or canola oil
- The zest of 2 large lemons
This list is for the cake part. You will also need more powdered sugar and lemon juice later for the glaze. I use oil instead of just butter because it keeps the cake moist for days. Butter tastes good, but oil keeps the crumbs soft even when the cake is cold. IMO, the combination of both butter and oil gives you the best of both worlds. It feels rich but stays very tender.
Tools for the Best Results

You do not need a big standing mixer for this recipe. A simple hand mixer or even a sturdy whisk will work just fine. I actually prefer using a whisk for the wet ingredients because I can feel when the sugar has dissolved. You will also need a loaf pan. A standard 9×5 inch pan is the best size for this amount of batter. If your pan is too big, the loaf will be flat. If it is too small, it might spill over the edges.
Another tool you really need is a zester or a small grater. The yellow part of the lemon skin holds all the fragrant oils. You want to grate just the yellow part. Do not go too deep into the white part of the skin. That white part is called the pith and it tastes very bitter. I use a fine grater to get tiny bits of zest that melt into the cake. It makes every bite taste like sunshine. Also, make sure you have some parchment paper to line your pan. This makes it so easy to lift the cake out once it is done cooling.
Recipe Quick Info
- Prep Time: 15 minutes
- Cook Time: 45-50 minutes
- Servings: 8-10 slices
- Difficulty: Easy
How to Bake the Lemon Loaf
Now comes the fun part. It is time to mix everything together and get it in the oven. The secret to a great loaf is how you mix it. You want to beat the eggs and sugar really well. This creates a base that is light and airy. If you just stir them quickly, the cake might be too heavy. I like to think of it as building a house. The eggs and sugar are the foundation. Once you have a good base, the rest of the steps are easy and fast. Don’t worry if you are new to baking; I will walk you through it.
Make sure your oven is preheated to 350°F (175°C) before you start. Many people forget this and put the cake in a cold oven. If the oven is not hot, the baking powder will not start working right away. Your cake might end up sunken in the middle. I always check my oven thermometer to be sure. It is a small thing that saves a lot of trouble later. Let us get into the step-by-step process of making this copycat treat. You are going to do a great job!
Mixing the Wet Ingredients

First, grab a large bowl. Crack your three eggs into it and add the sugar. Use your mixer or whisk to beat them for about two minutes. You want the color to turn a very pale yellow. Next, add your softened butter, vanilla, lemon extract, and lemon juice. Whisk it again until it looks smooth. It might look a little lumpy because of the butter, and that is okay. The lumps will disappear when we add the oil and dry parts.
- Beat eggs and sugar until light and pale.
- Whisk in the butter, vanilla, and lemon extracts.
- Pour in the lemon juice and stir gently.
- Slowly stream in the vegetable oil while whisking.
- Add the fresh lemon zest and stir.
I have found that adding the oil slowly helps it mix better with the lemon juice. If you dump it all in at once, it can sometimes separate. Think of it like making a salad dressing. You want everything to be friends in the bowl. Once the wet mix is ready, it should smell very strong of lemon. This is exactly what we want. The flour will tone down the flavor just a bit, so a strong start is good for a bold finish.
Adding the Dry Ingredients

In a different bowl, whisk together your flour, baking soda, baking powder, and salt. This makes sure the leavening agents are spread out. You don’t want a big clump of baking soda in one bite of cake! Now, slowly add the dry mix to your wet mix. Do not use the electric mixer for this part. Use a spatula and fold the flour in gently. Folding means you scrape the bottom of the bowl and bring it over the top. Do this until you don’t see any more white streaks of flour.
If you stir too hard or too long, you will develop the gluten in the flour. This makes the cake tough and chewy like bread. We want a cake that melts in your mouth. Just stop as soon as the flour is gone. The batter will be thick and smell amazing. FYI, if your batter looks a bit thin, don’t worry. The oil and lemon juice make it more liquid than a normal cake batter. This is why it turns out so moist later on. Now, pour it into your prepared loaf pan and smooth out the top with your spatula.
Baking to Perfection

Put your pan in the center of the oven. Bake it for 45 to 50 minutes. Every oven is a little different, so start checking it at 40 minutes. You know it is done when a toothpick stuck in the middle comes out clean or with just a few crumbs. If it comes out wet, it needs more time. If the top is getting too dark but the inside is still wet, cover the top with a piece of tin foil. This stops the top from burning while the middle finishes cooking.
I once took my cake out too early because I was hungry. The middle sank and it was gummy. It was a sad day for my taste buds. Please be patient! Let the cake cool in the pan for about 10 minutes. Then, lift it out using the parchment paper and put it on a wire rack. It needs to be completely cool before you put the icing on. If the cake is even a little warm, the icing will melt and run right off. We want that thick, white layer that everyone loves at Starbucks.
The Secret to the Perfect Glaze
The icing is what makes this loaf famous. At the coffee shop, it is thick, sweet, and a little bit sour. It is not like a thin glaze that soaks into the cake. It sits on top like a blanket of snow. To get this right, you have to use the right ratio of sugar to juice. If you use too much juice, it becomes a watery mess. If you use too much sugar, it won’t pour. I have experimented a lot to find the magic numbers for this icing. It should be thick enough that it stays on the cake but thin enough to drip slowly down the sides.
This part of the process is very satisfying. You get to watch the plain brown cake turn into a beautiful dessert. I like to make the glaze while the cake is cooling. It gives the sugar time to fully dissolve into the lemon juice. This makes the icing extra smooth and shiny. You can even add a tiny bit of heavy cream if you want it to be more white and opaque. That is my little secret tip for a professional look. Let us see how to mix it up and finish our masterpiece.
Mixing the Thick Lemon Icing

Take one cup of powdered sugar and put it in a bowl. Add one tablespoon of lemon juice and one tablespoon of heavy cream (or more juice if you prefer). Stir it with a fork. It will look like it is too dry at first. Keep stirring! The sugar will eventually melt. If it is still too thick to pour, add just a tiny drop more juice. You only need a very small amount to change the texture. I usually add it half a teaspoon at a time. It is much easier to make it thinner than it is to make it thicker again.
- Use sifted powdered sugar to avoid lumps.
- Add liquid very slowly.
- Whisk until it is perfectly smooth.
- The glaze should look like thick glue.
If you make it too thin by accident, just add a spoonful more of powdered sugar. This glaze should be very white. If it looks clear, you need more sugar. This icing is very sweet, which balances out the sour lemon in the cake. It is the perfect finishing touch. Once your cake is cold to the touch, you are ready to pour. I usually place a piece of wax paper under the wire rack to catch any drips. This makes cleanup so much easier!
Icing the Loaf and Serving

Pour the icing right down the middle of the cake. Use the back of a spoon to spread it toward the edges. Let it naturally drip down the sides. This gives it that “bakery” look that we want. Now, here is the hardest part: you have to wait. Let the icing sit for at least 30 minutes. It needs to harden so you can cut clean slices. If you cut it too soon, the icing will smear and look messy. It will still taste good, but it won’t look as pretty.
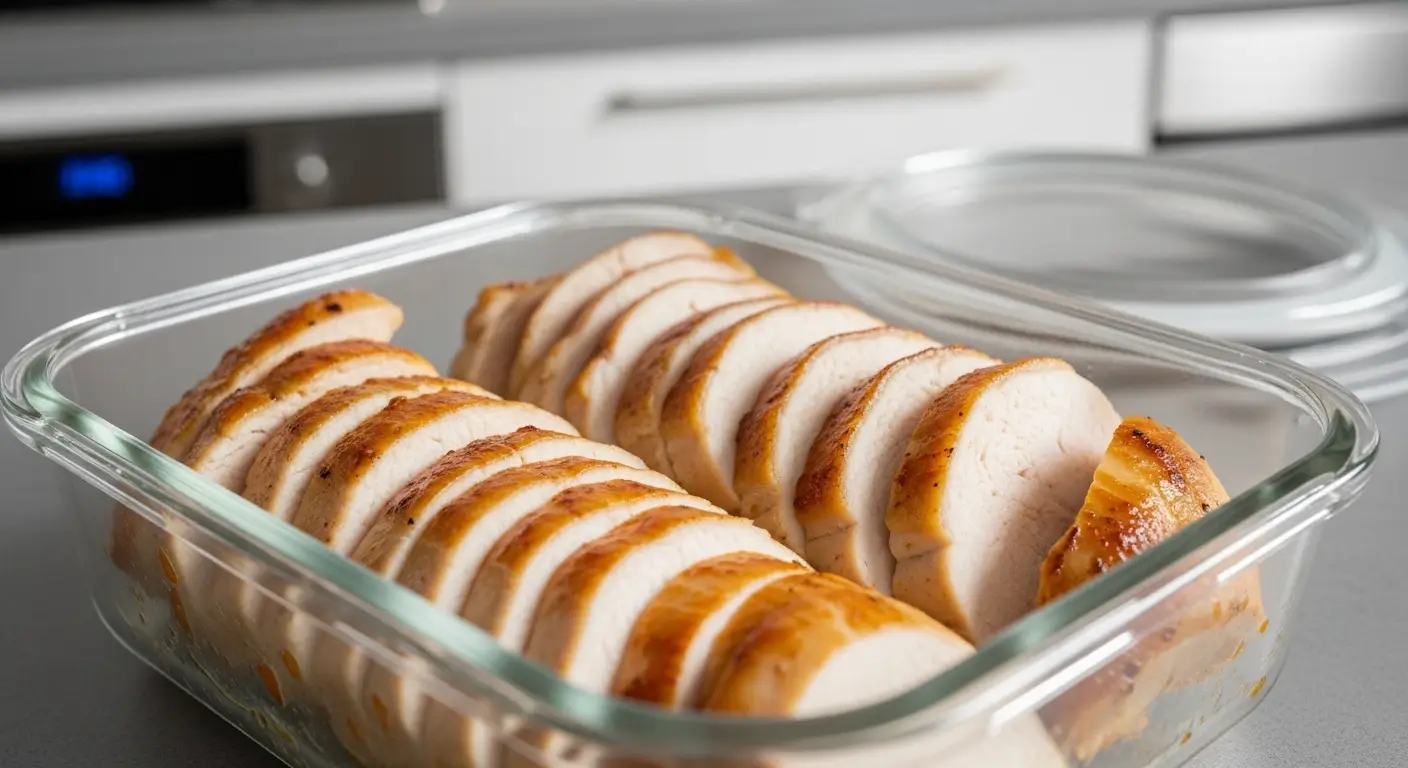
When you are ready to serve, use a sharp serrated knife. This is a knife with teeth, like a bread knife. Use a sawing motion to cut through the thick icing and the soft cake. This keeps the cake from getting squished. I like to serve my slices with a cup of hot tea or a cold glass of milk. This cake is very rich, so you only need a medium slice to feel satisfied. It is great for breakfast, a snack, or even a fancy dessert after dinner.
Pro Baking Tips
- Zest First: Always zest your lemons before you squeeze the juice out. It is much harder to zest a squished lemon!
- No Overmixing: Only stir the flour until it disappears. This keeps the cake light.
- Room Temp Eggs: Put cold eggs in a bowl of warm water for 5 minutes if you forgot to take them out early.
Storage and Freshness Tips

If you have leftovers, you are lucky! This cake actually tastes even better the next day. The lemon flavor has more time to settle into the crumbs. I keep my loaf in an airtight container at room temperature. It will stay fresh and moist for about three days. If you want it to last longer, you can put it in the fridge for up to a week. Just know that the fridge can sometimes dry out cakes, so make sure the container is sealed very tight.
You can also freeze this lemon loaf. I like to wrap individual slices in plastic wrap and then put them in a freezer bag. That way, I can take out just one slice whenever I have a craving. Just let it thaw on the counter for about an hour. It will taste just as fresh as the day you baked it. This is a great way to make sure you always have a treat ready for guests. Just don’t forget it’s in there, or you might find a “lemon ice cube” months later! Ha!
How to Get It Right Every Time
Why is my lemon loaf dry?
You might have baked it too long or used too much flour. Try measuring your flour with a spoon and leveling it off. Also, check the cake 5 minutes early.
Can I use bottled lemon juice?
You can, but the flavor will not be as bright. Fresh lemon juice has a better zing. If you must use bottled, make sure it is 100% juice with no sugar added.
Why did my icing melt off?
The cake was likely still too warm. The cake must be completely cool to the touch. Even a little heat will turn the thick icing into a runny liquid.
Can I make this gluten-free?
Yes! You can use a 1-to-1 gluten-free flour blend. The texture might be a little different, but the lemon flavor will still be amazing and delicious.
What if I don’t have lemon extract?
The cake will still taste good, but the lemon flavor will be weaker. You can add an extra tablespoon of lemon zest to help boost the flavor naturally.
Enjoy Your Homemade Treat
Baking this Starbucks Lemon Loaf at home is a great way to save money and have fun. You now know all the secrets to a moist cake and a thick glaze. I hope you enjoy every bright, tangy bite of your new favorite dessert. Happy baking!