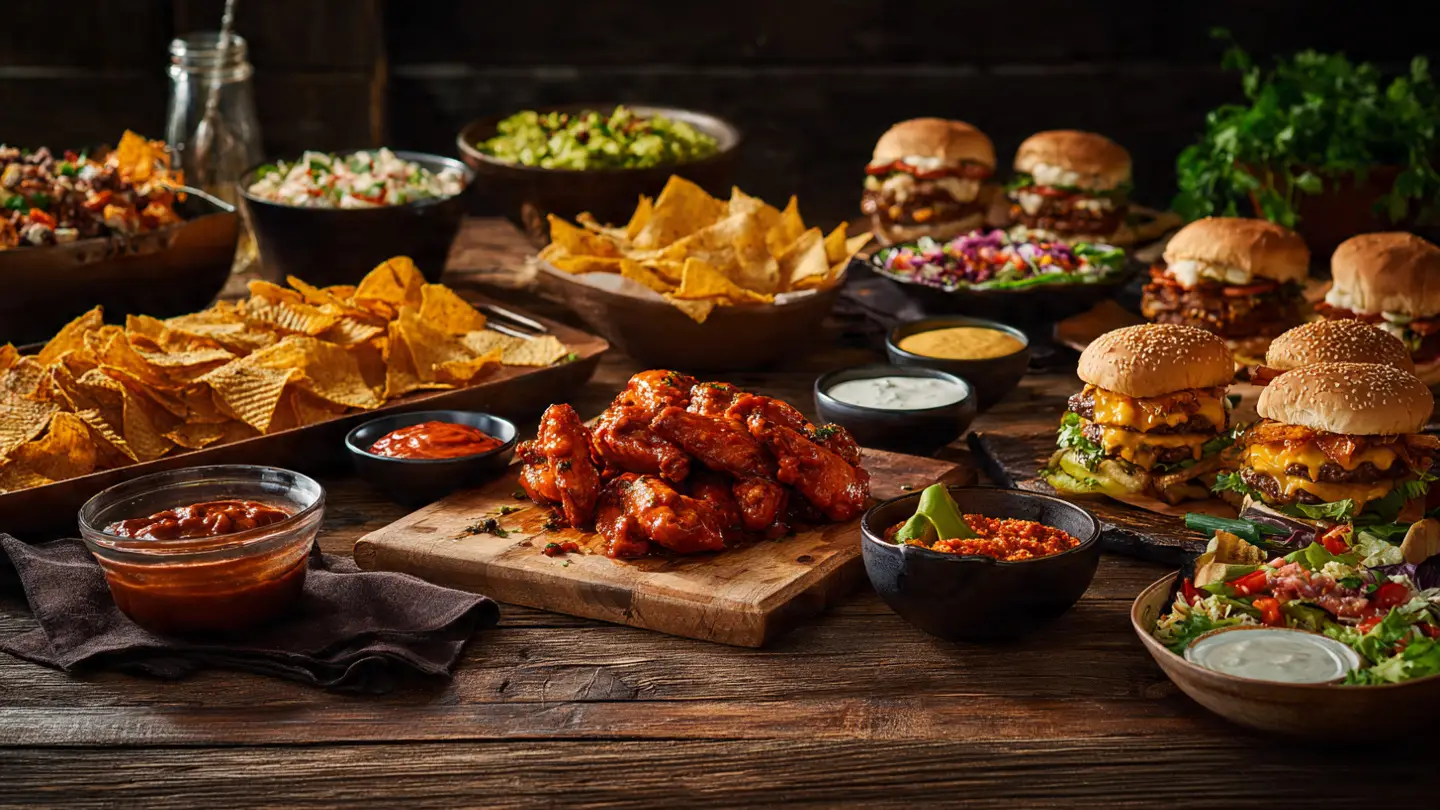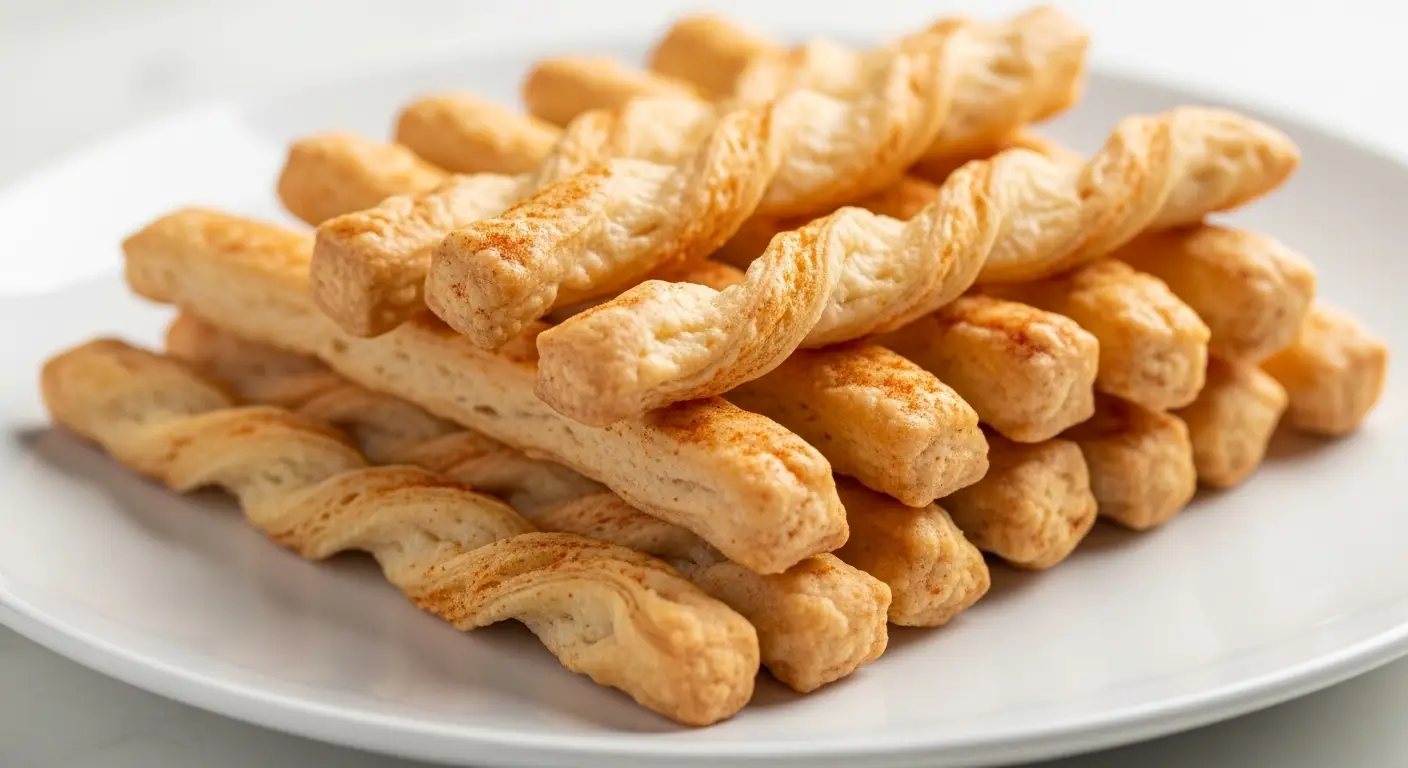
Cheese Straws
Cheese straws are the best snack ever. They are crunchy, salty, and full of cheesy flavor. I remember eating these at every holiday party when I was a kid. My grandma always had a big tin of them sitting on the counter. They are much better than crackers from a store because you know exactly what is inside them. You only need a few basic things from your kitchen to make a big batch of these gold treats.
In this guide, I will show you how to make perfect cheese straws from scratch. You will learn the right way to mix the dough so it stays flaky. I will also share my favorite way to shape them so they look professional. Whether you want a snack for a movie night or something to bring to a friend’s house, these are always a hit. Everyone will ask you for the recipe before the night is over!
Get your apron ready and let’s start baking together!
Why You Will Love Making These
Making snacks at home feels good. You can control how much salt goes in and what kind of cheese you use. These straws are very forgiving, which means it is okay if you make a mistake. They do not have to look perfect to taste amazing. In fact, the little bumps and rough edges often become the crunchiest parts. I love how the smell of melting cheese fills the whole house while they bake.
These are great for beginners because the dough is easy to handle. You do not need fancy tools to get a good result. If you have a bowl and a fork, you are halfway there. Kids love helping with this recipe too. They can help press the dough or watch the oven timer. It is a fun way to spend an afternoon in the kitchen without much stress.
The Best Ingredients for Crunch

The secret to a great cheese straw is the cheese itself. I always use extra sharp cheddar because it has the most flavor. If you use mild cheese, the straws might taste a bit plain. You should grate the cheese yourself instead of buying the bagged kind. Bagged cheese has a waxy coating that keeps it from sticking together, but that coating can make your straws feel greasy or gritty. I learned this the hard way when my first batch turned out flat and oily.
Butter is the next big player. Use unsalted butter so you can decide how salty the dough should be. The butter needs to be cold, just like when you make a pie crust. Cold butter creates tiny pockets of steam in the oven. This makes the straws light and airy instead of hard like a brick. You also need flour, salt, and a little bit of cayenne pepper. The pepper does not make them spicy, but it adds a nice warmth that cuts through the rich fat of the cheese.
Tools You Need to Get Started

You do not need a lot of gear to make these. A sturdy box grater is important for the cheese. I like using the side with the smallest holes so the cheese melts evenly into the flour. You will also need a large mixing bowl and a pastry cutter. If you do not have a pastry cutter, two forks work just fine. I used forks for years before I finally bought a real cutter, and my snacks always tasted great.
For shaping the straws, a rolling pin is helpful. If you want fancy shapes, you can use a cookie press or a pastry bag with a star tip. However, a simple knife or a pizza cutter works perfectly for classic straight straws. Don’t forget parchment paper for your baking sheets. It keeps the cheese from sticking and makes cleanup much faster. IMO, parchment paper is the best invention for anyone who hates washing dishes.
Recipe Quick Info
- Prep Time: 20 minutes
- Cook Time: 15 minutes
- Servings: 30 straws
- Difficulty: Easy
The Complete Ingredients List

Make sure you have everything ready before you start mixing. It is much easier to cook when you aren’t hunting for a spice jar with messy hands. Here is what you will need for one big batch:
- 2 cups of all-purpose flour
- 1/2 pound of extra sharp cheddar cheese (grated)
- 1/2 cup of cold unsalted butter (cut into cubes)
- 1 teaspoon of salt
- 1/4 teaspoon of cayenne pepper
- 1/2 teaspoon of paprika (for color)
- 2 tablespoons of cold water
Make sure your water is very cold. I usually put an ice cube in a cup of water and let it sit for a minute. Cold water keeps the butter from melting while you work the dough. This is the key to getting that flaky texture everyone loves. If the dough gets too warm, the butter leaks out and the straws become tough.
Step-by-Step Mixing Instructions

Start by putting your flour, salt, cayenne, and paprika in the large bowl. Give it a quick whisk to mix the spices. Add the cold butter cubes next. Use your pastry cutter or forks to mash the butter into the flour. You want it to look like coarse crumbs. It should not be smooth like a cake batter. You want to see tiny lumps of butter still in there.
- Add the grated cheese to the flour mixture.
- Toss it gently with your hands to coat the cheese in flour.
- Sprinkle one tablespoon of cold water over the top.
- Stir with a fork until the dough starts to clump together.
- If it is too dry, add the second tablespoon of water.
- Press the dough into a ball with your hands.
Do not over-mix the dough! If you kneed it too much, the straws will be hard. Just press it until it holds its shape. Once it is a ball, wrap it in plastic and put it in the fridge for 30 minutes. This resting time lets the flour soak up the moisture and makes it easier to roll out later. I once tried to skip this step, but the dough was too sticky to roll. FYI, patience really pays off here.
How to Shape Your Cheese Straws

Now comes the fun part. Take your dough out of the fridge and put it on a floured surface. Dust your rolling pin with a little flour too. Roll the dough out until it is about 1/4 inch thick. Try to keep it in a rectangle shape. This makes it easier to cut into even strips. If the edges are messy, just trim them off and add them back to the dough pile.
I like to use a pizza cutter to make long strips. You can make them as long or as short as you want. Usually, about 4 to 6 inches is a good length. If you want them to look fancy, you can twist each strip a few times. This gives them a spiral look that catches the light beautifully. If the dough breaks while you twist, it might be too cold. Let it sit for two minutes and try again. Lay the strips on your baking sheet with a little space between each one.
Baking to Golden Perfection

Heat your oven to 375 degrees. This high heat is important. It makes the water in the butter turn to steam quickly, which lifts the layers of the dough. Put your baking sheet on the middle rack. Bake them for 12 to 15 minutes. You have to watch them closely toward the end. They can go from perfect to burnt very fast because of the high fat content.
You are looking for a deep golden color. The ends should be slightly darker than the middle. When they come out of the oven, they will still feel a little soft. That is normal! They will crisp up as they cool on the pan. I usually let them sit for at least 10 minutes before I touch them. If you move them too soon, they might snap in half. Once they are cool, they should have a loud snap when you break them.
Success Tips for Bakers
- Keep it Cold: If the kitchen is hot, put the dough back in the fridge for 10 minutes between rolling and cutting.
- Cheese Choice: Use a block of cheese, not pre-shredded. The starch in bagged cheese ruins the crunch.
- Even Thickness: Use rolling pin rings if you have them to make sure every straw is the same height.
Fun Ways to Serve Your Snacks

Cheese straws look great when you stand them up in a tall glass or a mason jar. It makes them easy for guests to grab. They are the perfect side for a bowl of creamy tomato soup. I also love serving them on a cheese board with some grapes and nuts. The salty flavor goes really well with sweet fruit. If you are having a party, you can put a few jars around the room so people can snack while they talk.
You can also crumble them up! If you have some broken pieces at the bottom of the tin, don’t throw them away. They make amazing croutons for a salad. I once used the crumbs to top a macaroni and cheese dish, and it was the best thing I ever ate. These snacks are very versatile. You can even pack them in a lunchbox for a special treat at school or work. Just make sure to wrap them well so they don’t get crushed.
Flavor Variations to Try Next Time

Once you master the basic recipe, you can start getting creative. You don’t have to stick to just cheddar. I have made these with Gruyere and Parmesan, and they were delicious. Just remember that harder cheeses work better than soft ones. You can also change the spices. Instead of cayenne, try using dried rosemary or thyme. Herbs give the straws a very different, earthy smell that is perfect for dinner parties.
Some people like to add a little crunch on the outside. You can brush the straws with a tiny bit of egg wash and sprinkle sesame seeds or poppy seeds on top before baking. Another great trick is to use smoked paprika instead of regular paprika. This gives the straws a “bacon” flavor without any meat. I personally love adding a lot of cracked black pepper to mine. It gives them a sharp bite that is very addicting.
Better Than Store-Bought
Why do these taste so much better than the ones in a box? It is all about the fresh cheese. Most store brands use cheese powder or oils that taste fake. When you bake these at home, the oil comes from real butter and real cheese. This creates a rich flavor that lingers on your tongue. Plus, there are no chemicals or things you can’t pronounce in your homemade version. It is just simple, honest food.
I also think the texture is better. Store-bought straws are often very dry and dusty. Homemade ones have a “short” texture, which means they melt in your mouth while still being crunchy. This happens because we don’t over-work the flour. We keep those gluten strands short and happy. Every time I share these with friends, they are shocked at how much better they are. It really shows that a little effort in the kitchen goes a long way.
Storage and Saving for Later

If you don’t eat them all at once (which is hard!), you need to store them correctly. The main enemy of a cheese straw is moisture. If the air gets to them, they will turn soft and chewy. Keep them in an airtight container like a tin or a plastic tub. They will stay fresh at room temperature for about a week. I like to put a piece of wax paper between the layers so they don’t stick or break.
Can you freeze them? Yes, you can! You can freeze the raw dough for up to three months. Just thaw it in the fridge overnight before you roll it out. You can also freeze the baked straws. When you want to eat them, put them in a 350-degree oven for 5 minutes. This wakes up the butter and makes them crunchy again. It is a great way to be prepared for unexpected guests. Just pull a few out of the freezer and your house will smell like a bakery in minutes.
Common Questions About Cheese Straws
Can I use low-fat cheese for this recipe?
I do not recommend it. Low-fat cheese does not melt the same way and has less flavor. The fat is what makes the straws crunchy and tasty.
Why did my straws turn out greasy?
This usually happens if the butter or dough got too warm before baking. Always use cold butter and let the dough rest in the fridge.
How do I make them extra spicy?
You can double the amount of cayenne pepper or add a few drops of hot sauce to the cold water before mixing it into the dough.
My straws are soft after cooling. What happened?
They might be under-baked. Put them back in the oven for 2-3 minutes until they are a darker golden brown. They need that heat to crisp up.
What is the best way to cut them without a pizza cutter?
A sharp knife works well. You can also use a fluted pastry wheel to give the edges a pretty zigzag pattern.
Time to Start Baking
You now have all the secrets to making the best cheese straws ever. They are simple, delicious, and sure to be a favorite in your home. Just remember to keep your ingredients cold and use the sharpest cheese you can find. Happy baking!