Transform your backyard into a luxury retreat without breaking the bank. Discover the 10 best budget-friendly DIY upgrades that give your outdoor space an ultra-expensive, high-end look.
GENIUS SMALL KITCHEN LAYOUTS THAT FEEL HUGE
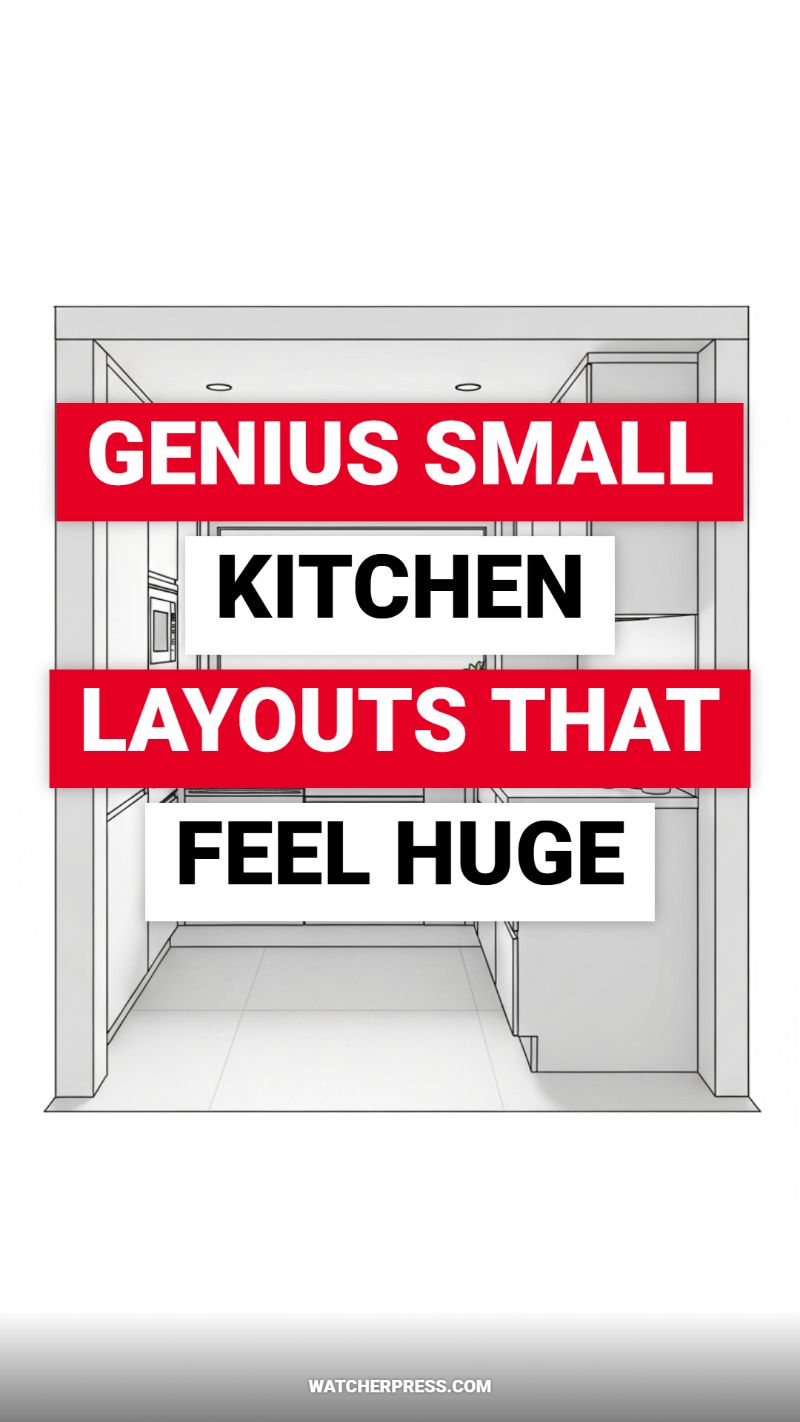
While this heading refers to interior design, the principle of maximizing function within minimal square footage is absolutely essential for creating high-end, budget-friendly backyard zones. When tackling small patios or compact yards, you must employ genius layouts that utilize every inch vertically and horizontally, making the area feel exponentially larger and more purposeful. To achieve this ‘huge’ effect on a budget, prioritize long, streamlined work surfaces—similar to the galley layout depicted in the image—using inexpensive materials like treated lumber or simple concrete pavers for countertops. Define distinct, functional zones (like grilling, dining, and relaxation) using only low-profile elements, such as container gardens or vertical slatted screens, rather than bulky furniture or expensive modular units. Paint boundary walls or fences in light, reflective colors to push the visual lines outward, dramatically increasing the perceived size of your outdoor room without incurring high construction costs.
To execute a small, budget-friendly outdoor ‘layout that feels huge,’ focus on building vertically. Install multi-tiered planters or a DIY vertical herb garden wall to draw the eye up, immediately distracting from the area’s limited footprint. For seating, choose built-in benches that double as storage, constructed cheaply using simple cinder blocks and cushions, replacing costly standalone outdoor sofas. This strategy ensures seating is tucked neatly against the perimeter, freeing up crucial central floor space for movement or gathering. Furthermore, strategic lighting is paramount: instead of large, imposing fixtures, use strings of warm LED bistro lights hung high across the space to create a canopy effect, elevating the ceiling and softening the boundaries. This careful, layered lighting transforms a cramped corner into a sophisticated, airy entertaining space after dusk.
When considering the material palette, the goal is cohesion and simplicity, which inherently reads as upscale. Limit your primary surface materials (flooring and countertops) to one or two types, ensuring they are budget-friendly—think large format gravel or simple poured concrete for the ground, and sanded plywood sealed for outdoor use or inexpensive tiles for prep surfaces. Avoid clutter by implementing robust organization; every item must have a designated home, often hidden within the built-in storage. By maintaining crisp lines, using a restrained color scheme, and emphasizing functional flow over decorative excess, you mimic the minimalist design principles of high-end outdoor architecture. This meticulous organization and visual efficiency trick the brain into perceiving the space as far more substantial and expensive than its actual size or budget allows.
BEST DIY PRIVACY SCREENS FOR NOSING NEIGHBORS

Achieving architectural privacy doesn’t require commissioning custom millwork; the sleek, vertical slatted screen visible in the image is a prime example of a budget DIY upgrade that instantly elevates a deck or patio. This look mimics high-end design, often featuring materials like teak or ipe, but you can achieve the same sophisticated aesthetic using standard, affordable lumber like common cedar fence pickets or pressure-treated pine 1x2s. The key to making this upgrade look ultra-expensive lies in uniformity and finish. Instead of solid, bulky fencing, the narrow, evenly spaced vertical slats provide a modern visual texture while offering effective sightline blockage from nosy neighbors. This design allows light and air to pass through, ensuring your space feels intentionally enclosed and private, not boxed-in or cheaply constructed. To start, select straight, knot-free pieces and plan your screen’s width and height relative to your space.
To execute this DIY project successfully, begin by constructing a robust internal frame (which will be hidden by the slats) using 2x4s or 4×4 posts securely fastened to your existing structure or anchored into the ground. Consistency is paramount for achieving that custom, high-end appearance. Once the frame is ready, measure and cut all your chosen slats (e.g., 1-inch by 2-inch boards) to the exact same length. The trickiest part is maintaining uniform spacing between them—using a simple spacer block (a small piece of wood cut to your desired gap size, typically 1/2-inch to 3/4-inch) is essential. Apply an exterior-grade wood stain or sealer before installation; this prevents the color bleeding onto your patio surface and ensures complete coverage, a detail often missed in amateur builds. The rich, warm tone seen in the photo requires a deep mahogany, teak, or walnut stain applied evenly, allowing the natural grain to show through while protecting the wood from weathering.
For expert results that truly mimic luxury design, pay attention to the details of assembly and presentation. Avoid visible hardware on the face of the screen by using screws driven through the back of the slats and into the hidden frame members. If front mounting is necessary, use high-quality decking screws and ensure all heads are countersunk and aligned. Furthermore, consider extending the screen higher than minimum requirements to emphasize the height and grandeur, as shown in the visual where the screen seems to meet an overhead structure. Finally, integrating modern design elements—such as incorporating linear LED lighting along the base or positioning a minimalist outdoor chair and stone planter adjacent to the screen—will complete the transformation. This simple vertical slatted design is proof that strategic use of pattern and quality finishing can turn budget materials into a breathtaking, expensive-looking architectural feature.
THE SECRET TO FINDING VIRAL DECOR AT GOODWILL

While this method is often applied to indoor styling, the same principles of thrifting and curation can transform your backyard on an ultra-tight budget. The secret to finding high-impact pieces for your outdoor space is redefining what “outdoor decor” means. Instead of purchasing expensive, weather-rated planters, focus your thrift hunt on sturdy ceramic, glass, and brass objects that can be repurposed into eye-catching outdoor vignettes. Look specifically for groupings of similar items, like the collection of neutral vases shown here. These vases—often available for just a dollar or two—can be used as minimalist planters for small succulents, sleek holders for citronella tapers, or simple water vessels for floating blooms. The key is seeking out monochromatic or highly textured items (matte white, natural clay, deep bronze, or textured stone finishes) as these inherently read as high-end designer pieces, instantly upgrading a utilitarian patio table or basic potting bench. Always check the bases for quality marks, even if you intend to cover them with plants.
To successfully translate thrifted finds into a cohesive, expensive-looking backyard setup, focus on the power of the vignette. A single cheap vase looks like clutter; a curated group of five complementary ceramics looks intentional and artful. Start by selecting a backdrop for your display—this could be a narrow shelf attached to a fence, a built-in barbecue ledge, or the top of an outdoor console table. When arranging your thrifted haul, use the principle of varying heights and textures. Incorporate some heavy, dark elements (like old books wrapped in plastic or concrete pavers) to lift smaller items, mirroring the layered look seen on the shelves in the visual. Ensure that every item in the grouping relates to the others either through color (staying within two main tones, such as whites and browns) or material (all ceramic, all glass, etc.), which creates visual harmony that disguises the low cost of the individual pieces.
For items that will be permanently exposed to the elements, a little expert prep work goes a long way toward longevity. If you find porous ceramic pieces that you wish to use as planters, consider sealing the inside with a waterproof sealant or simply utilizing them as cachepots (decorative covers) for inexpensive nursery pots. For metal items like brass candleholders, allow them to patina naturally outside, as this aged look adds character and perceived antiquity that high-end decorators often pay a premium for. The true budget upgrade comes from the curation: by intentionally grouping neutral, textured, and repurposed thrift finds, you shift the focus from the object’s cheap price tag to the sophisticated styling, making your entire outdoor space feel thoughtfully designed rather than merely decorated.
5 Chic Outdoor Showers You Need This Summer
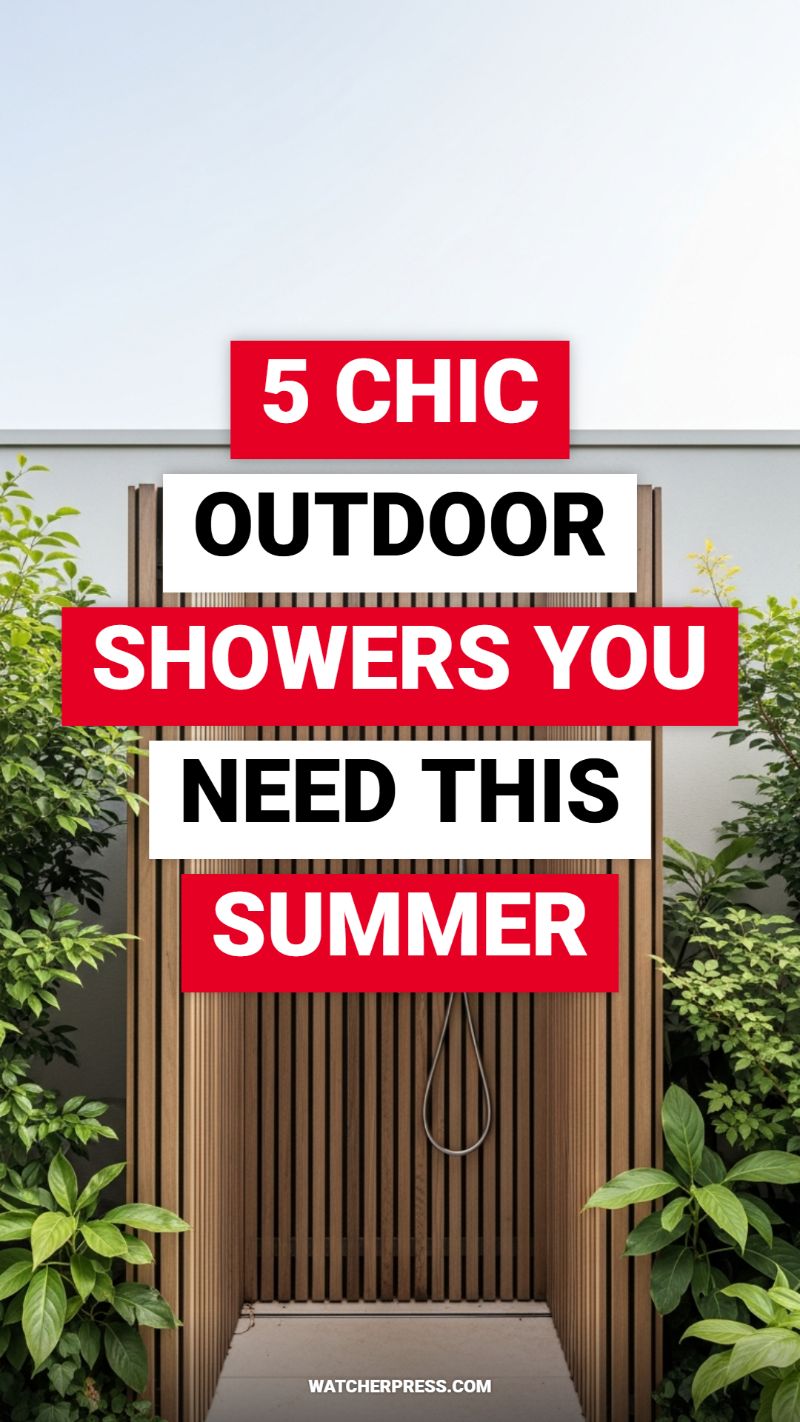
The image showcases a high-end, contemporary outdoor shower defined by its clean lines and vertical slatted wood enclosure. This aesthetic, often associated with luxury retreats, is surprisingly achievable on a budget. To replicate this look without the hefty price tag, skip expensive hardwoods like teak and opt for pressure-treated pine or cedar fence pickets. The secret to the modern appearance lies in consistency: ensure your vertical slats are uniform (e.g., 1x4s) and leave minimal, uniform gaps between them. For the plumbing, avoid costly in-wall installations. Instead, purchase a basic utility sink faucet or a simple galvanized pipe shower head kit that connects directly to a garden hose spigot, keeping the plumbing exposed for an industrial, minimalist charm.
The construction is straightforward: build a simple 4×4 post frame, then clad it vertically with your chosen slats. Privacy requires at least three solid walls. Crucially, the base must handle drainage effectively to maintain the luxurious feel and prevent water pooling. If you don’t have existing decking, creating a simple, spa-like floor is easy. Excavate a small area, lay landscape fabric, and fill it with decorative pea gravel or river stones. Alternatively, build a small modular slatted wood platform (using the same wood as the walls) that sits atop the gravel, ensuring water runs through it easily. Attach your minimalist plumbing fixture high enough to clear the tallest user, securing the pipe neatly to one of the interior wall slats.
What truly makes an outdoor shower look “ultra-expensive” is the environment. Take inspiration from the image and integrate natural, lush greenery around the enclosure. Strategic planting of ferns, bamboo, or large potted shrubs softens the hard edges of the wood structure and creates a feeling of secluded sanctuary. Accessorize minimally; perhaps a small, heavy stone bench or hook set for towels, and simple brass or matte black hardware. If space allows, add a small solar-powered light fixture mounted high above the shower to illuminate the structure beautifully at night, enhancing the spa atmosphere without running electrical lines, completing the luxury upgrade within a tight budget.
QUICK DIY DECOR PROJECTS UNDER $20
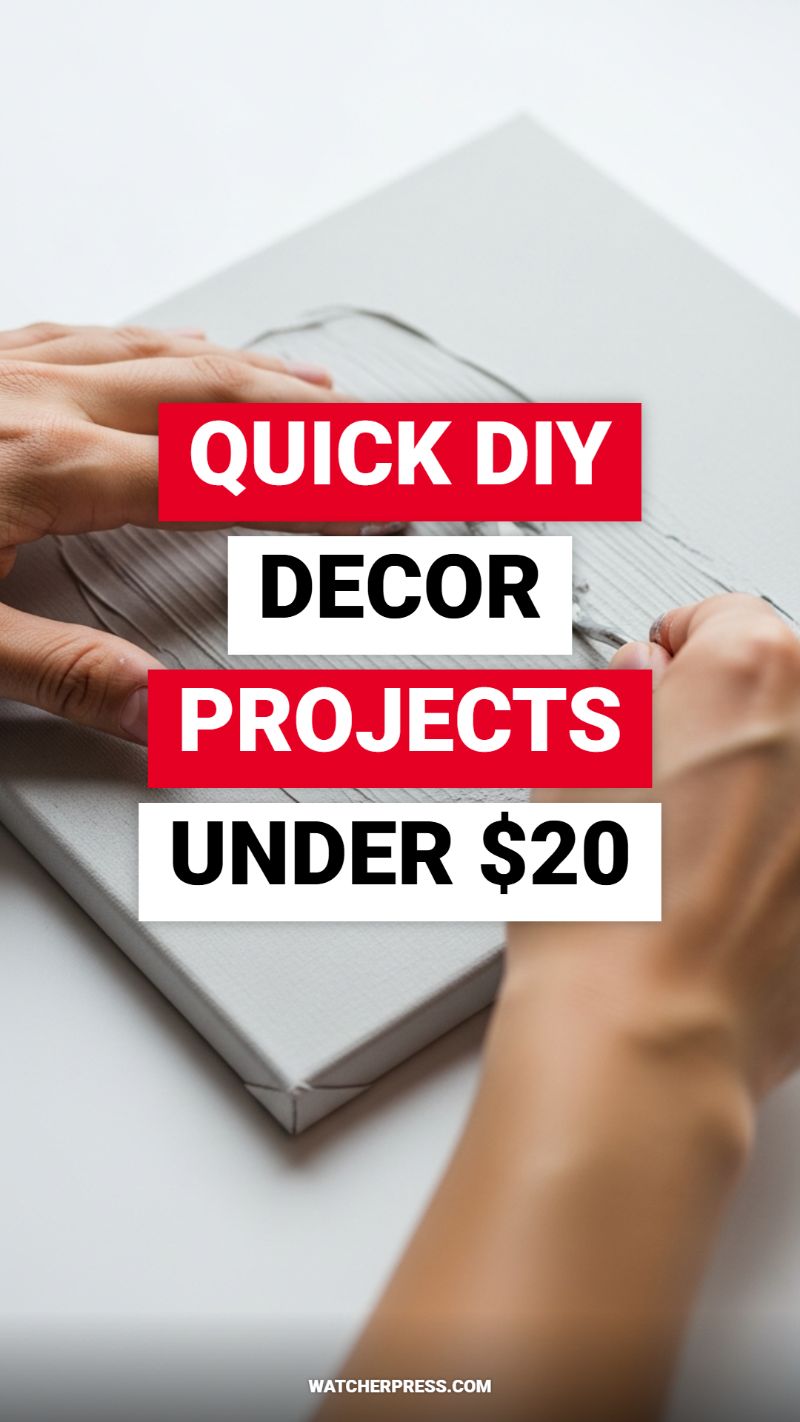
One of the most effective ways to instantly elevate your backyard aesthetic is by introducing large-scale, minimalist artwork. While high-end textured canvases can cost hundreds, you can replicate this ultra-expensive look for less than $20 using simple, readily available materials. To begin this quick DIY decor project, source an exterior-grade wood panel or an inexpensive pre-stretched canvas that has been primed with exterior sealant. The primary material for the texture is joint compound, often called spackle or texture paste, which is incredibly cheap and easy to manipulate. Ensure you have a wide trowel, putty knife, or even an old plastic comb on hand to create diverse textures. For a truly sophisticated look that mimics high-end concrete art, keep your palette simple—think matte white, light grey, or deep charcoal, using outdoor-appropriate paint once the texture is dry.
Creating the desired texture is where the artistry lies. As shown in the image, applying the compound requires intentional, sweeping motions. Start by spreading a generous, even layer of the joint compound across the entire surface of your prepared canvas or board. Before it sets, use your tool of choice (a notched trowel creates linear grooves, while a palette knife can build up organic, impasto peaks) to carve or sweep patterns into the wet material. Work relatively quickly and experiment with pulling the paste in different directions—a messy, yet deliberate, application often yields the most professional, abstract result. Allow the compound to dry completely, which may take up to 24 hours depending on the thickness of your application, ensuring the surface is rock hard before proceeding to the final steps.
The final steps are crucial for transforming this budget project into a durable, upscale piece suitable for a backyard setting. Once dry, lightly sand down any overly sharp edges to refine the piece, then apply two coats of high-quality exterior paint in your chosen color. Expert advice suggests opting for a flat or matte finish, as gloss tends to cheapen the concrete or plaster look we are aiming for. To guarantee longevity against moisture and sun, apply a clear, UV-resistant exterior sealant over the entire finished piece. Grouping two or three monochromatic textured panels together on a patio wall or mounting a single, large piece above an outdoor console table instantly provides the focal point and architectural interest typically reserved for five-figure landscaping budgets.
STOP BUYING THIS OUTDOOR FURNITURE NOW

The visual evidence here is clear: sleek, low-profile modular seating is the definitive style for luxury outdoor living. The clickbait heading refers not to the furniture you see, but to the mass-produced, flimsy alternatives—the cheap, shiny plastic or poorly constructed resin wicker sets that fade within a single season. To achieve the high-end aesthetic displayed here on a budget, you must prioritize form and function over busy ornamentation. The secret lies in modularity, which allows you to configure your setup precisely for your space, simulating custom built-in pieces. Look for frames in dark charcoal, stark white, or muted grey metals (aluminum is ideal for longevity) rather than traditional brown wicker. Choosing these monochromatic neutrals instantly elevates the perception of quality and ensures your investment doesn’t clash with future decor changes.
The critical ‘how-to’ for the budget-conscious shopper is mastering the cushion game. True luxury outdoor furniture is characterized by deep seating and thick, substantial cushions—not the flat, quick-dry pads often included in big-box bundles. If you find an affordable sectional frame (often available during end-of-season sales), commit to upgrading the cushions. Purchase high-density outdoor foam locally and invest in durable, weather-resistant covers in a light, unified tone, mirroring the luxurious light grey shown in the image. This approach allows you to spend a larger portion of your budget on the elements that guests physically interact with (the comfort) while keeping the structural cost low. Ensure the frame’s depth allows for back pillows that maintain the clean, rectilinear profile crucial to the modern design.
Finally, achieving this ultra-expensive look requires minimal distraction. The sectional shown relies on a clean, uncluttered wooden deck surface and a simple, geometric railing. When installing your new modular set, resist the urge to fill the space with excessive small items. Instead, use scale to your advantage; a large, well-placed sectional automatically dictates luxury. Position the pieces to face a view or frame a focal point, and use only one or two oversized, functional accessories, such as a large, low-profile coffee table or a substantial planter. By focusing on volume, neutral tones, and deep comfort, you successfully transform an entry-level purchase into a high-end destination space.
5 MUST-HAVES FOR A PERFECT SUMMER PATIO

Achieving a minimalist, high-end patio aesthetic doesn’t require importing expensive Italian stone. The secret, as demonstrated in this visual, lies in selecting high-impact foundational materials that maximize perceived space and clean lines. To replicate this look on a budget, prioritize large-format square pavers in a light tone—think white, light grey, or bone. While natural stone is pricey, budget-friendly alternatives like molded concrete pavers or outdoor porcelain tiles can mimic the sophisticated, seamless finish. Expert tip: ensure the pavers are installed tightly with minimal grout lines (or color-matched grout) to reduce visual distraction and create a unified, expensive-looking expanse. Focus your efforts on laying pavers only in the immediate seating area rather than the entire backyard to drastically cut costs, utilizing the surrounding lawn or turf as a contrasting texture, as seen here.
The next step is strategic seating and anchoring the space. The chairs pictured are a minimalist, sling-style deck chair—a design that is widely reproduced across various price points. Look for budget versions featuring teak, acacia, or aluminum frames paired with simple grey textile cushions. The key to elevating these affordable pieces is the addition of a defined area rug. An outdoor rug acts as the flooring for your outdoor ‘room,’ immediately anchoring the furniture and introducing a sophisticated pattern. Choose high-contrast patterns, like the graphic black, white, and gray shown here, which mask any imperfections in the underlying flooring and add an architectural element that distracts from less expensive furniture frames. This rug should be large enough so that at least the front legs of all seating rests comfortably on it.
Finally, finish the look with low-cost, high-impact accessories that speak to modern minimalism. Replace bulky tables with a simple, sculptural side piece, such as the cylindrical concrete table shown. This can be easily replicated using a sealed planter turned upside down or by sourcing affordable composite material tables. The accompanying greenery should be minimal and low-maintenance; a single potted succulent adds life without introducing clutter. The overall feeling of expense is achieved through restraint and organization—ensure your color palette (neutral grays, whites, and natural wood tones) is strictly adhered to, and keep the space rigorously tidy. A clutter-free, carefully curated outdoor zone instantly reads as intentional and luxurious, regardless of the individual item price tags.
COZY FIRE PIT AREAS FOR LATE NIGHT CHATS

Creating a dedicated outdoor gathering spot centered around a fire pit is one of the most effective ways to instantly elevate your backyard ambiance, delivering an expensive resort feel without the hefty price tag. To achieve the minimalist, high-end look exemplified here, skip the costly, labor-intensive custom stone fireplace and opt instead for a modern, pre-cast concrete or fiber-cement bowl fire pit. These ready-made pits are significantly cheaper than custom masonry work, yet their clean, geometric lines lend themselves perfectly to contemporary design. Placement is crucial: situate the fire pit away from the house, defining it as a separate destination. This sense of intentional distance makes the area feel like an escape. Ensure the pit is large enough to be functional but doesn’t overwhelm the space, maintaining clear pathways around the perimeter for easy access and flow, which is a hallmark of sophisticated outdoor design.
The secret to maximizing the visual impact while controlling costs lies in material selection for both seating and the base. Instead of expensive natural stone or composite decking, define your fire pit zone using simple, high-impact materials like pea gravel or crushed granite (as seen in the image). These materials are excellent for drainage, easy to install yourself, and provide a pleasing, crunching sound underfoot that adds to the sensory luxury. For seating, uniformity is key to looking expensive. Invest in classic, comfortable, all-weather Adirondack chairs, which are durable and often available affordably in maintenance-free materials like poly-wood or treated lumber. The final touch that converts basic seating to luxury seating is high-quality cushions. Stick to neutral, earth-toned fabrics (like charcoal gray or linen) with dense foam inserts—the uniformity and quality texture immediately suggest custom, high-end design.
To truly capture that ‘late-night chat’ magic, ambiance and lighting must be prioritized. The warm glow of the fire is enhanced exponentially by soft, diffused overhead lighting, which is achieved affordably using café-style string lights (also known as bistro or festoon lights). Install durable, commercial-grade LED string lights and ensure they are hung high and draped loosely to cover the entire conversation area. This creates a virtual ceiling of light that feels intimate and expansive at the same time. Expert Tip: Always opt for warm white (2200K to 2700K color temperature) dimmable bulbs to replicate the soft, rich glow of candlelight or sunset—this color temperature is essential for luxurious outdoor spaces. Finally, if using a gas pit, consider upgrading the standard lava rock media to high-polish fire glass or ceramic stones; this small, decorative change reflects the flame beautifully and locks in the modern, ultra-expensive aesthetic.
MAXIMIZE SMALL PATIOS WITH MINI KITCHENS

While full-scale outdoor kitchens often require immense budgets and sprawling backyards, a focused “mini kitchen” utilizing built-in components is a brilliant, cost-effective way to achieve an ultra-expensive look in a tight space. The primary strategy here is integration over size. Instead of buying a prefabricated grill cart, invest your budget in building a simple, permanent structure out of affordable masonry, such as cinder blocks covered in smooth stucco or poured concrete. These materials are inexpensive, incredibly durable, and immediately lend a custom, modern architectural feel. Limiting the size to just the area required for a small grill head and minimal staging space saves thousands on countertop material and construction labor, allowing you to splurge slightly on a quality stainless steel drop-in appliance that instantly elevates the entire installation.
The secret to making this upgrade look professional and expensive is the flawless integration of the components. Choose a compact, high-quality built-in gas grill head. You must measure the appliance specifications precisely to ensure the masonry cutouts are clean and snug, achieving that flush, seamless appearance. Below the grill, install a coordinating stainless steel access door or drawer unit. This serves two essential functions: providing discreet storage for propane tanks or grill accessories, and visually completing the built-in cabinet look. This metal-on-concrete aesthetic is inherently modern and screams custom design, contrasting sharply with the clunky, temporary look of traditional wheeled grills.
To maximize the visual appeal of this compact setup, focus on minimalist design principles. Keep the color palette restricted to neutral tones—the white of the stucco, the light gray of the countertop, and the silver of the stainless steel—to create a clean, intentional feel that expands the perception of the space. Ensure that the counter surface is just large enough to the side of the grill to handle a cutting board or plating area, reinforcing the functionality without adding unnecessary bulk. This strategic simplification turns a tiny corner of your patio into a highly functional outdoor culinary station, significantly increasing your home’s entertainment potential and perceived value for a fraction of the cost of a full remodel.
TOP 5 VIRAL AMAZON DECOR FINDS UNDER $50

While the image showcases chic interior staples—a textured vase, a cozy throw, and casual footwear that speaks to laid-back luxury—the same principles of texture, neutrality, and high-impact styling can be applied directly to your backyard space, all while adhering to the under-$50 budget constraint often associated with viral Amazon finds. To achieve an ultra-expensive exterior look affordably, focus first on textural elements. Replace the ribbed ceramic vase shown with a set of three textured resin or fiberglass planters (often sold in sets on Amazon for less than $40). Choose a matte finish, ideally in white, black, or deep charcoal gray, as highly glossy plastics tend to look cheap. The visual interest provided by the pattern on the vase translates perfectly to vertical garden wall panels or decorative privacy screening, which are easily sourced budget buys that instantly make a space feel more enclosed and deliberate. Think about adding weather-resistant textiles, mirroring the soft gray throw shown, in the form of outdoor pillow covers or a quick-drying throw blanket for your existing patio furniture to soften harsh lines and introduce a luxurious, layered look.
Next, focus instructionally on the ambient elements that define high-end design: lighting and defining zones. The magazine in the image symbolizes a curated lifestyle, which outdoors is achieved through strategic illumination. Viral Amazon lighting solutions, typically solar-powered LED string lights or path markers, offer the best return on investment. When selecting string lights, ignore cool-toned white bulbs and opt specifically for 2700K (warm white) or lower; this color temperature mimics candlelight and gives a space a sophisticated, high-end glow rather than a harsh, commercial feel. Position lights not just overhead, but along perimeter walls or under railings to create depth and eliminate shadows. Furthermore, use inexpensive gravel or simple paver stones (the exterior version of the stylish, walkable area shown by the shoes) to clearly define a “patio zone” versus a “garden zone,” making your budget space feel intentional and professionally structured.
Finally, to ensure these budget finds translate into an ultra-expensive aesthetic, employ the visual styling rules utilized in the indoor vignette. Grouping objects is key: instead of scattering five cheap items randomly, group three coordinated planters together or cluster a seating area with matching, budget-friendly lantern-style solar lights. Stick to the cohesive, neutral palette suggested by the image—white, gray, and natural tan/brown—to avoid visual clutter. This monochromatic discipline ensures that even inexpensive items look intentional and designer-approved. By prioritizing subtle texture, warm lighting, and careful arrangement of your under-$50 Amazon scores, you can transform your backyard into a space that looks far more costly than it actually is.
DARK ACADEMIA MEETS WESTERN HOME DECOR STYLE

To achieve an ultra-expensive look in your backyard on a tight budget, take a cue from the moody sophistication of the Dark Academia aesthetic and the rugged richness of Western design. The most impactful and cost-effective upgrade is using color to create depth and drama. Start by applying a dark, rich stain—think deep espresso or charcoal black—to existing fences, sheds, or deck flooring. This simple step mimics the luxurious, dark wood finishes found in expensive interiors. Unlike light colors that show wear quickly, dark tones conceal imperfections and create a deliberate sense of enclosure, instantly turning your backyard into a secluded, high-end retreat. Ensure proper surface preparation (cleaning and light sanding) before applying two thin coats of a quality exterior oil-based stain for lasting color and protection. The transformation from tired, faded wood to dramatic, sophisticated architecture will look like a professional, expensive overhaul.
Next, integrate budget-friendly rustic elements to weave in the Western influence and add textural richness. Rather than installing costly stone patios, define paths or seating areas using inexpensive, oversized gravel or decomposed granite, bordered by repurposed timbers or cinder blocks painted matte black. For furniture, prioritize simple, sturdy lines, and enhance them with layers of texture. Use durable outdoor throws in natural fabrics like heavy canvas, faux shearling, or even inexpensive plaid blankets draped over existing seating to introduce that cozy, layered Western feel. You can also create high-end planters from inexpensive terracotta pots simply by painting them with a textured black or deep bronze spray paint, mimicking expensive cast iron. This focus on texture and dark, earthy colors ensures the space feels grounded, curated, and far more substantial than typical patio furniture sets.
Finally, the key to making any backyard look ultra-expensive is strategic lighting, which provides the moody ambiance necessary for both the Dark Academia and Western styles. Avoid harsh, bright lights. Instead, use warm-toned (2700K) LED string lights strung in geometric patterns over seating areas or inexpensive solar stake lights to subtly illuminate pathways. A high-impact budget trick is to install inexpensive spotlights hidden behind large plants or aimed up at a dark stained fence; this technique, known as ‘up-lighting,’ adds dramatic shadows and highlights architectural details, creating a gallery-like effect. If you have an outdoor dining area, consider swapping out a standard light fixture for an oversized, simple pendant light (you can often DIY one using basic hardware store materials and matte paint) to serve as a high-end focal point that draws the entire space together.
Pallet Furniture: The Ultimate DIY Backyard Upgrade
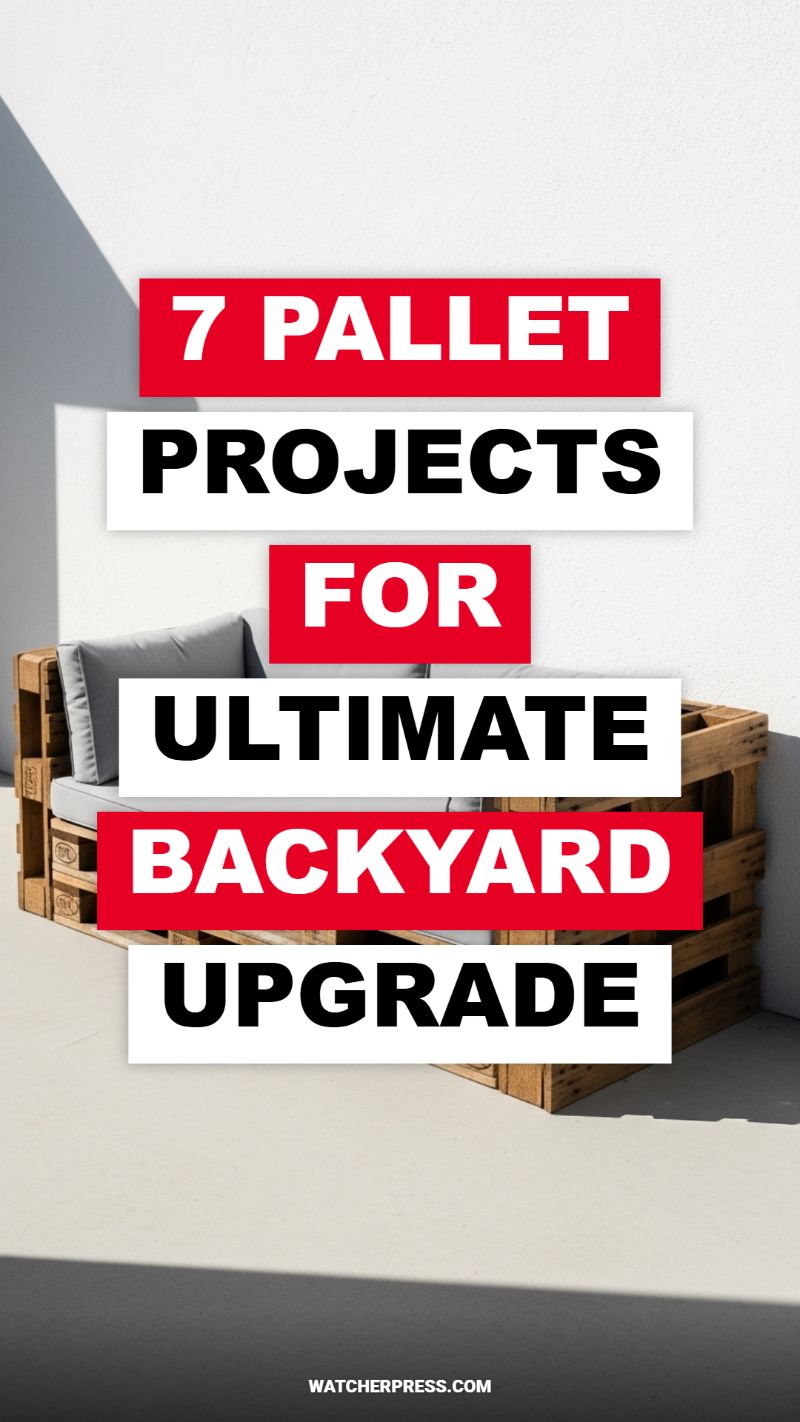
Reclaimed wood, particularly shipping pallets, offers the single most cost-effective way to build substantial, high-impact outdoor furniture that mimics expensive, custom-built pieces. The foundational structure seen here—a deep, low-profile lounge sofa—requires typically three or four Euro pallets (EPAL) which are standardized and often available for free or a minimal fee. To start your project, first prioritize safety by sourcing pallets stamped with “HT” (Heat Treated) and strictly avoid those marked “MB” (Methyl Bromide), which indicates chemical fumigation. Thoroughly clean the wood using a mild bleach solution or power washer, then perform rigorous sanding. Proper preparation is essential not only for splinter prevention but also to ensure that your paint or stain adheres evenly, giving the final product a professional, high-end appearance.
Building the sofa structure is surprisingly straightforward. For a comfortable seating height (typically 15 to 17 inches off the ground), stack two pallets horizontally and secure them together using long wood screws and heavy-duty corner brackets. For the backrest, you can utilize a third pallet, securing it vertically to the stacked base. Expert advice dictates creating a slight angle (around 10-15 degrees) on the backrest for ergonomic comfort—this can be achieved by cutting the vertical pallet support beams at an angle before attaching them. Once the structure is stable, the most important step for achieving the ‘ultra-expensive’ look is the finish. Apply a quality exterior wood stain, such as a deep teak or dark walnut, followed by several coats of an outdoor polyurethane sealer to protect the wood from UV damage and moisture. This process transforms rough industrial wood into rich, durable patio furniture.
While the pallet structure itself is a budget win, the perceived value of your lounge hinges entirely on the cushions. Do not skimp on this element. Investing in high-quality, dense foam outdoor cushions with durable, weather-resistant fabric (like Sunbrella) is the secret to elevating this DIY project to luxury status. Ensure the cushions fit the dimensions of your pallet frame snugly—custom-fit cushions, rather than mismatched sizes, eliminate the DIY look immediately. Style the sofa with large, coordinating throw pillows and perhaps a patterned outdoor rug nearby. This attention to texture and layering completes the transformation, presenting a chic, modern outdoor seating area that guests will assume cost thousands of dollars.
Budget Outdoor Kitchen Ideas That Look Expensive
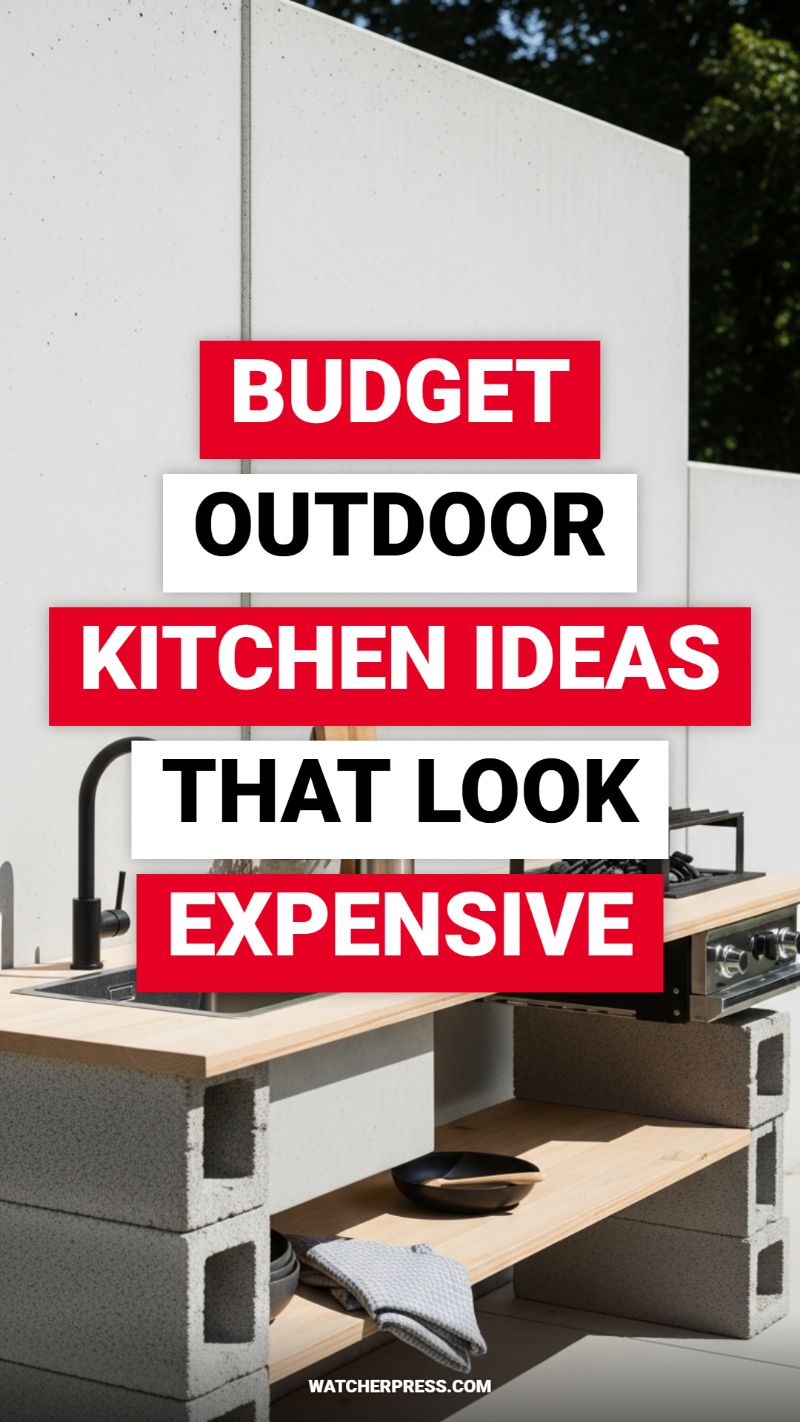
This design achieves a high-end, architectural aesthetic using one of the most readily available and inexpensive materials on the market: standard concrete masonry units (CMU), commonly known as cinder blocks. The secret to making this budget build look ultra-expensive lies in the execution and material contrast. Instead of using complex framework, the simple, stacked arrangement of the white-washed or clean gray CMU blocks creates a structured, modern base that mimics expensive poured concrete or custom stucco work. You must pair this rough, industrial texture with a premium, smooth surface, such as a thick, sealed wooden slab (like cedar, treated butcher block, or sealed plywood) for the countertop. The deliberate contrast between the warm, natural grain of the wood and the cool, minimalist gray of the concrete elevates the entire setup, instantly giving it a contemporary loft or high-design outdoor living feel rather than a typical backyard DIY project.
Construction of this module is straightforward but requires stability. Before starting, ensure your building area is level—a concrete patio or paved area is ideal. Stack the CMU blocks to your desired counter height and length, staggering the blocks as you would with traditional bricklaying to ensure a robust structure. For long-term stability and safety, particularly if integrating heavy appliances or plumbing, it is highly recommended to secure the blocks using a construction-grade adhesive designed for masonry, or even filling the cavities with concrete and rebar for maximum permanence. Critically, design your structure to naturally incorporate storage and appliance niches; leave gaps in the block arrangement to slide in shelves, like the lower wooden slab pictured, and ensure you have specific, pre-measured openings for drop-in elements like the sink basin and the cooktop burner, which help solidify the built-in, custom appearance.
The single most important step in ensuring this project looks expensive is the selection of finishing fixtures. Because CMU blocks are extremely inexpensive, you can afford to allocate a larger portion of your budget to high-impact visual elements. Avoid standard hardware store faucets and opt for sophisticated choices such as matte black, brushed nickel, or tall, gooseneck designs, as seen with the sleek black faucet in this example. For cooking elements, selecting built-in cooktop inserts or griddle plates that sit flush with the countertop further enhances the custom look, ditching bulky, freestanding grills. Finally, protect your investment by thoroughly coating all wood surfaces with multiple layers of marine-grade sealant or exterior oil to withstand weather, and consider applying a concrete sealer to the masonry blocks to prevent staining and moss growth, thus preserving the clean, modern aesthetic for years to come.
Create Your Dream Backyard Oasis in 3 Steps
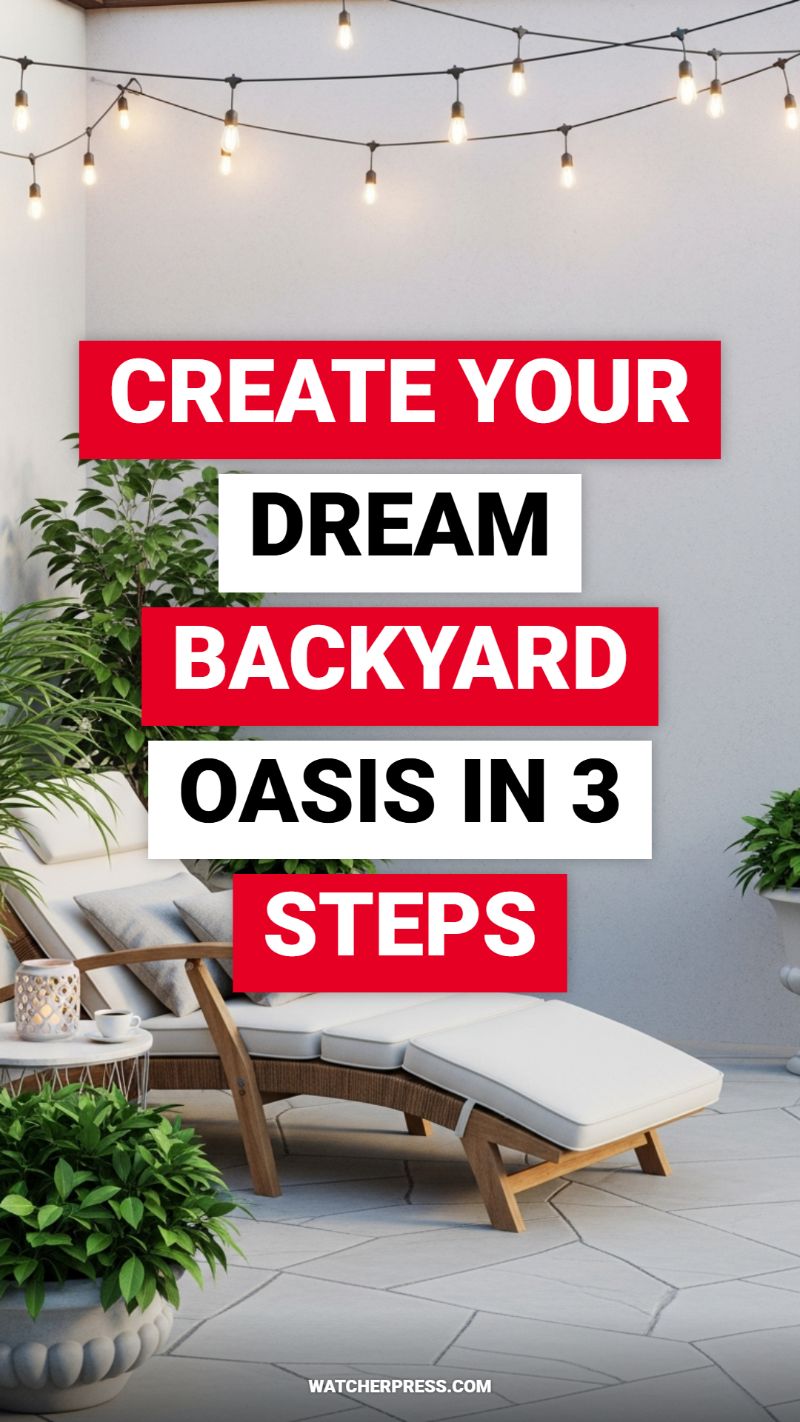
The secret to achieving an ultra-expensive backyard retreat, like the one pictured, without draining your savings lies in strategic staging and atmosphere control. The first essential step is mastering the art of illumination. String lights, often called bistro or market lights, are the number one upgrade for delivering instant ambiance that looks custom and high-end. Instead of just running a single line, create a canopy effect by crossing them over the seating area or running multiple rows diagonally across the patio. This defines the space, provides a warm, inviting glow, and crucially, hides any mundane elements of the surrounding architecture. Opt for warm white LED bulbs for maximum longevity and energy efficiency. Securing these lights properly—perhaps using simple wooden poles set into planters if you don’t have walls or eaves—helps establish the feeling of a permanent, well-designed outdoor room.
The second critical step is injecting life and texture through strategic greenery. Expensive landscapes often look full and layered. You can replicate this by using large potted plants to frame your seating area, as seen in the image. Focus on scale; two or three large planters with tall, leafy specimens like ferns, bamboo, or large-leafed tropical plants make a much greater impact than many small, scattered pots. To keep the look cohesive and upscale, choose neutral planters (white, terracotta, or concrete) and group them closely together to create dense, lush corners. This technique not only adds color and vitality but also provides necessary privacy, transforming a regular patio into a secluded sanctuary. Additionally, pay attention to the groundwork. If new paving isn’t in the budget, deep cleaning your existing patio and adding a fresh layer of sealant, or even using large, irregularly shaped mats or outdoor rugs, can drastically improve the perceived value of the flooring.
Finally, the third step involves elevating your furniture through sophisticated styling and textiles. A simple wooden lounge chair, or even a basic metal set, can appear luxurious when draped in crisp, white or natural-toned cushions and plush throw pillows. This monochromatic palette signals resort-level comfort and sophistication. Focus on quality outdoor fabrics that are durable and resistant to fading, as quality textiles are a telltale sign of expense. Integrate small but impactful accessories: a stylish side table, such as the wire basket design shown, is perfect for holding necessary comforts. Add a decorative element like a simple lantern or a ceramic candle holder to imply leisure and attention to detail. By emphasizing soft textures, light neutrals, and controlled staging, you turn functional outdoor seating into a curated extension of your living space, making your budget backyard look utterly high-end.
BUILD A KILLER OUTDOOR BAR FOR UNDER $100
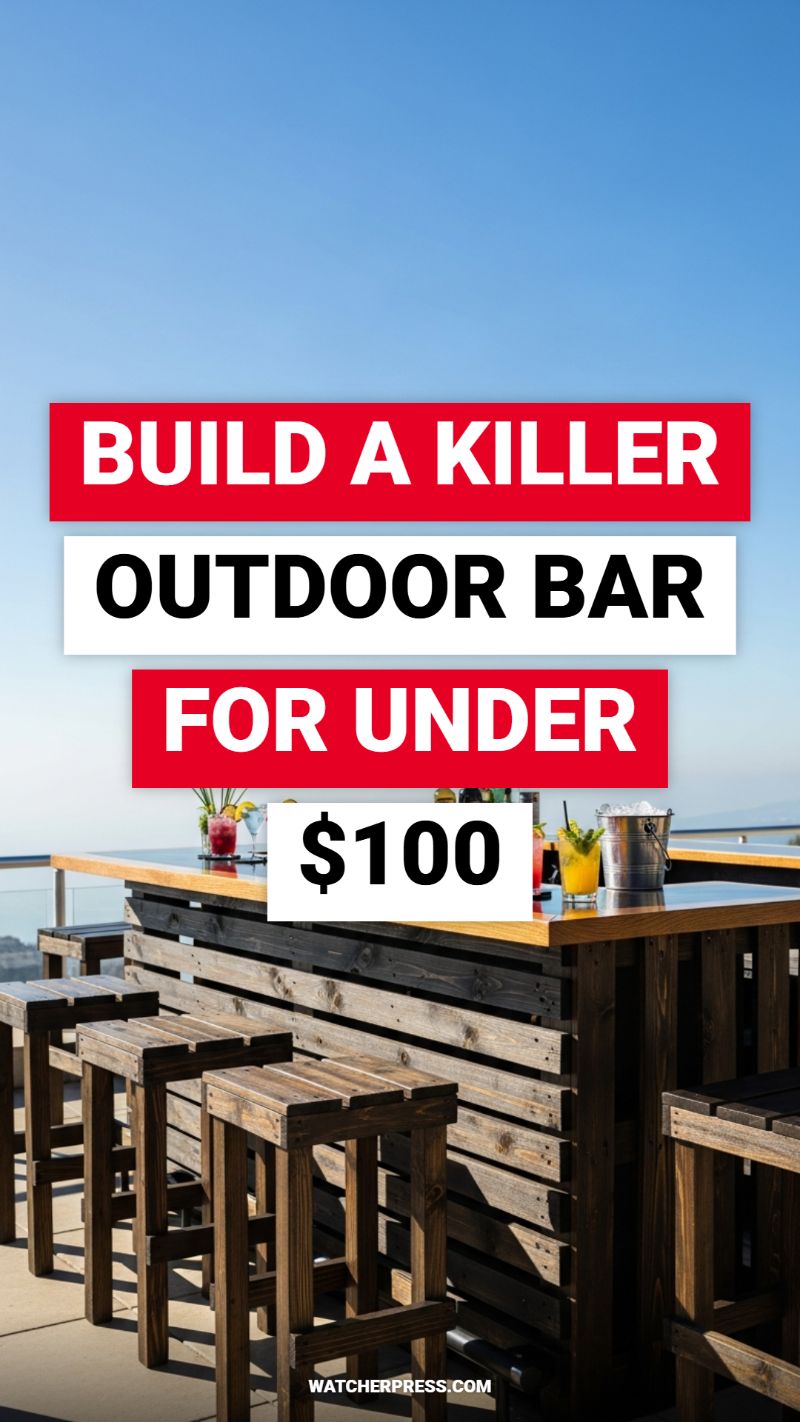
Achieving a bespoke, high-end outdoor bar aesthetic without spending thousands is entirely possible by utilizing reclaimed lumber, primarily shipping pallets. The secret to this ultra-expensive look, as depicted in the image, lies in the intentional contrast of wood finishes and meticulous construction. Begin by sourcing several clean, heat-treated (HT stamped) wooden pallets, which are often available for free from industrial areas or small businesses. Dismantle the pallets carefully to preserve the slats, sorting them by quality and width. The visual appeal of this bar is generated by the two-toned facade—some slats appear naturally aged or lightly stained, while others have been treated with a dark charcoal or ebony stain. Before assembly, pre-staining the slats in these two distinct tones and sealing the top counter material with a glossy, marine-grade varnish will elevate the piece from basic DIY to professional-grade.
The instructional phase begins with building a sturdy internal frame, typically using 2x4s or thicker pallet stringers, sized to standard bar height (around 42 inches). Unlike typical cabinetry, this design favors exposed horizontal cladding. Once the skeletal structure is stable, begin attaching the prepared slats, alternating the light and dark wood finishes to create the rich, textured dimension seen in the photograph. This alternating pattern is the key expert trick that breaks up the monotony of simple wood and mimics custom millwork. Ensure the slats are attached securely using exterior-grade screws or hidden construction adhesive. For the countertop, which must withstand weather and spills, use a thick piece of plywood or salvaged butcher block. After cutting the top to size, apply at least three coats of clear, UV-resistant polyurethane or marine varnish, sanding lightly between coats, to achieve the glossy, durable finish that makes the surface look highly valuable and resistant to the elements. Remember to incorporate an overhang for comfortable seating.
The final steps involve the necessary finishing touches that maximize the high-end appearance while keeping the project within the $100 budget. If you are building the matching bar stools (a crucial element for cohesion), use the same reclaimed wood and finishing techniques. The $100 budget largely needs to be allocated toward screws, fasteners, quality exterior stain, and the marine sealant for the countertop—the most important components for longevity and aesthetic appeal. Position the finished bar in an area with a great view or alongside existing patio infrastructure, as shown here, to amplify its impact. Lastly, strategic staging with quality barware, an ice bucket, and colorful drinks transforms the functional piece into an attractive focal point, confirming that smart material sourcing and diligent finishing can result in a backyard upgrade that drastically over-delivers on its low investment cost.
DIY Backyard Dog Areas Your Pet Will Love
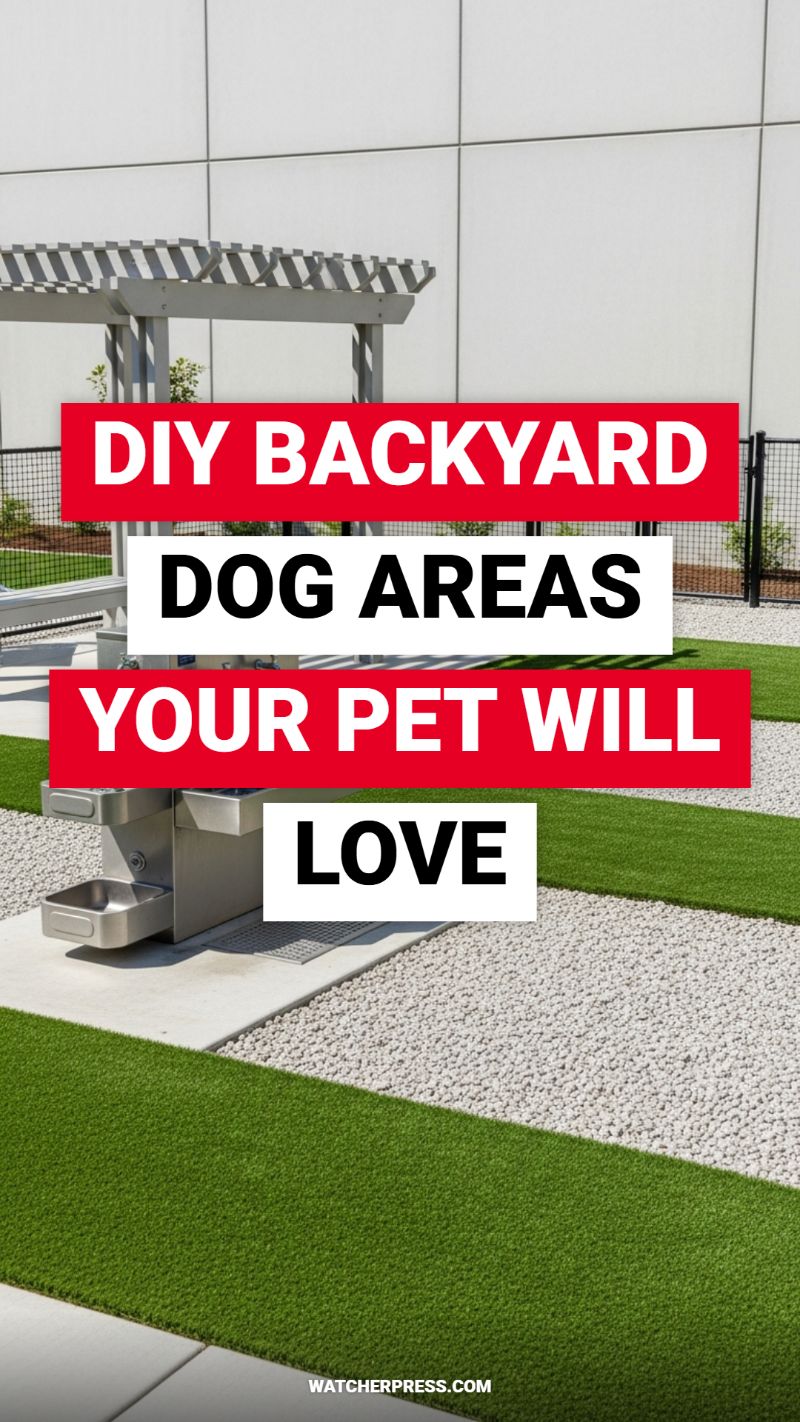
Transforming a neglected corner of your yard into a dedicated, high-design dog run is a budget upgrade that yields incredibly expensive-looking results. The key to this successful aesthetic is structured material contrast, as demonstrated by the use of artificial turf, bright white pea gravel, and crisp concrete borders. This segmented approach immediately elevates the space from a simple patch of dirt to a thoughtfully designed, multi-textured environment. Utilizing synthetic turf for high-traffic zones eliminates mud and contributes to the sleek, manicured look that defines luxury landscaping, while the surrounding gravel offers excellent drainage and a cool surface for your pet. Focus on maintaining perfectly straight edges between these materials; sharp transitions are the hallmark of professional installation and are what make this DIY project look ultra-expensive.
To replicate this premium finish on a budget, start by carefully planning your layout using geometry—straight lines and clean rectangular patches. Proper sub-base preparation is critical for both the turf and the gravel to ensure superior drainage and longevity. When selecting materials, utilize inexpensive edging, such as plastic bender board or standard concrete blocks buried halfway, to maintain the separation between the turf and the gravel zones. Opt for affordable bulk gravel (like pea gravel or crushed granite) for the largest areas, as it is highly effective for filtering waste and provides a stark, clean contrast to the vibrant green turf. Even the inclusion of a stainless steel, commercial-style watering station, which appears premium, can often be achieved cost-effectively by plumbing a simple, low-profile basin to an existing exterior water line, adding that ultimate amenity without the custom price tag.
This upgrade maximizes impact while minimizing maintenance and long-term costs. Because the design minimizes the use of high-cost materials like extensive paving, relying instead on affordable bulk fillers and targeted use of durable turf, it remains budget-friendly. The expert advice for preserving this high-end look is centered on maintenance: regularly hose down the gravel areas to sanitize and flush away waste (a proper gravel base drains rapidly, preventing odors), and brush the turf periodically to maintain its loft. A structured, low-maintenance dog area not only prevents backyard damage but significantly enhances the functionality and resale appeal of your property, serving as a powerful demonstration that strategic design choices can easily mimic ultra-expensive luxury.
HOW TO NAIL VIBRANT MEXICAN HOME DECOR
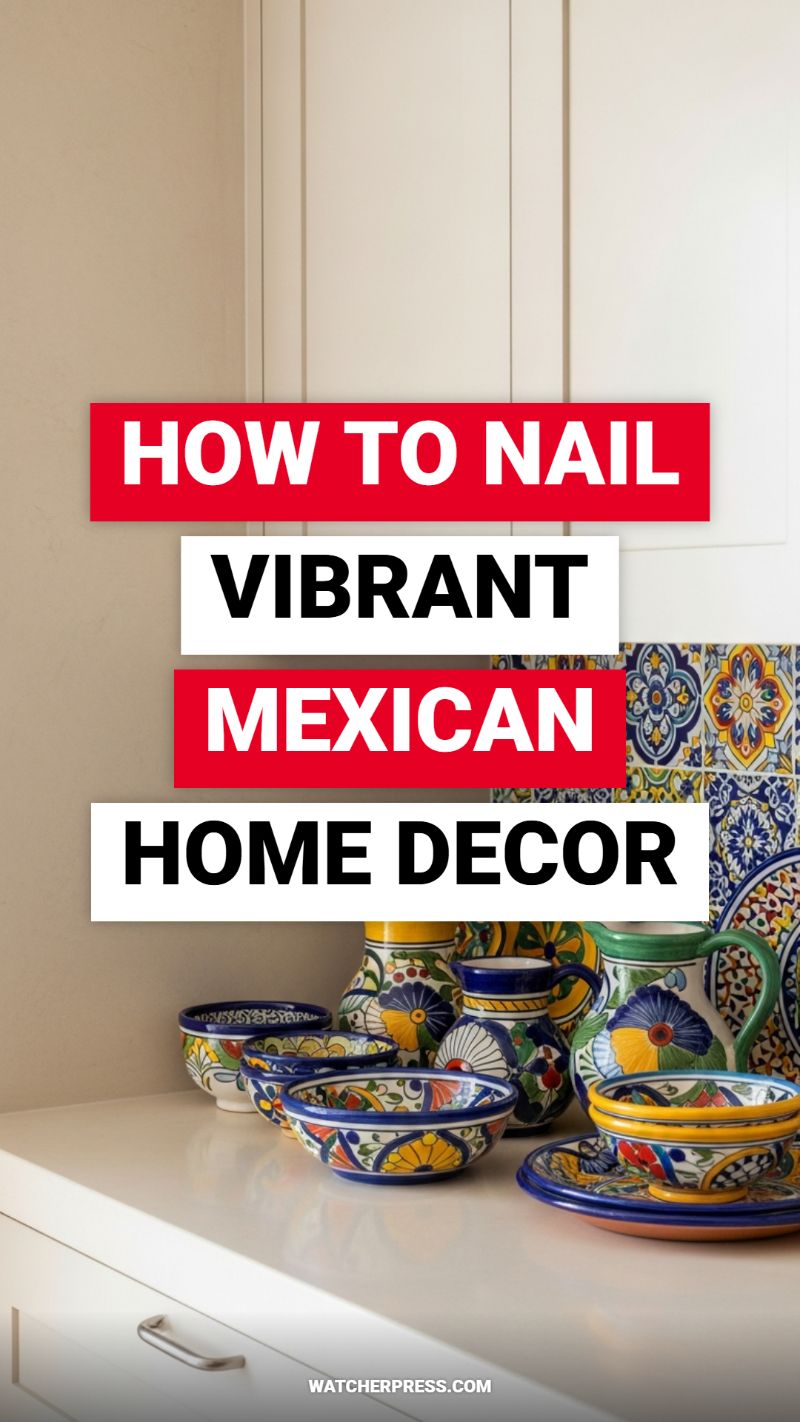
Incorporating vibrant, artisanal Mexican decor, often inspired by Talavera or Majolica ceramics, is one of the quickest ways to transform a standard backyard or patio into a luxurious, vacation-ready retreat without extensive structural upgrades. This style relies heavily on saturated color palettes—deep cobalt blues, sunny yellows, fiery reds, and rich greens—often set against a clean, neutral backdrop (like white stucco or light wood fencing) to maximize the visual impact. To effectively translate this aesthetic to an outdoor setting, focus on high-impact accents. Start by swapping out standard terracotta pots for brightly glazed or hand-painted planters; these instantly become focal points for tropical foliage or succulents. Look for large, patterned decorative plates or bowls (which can often be found affordably at import stores or flea markets) and display them securely on outdoor shelves or grouped on a patio dining table. The richness of these colors signals bespoke craftsmanship, providing that ultra-expensive feel even when using budget pieces.
The key to applying this expensive look on a budget involves strategic use of tiling and texture. While fully tiling a patio area is costly, you can achieve the same sophisticated effect by focusing on small, highly visible tiled areas. Consider using vibrant Talavera-style tiles to resurface an old outdoor coffee table or the facade of a simple DIY outdoor bar. For the most budget-conscious approach, look for high-quality, weather-resistant peel-and-stick vinyl tile decals, which can be temporarily applied to concrete steps or the edge of a raised garden bed for a fraction of the price of real ceramic. When selecting your tiles or pottery, pay close attention to the complexity of the pattern; intricate floral, geometric, or mandala designs mimic high-end imports and draw the eye away from less expensive surrounding materials. Remember that this decor style is maximalist in color but benefits from curation, so group items in odd numbers (like three pitchers or five bowls) for an artful, professionally styled display.
To complete the transformation and ensure the space reads as ultra-expensive, integrate soft furnishings and atmospheric lighting that complement the hard surfaces. Drape durable, colorful textiles, such as striped serape blankets or hand-woven rugs, over outdoor seating. Not only do these elements introduce textural complexity, but they also provide an easy, temporary injection of color that can be switched out seasonally. Finally, elevate the ambiance with specialized lighting. While standard string lights are essential, pair them with budget-friendly metal punched-tin lanterns, which cast elaborate, patterned shadows when lit, creating a romantic and exclusive evening atmosphere. By layering vibrant, patterned materials with thoughtful lighting, you create an outdoor space that feels curated, handcrafted, and significantly more costly than the sum of its parts.
HIDDEN STORAGE HACKS FOR SMALL KITCHENS
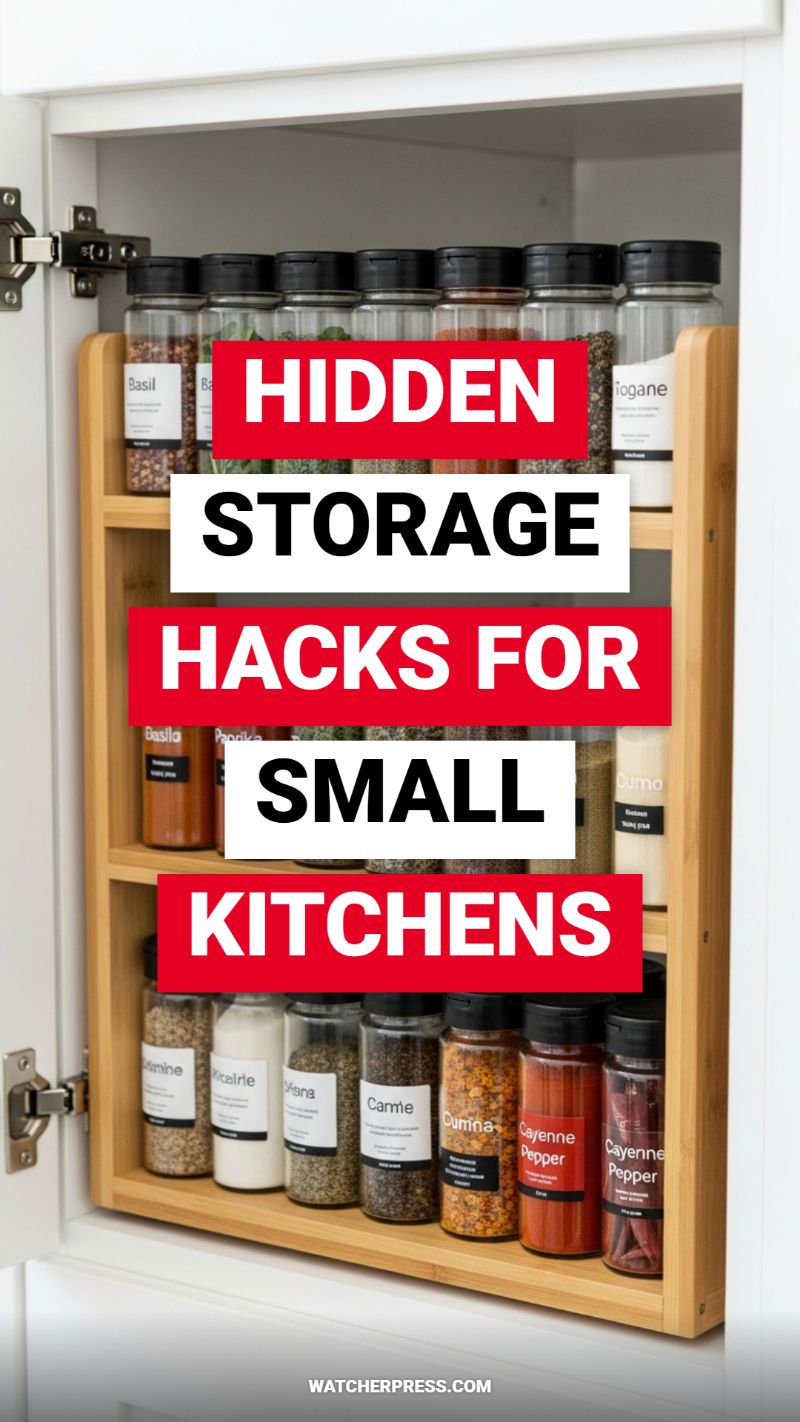
Utilizing hidden, vertical space is the ultimate secret weapon for anyone struggling with limited square footage in their kitchen. The visual appeal of a custom, organized setup like the door-mounted spice rack shown here lies in its strategic use of the inside of the cabinet door, a space typically left fallow. This simple upgrade immediately frees up valuable drawer space or internal shelving, transforming clutter into a streamlined system. For small kitchens, this maximizes efficiency without increasing the room’s physical footprint, creating a sense of spaciousness and intentional design that is often associated with high-end, custom cabinetry. The key to the polished look is choosing a multi-tiered, narrow rack—often made of wood or bamboo—that offers maximum capacity while remaining shallow enough to allow the door to close cleanly over existing shelves and stored items.
To execute this storage hack successfully, precise planning is essential. Before purchasing the rack, meticulously measure the internal clearance—from the inside of the door to the edge of the nearest shelf—to guarantee that the spice jars will not collide with contents stored inside the cabinet when the door is closed. Look for racks that are designed specifically for door mounting, or opt for simple wooden models that can be secured using short screws or industrial-strength adhesive strips for renters or those avoiding drilling. The ultimate upgrade that elevates this look from basic storage to ultra-expensive design is the use of uniform jars and clear, consistent labels, as seen in the image. Purchasing a set of matching spice jars and decanting bulk spices into them creates instant aesthetic cohesion, making the whole system appear custom-designed rather than simply assembled.
Maintain this functionally luxurious look by implementing a strict organizational strategy. First, categorize and group your spices logically (e.g., savory cooking spices on one shelf, baking extracts and spices on another). Second, ensure your labeling system is robust; professional-looking, minimalist labels (often available cheaply online) affixed to the front of the jars ensures quick identification and maintains the upscale visual appearance. This specific hack is successful because it takes frequently used but often messy items (spices) and provides them with a permanent, dedicated, and contained home. This system prevents the notorious ‘spice explosion’ across countertops and drawers, demonstrating an advanced level of kitchen management that always reads as high-end and intentional.
HIGH-IMPACT LANDSCAPING: EASY WEEKEND PROJECTS

Achieving that ultra-expensive, custom-designed yard look often boils down to one simple factor: definition. The image beautifully illustrates this through crisp, intentional boundaries between the lawn and the planting beds. You can replicate this sophisticated aesthetic over a single weekend using budget-friendly materials. Start by establishing a clean, uniform edge. Use a half-moon edger or a sharp spade to cut a deep trench (4-6 inches) along the perimeter. Instead of expensive natural stone, opt for affordable modular concrete or brick pavers, laid edge-to-edge and stabilized with sand or gravel below grade. This permanent, clean line prevents turf intrusion and provides a visual “frame” for your landscape beds, instantly elevating the entire yard’s appeal far beyond its actual cost.
Nothing transforms a backyard from mundane to magical quite like strategic lighting, a feature traditionally associated with high-end installations. Today’s LED low-voltage lighting kits are incredibly accessible and require no electrician for installation, making them the perfect high-impact weekend project. Focus your efforts not on flooding the area with light, but on accentuating key features, like the shrubs and textures seen in the sample image. Use uplights (spotlights aimed upward) to highlight the form of trees or the variegated foliage of plants like hostas. Run the low-voltage wire shallowly (or even just tucked under the mulch) from a single outdoor transformer. When darkness falls, this subtle illumination creates depth, security, and a dramatic ambiance that looks custom-designed and seriously expensive.
The final touch for a professionally maintained appearance is the planting bed itself. The visual contrast in the image—dark mulch meeting vibrant green and white foliage—is key to luxury landscaping. When planning your planting, prioritize texture and density; use inexpensive but high-performance plants like various hostas or ferns for shaded areas, or resilient groundcovers for sunnier spots. The most essential budget trick, however, is the mulch. Invest in a high-quality, dark-colored shredded bark mulch. Apply a consistent layer (3-4 inches deep) across all exposed soil. This rich, deep color not only retains moisture and suppresses weeds (reducing future maintenance), but it also acts as a dark backdrop, making the greens and whites of your plants “pop” with intensity, providing the finishing polish that screams luxury.
BOLD & BEAUTIFUL AFRO CHIC DECOR IDEAS

Achieving a high-end, bespoke look in your backyard doesn’t require massive construction; it requires strategic styling, borrowing heavily from global-inspired aesthetics like “Afro Chic.” This design philosophy emphasizes rich, earthy textures, bold geometric patterns, and natural materials—all of which can be sourced affordably for outdoor use. To translate this indoor inspiration to your patio or deck, start with grounding the space using an oversized outdoor area rug. Look for durable, synthetic jute or woven polypropylene rugs featuring vibrant, tribal-inspired prints or simple, rough-hewn textures, mimicking the natural woven look seen in the image but ensuring durability for weather exposure. This single element defines the zone, provides instant visual warmth, and creates a finished, room-like feel that drastically elevates the perceived value of your outdoor area for minimal cost.
The true essence of this “bold and beautiful” approach lies in the strategic use of pattern and color, which often signals custom, high-end design. Instead of investing in new furniture, use high-impact, weather-resistant throw pillows and cushions to revitalize existing pieces. Source fabrics or ready-made covers featuring Kente cloth-inspired prints, mudcloth patterns, or bold primary color blocks, reminiscent of the vibrantly patterned pouf pictured. These small textile changes introduce immediate visual complexity and depth without requiring large investments. Complement these patterned elements with natural wood tones—perhaps by staining or sanding down an old outdoor coffee table, or using inexpensive terracotta or ceramic pots for plants. The contrast between the simple, natural base and the intensely patterned textiles creates the sophisticated, collected look of a luxury retreat on a minimal budget.
Finally, tackle lighting to achieve that ultra-expensive resort ambiance. The original image uses tall, woven lamps that provide a soft, diffused glow—a look you can replicate outdoors with budget-friendly rattan or wicker pendant shades hung over existing string lights or outdoor floor lamps. Alternatively, utilize solar-powered lanterns placed directly on the ground or on tables, focusing on materials that mimic natural weaves. Ensure all decorative wood elements, such as the intricate carving on the coffee table in the image, are echoed in smaller backyard accents like carved wooden serving trays or screens. By focusing on texture, layering affordable, high-impact textiles, and using carefully curated natural accents, your backyard space instantly transforms from basic to bespoke, offering a luxurious outdoor living experience.