Unlock your home’s full potential! Discover 100+ genius, budget-friendly ideas and tips for transforming every room, from kitchens and baths to bedrooms and outdoor spaces. Start your ultimate home transformation journey today.
10 SMALL SPACE KITCHENS
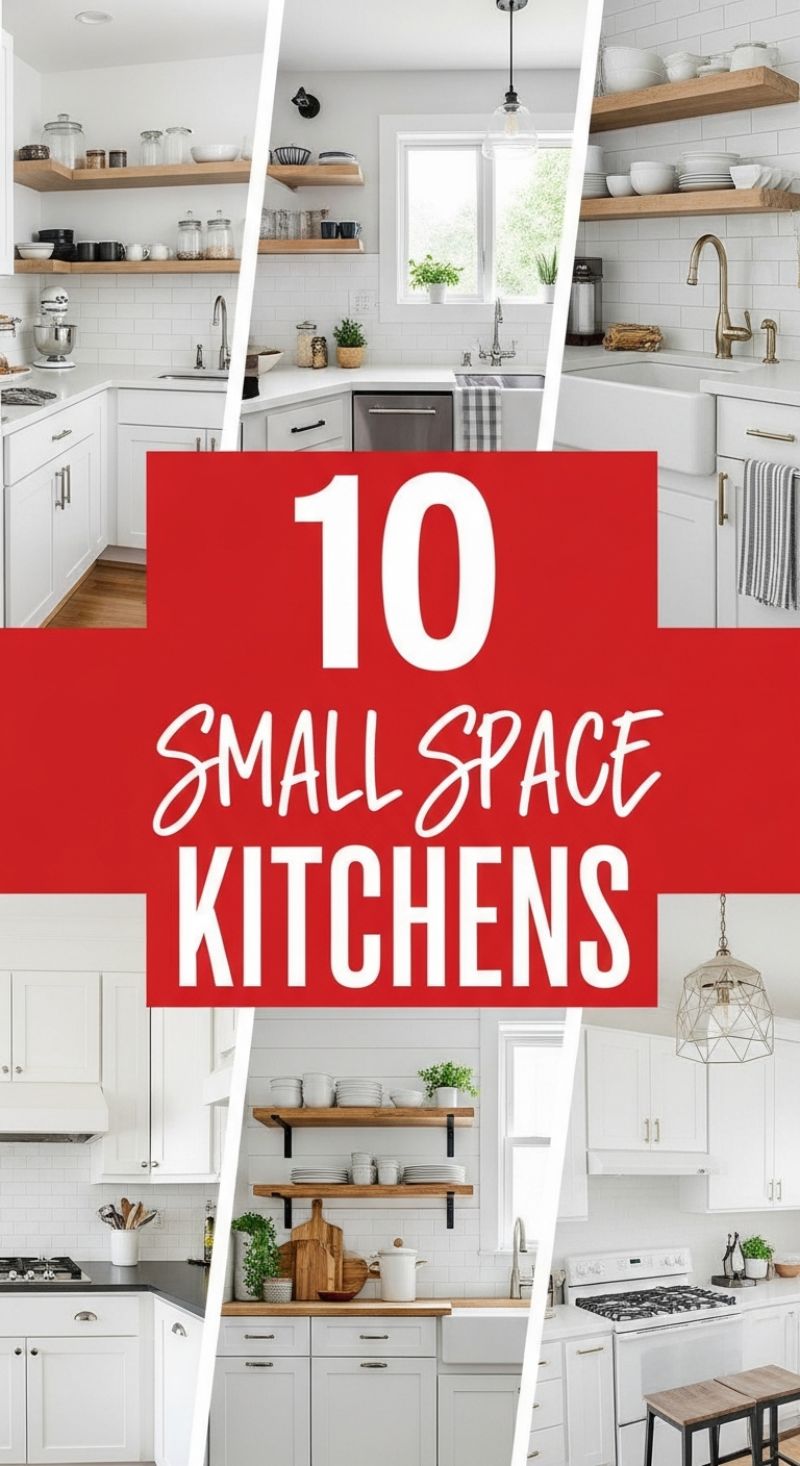
Achieving a spacious, airy feel in a small kitchen, as demonstrated in these successful examples, hinges primarily on a cohesive, bright color palette and strategic structural choices. Opt for all-white cabinetry, walls, and countertops to create an uninterrupted flow that tricks the eye into perceiving more space. This monochromatic base should be paired with classic textures, such as white subway tile used as a full backsplash, which adds subtle texture without adding visual noise. The most crucial structural modification for small spaces is often replacing bulky upper cabinets with floating open shelves. This swap eliminates significant visual weight, allowing light to travel further and enhancing the feeling of openness. The featured kitchens expertly incorporate light-toned, natural wood for these shelves, which introduces necessary warmth and organic texture to the design, preventing the otherwise all-white room from feeling sterile. When implementing floating shelves, ensure brackets are minimal or hidden to maximize the ‘floating’ effect, reinforcing the lightness of the overall composition.
While optimizing visual space is paramount, fixtures and functionality must not be overlooked. The consistent use of deep, apron-front farmhouse sinks in many of these smaller settings is intentional; they offer superior wash space and add a classic, grounded focal point without demanding extensive counter space like a traditional double basin might. Complement this substantial feature with well-chosen hardware. An expert technique for elevating the design is mixing metal finishes, such as pairing stainless steel or white appliances with brass or gold-toned cabinet pulls and faucets, which adds a layer of sophistication and bespoke quality. For small-space functionality, select appliances strategically; consider 18-inch dishwashers, narrower ranges, or cleverly concealed vent hoods integrated into minimal cabinetry to maintain the clean lines and maximize every possible inch of precious counter space.
The final touch that brings these small kitchen designs together is disciplined organization and thoughtful styling. The success of open shelving relies heavily on maintaining an organized look. To prevent clutter, only display items that are visually appealing and frequently used, such as matching sets of white ceramic dishware, clear glass storage jars for dry goods, and a curated collection of wooden cutting boards leaned against the wall. This intentional, minimalist approach ensures the shelves enhance, rather than detract from, the clean aesthetic. Introduce living elements like small potted herbs or succulents to inject freshness and a subtle pop of color. Finally, ensure lighting is strategically utilized; simple, exposed bulb pendant lights or minimal geometric fixtures, as seen in the collage, draw the eye upward, emphasizing vertical height and contributing significantly to the overall illusion of a larger, well-designed space.
13 Chic Thrift Flips
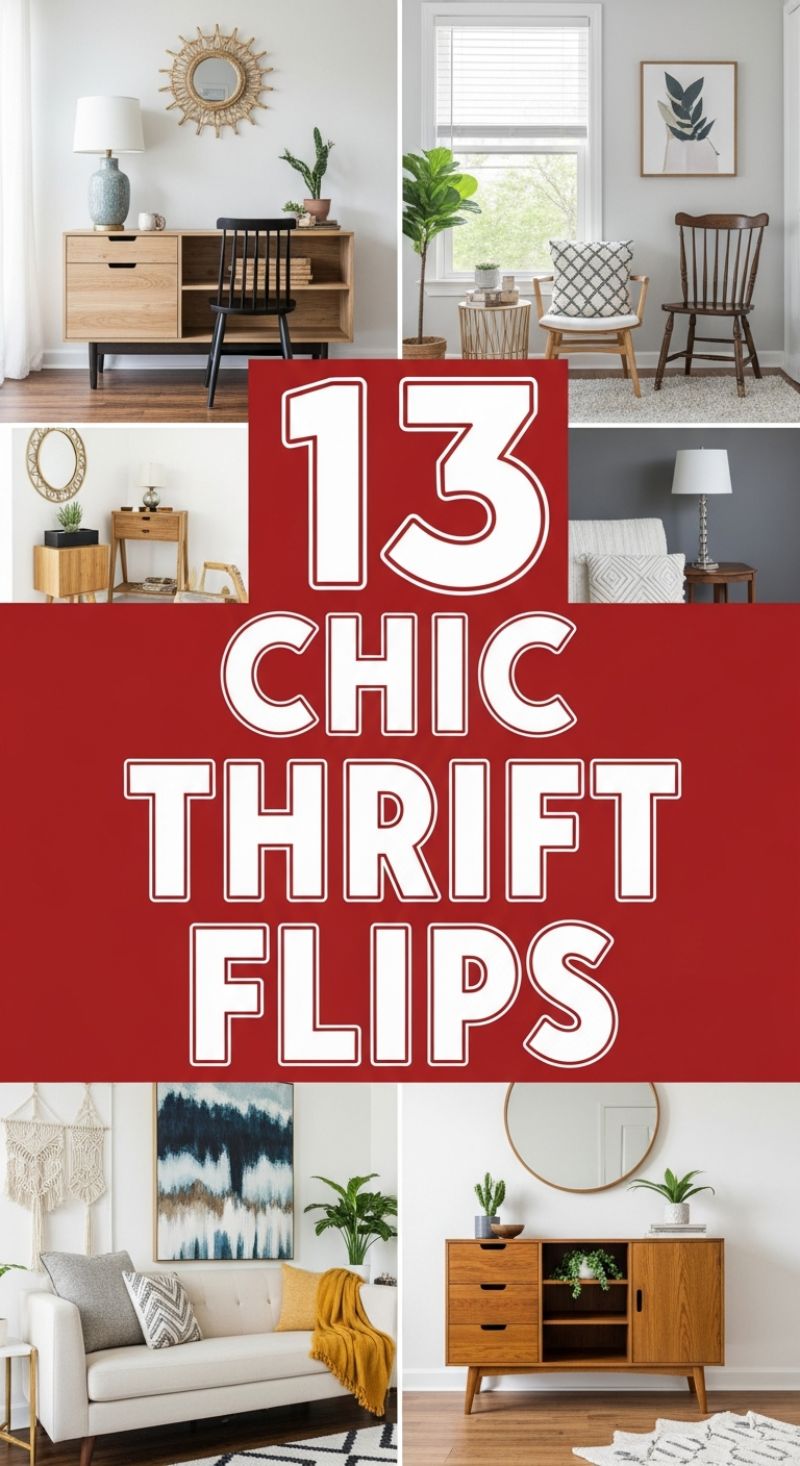
The secret to achieving a high-end, curated interior without breaking the bank lies in mastering the art of the thrift flip. The stunning vignettes showcased here—featuring mid-century modern credenzas, stylized seating, and updated storage pieces—are a testament to the fact that furniture’s second life can often be its best. When sourcing pieces for a transformation project, the primary goal is to look beyond surface imperfections and identify furniture with excellent structural ‘bones.’ Prioritize solid wood constructions or sturdy particle board pieces with simple, classic silhouettes, especially those influenced by Danish Modern or Mid-Century aesthetics. Look specifically for chests, sideboards, or dressers with clean lines, flat fronts, and simple existing hardware, as these require the least amount of complex repair and respond best to modernization. If a piece lacks the desirable tapered legs indicative of the style, plan to add new ones; this single, inexpensive update is perhaps the most crucial step in elevating a tired vintage piece to a chic statement maker.
Once the ideal piece is secured, the transformation process requires meticulous preparation. For wood pieces, a thorough sanding (starting with 80-grit and finishing with 220-grit sandpaper) is non-negotiable to remove old finishes and allow new stains or paint to adhere properly. If you opt for the authentic mid-century wood tone seen in the images, use a rich walnut or teak stain followed by multiple coats of a satin polyurethane finish to protect and deepen the color. Alternatively, for a dramatic, modern contrast, choose a high-quality matte paint in charcoal grey or deep black for the body, allowing the natural wood tone of the handles or base to pop. A quick win is updating hardware; swap out dated handles for sleek, minimalist brass pulls or simple black leather tab handles. Remember that the goal is not to hide the age of the piece entirely, but to celebrate its form while giving it a professional, customized finish that rivals high-end retail furniture.
Finally, the success of a thrift flip is determined by its styling integration within the room. To achieve the sophisticated, balanced look depicted, anchor the newly flipped piece with large, impactful accessories. Place a striking round mirror or large piece of abstract artwork above the credenza to draw the eye and establish scale. Layer textures through decorative objects like woven baskets, macrame wall hangings, and plush, patterned throw pillows and blankets. Introducing vibrant, healthy houseplants (like the Fiddle Leaf Fig or succulents shown) instantly breathes life and color into the space, softening the hard lines of the furniture. When placing your refurbished seating, ensure they are paired with appropriate accent tables—a slim metal or wire side table provides necessary contrast against the weighty wood furniture, finalizing the modern, thoughtfully assembled interior. This holistic styling approach ensures your thrifted treasure looks like an intentional design choice, not just a rescued relic.
14 Essential Counter Decor
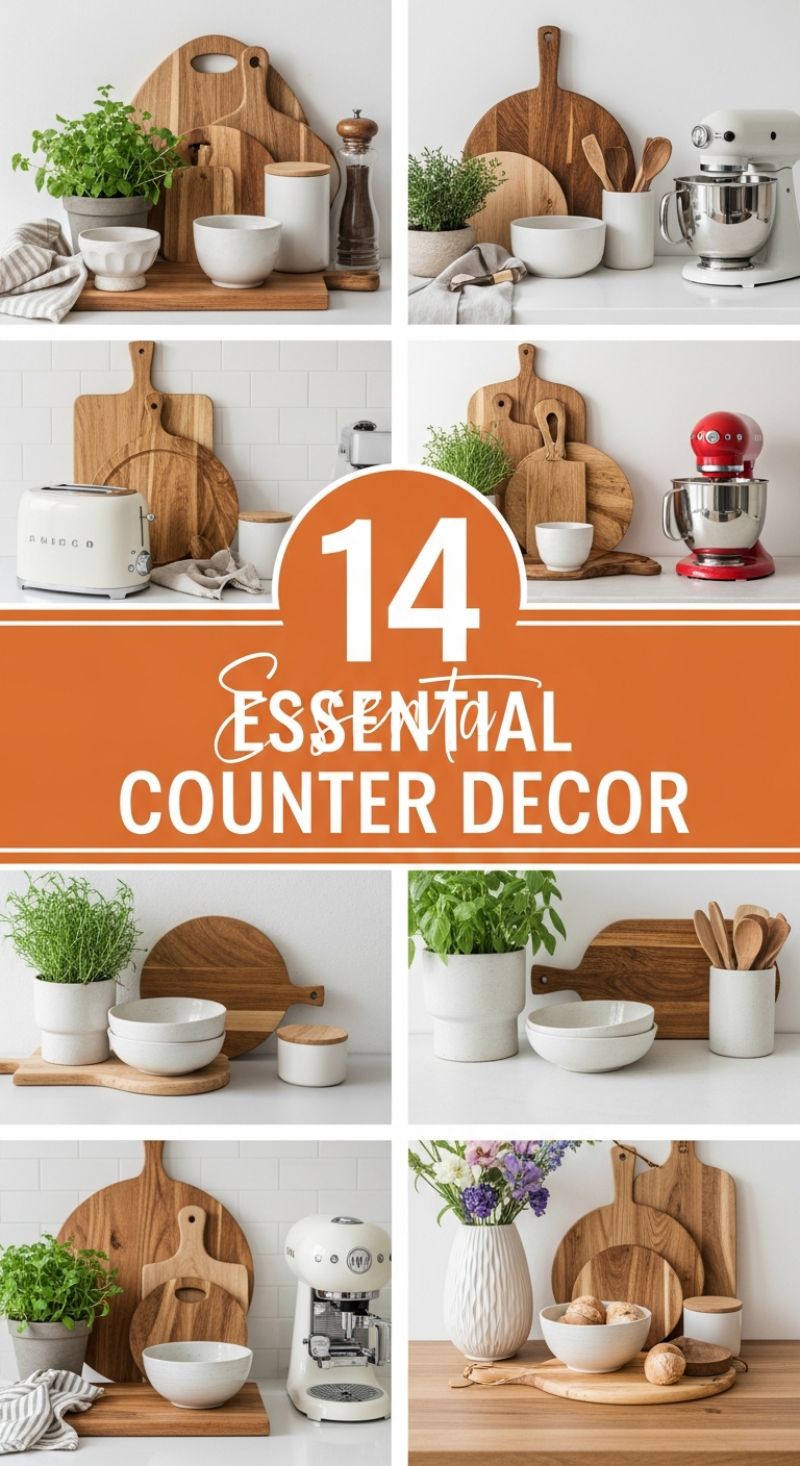
The secret to achieving an elevated and cozy kitchen counter lies in thoughtful layering, starting with your backdrop. As shown in these stunning arrangements, utilizing a collection of wooden cutting boards in varying sizes, shapes (round, paddle, rectangular), and wood tones (acacia, oak) creates instant depth and texture against a simple tile backsplash. These boards serve as the anchor for the entire vignette. To style this effectively, lean the tallest, largest board toward the back, gradually scaling down the sizes as you move forward. This foundation should be built upon natural materials. Prioritize warm wood elements and tactile, neutral ceramics—think matte white or speckled beige bowls, canisters, and utensil holders. This limited, organic material palette ensures that even complex arrangements look cohesive and sophisticated, avoiding visual clutter. For practical reasons, group these styled items onto a larger serving board or tray; this not only grounds the display but allows you to easily move the entire grouping for deep cleaning.A truly essential counter decor scheme seamlessly blends beauty with utility. Functional items, such as small appliances, should complement the overall aesthetic. If possible, choose appliances in neutral colors (white, cream, silver) to maintain the clean, bright look established by the wood and ceramics. Appliances like stand mixers or espresso machines should be placed strategically at the end of a counter run or within a dedicated zone. Crucially, introduce living elements. Potted fresh herbs—such as basil, oregano, or thyme—in simple, textured planters (like the white and grey pots featured) instantly inject vibrant color, natural aroma, and a sense of life into the kitchen. These plants don’t just look good; they are practical, too. Complement the greenery with functional storage: use simple white crocks or cylindrical containers to hold frequently used wooden spoons and spatulas, keeping clutter off the flat surface while maintaining the clean, rustic aesthetic.To move beyond just placing items and truly *style* your counter, focus on the rule of odd numbers (grouping items in sets of three or five) and varying heights. Stacking two bowls of slightly different sizes provides immediate height variation and visual weight. Contrast the flat, vertical lines of the leaning cutting boards with the rounded forms of planters and bowls. For a final touch of polish, incorporate textiles; draping a neatly folded linen or striped tea towel at the base of the arrangement softens the hard lines of the counter and adds subtle texture. Furthermore, consider seasonal additions—a simple vase of flowers in a textured white vase, as seen in the bottom right vignette, can elevate the space instantly. Remember, essential counter decor is about curated simplicity; every item should feel intentional, functional, or beautiful (ideally, all three), turning everyday kitchen necessities into a stylized focal point.
20 GIRLY GALENTINES DECOR

Achieving a highly customized and high-impact temporary room transformation, such as the festive ‘Galentine’s’ theme shown here, relies heavily on meticulous planning and maximalist layering. Begin by establishing a strong, cohesive color narrative. The foundation of this look is the vibrant interplay of blush pink, fuchsia, rich red, and luxurious gold accents. For the dining area, start with textiles: a soft pink tablecloth or runner provides an instant mood shift. Layer your place settings by using plates with gold rims and complementing them with gold flatware. To elevate the tablescape beyond simple dining, incorporate multiple large floral centerpieces featuring densely packed roses and ranunculus in varying shades of pink and red. These arrangements should be placed in elevated vessels, such as gilded urns, to add verticality and visual weight, instantly making the room feel richer and more formal. Crucially, integrate mood lighting through slender pink taper candles placed in antique brass holders to cast a warm, flattering glow, transforming the everyday dining area into an immersive celebratory space.To achieve architectural impact beyond the table, focus on statement installations like the asymmetrical balloon garland and the champagne tower. A DIY balloon garland, utilizing a mix of small (5-inch) and large (24-inch) balloons in coordinating pink and red tones, adds significant volume and texture, drawing the eye upward and visually enlarging the space. Anchor this garland near a doorway, buffet, or staircase for maximum visibility. Simultaneously, the tiered glass structure, whether housing champagne or a specialty cocktail, serves as both functional beverage service and a striking sculptural centerpiece. When recreating this, ensure the glasses are uniform and the liquid color (here, vibrant red) enhances the overall palette. This technique of combining high-volume, lightweight elements (balloons) with elegant, structured focal points (the tower) creates depth and visual excitement necessary for a successful temporary environment.Finally, elevate the dessert station from a simple serving area to a curated design moment. Utilize multiple pedestal stands of varying heights and diameters to create a dynamic, multi-level display, preventing the treats from looking flat or crowded. Stick rigorously to the color palette; for instance, pink-frosted cupcakes with small red heart toppers, paired with rich red macarons, integrate the food directly into the decor scheme. Scattering loose rose petals or heart-shaped confetti around the base of the stands further blurs the line between functional food service and decorative art. By treating every element
—from the napkin fold to the height of the cupcake tower
—as an opportunity to reinforce the chosen theme and palette, you execute a professional-grade room transformation that is temporary yet spectacularly effective.
9 Private Hot Tub Escapes
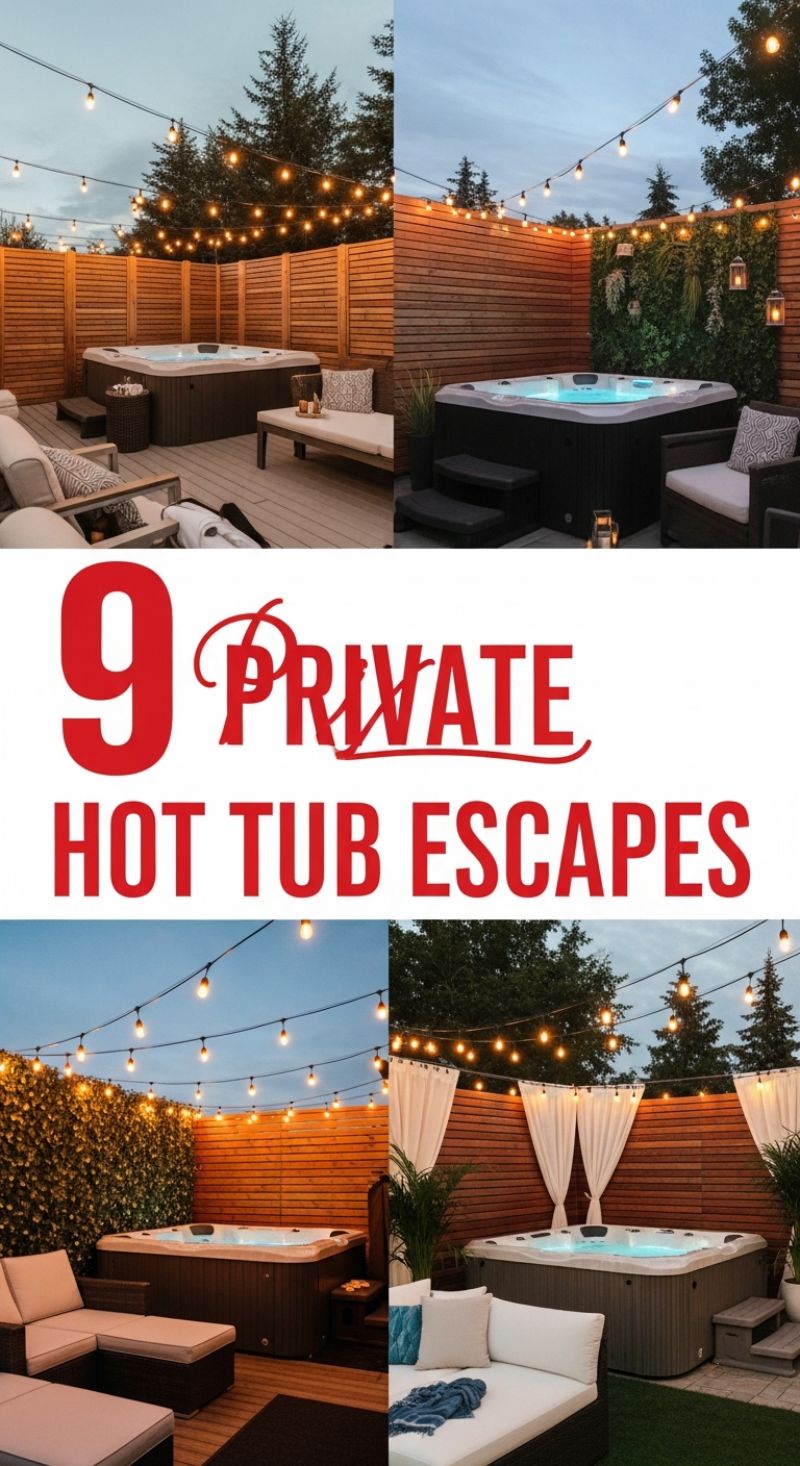
Transforming a standard backyard hot tub into a private resort-style escape requires strategic planning centered on privacy, ambiance, and comfort. The foundation of this transformation lies in the enclosure. Adopt the modern aesthetic seen here by installing sleek, horizontal wood fencing or slatted privacy screens. These structures offer maximum visual separation while allowing airflow, creating a truly secluded atmosphere. Use durable, weather-resistant materials like cedar, redwood, or high-quality composite wood for longevity. When designing the deck or patio base, ensure it accommodates both the hot tub and the designated lounging area; this zoning is crucial for flow. Consider building integrated steps or benches around the tub itself to enhance accessibility and provide built-in spots for towels or drinks, making the entire setup feel custom and luxurious rather than simply functional.
Ambiance is elevated primarily through layered lighting and strategic greenery. The signature look for a relaxing escape involves installing long strings of outdoor festoon or bistro lights (Edison bulbs) hung high above the area, mimicking a cozy canopy. These should ideally be warm-toned (2200K to 2700K) and connected to a dimmer switch to control the mood, transitioning easily from bright entertaining to soft soaking light. Supplement this overhead lighting with low-level landscape lighting on the steps and perhaps submerged LEDs within the tub itself for safety and drama. To soften the harsh lines of the privacy fence and introduce tranquility, incorporate biophilic design elements. This could mean installing a vertical garden or a faux living wall panel, which provides a rich, sound-dampening contrast to the clean wood and enhances the sense of being immersed in nature.
Finally, focus on the comfort of the adjacent lounging area. A private hot tub retreat is incomplete without deep, comfortable seating where guests can relax before or after soaking. Opt for modular, weather-resistant outdoor furniture—such as sectionals or large daybeds—made with marine-grade materials or Sunbrella fabric cushions that dry quickly and resist fading. Maintain a clutter-free environment by utilizing stylish storage benches or baskets for towels and robes. Ensure practical elements are within arm’s reach; sturdy side tables are essential for holding drinks, snacks, and personal devices, completing the design trifecta of privacy, mood, and unparalleled functionality.
15 FRESH SPRING TABLESCAPES
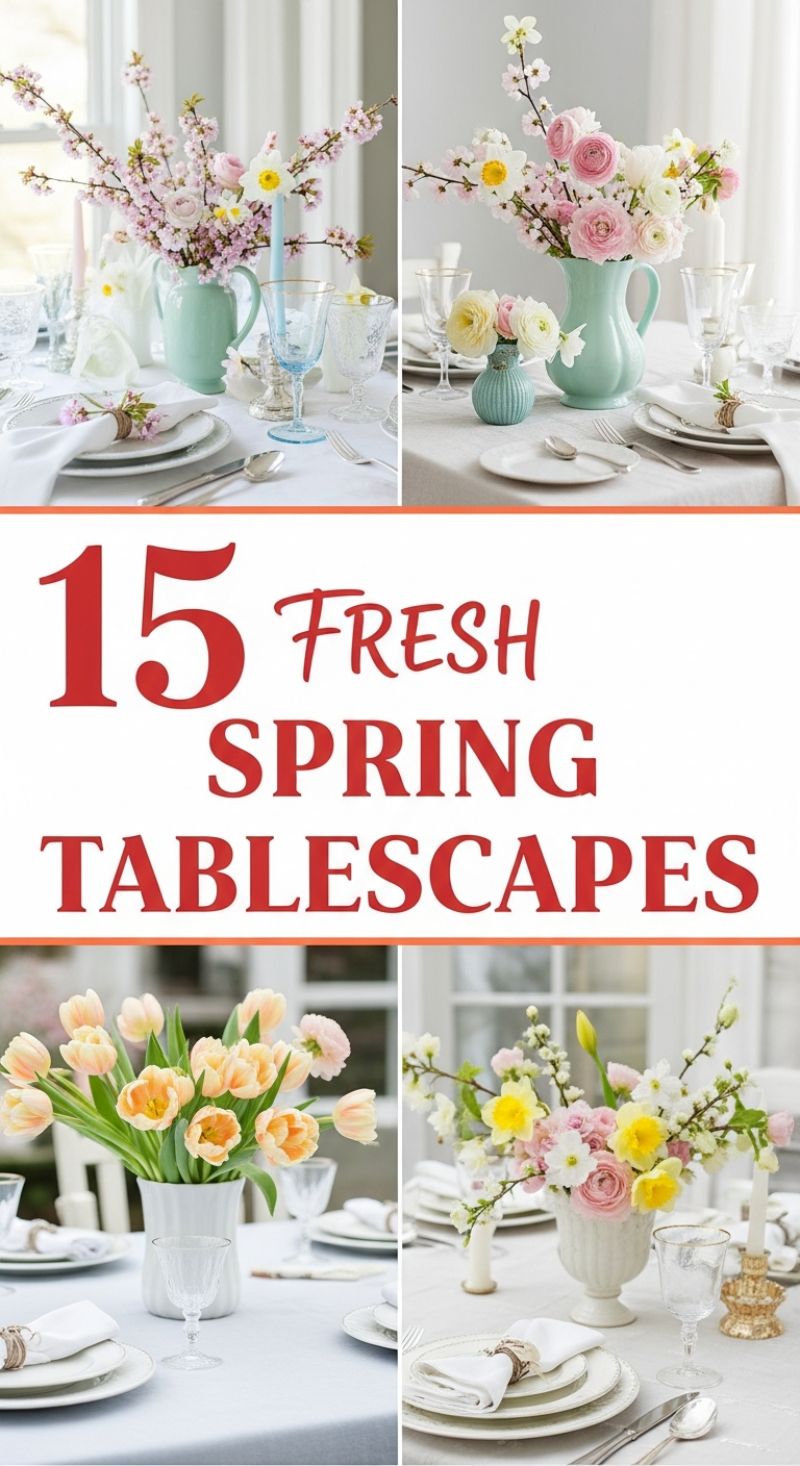
Transforming your dining area for spring is one of the quickest ways to revitalize your home’s aesthetic, creating an inviting space perfect for entertaining or daily enjoyment. The foundation of a successful spring tablescape lies in embracing light, neutral linens and introducing soft, vibrant pastel accents. Begin your setup with a crisp, light-colored tablecloth—white, cream, or a pale gray linen works best, providing a clean canvas that maximizes brightness. Layering is key to depth; start with decorative chargers, followed by your standard dinner plates, and top with salad plates. Keep the dinnerware predominantly white or off-white to let the flowers and minor accessories provide the color. Expert advice suggests integrating texture early on, perhaps through ribbed or embossed plates, or incorporating rustic elements like woven placemats beneath your light linen, grounding the airy design while maintaining a fresh, elevated feel.
The centerpiece is the undisputed star of a spring table, and the secret to achieving this look is abundant, varied florals placed in unexpected vessels. Move beyond traditional glass vases; utilize unique containers like antique pitchers (as shown in the soft mint color), ceramic urns, or even small, textured bud vases in complementary colors. For the arrangement itself, aim for height and visual contrast. Combine tall, airy elements, such as flowering branches (like cherry blossoms or forsythia), with fuller, more rounded spring blooms like ranunculus, tulips, and daffodils. A successful arrangement balances mass and movement; the branches provide upward reach and lightness, while the dense flowers anchor the arrangement. For longer tables, consider creating a series of arrangements using a large focal vessel flanked by two or three smaller, coordinating bud vases to spread the visual interest down the entire length of the table.
Finally, elevate the individual place settings through carefully chosen details and natural accents. Napkin presentation should be simple yet elegant; roll or fold white linen napkins and secure them with natural materials like simple twine, rope, or raffia, often tucking in a single small bloom or sprig of greenery for an organic touch. Select glassware that complements the soft color scheme—textured clear glass adds vintage charm, while subtle colored glass (like light blue stemware) enhances the pastel palette without overwhelming it. Complete the ambiance with candlelight; choose slim taper candles in soft colors (pale pink or light blue) or use small, polished gold or silver candle holders. These metallic accents introduce a touch of necessary sparkle and formality, ensuring the tablescape feels polished and ready for any special spring gathering, whether it’s a casual brunch or a formal Easter dinner.
10 INCREDIBLE SMALL BATHS
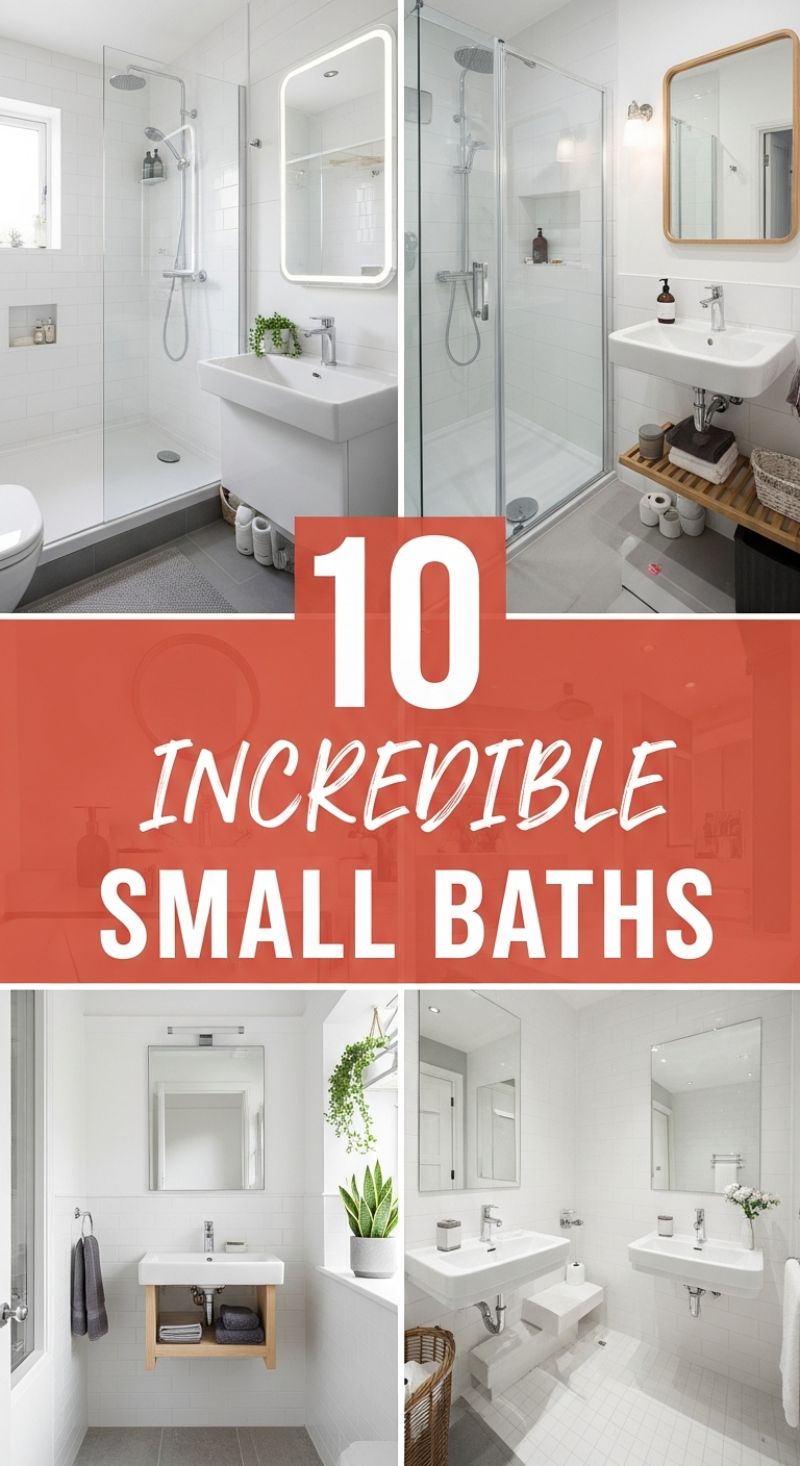
Transforming a tiny bathroom requires strategic planning focused on visual expansion, efficient storage, and smart fixture selection. The primary strategy, exemplified by these stunning designs, is adhering to a light, monochromatic palette—predominantly bright white or soft light gray. This use of uniform, reflective color maximizes the perception of space by blurring boundaries and bouncing natural and artificial light. To further this effect, eliminate bulky shower curtains entirely and install frameless or semi-frameless glass enclosures. By allowing an unobstructed view through the shower area to the back wall, you instantly double the visual depth of the room. Furthermore, utilize reflective surfaces like large, well-placed mirrors. The illuminated, rounded rectangle mirror seen in one example not only provides task lighting but also draws the eye upward, reinforcing the sense of height and openness.
When dealing with limited square footage, every fixture must be chosen for its compact size and its ability to maximize floor visibility. Opt for wall-mounted (floating) sinks or vanities, which expose the floor beneath them, creating an illusion of additional square footage; a pedestal or a traditional vanity visually chops the space in half. If you need storage, follow the examples that use open, slat-wood shelving beneath a floating sink. This configuration provides necessary towel storage without the visual bulk of a closed cabinet. In the shower, integrate recessed niches for shampoo and soap rather than relying on protruding caddies. Similarly, consider a wall-mounted toilet, which conceals the cistern within the wall cavity, saving crucial inches of space compared to a standard floor-standing model. Prioritize vertical space using towel hooks or minimalist ladder storage over bulky racks.
To prevent a white, minimalist bath from feeling cold or sterile, introduce warmth through organic textures and intentional accents. These designs skillfully incorporate natural wood elements—seen in the wooden mirror frames, floating shelf bases, and possibly flooring accents—to provide necessary contrast and grounding. Texture can also be introduced softly through decorative accessories, such as a woven laundry basket, soft towels in muted tones (like charcoal or slate gray), and especially through greenery. Humidity-loving plants like snake plants or small hanging vines add a vibrant, spa-like quality. The key is strict functionalism: ensure that every piece of decor serves a purpose or is visually impactful, maintaining a clean, clutter-free environment which is paramount in making any small bath feel truly incredible.
7 Stylish Corner Decor
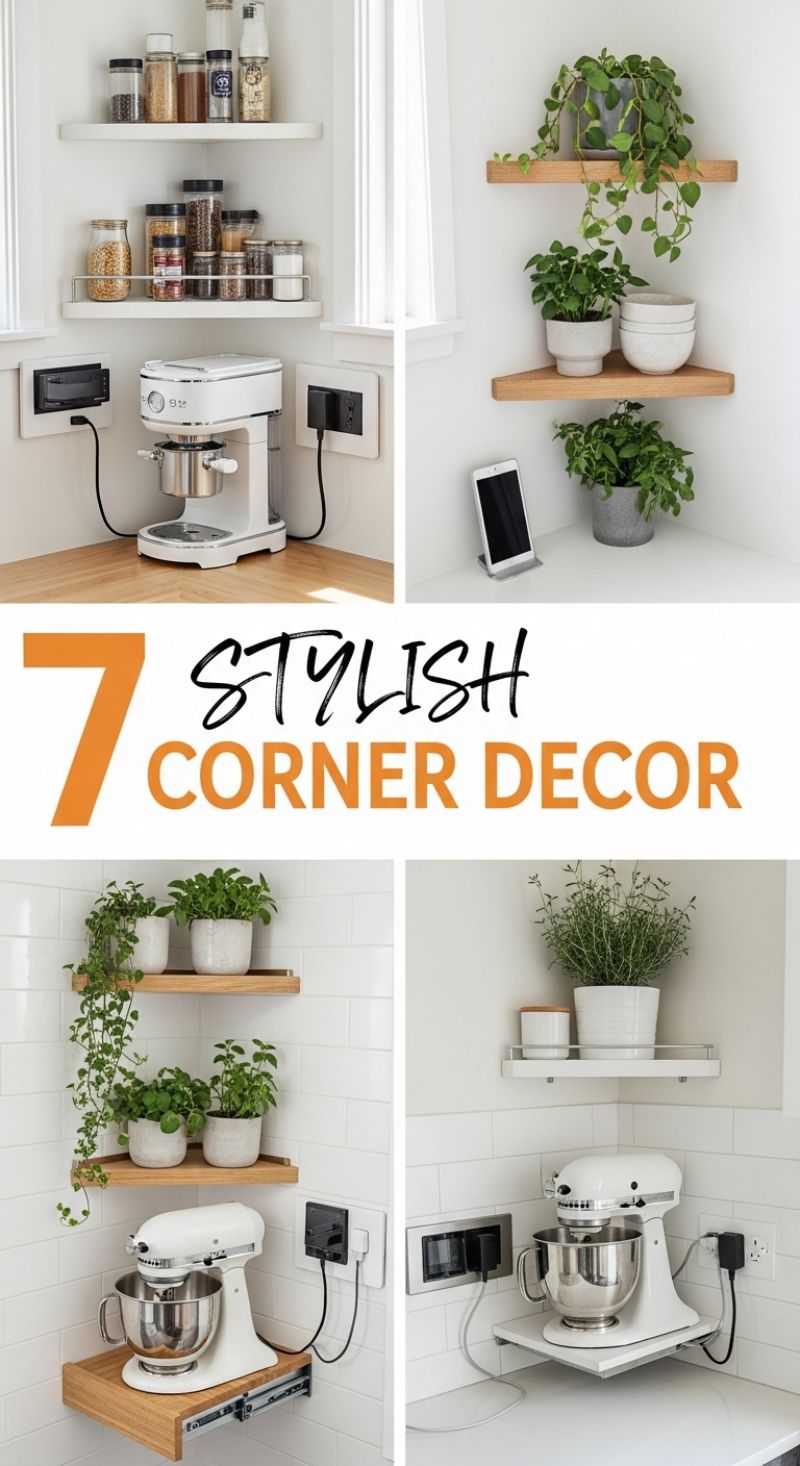
Wasted corner space is a perennial challenge in kitchen design, but strategic use of floating corner shelves transforms these awkward voids into highly functional and attractive zones. The key to maximizing this area is understanding the dual role of the corner: organization and aesthetic focal point. For practical utility, opt for multi-tiered shelves, like the white floating shelves featured, to house frequently used items. This is ideal for creating a dedicated coffee bar or spice station, keeping essentials within arm’s reach while cooking or brewing. When installing these utility shelves, ensure you use robust mounting hardware, especially if you plan on storing glass jars or small appliances. A crucial expert tip derived from these examples is the strategic placement of electrical outlets directly integrated into the corner or adjacent wall plates. This setup allows cords to drop neatly down to the appliance without stretching across the counter, maintaining a clean and streamlined appearance that elevates the functionality of the space.
For larger, heavier kitchen equipment that typically hogs valuable counter space—such as the ubiquitous stand mixer—the image provides a brilliant, custom solution: the pull-out corner platform. This specialized ‘appliance garage’ uses heavy-duty drawer glides or slide mechanisms installed beneath a corner shelf (available in materials ranging from natural wood to white laminate). Instead of leaving the mixer exposed or storing it deep in a lower cabinet, this system keeps it accessible yet hidden when not in use. To retrieve the mixer, you simply pull the platform forward, eliminating the strenuous lifting required to move the appliance from storage to operating position. This level of customization ensures that the corner serves as a high-efficiency power station, dramatically improving workflow and counter organization, especially in kitchens where square footage is at a premium.
Beyond pure function, corners offer an incredible opportunity for aesthetic enhancement. If storage isn’t the primary need, utilize natural wood corner shelves to create a softening design element. Introduce organic texture by decorating with living greenery; trailing plants like Pothos or Peperomia are perfect for softening the hard angles of the wall intersection. Pair these plants with simple, neutral ceramic bowls or white planters to maintain a clean, modern look, as demonstrated in the top-right example. When combining functionality with decor, remember the principle of visual balance. If one corner is utilitarian (like a spice rack), keep the opposing corner decorative to prevent the space from feeling cluttered. By thoughtfully combining different materials—warm wood tones for decor and durable white surfaces for high-utility areas—you can turn overlooked corners into integrated, intentional design statements that truly complete your home transformation.
12 ELEGANT BATHROOM ELEMENTS
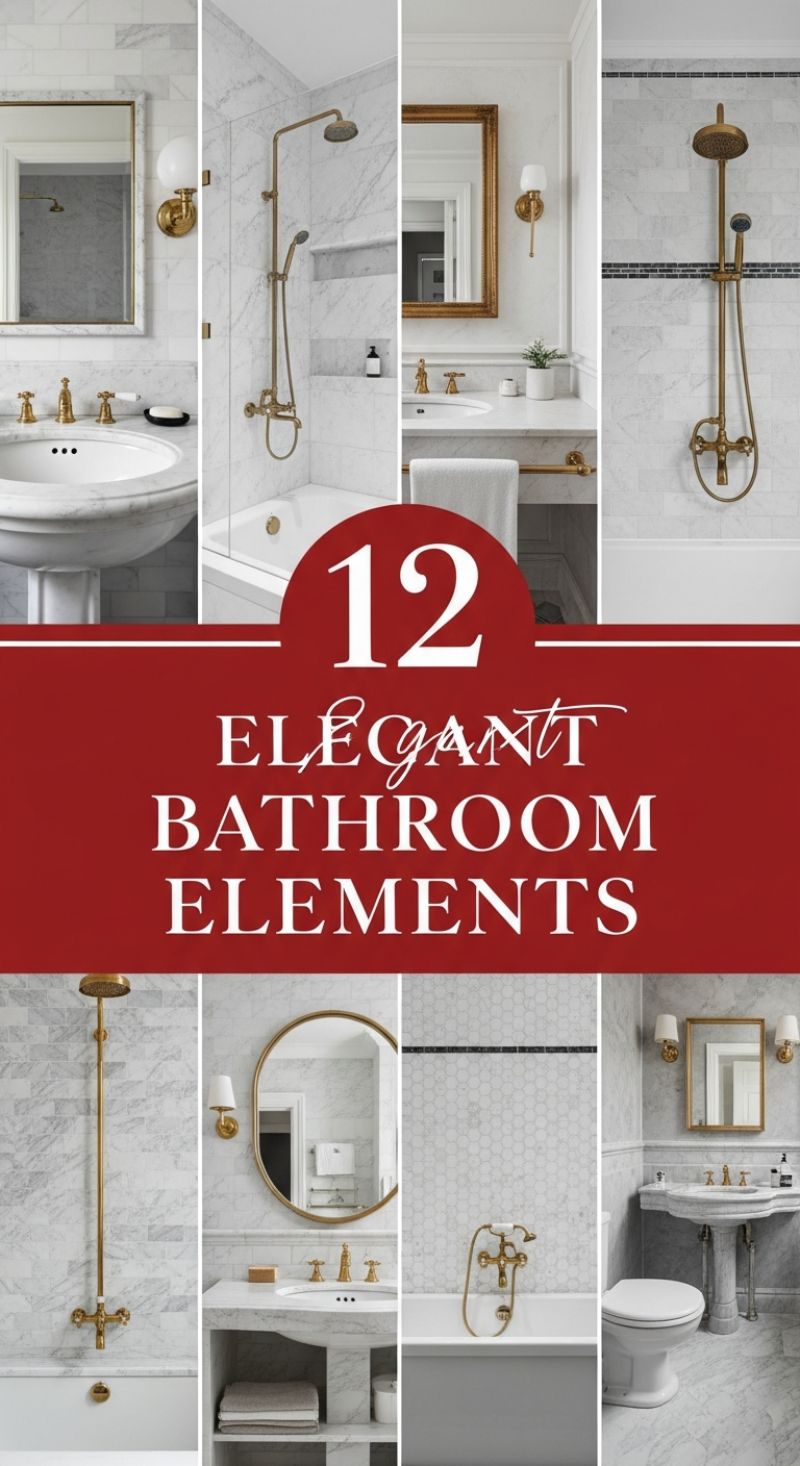
To replicate the classic luxury demonstrated in these vignettes, focus first on establishing a timeless foundation through high-quality stone. The unifying element across these designs is white marble—specifically, light-veined varieties like Carrara or Calacatta. Use this material extensively, covering walls, floors, and vanity tops to create an enveloping sense of serenity and permanence. Vary the scale and pattern of the stone to add visual depth; for example, pair large, rectified subway tiles in the shower with smaller hexagonal mosaics on the floor or as a decorative band. This layering of textures, all within the same monochromatic palette of white and grey, is the secret to achieving sophistication without excessive color or clutter. Furthermore, consider a traditional pedestal sink or a floating marble vanity with integrated shelving, as these choices maintain clean lines and maximize the visual perception of space, grounding the room in architectural elegance.
The true transformative power of this aesthetic lies in the consistent application of warm metallic hardware. Aged or brushed brass fixtures are essential for injecting warmth and vintage charm against the cool marble backdrop. When selecting brass elements, commit fully: ensure all faucets, shower systems, lighting fixtures, and even small accessories like toilet paper holders and towel bars share the exact same finish and tone. The choice of an exposed shower system, featuring external plumbing pipes and cross handles, is particularly effective here, referencing historic European design while offering a sculptural quality often lacking in modern recessed fixtures. This attention to cohesive metalwork transforms functional necessities into decorative statement pieces, immediately elevating the bathroom from utilitarian to opulent.
Finally, complete the elegant look by focusing on symmetry and soft lighting. Every successful traditional bathroom relies on thoughtful focal points. Install a classic mirror—whether a simple rectangle framed in gold or a dramatic oval—centered above the sink. Flank this mirror with matching sconces featuring milky white globes or small linen shades. Symmetrical wall lighting not only provides ideal, shadow-reducing illumination for the vanity area but also introduces a classical balance to the space. Avoid harsh overhead lighting and rely instead on these layered light sources. To finish, incorporate subtle details like traditional-style faucet handles (e.g., cross handles or porcelain levers) and small, practical luxuries like a simple white towel set and minimal bath products displayed in refined containers, ensuring the overall effect is curated, comfortable, and enduringly elegant.
16 WHIMSICAL BABY SHOWERS
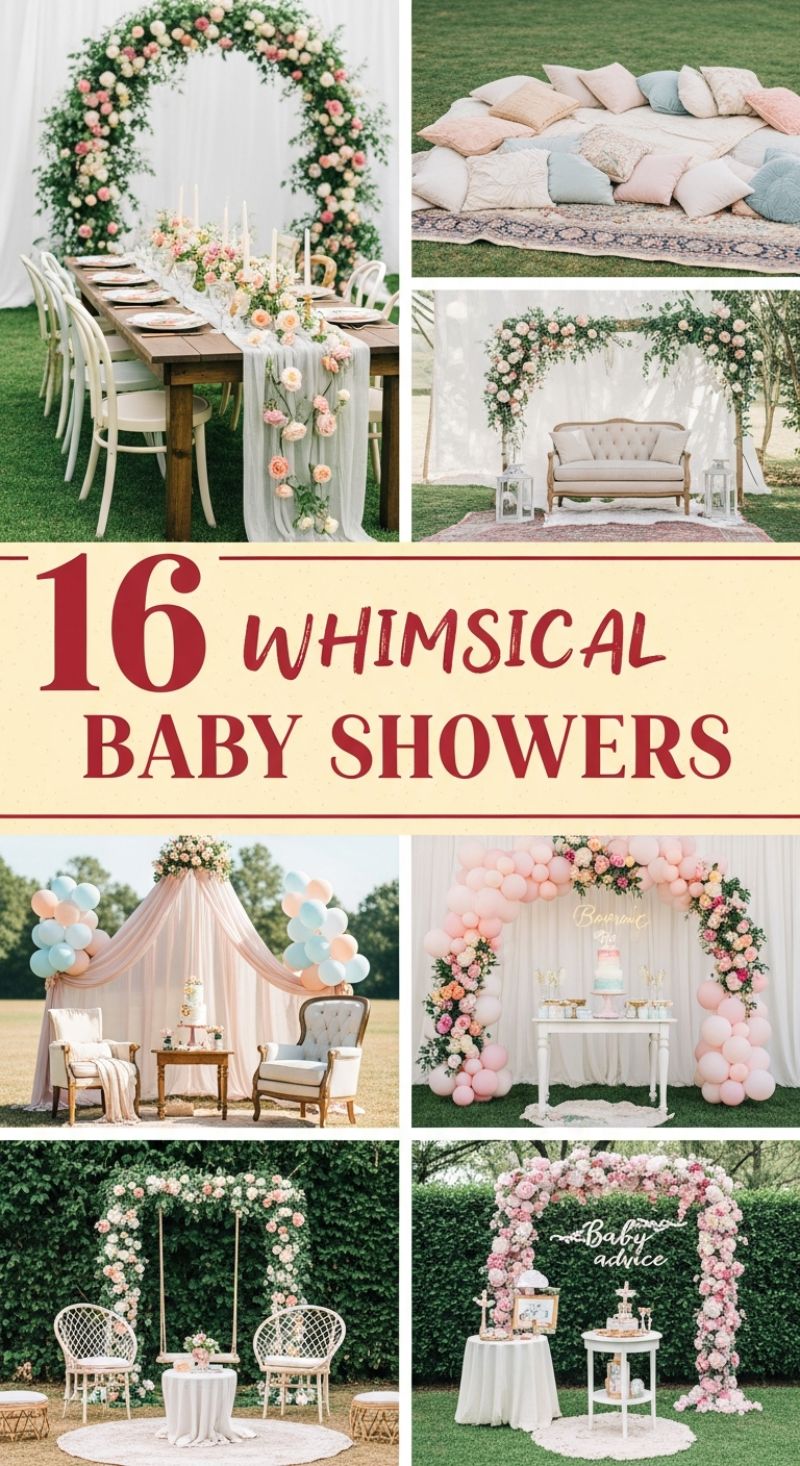
The key to translating the “whimsical” event aesthetic—characterized by lush floral arches, soft pastels, and elegant draping—into a permanent home transformation lies in carefully blending natural and luxurious elements. For transforming a garden, patio, or even a large sunroom into a perpetually dreamy entertaining space, start by defining the area with foundational elements. This style relies on creating an immediate focal point, usually achieved through a large floral installation. To replicate the look seen here, focus on establishing a pastel palette (think blush pinks, soft creams, pale blues, and peaches) which should permeate the chosen textiles. Ground the space with layering rugs, opting for distressed or vintage-style Persian patterns, which provide structure and contrast against natural grass or stone. Instead of purely functional outdoor furniture, incorporate pieces that offer softness and vintage charm, such as upholstered tufted benches or French-style armchairs (ensure these are appropriately protected for outdoor use or reserved for indoor-outdoor flow areas), elevating the area from casual seating to a sophisticated venue.
The signature structural element for achieving this whimsical look is the floral arch or garland. For a lasting home transformation, consider installing a semi-permanent framework (made of sturdy, treated wood or metal) covered in high-quality, weather-resistant faux florals and lush greenery. This minimizes maintenance while maximizing visual impact throughout the season. When setting up for a specific event, create an enchanting backdrop by hanging sheer white or blush fabric drapes behind the arch, especially effective when framing a hedge or fence line, instantly adding depth and ethereal movement. Alternatively, embrace the popular balloon garland trend shown, mixing clusters of varying pastel balloon sizes with natural floral accents trailing down the sides—this combination balances modern celebration trends with rustic elegance. The effectiveness of the design hinges on these structural elements appearing abundant and organically placed, suggesting effortless romance.
Beyond the main structures, focus on varied and intimate seating arrangements to maximize the feeling of warmth and comfort. Implement the low, floor-picnic style by utilizing layered throws and an array of oversized, plush throw pillows in soft, coordinating textures, perfect for a relaxed garden setting. Alternatively, create several small, distinct vignettes using dainty white wicker or rattan chairs paired with small, circular pedestal tables, evoking a charming tea party feel. Detail is crucial in this aesthetic; ensure tabletops are adorned with cascading runners (like the sheer, flowing fabric seen draped with fresh flowers) and incorporate soft lighting. Use decorative white lanterns, both large and small, placed strategically around the area and on surfaces, or incorporate clusters of safely contained candles, particularly as twilight approaches. These layers of softness, luxury textiles, abundant florals, and intentional lighting are what truly transform a basic outdoor area into a magical, immersive environment ready for sophisticated entertaining.
12 Backyard BBQ Kitchens: Designing the Ultimate Outdoor Culinary Space

Transforming your backyard into an entertainment oasis begins with a dedicated outdoor kitchen, shifting beyond the standard portable grill to a permanent, functional culinary station. When designing your space, prioritize the workflow triangle—planning zones for cooking, prep, and storage—just as you would indoors. As seen in these diverse examples, the most successful outdoor kitchens incorporate high-quality built-in stainless steel grills, ample counter space for food preparation and plating, and integrated weather-proof storage cabinets. Site placement is critical; choose a location close enough to the main house for convenience (running utilities like gas and water) but ideally slightly removed from heavy indoor traffic areas. Ensure the area is built on a stable, level foundation, such as concrete pavers or a composite deck, providing the structural integrity needed for heavy stone veneer bases and appliance loads, while also facilitating drainage. Expert planning is essential to ensure longevity and functionality, so map out utility lines early in the design process.
The aesthetic success of a permanent BBQ kitchen relies heavily on material selection, which must withstand harsh seasonal changes, UV exposure, and heat. The base structure often utilizes stacked stone, natural ledger stone, or brick veneer, which offers a robust, custom look that can be matched to the architecture of your home, creating a seamless transition from house to yard. For a modern aesthetic, consider using painted stucco or durable composite siding with sharp, clean lines, contrasting beautifully with the dark granite or sealed concrete countertops, as shown in the top right example. Always select non-porous, UV-stable countertop materials that resist staining and are easy to wipe down after cooking. Stainless steel components are non-negotiable for appliances and access doors, offering superior resistance to rust and corrosion, but ensure they are commercial-grade for true outdoor durability. Incorporate features like a trash bin drawer, warming drawers, or integrated side burners to boost utility and mimic the versatility of an indoor cooking environment.
The ultimate outdoor kitchen goes beyond grilling to integrate comprehensive utilities and comfortable gathering spaces. If budget allows, run a dedicated water line to install a sink and faucet, making cleanup significantly easier and minimizing trips back into the house. Similarly, connect a permanent natural gas line to eliminate the hassle of refilling propane tanks. Strategically placed electrical outlets are necessary for rotisserie motors, blenders, or even small refrigerators/keg coolers—opt for GFCI-protected, weather-resistant covers. Finally, consider how the kitchen integrates with the adjacent dining and lounging areas. The bottom right image perfectly illustrates this integration, placing the cooking zone directly beside a comfortable seating arrangement on the deck. Designing the space to accommodate seating—such as a counter overhang for bar stools—encourages social interaction, cementing the outdoor kitchen’s role as the central hub for home entertaining.
11 VIBRANT MEXICAN DECOR IDEAS
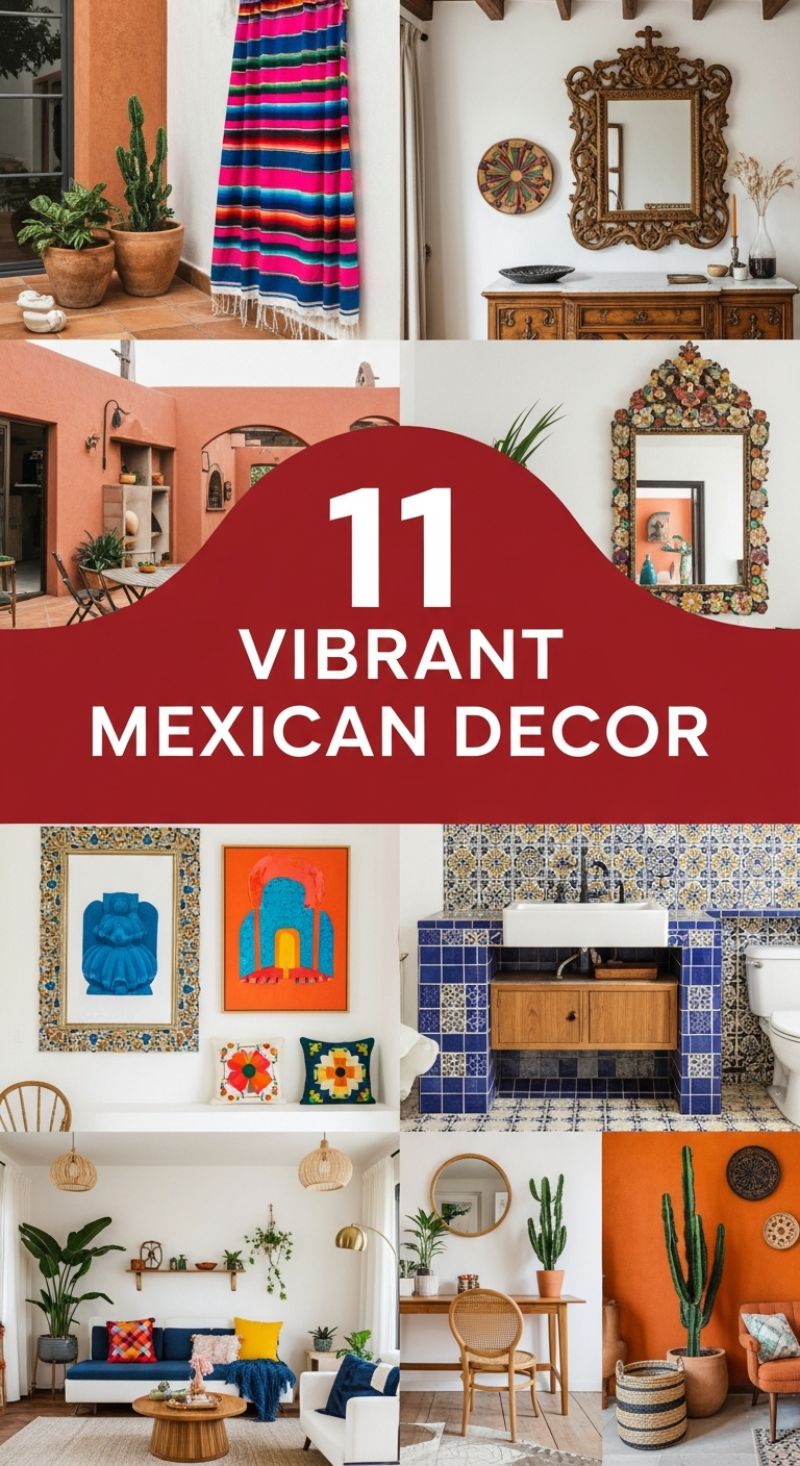
Mexican interior design is synonymous with exuberance, warmth, and masterful craftsmanship, creating spaces that feel instantly alive and deeply rooted in culture. To successfully incorporate this aesthetic, start with a bold palette grounded in earth tones. Use terracotta, deep ochre, or dusty rose on feature walls, especially in outdoor or semi-outdoor spaces, setting a foundation that mimics traditional adobe structures. The instructional cornerstone for this style is the strategic use of hand-painted ceramics, particularly Talavera tiles. Apply these high-impact tiles to functional areas like bathroom vanities or kitchen backsplashes, pairing the intricate patterns (often featuring vibrant blues, yellows, and whites) with solid-color square tiles (such as cobalt blue) to delineate boundaries and amplify the geometric intensity. Balance this visual weight by integrating natural wood elements for cabinetry and exposed ceiling beams, preventing the colors from overwhelming the space, and complete the foundation with large terracotta pots filled with native cacti and succulents.
The defining elements of vibrant Mexican decor are the textiles and folk art, which provide the essential layers of personality and texture. Focus on integrating handcrafted furniture pieces—look for richly carved wooden mirrors (tin-framed mirrors are also excellent choices) and rustic dressers, or opt for contemporary furniture silhouettes complemented by rattan and woven seating that emphasizes natural forms. When introducing textiles, think maximalism tempered by authenticity: drape brightly striped serapes or blankets in saturated hues (pinks, blues, oranges) over seating or use them as dramatic wall hangings. Layer embroidered cushions featuring bold floral motifs or geometric patterns on sofas. For wall decor, embrace large-scale contemporary art that utilizes simple shapes and highly saturated colors (such as the bright blue and orange paintings shown), allowing them to contrast sharply with white walls to maximize their impact and energy.
Creating the right ambiance involves selecting warm, flattering lighting and prioritizing comfort. Opt for natural light fixtures, such as woven pendant lamps made from raffia or wicker, which cast soft, textured shadows essential for an inviting, bohemian feel. The furniture arrangement should promote relaxation; incorporate deep seating, natural fiber rugs, and simple wooden accent tables. Finally, greenery is non-negotiable; large, imposing cacti varieties, such as the Saguaro, are excellent choices, placed in simple clay pots or woven baskets. This style is not about minimalism; it’s about curated abundance—every piece, from the embroidered pillow to the painted tile, should feel uniquely personal and contribute to a rich narrative of color, texture, and cultural heritage, transforming a simple room into a vibrant, sun-drenched sanctuary.
20 Dreamy Shabby Chic Bedrooms
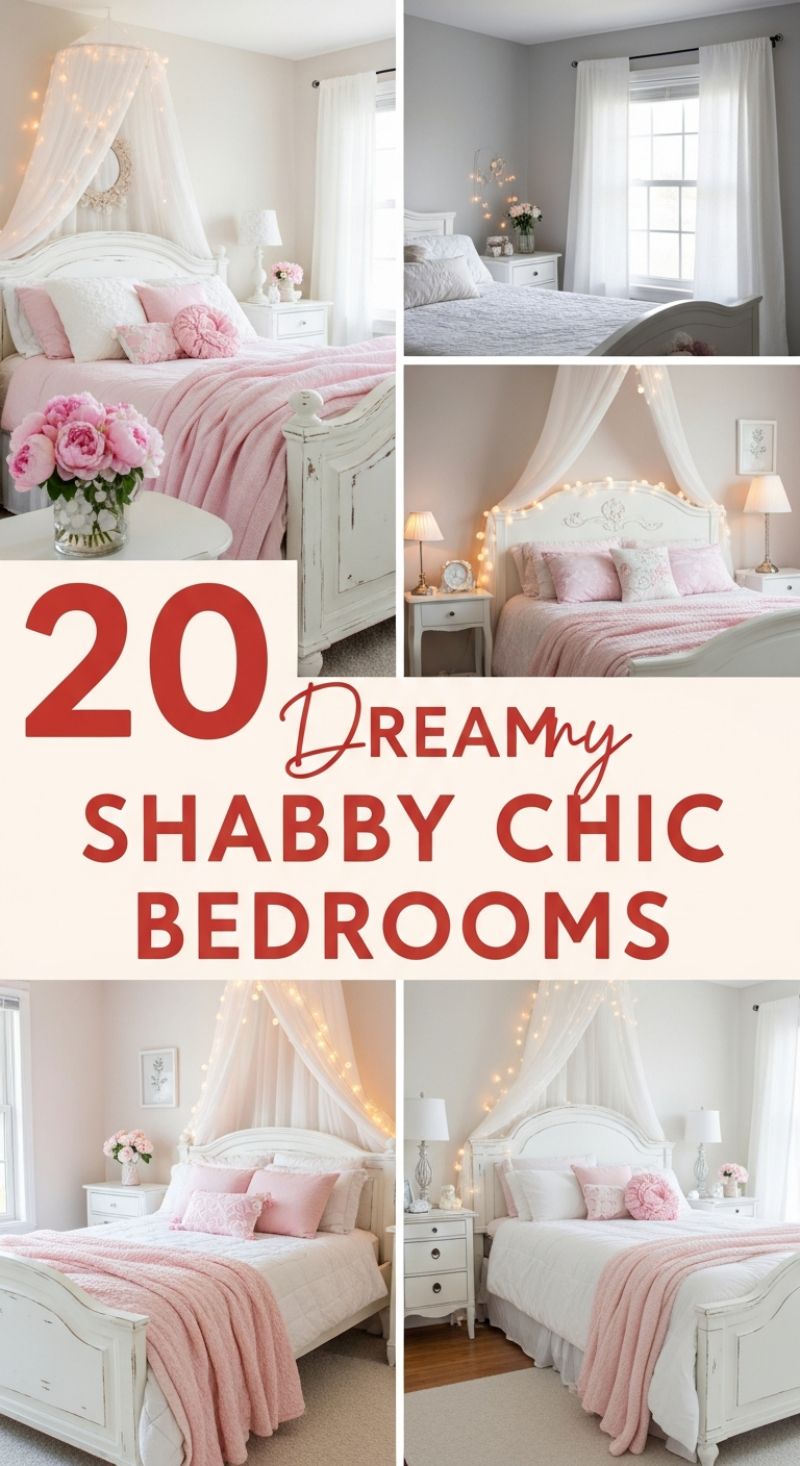
The cornerstone of a dreamy Shabby Chic bedroom is the furniture, anchored by a distressed white bed frame. Look for pieces featuring curved lines, subtle carving, or sleigh-style silhouettes to maximize romantic appeal. The “shabby” element is crucial; if you can’t find antique pieces, achieve this look by applying chalk paint to vintage finds and lightly sanding the edges and details for an authentically worn patina. The palette should be overwhelmingly light: start with warm white or soft off-white walls, allowing creams and pale neutrals to dominate. Introduce color through one primary accent, such as the blush pink shown in these examples, or alternatively, soft sage green or pale lavender, ensuring the overall effect remains airy and gentle.
Achieving the ethereal “dreamy” quality depends heavily on layered textiles and carefully managed lighting. Begin with crisp white foundation bedding, such as quilted spreads and ruffled bed skirts, and then pile on throws and decorative pillows in your chosen accent color. Focus on materials that evoke softness, such as cotton, linen blends, and velvet for pillows. The iconic visual element here is the sheer fabric canopy or netting draped gracefully over the headboard, often secured with tie-backs or flowing loosely. This architectural detail instantly softens the room. Crucially, thread warm-toned LED fairy lights (or string lights) through the sheer fabric or around the headboard perimeter. This provides a magical, diffused glow, serving as both ambient lighting and the key decorative feature that defines this romantic style.
Complete the transformation by focusing on romantic and vintage-inspired accessories. Bedside tables should complement the distressed white aesthetic; opt for pieces with subtle drawer details or slightly mismatched profiles to reinforce the collected, vintage feel. Choose vintage-style lamps with pleated or textured shades to cast soft, flattering light, and consider placing a small, ornate clock or framed botanical print on the nightstand. No Shabby Chic room is complete without flowers; incorporate generous arrangements of full-bodied blooms like peonies or roses, displayed in clear glass or distressed pitchers. The key to successful Shabby Chic styling is balancing comfort and romance, ensuring the room feels lived-in, layered, and infinitely welcoming without tipping into a cluttered or overly modern aesthetic.
15 WHIMSICAL COTTAGE CORE

Achieving the Whimsical Cottage Core aesthetic involves merging rustic charm with abundant natural elements, prioritizing comfort and a soft, airy ambiance. Start with a foundational palette of creams, whites, and light neutrals to maximize the feeling of light and space, essential for replicating the bright rooms seen in this collage. The core visual strategy relies heavily on textiles; look for natural fibers such as linen and cotton, and liberally incorporate gentle, small-scale floral or botanical patterns, visible on bedding, throw pillows, and especially floor-length curtains. This is not the space for bold, geometric prints; instead, embrace softness and vintage appeal. The instructional key here is layering—pair a thick, textured throw with smooth sheets, or place a simple, shaggy area rug on a distressed wooden floor. These layers of texture counteract the simple color scheme and introduce the inherent warmth that defines the Cottage Core style, transforming a standard room into a cozy, lived-in sanctuary.
Furniture selection should lean heavily toward the handmade, antique, or visibly worn, moving away from mass-produced modern pieces. Opt for natural wood in its raw or distressed state—a rustic farmhouse dining table, an antique writing desk with drawers, or a practical, open ladder shelf. Open shelving is crucial for displaying curated collections and maintaining a visually light presence. Expert advice dictates using wicker or woven rattan baskets extensively; these functional containers not only hide clutter but introduce another vital natural texture, fitting seamlessly onto shelves, beside desks, or under consoles. Most importantly, incorporate prolific greenery. Houseplants are the lifeblood of Cottage Core, injecting vibrant life into the neutral surroundings. Utilize a variety of plants—tall, structural snake plants (Sansevieria), trailing Pothos in hanging macrame planters, or delicate potted herbs—and house them in simple terracotta, white ceramic, or purposefully chipped pots to enhance the rustic character.
To complete this transformation, focus on strategic styling and accessorizing. Accessorize with items that look collected over time, such as mismatched stoneware, antique-style circular or oval mirrors with tarnished gold frames (which beautifully reflect natural light), and simple ceramic vessels used both for storage and display. Grouping items, rather than spacing them out, creates a curated, cozy clutter—a hallmark of the whimsical style. Lighting should be soft and warm, achieved using lamps with simple linen or fabric shades, avoiding harsh overhead fixtures. The goal is to cultivate an environment that feels deeply personal, restful, and perpetually bathed in soft, natural light, effectively combining functional living spaces with the charm and tranquility of an idyllic, rural escape.
8 Stunning Ladder Decor Ideas

The decorative leaning ladder is perhaps the most versatile and cost-effective piece of vertical storage and accent decor you can add to any room. It functions simultaneously as practical storage, textural art, and space-saving organization. To replicate the stunning looks seen here, start with material selection; choose a ladder that complements your home style—a light bamboo or natural wood finish suits bohemian or minimalist spaces, while a distressed gray or bright white painted finish fits farmhouse or coastal aesthetics. The key to successful styling lies in layering. When using the ladder for throws and blankets in a living room or bedroom, ensure you stack varied textures rather than just colors. Combine chunky cable knits, soft popcorn weaves, and smooth cotton or linen throws. A sophisticated color palette involves using 70% neutrals (white, cream, or gray) and 30% deep accent colors (such as rust, forest green, or navy) to create a visual anchor at the bottom or middle rung, giving the arrangement depth and sophistication. Remember to fold or drape throws neatly, allowing fringes and tassels to fall evenly, maximizing their textural appeal.
Beyond textile display, these ladders offer genius solutions for high-utility areas like bathrooms and entryways. In the bathroom, a towel ladder saves precious floor space. Instead of folding towels flat, roll hand towels and layer them with large bath sheets folded in quarters, alternating light and dark colors for contrast. For a unique organizational twist, secure small woven baskets, canvas caddies, or specialized hanging organizers directly to the rungs. This instantly transforms the ladder into a magazine rack, mail sorter, or even a vertical storage spot for extra toilet paper rolls or shoes near an entryway. Expert tip: If using the ladder on a hard, slippery floor, ensure you add non-slip rubber feet or secure the top to the wall, especially when utilizing it in high-traffic zones, maintaining safety while maximizing function.
Finally, elevate the simple storage function by introducing elements of life and light. Trailing greenery, such as Pothos or Ivy, can be hung from the top rung in a macrame hanger or simply draped over the sides. This softens the rigid lines of the ladder and brings organic texture into the space, perfect for softening a sharp entryway or adding depth to a bedroom corner. Another simple yet transformative decorating technique is integrating ambient lighting. Wrap a delicate strand of warm-toned fairy lights or globe lights around the wooden frame, weaving them between the stored items. When illuminated, this simple addition turns the storage piece into a cozy, functional bedside lamp alternative or a welcoming focal point, perfect for adding warmth and hygge to your home transformation project.
15 Genius Half Bathroom Ideas
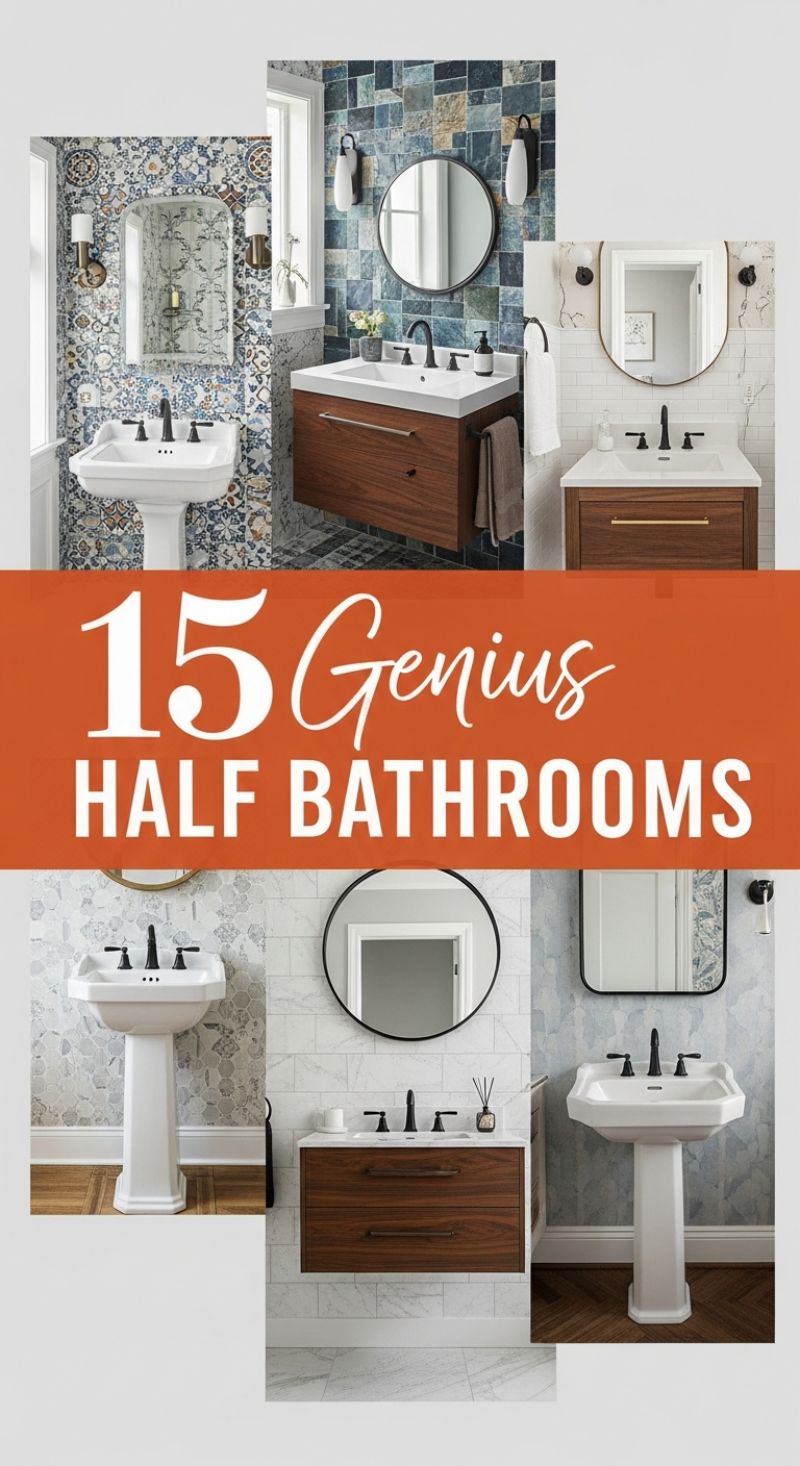
Half bathrooms, or powder rooms, offer the perfect canvas for high-impact design because of their limited size and function. Since guests frequently use these spaces, they should reflect a bold extension of your home’s personality. The key strategy for a successful powder room transformation is maximizing visual interest on the walls and floors. As demonstrated in these examples, don’t shy away from rich, patterned tile—whether it’s intricate blue and white traditional motifs, multi-tonal slate, or a modern hexagonal pattern—since the surface area is small enough that the design won’t feel overwhelming. Pair these busy backdrops with contrasting, dark fixtures, such as matte black faucets and round or arched mirrors, to anchor the aesthetic and provide a sophisticated, contemporary edge against the complexity of the wall treatment. This combination ensures the space is dramatic, memorable, and visually arresting.
Choosing the right sink setup is crucial for functionality and flow in a tight space. You generally have two strong options, both pictured here: the classic pedestal sink or the modern floating vanity. Pedestal sinks are superb for preserving every inch of floor space, creating a traditional or transitional feel that allows elaborate wall and floor treatments to truly shine. Conversely, a wall-mounted floating vanity, often seen in rich walnut or dark wood finishes, offers essential closed storage while maintaining an airy, open feel, preventing the room from feeling cramped. When incorporating a vanity, choose a clean, white top and integrate sleek, black handles for a cohesive look that complements the dark plumbing fixtures. Ensure your choice aligns with the room’s primary need: storage (floating vanity) or maximizing perceived space (pedestal sink).
Finally, pay close attention to lighting and reflective surfaces, as these elements enhance the illusion of space and luxury. Select mirrors with interesting shapes—arched or circular designs soften the angular lines often present in small rooms. Position stylish sconces on either side of the mirror instead of relying solely on overhead lighting; this arrangement provides optimal, shadow-free illumination for anyone using the vanity. Expert advice suggests that the powder room is the ideal location to splurge on materials you might find too costly for a full bathroom renovation, such as intricate natural stone tiles or high-end designer wallpaper, making it a true jewel box within your home.
18 Hygge Cozy Bedrooms
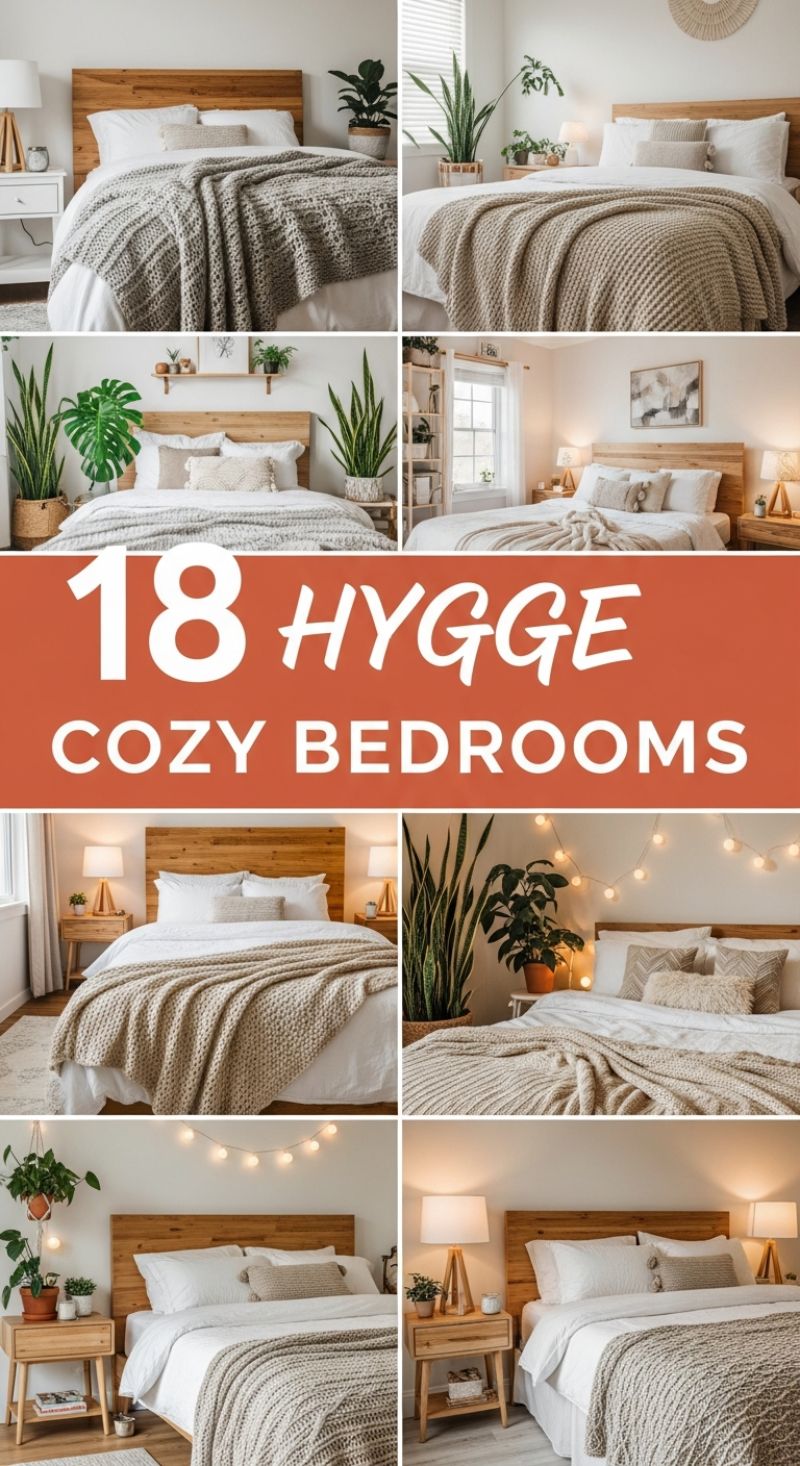
To achieve the effortless tranquility of a Hygge bedroom, start with a calming, neutral foundation. The unifying element across all these designs is pure white bedding, which acts as a clean canvas and amplifies natural light. The key to moving from stark minimalist to cozy Hygge is texture layering. Invest in at least one oversized, chunky knit throw blanket in a natural hue like oatmeal, soft grey, or cream, draping it casually across the foot of the bed rather than making it perfectly neat. Pair this with decorative cushions featuring tactile materials such as macrame, wool, or faux fur. Crucially, anchor the space with natural wood elements—the featured rooms consistently utilize slatted or solid light-toned wooden headboards and matching nightstands, instantly injecting warmth and organic texture into the room’s core.
A hallmark of the modern cozy aesthetic is bringing the outdoors in, and these examples illustrate the power of strategic plant placement. Opt for large, impressive statement plants, such as Sansevieria (snake plant) or Monstera Deliciosa, often housed in woven baskets or simple terracotta pots, to introduce vibrant green and purify the air without cluttering surfaces. Beyond greenery, the quality of light is paramount to creating a truly Hygge atmosphere. Ditch bright, harsh overhead lighting in favor of multiple soft, warm light sources. Incorporate delicate string lights (like the globe style shown) draped subtly above the headboard to provide a gentle, ethereal glow in the evening. Bedside table lamps should feature neutral linen shades and natural wood bases, ensuring the light is localized, dimmable, and contributes to the room’s overall sense of intimate comfort.
Maintain the serenity of the space by choosing functional, non-fussy furniture. The nightstands featured are typically light wood, mid-century modern inspired with simple drawers and open shelving, balancing storage needs with clean lines. Styling these surfaces should remain sparse—perhaps a scented candle, a small stack of books, and the essential bedside lamp. For final decorative touches, focus on handmade or natural elements: small pieces of abstract artwork with muted tones, tiny potted succulents, or a simple woven wall hanging. The goal is curation, not collection; every item should serve to enhance the room’s peaceful, uncluttered environment, allowing the warmth of the wood and the softness of the textiles to dominate the sensory experience.
17 EASY DIY BOHO DÉCOR
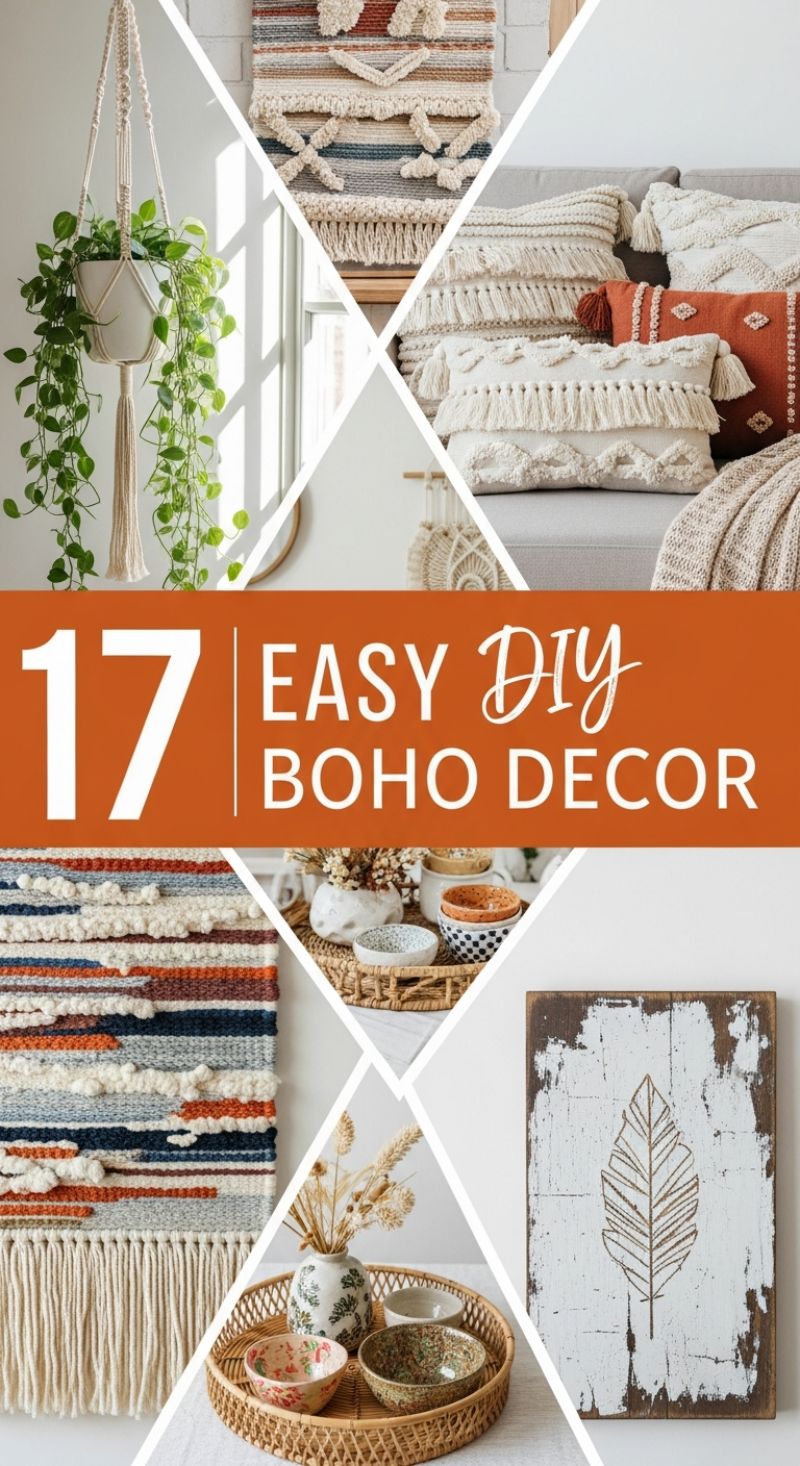
Achieving an authentic bohemian aesthetic relies heavily on layered textures and tactile textiles, many of which are easily crafted at home using budget-friendly materials. Start your transformation by tackling vertical surfaces. Instead of expensive framed art, create striking fiber art wall hangings. Source thick cotton rope or chunky yarn in a neutral palette (cream, taupe) complemented by earthy accents (terracotta, muted blue, rust). Experiment with foundational weaving techniques like Rya knots or soumak stitching, which are simple to learn but highly effective at building the rich dimension seen in high-end fiber art. For seating, ditch plain pillows in favor of personalized texture. DIY your cushion covers using basic linen or canvas, then apply fringe, tassels, or macrame knots directly onto the fabric. Layer these textiles generously on sofas and chairs—the goal is comfortable, lived-in abundance achieved through contrasting textures, such as soft knitted throws draped next to rough woven, tasseled pillows.
Integrate natural materials to ground your design, utilizing affordable elements like rattan, bamboo, and reclaimed wood. A key feature of the bohemian look is the casual, yet curated, vignette, often centered around a woven rattan or wicker tray. Use this tray to corral disparate natural objects, such as patterned ceramic bowls, small vases, and found treasures. Expert tip: always include organic elements. Macrame plant hangers are quintessential Boho, and even a beginner can quickly master the basic square knot and spiral knot necessary for suspending greenery. Hang trailing plants like Pothos or philodendrons near windows to maximize light and add essential vertical interest, instantly softening the hard lines of a room. Complement living plants with dried grasses, such as Pampas or Bunny Tails, placed in simple, matte ceramic vases, providing texture and longevity without the continuous maintenance of fresh floral arrangements.
Personalizing your space with handcrafted art elevates the DIY look from standard to truly unique. Consider the distressed wood feather sign displayed: this project is exceptionally simple and budget-conscious. Source reclaimed pallet wood or inexpensive planks, paint them with a chalky white paint, and sand heavily after drying to achieve a perfectly weathered, distressed finish that exposes the dark wood beneath. Use a simple stencil or freehand sketch to etch or paint a geometric or botanical design—like the stylized feather—in a complementary earth tone. This rustic wooden element grounds the room, balancing the softness of the textiles and the lightness of the plants. By combining these three core DIY strategies—textured textiles, abundant greenery in macrame holders, and simple, rustic art—you can achieve a deeply layered and cohesive Boho transformation that feels sophisticated and intentionally designed, all while keeping your budget firmly in check.
8 Genius Bath Layouts for Maximum Style and Efficiency
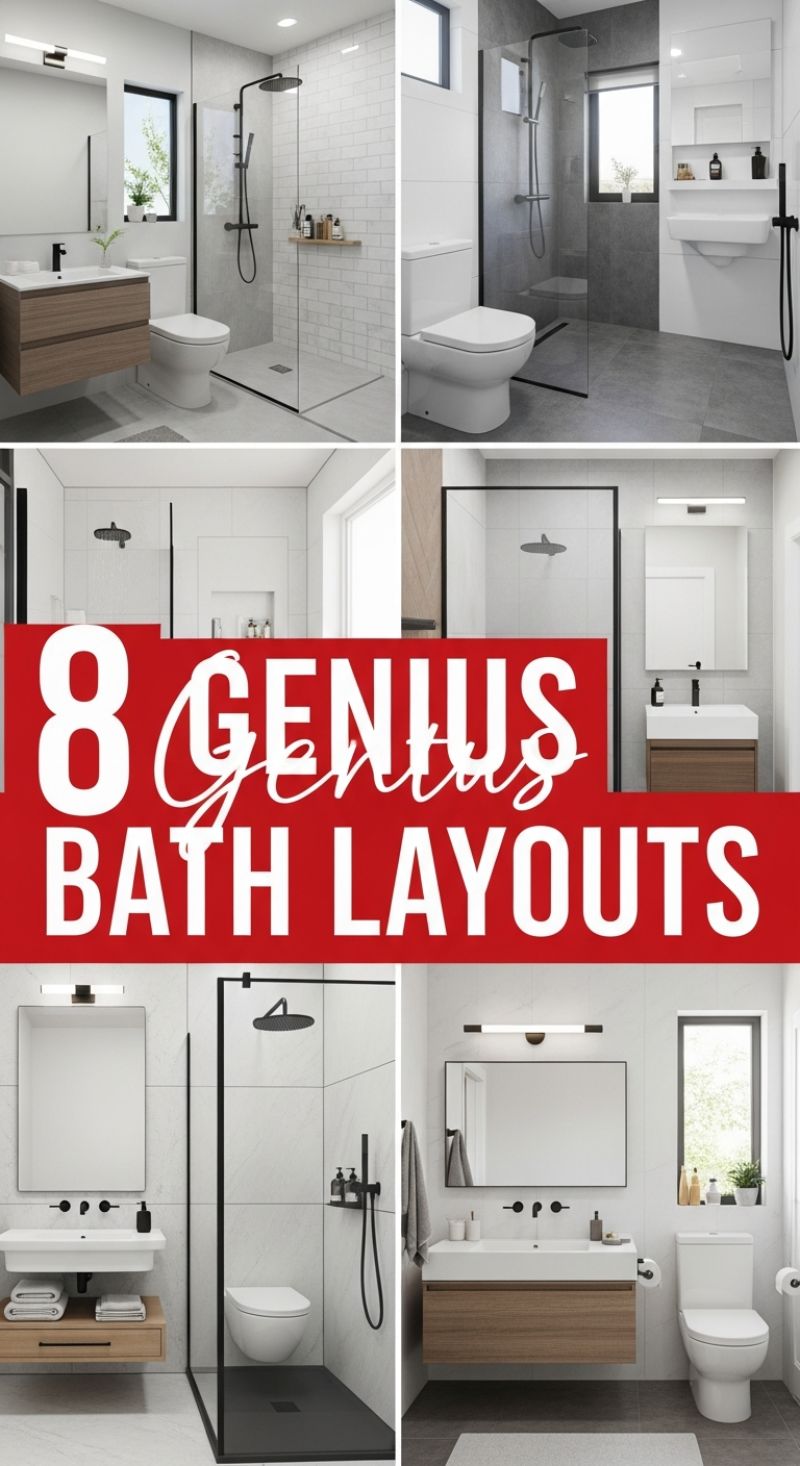
Transforming a bathroom, especially a smaller one, hinges entirely on a genius layout that prioritizes flow and function over size. These modern layouts demonstrate that efficiency does not require sacrificing luxury or style. The overarching strategy utilized here is modern minimalism coupled with high-contrast elements. To replicate this look, start by focusing on optimizing visual space: choose frameless or thin black-framed glass shower enclosures to segment the wet zone without obstructing sightlines. The floating vanity is essential; by mounting the vanity unit off the floor (often in wood tone for warmth against crisp white tiling), you expose more floor area, tricking the eye into perceiving a larger space. Pair this with sleek matte black fixtures—from the rain shower head to the sink faucet—to provide a sharp, contemporary contrast against light-colored walls, whether you opt for classic subway tiles or large-format marble-look porcelain.
Effective layout planning requires careful zoning to meet clearance requirements while maximizing utility. Observe how several of these designs strategically place the toilet adjacent to the walk-in shower, sometimes directly opposite the vanity, maintaining a clear pathway through the center. For narrow bathrooms, adopt a linear configuration, placing the vanity, toilet, and shower all along one wall to utilize length rather than width. In layouts where space is truly constrained, consider a ‘wet zone’ approach where the shower floor seamlessly transitions to the main floor, creating an open concept only separated by a partial glass screen. Expertly utilize wall space for storage: incorporate recessed shower niches for products, and opt for wall-mounted sink faucets (as seen in the bottom left layout) to free up precious vanity surface area. Remember to incorporate a durable, dark-colored shower pan or large-format dark floor tile within the shower area to clearly define the zone and provide necessary non-slip contrast.
Finally, layer in thoughtful details that elevate the design. Lighting is crucial for both function and atmosphere. Integrate horizontal LED bar lighting directly above the vanity mirror for optimal task illumination without harsh shadows. The placement of natural light is also key; the layouts often show a window within or adjacent to the shower area, which is vital for ventilation and making the tight space feel airy. For storage beyond the vanity, use sleek, recessed medicine cabinets or simple floating wood shelves (like the one shown in the top left shower) for accessible yet stylish display. By focusing on large, unbroken surfaces—such as large-format floor tiles to minimize grout lines—and maintaining a clean, clutter-free aesthetic, you can successfully implement a ‘genius’ layout that feels spacious, streamlined, and highly functional, regardless of your bathroom’s actual square footage.
Transforming Spaces with Raw Energy: The DIY Punk & Grunge Aesthetic

To successfully execute the highly textured, raw energy of the punk and grunge aesthetic seen here, the transformation must begin with the backdrop. Expertly layered textures are paramount to avoiding a flat, manufactured look. Start by treating your walls with a matte, heavily textured finish—think faux concrete or plaster with a black or charcoal gray base. The strategic application of color is equally critical; utilize deep reds and crimson sparingly, as demonstrated by the overspray effect on the surface. To replicate this, use spray paint to create intentional, imperfect edges or stripes on a feature wall or existing furniture pieces. This foundational layer creates visual depth and immediately establishes the rebellious, DIY spirit of the space. Instead of clean lines, embrace distressed elements by sanding down edges or slightly tearing any paper or poster elements before mounting them, ensuring every item looks like it has a history and tells a story of creative chaos.
The signature visual elements of this look involve repurposing industrial and anti-establishment iconography. The heavy, rusted metal chain featured prominently can be transformed from mere decoration into functional hardware—use it as a unique curtain tie-back, wrap it around shelving units, or secure it as a sculptural centerpiece on a gallery wall. Safety pins, often a staple of punk fashion, should be curated and displayed en masse, perhaps affixed to a black canvas or backing board, turning a collection of common objects into organized, impactful art. When integrating music memorabilia, like the scratched vinyl record shown, present it as functional design. Mount old records directly to the wall, or incorporate them into custom furniture tops. The key principle is to use authentic materials (metal, worn leather, distressed wood) that contrast sharply with the soft lighting, ensuring the space feels lived-in and passionately assembled, rather than merely decorated.
For finishing touches, focus on lighting and the subtle integration of graphic design elements. Opt for industrial-style lighting fixtures, such as exposed Edison bulbs or wire-caged lamps, to cast a dim, moody glow that enhances the dark color palette. Use the guitar picks and small, hand-drawn paper scraps as inspiration for bespoke accessories; these can be decoupaged onto small storage boxes or framed as miniature art pieces near a workspace. For furniture, eschew polished wood in favor of repurposed materials, such as metal filing cabinets, locker units, or raw, stained pallet wood for shelving. When curating the final layout, remember that the grunge aesthetic thrives on deliberate imperfection and asymmetry. By combining these raw, found objects with intentional textural application and moody lighting, you transform a standard room into a high-energy den that powerfully expresses a non-conformist, rock-and-roll sensibility.