Discover The Ultimate Hair Guide featuring 100+ stunning hairstyle ideas for short, medium, and long hair. Find perfect looks for date night, prom, weddings, natural hair, braids, and quick daily styles.
9 Romantic Date Night Looks
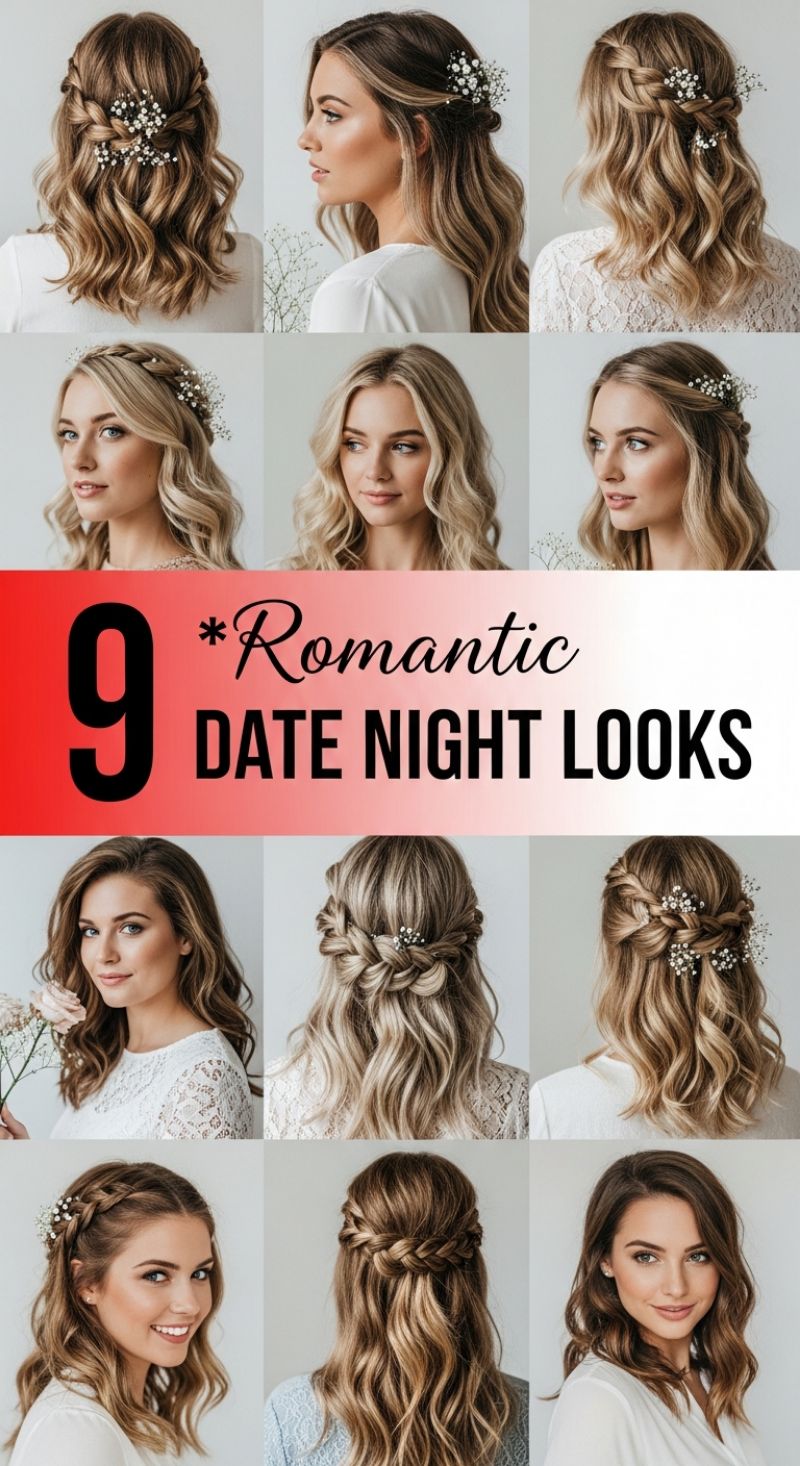
The hairstyles featured here are the epitome of romantic elegance, focusing on soft texture, undone waves, and delicate braided details. This collection of nine looks provides ample inspiration for achieving a sophisticated yet effortless half-up style, perfectly suited for medium to long hair lengths. The foundational element for all these looks is volume and texture. Start by applying a heat protectant and volumizing mousse, then use a large barrel curling iron (1.5 to 2 inches) to create loose, cascading waves. It is crucial to brush out the curls gently after cooling to achieve the soft, voluminous ‘undone’ effect seen in the visuals. Before styling, mist the hair with a dry texturizing spray; this adds necessary grip, making the braids hold shape better and appear thicker and softer. The ultimate goal is movement and airy lightness, not stiff structure. These techniques ensure the hair maintains its shape and romance throughout your evening. The central theme across these looks is the braided half-up, which involves securing sections from the front hairline at the back of the head. There are two primary techniques displayed: the classic Braid Crown and the intricate Wrapped Braid. For the Braid Crown (visible in the top left, center, and bottom center), take a three-inch section of hair above the ear and begin a Dutch or French braid, feeding in small sections from the hairline as you progress horizontally across the back of the head. Secure this braid with a clear elastic at the nape, then repeat on the opposite side, wrapping the second braid over the first. For a quicker alternative (seen in the middle row, sides), simply twist two large sections of hair tightly from the temple area and pin them together discreetly at the back of the crown. Expert tip: After securing any braid, gently pull the edges apart (a technique called ‘pancaking’) to loosen the weave and dramatically increase the perceived thickness and volume, lending that sought-after ethereal quality. The final, and most essential, step in mastering these romantic looks is the accessory. Every style showcased here is elevated by the inclusion of small, delicate floral accents, most notably baby’s breath (gypsophila). These tiny white blossoms instantly transform a simple braid into a wedding-guest or date-night masterpiece. To apply, use small, hair-safe clips or pins featuring the flowers, tucking them strategically where the braids converge or where the twist is secured. Ensure any stray flyaways around the face are curled softly to frame the features, keeping the overall aesthetic soft and flattering. Finish the entire style with a flexible hold hairspray to ensure longevity without compromising the hair’s natural bounce and movement. These are versatile styles that move seamlessly from a casual outdoor date to a more formal evening occasion, requiring minimal effort for maximum romantic impact.
12 Stunning Prom Hairstyles
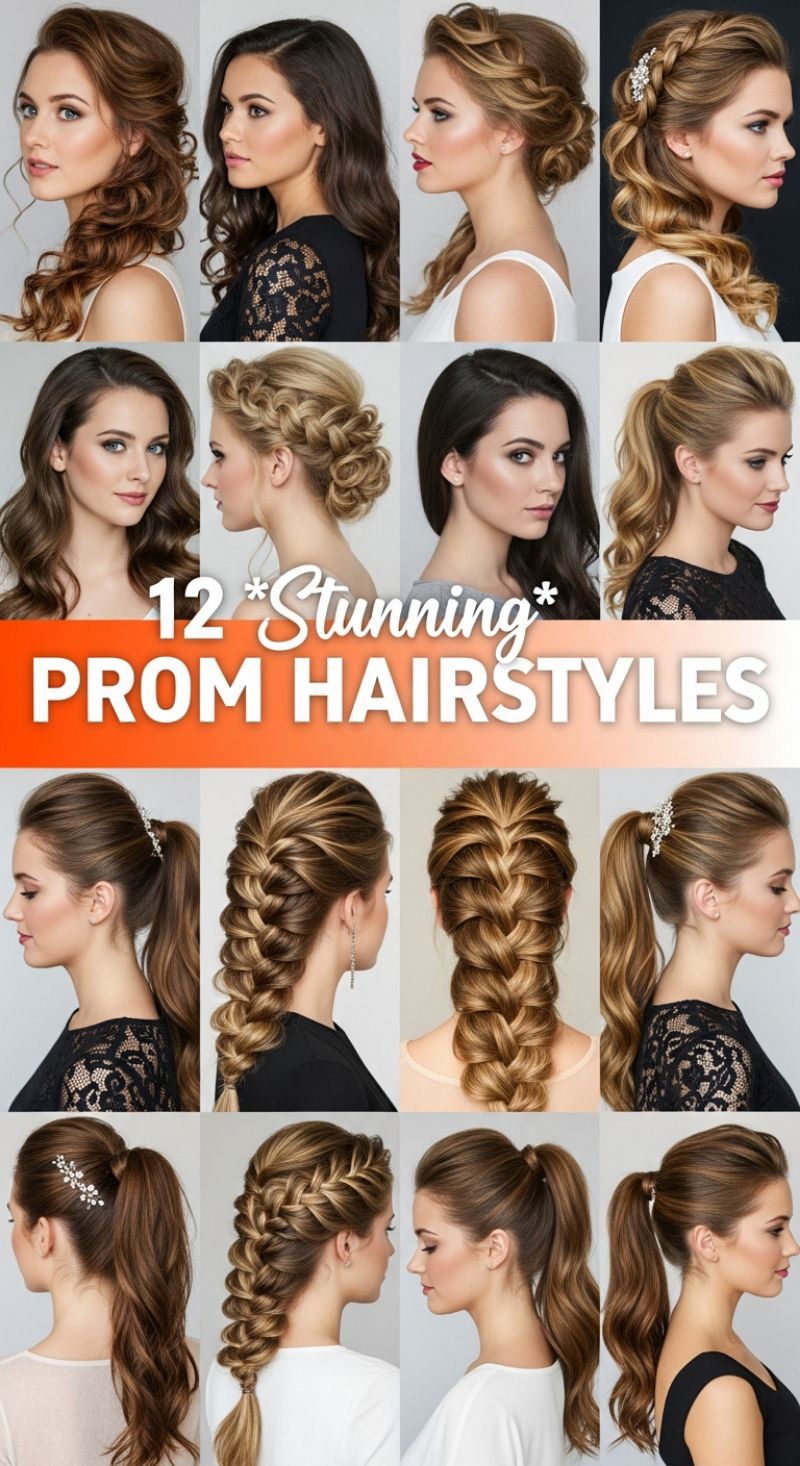
Prom night calls for a hairstyle that balances sophistication, durability, and personal style. This curated selection features 12 versatile looks perfect for any formal event, ranging from romantic updos to high-impact braided creations and polished ponytails. For timeless elegance, consider the soft, side-swept half-up styles seen in the top row. These rely on beautifully curled lengths and strategic pinning to keep hair off the face while showcasing movement. The most intricate formal option displayed is the braided crown updo, achieved by creating thick Dutch braids along the hairline and wrapping them securely into a low, voluminous bun. To ensure this style lasts all night, prep hair with texturizing spray before braiding and use strong-hold hairspray once the look is set. When pairing these styles with your attire, remember that high necklines or intricate back details are beautifully highlighted by a clean updo, while V-necks and strapless dresses complement loose, flowing styles.
For those who prioritize drama and structure, mastering the art of the voluminous braid is essential. The image showcases stunning variations of the chunky Dutch or French braid, often referred to as ‘pancaked’ braids. To recreate this look, execute a tight braid down the center or side of the back of the head. Once the braid is complete and secured at the end, gently pull apart (or ‘pancake’) each loop of the braid using your fingers. This process thickens the braid dramatically and adds a soft, ethereal texture. If your hair lacks sufficient length or thickness for these large braids, consider incorporating hair extensions that match your color and are secured discreetly under the crown section. Secure these heavy braided styles with small, clear elastics and finish with a serum to enhance shine and reduce flyaways, ensuring a picture-perfect profile.
Finally, the modern ponytail emerges as a chic, yet comfortable choice. This collection demonstrates that a ponytail can be far more than casual. To achieve the sleek, high-volume ponytails shown, begin by blow-drying the hair smooth, focusing on creating lift at the roots. Before securing the pony, lightly tease the crown section to build a subtle bump, which prevents the look from falling flat. You can opt for a pin-straight, sleek finish, or curl the ponytail lengths for added bounce and movement. For the ultimate polished touch, take a small section of hair from the underside of the secured ponytail, wrap it tightly around the hair tie, and secure it underneath with a bobby pin. Accessories, like the delicate jeweled clips shown, can be easily incorporated near the base of the pony or along the hairline of the half-up styles to add a touch of sparkle reflective of your jewelry.
7 Elegant Half-Up Styles
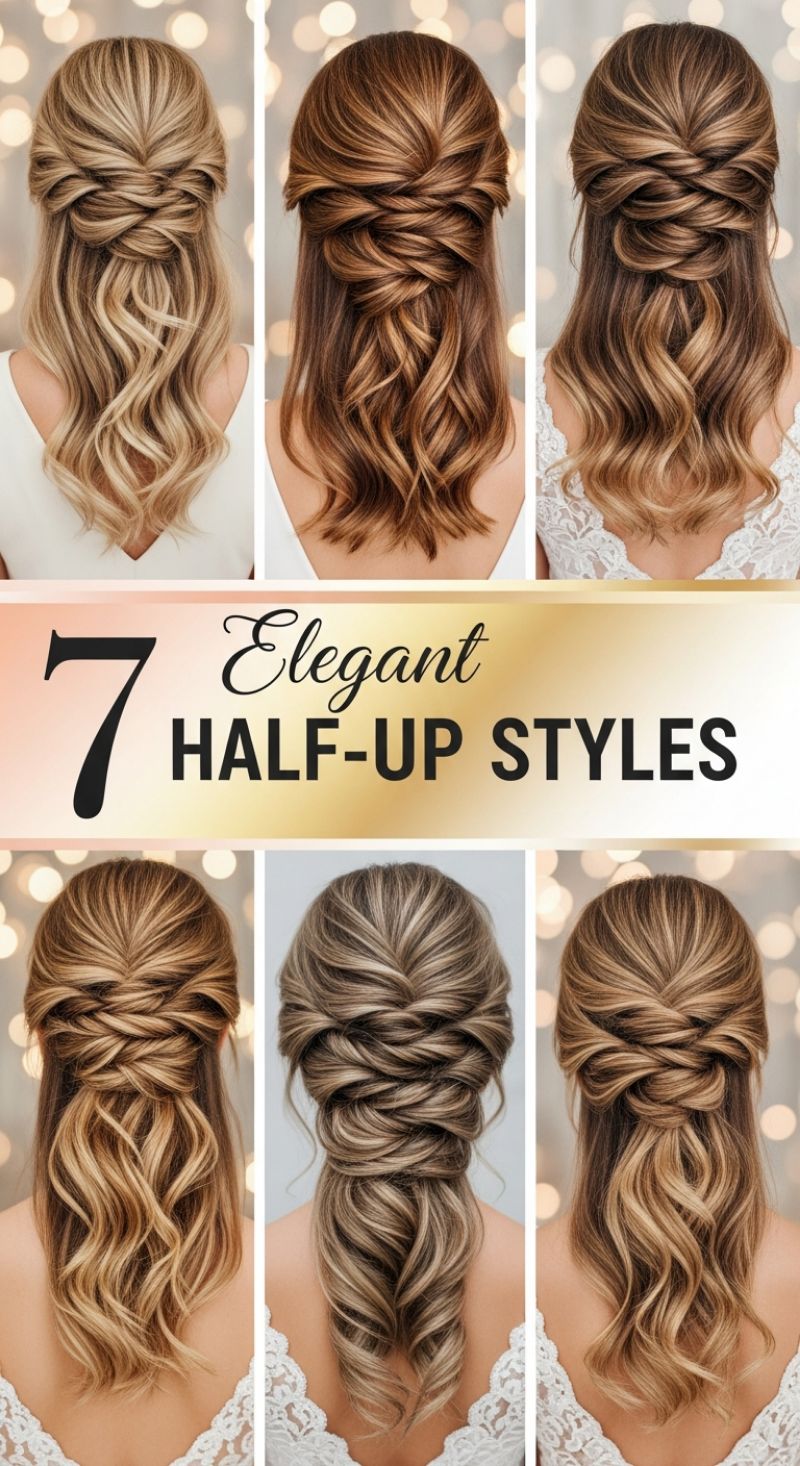
The half-up, half-down style remains a perennial favorite for its ability to combine the elegance of an updo with the romantic flow of loose waves. The intricate variations showcased here elevate this classic look by incorporating detailed twists, interlocking loops, and subtle braids, making them ideal for formal events, bridal parties, or elevated everyday wear. The visual success of these styles relies heavily on hair preparation; before styling, ensure the hair has ample texture and movement. Begin by applying a volumizing mousse or setting spray to damp hair, then dry and create soft, polished waves using a large-barrel curling iron. The contrast of the smooth, pulled-back crown and the textured, flowing lengths is critical—especially when working with dimension-rich hair colors like balayage or ombré, as the woven patterns beautifully highlight the different tones.
To execute these intricate woven designs, precise sectioning is essential. Start by isolating the top section of hair, generally from the top of the ears upward, to form the anchor point. This base can be a small ponytail secured with a clear elastic, or simply a neat twist pinned firmly at the back of the head. The visible artistry comes from the strands layered over this anchor. Take two one-inch sections from the sides and twist them tightly (a rope braid) or lightly plait them, then loop them across the center, pinning them strategically to create an overlapping or woven effect. For a more voluminous, stacked look, like the center bottom image, repeat this process, gathering additional hair from slightly lower sections and weaving them over the previously secured pieces, building height and complexity down the back of the head. Always tuck the ends of the twisted pieces under the preceding sections or the main anchor point for a seamless finish.
Expert styling tip: The stability of these elaborate half-up styles depends on proper bobby pin technique. Instead of sliding pins straight in, insert them in a wave or ‘X’ pattern against the scalp to lock the hair securely, ensuring they are invisible against the woven pattern. For those with finer hair, backcombing the roots of the sections used for twisting can maximize fullness and prevent the style from collapsing flat. These looks require medium-to-long hair to achieve the necessary length for looping and intertwining; however, shorter hair can still achieve the look using fewer, simpler twists secured higher on the crown. Once the desired pattern is complete, mist with a flexible but strong-hold hairspray, concentrating product on the pinned areas, to ensure the elegant structure holds throughout the event without losing the softness of the cascading waves.
8 Gentle Natural Hair Styles: Protective and Stunning Looks

Natural hair requires consistent moisture and minimal manipulation to thrive, and these eight styles exemplify how to achieve stunning aesthetics while prioritizing hair health. The core principle behind a “gentle” style is protection: minimizing exposure to environmental stressors, reducing daily combing, and locking in hydration. Styles showcased include foundational protective looks like Box Braids, Faux Locs (as seen in the high bun and individual locs), and the ultimate protective technique, Bantu Knots. Additionally, we see sleek updos achieved through cornrows and flat twists, as well as beautifully defined wash-and-go styles that emphasize the natural curl pattern. The key to successfully executing any of these looks is starting with clean, deeply conditioned hair and ensuring that moisturizing products are generously sealed in with natural oils before braiding or twisting begins, setting the foundation for weeks of healthy hair retention.
To master gentle styling, focus on technique and product choice. For styles like Bantu Knots, which offer both a temporary updo and a heatless curl pattern when released, start by dividing the hair into precise, moisturized sections. Apply a butter or cream styler, then tightly twist each section around itself until it coils into a small knot flush against the scalp, securing the end with a pin or tucking it under. For durable styles like Box Braids or Faux Locs, the installation should be firm enough to last but never tight enough to cause tension headaches or hairline stress—this distinction is critical for genuinely gentle wear. Expert tip: Ensure your stylist avoids pulling hair from the fragile nape or temple areas, and always use a light oil blend (like jojoba or argan) on the scalp between parts to soothe skin and reduce itchiness during the initial wear period.
Longevity and maintenance are paramount to keeping these styles gentle over their lifespan. While wearing protective styles, moisture loss is still a concern. Invest in a dedicated braid spray or a mixture of water and light oil/leave-in conditioner to spritz the hair and scalp every few days, particularly concentrating on the ends, which are the oldest and most vulnerable parts of the strand. At night, always protect the hair with a silk or satin scarf or bonnet to prevent friction and preserve the style’s integrity and neatness. When it’s time for removal, dedicate several hours to the process; rushing will lead to breakage. Gently detangle each section from the ends up, utilizing a slip-focused conditioner, and follow up immediately with a protein treatment or deep conditioning mask to replenish the hair before moving on to your next style.
15 *Protective* BRAID LOOKS
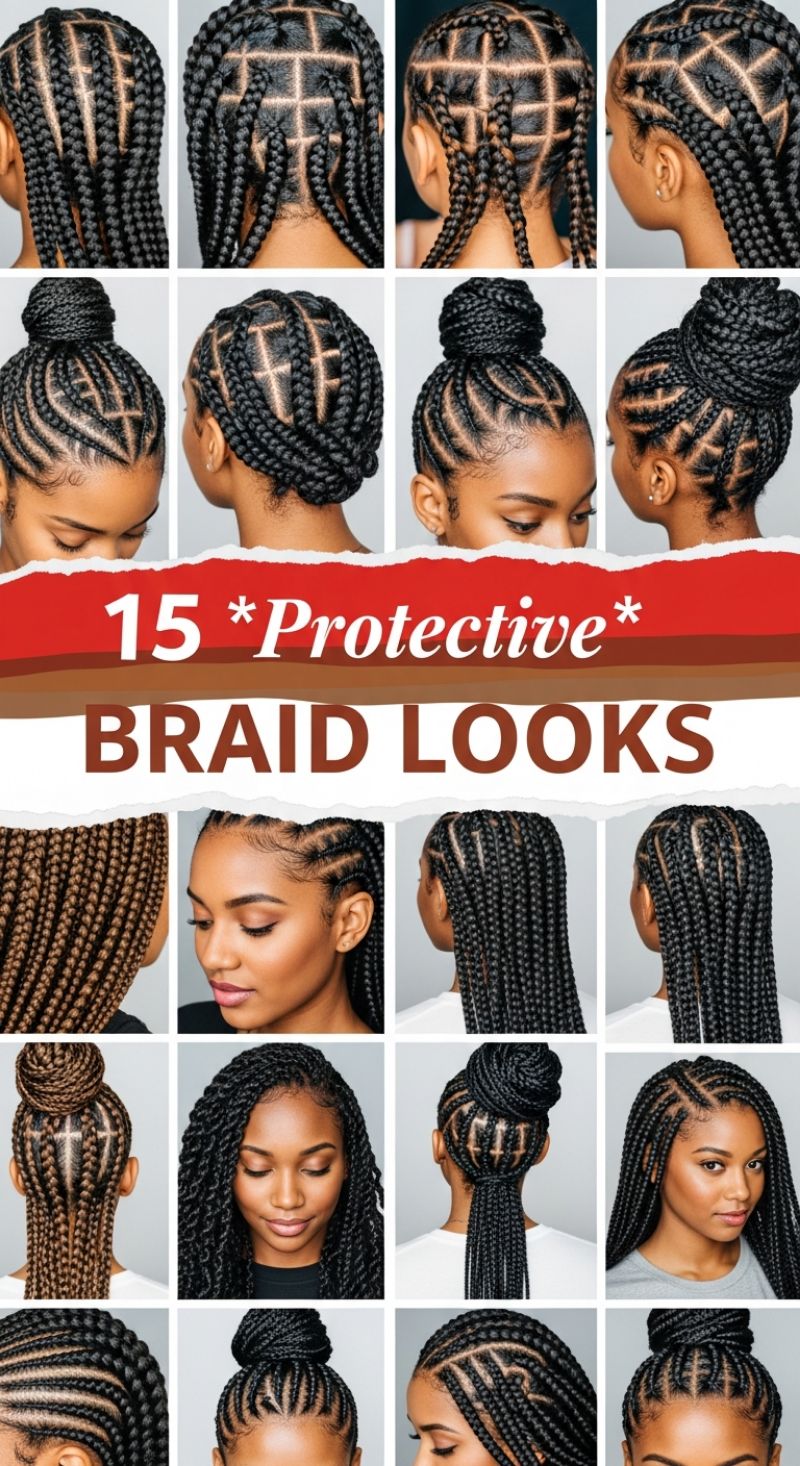
Protective braiding is a cornerstone of healthy hair maintenance, significantly reducing exposure to environmental stressors and minimizing daily manipulation necessary for length retention. The collection of styles featured here highlights the creativity inherent in braid artistry, particularly focusing on intricate and precise partitioning. To replicate the stunning, geometric designs visible—such as the crisp box patterns, intersecting diagonals, and clean diamond shapes used for both individual braids and feed-in cornrows—start by investing in a high-quality rat-tail comb. Precision parting is paramount for achieving a polished look; ensure each section is perfectly squared, triangular, or angled before braiding begins. For feed-in styles, the tension must be applied consistently from the root, gradually adding braiding hair to ensure a seamless transition and prevent excessive pull on the delicate hairline. This meticulous foundation ensures the style looks neat upon installation and maintains its structural integrity throughout the entire wear period.
This selection demonstrates incredible versatility in styling, transitioning seamlessly from long, flowing box braids and twists (some featuring rich, warm brown tones) to elegant, practical updos. The high braided bun, a timeless choice shown here in several variations—some based on tightly secured cornrows and others utilizing loose box braids—is ideal for formal events or simply keeping hair off the neck during warmer seasons. When constructing a high bun from long braids, it is crucial to ensure the weight is distributed evenly to avoid unnecessary strain on the crown and scalp; wrapping the braids securely around a central anchor point minimizes tension. For the free-hanging styles, like the sleek, medium-sized box braids, moisture management is critical. Apply a lightweight oil (such as jojoba or tea tree oil) directly to the scalp and lightly along the length of the braids periodically to keep both the natural hair and extensions hydrated, focusing especially on the ends, which are prone to friction and dryness.
For maximum hair health, consider opting for knotless installation techniques, which drastically reduce the risk of breakage and tension often associated with the traditional knotted base, making the style feel lighter and more comfortable immediately. The overall longevity of these protective styles—which typically ranges from four to eight weeks—depends heavily on meticulous night care and edge maintenance. Always sleep on a silk or satin pillowcase, or cover your hair with a bonnet or scarf to prevent friction that leads to frizz and flyaways. Pay special attention to the baby hairs and edges, styling them gently with a non-flaking, moisturizing edge control product. While these styles are protective, they require intermittent cleansing; use a dilute witch hazel solution or specialized braid spray to gently cleanse the scalp without disturbing the braids themselves, ensuring your style remains fresh and your scalp healthy for the style’s full duration.
5 Speedy 5-Minute Hairstyles: Effortless Updos for When You’re Pressed for Time
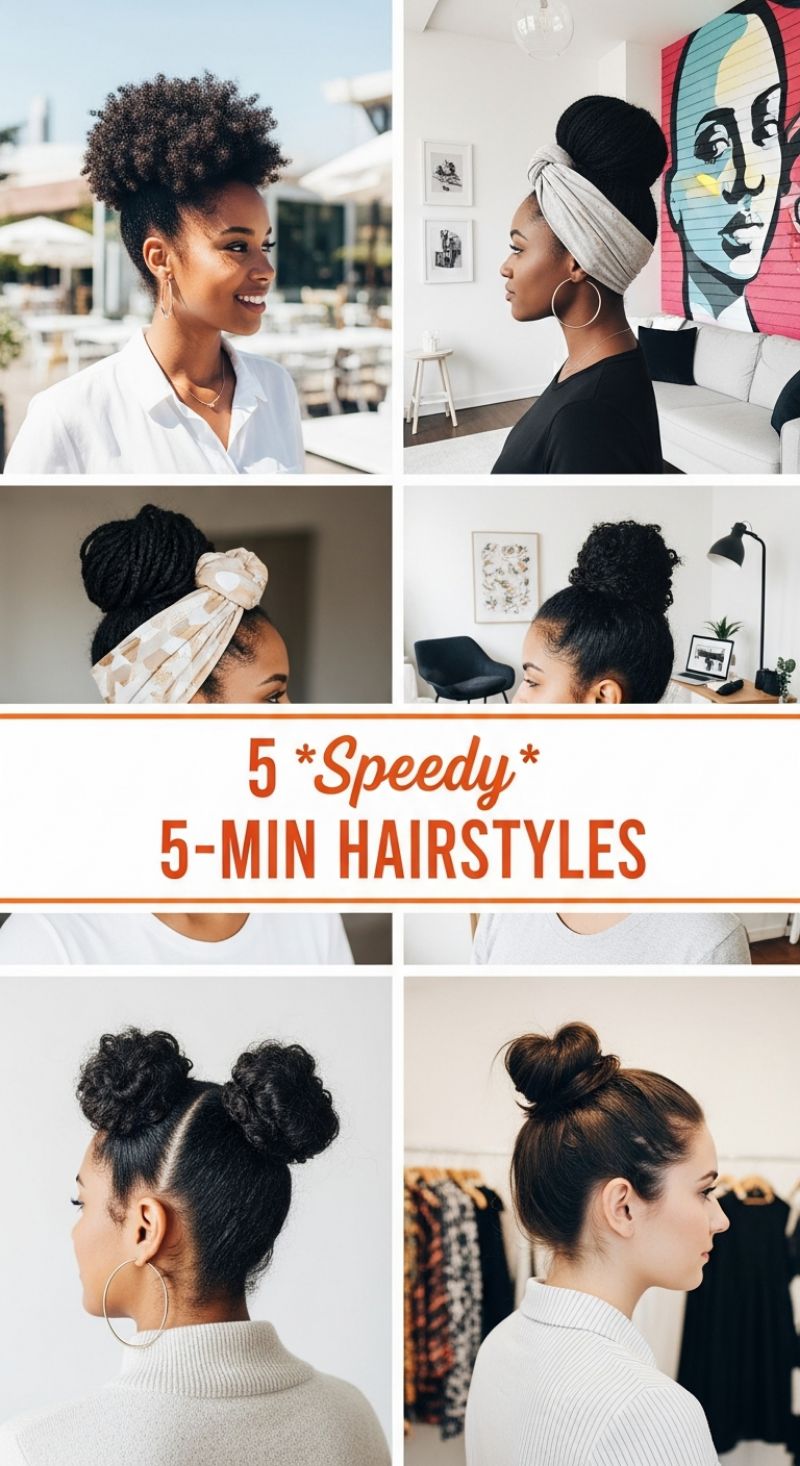
When the clock is ticking and you need a polished look instantly, mastering the quick updo is essential. The core principle behind these five speedy styles is utilizing height and texture to create maximum impact with minimal styling time. The foundational technique for most of these looks involves gathering the hair high on the crown, which instantly elongates the neck and draws attention upwards. For voluminous, textured looks like the High Puff or Textured Bun (as seen in the top left and middle right), the key to keeping it quick is focusing only on the perimeter. Start by applying a smoothing gel or edge control product to the hairline and nape, using a boar bristle brush to tightly smooth the sides into a high ponytail position. Secure the base tightly with a snag-free elastic. Once secured, use your fingers or a pick to gently pull and fluff the hair in the ponytail, creating that effortless, voluminous cloud effect. This contrast between the sleek sides and the voluminous top is the secret to a professional finish that truly takes less than five minutes.
For a fast, protective style that doubles as an instant outfit upgrade, integrate head wraps and scarves (styles top right and middle left). The full Turban Wrap (top right) is ideal for days when you want to fully conceal your hair, perhaps due to a braid-out that didn’t quite work or wet hair you haven’t had time to dry. Simply secure the hair into a high knot or bun and then wrap a large, soft fabric around the head, twisting it dramatically at the front and tucking the ends. For a partial accent (middle left), secure your high bun first—this works particularly well over braids or faux locs—and then wrap a smaller, patterned scarf around the base of the bun, tying it into a statement knot or bow near the hairline. Expert tip: choosing a scarf made of satin or silk will help protect your edges and minimize friction, offering both style and hair health benefits.
Finally, for quick, structured looks, try the Sleek Top Knot or the trendy Double Space Buns (bottom images). The Top Knot (bottom right) is the ultimate classic for speed; pull all hair high, twist it into a rope, coil it around the base, and secure it with a large hair tie or a few pins, leaving the coil slightly loose for a modern, ‘messy’ vibe. For the Space Buns (bottom left), create a clean center or zig-zag part first—this division is crucial for symmetry. Secure two high ponytails near the crown, then twist each ponytail tightly and coil them into firm buns. Pin them firmly from all sides. To ensure these buns last all day, spray the finished look lightly with a flexible-hold hairspray. These quick styles prove that looking polished doesn’t require complex techniques or excessive heat styling; it just requires a strategic approach to gathering and accessorizing.
10 Chic Short Natural Hairstyles
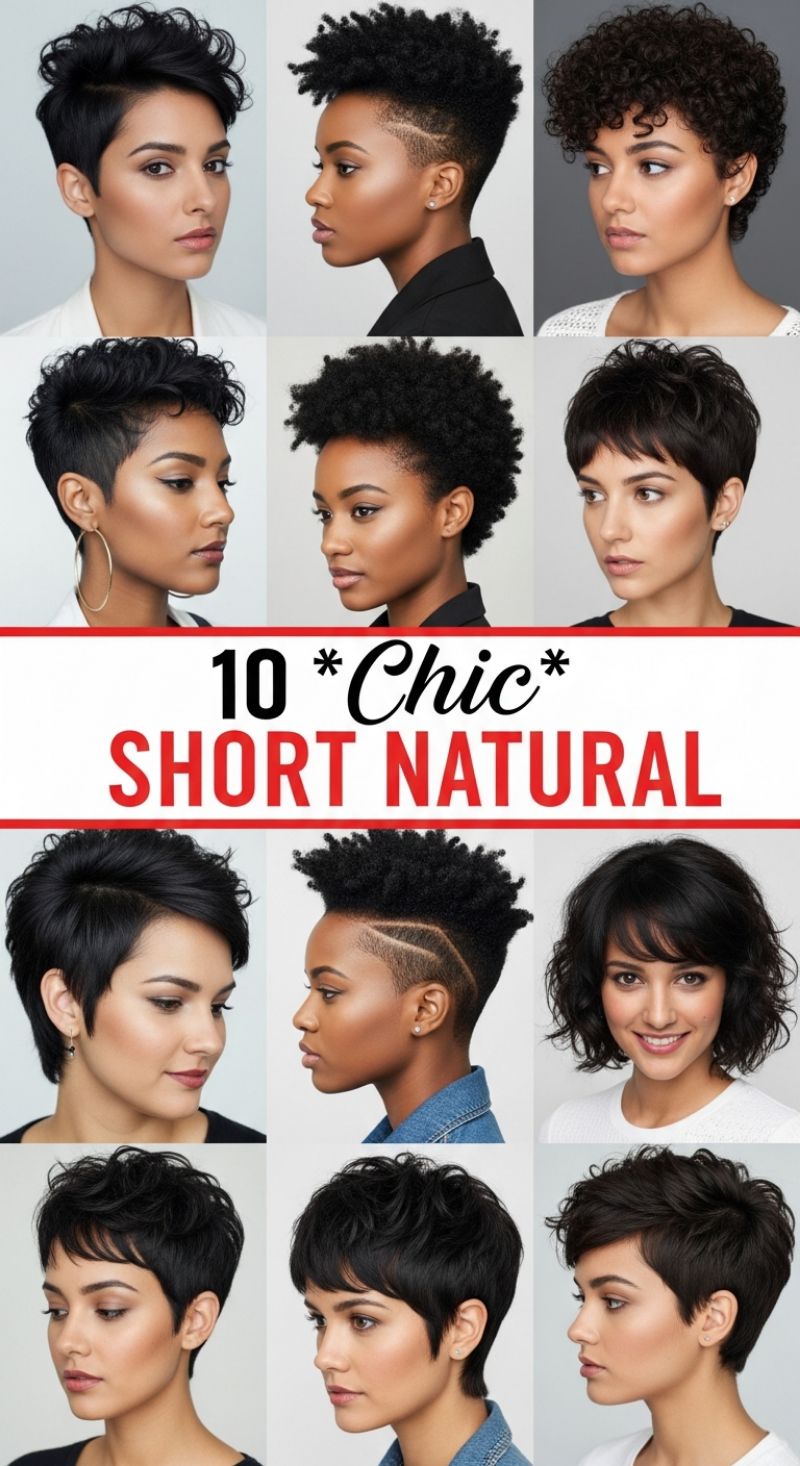
These stunning examples of short natural hairstyles highlight the versatility and power of a clean, cropped look. The collection predominantly features two main silhouettes: the sleek, layered pixie and the highly defined, tapered natural cut. To achieve the foundation for these styles, communication with your stylist is key. Request a structured cut that utilizes tapering on the sides and nape—this provides the necessary contrast and lift to maximize the volume on top. For clients with naturally wavy or looser curled hair (like the examples featuring the dark, layered cuts), the goal is a detailed razor or scissor cut that allows for movement and texture without weight. If your texture is coily or kinky (4a-4c), focus on a shape-defining cut, such as a sculpted TWA (Teeny Weeny Afro) or a high top fade, ensuring the hair is carefully shaped when dry to avoid shrinkage surprises and achieve the desired geometry, often seen paired with sharp, artistic line work or deep fades for an undeniably fierce edge.
Styling these short cuts requires specialized attention to texture definition and moisture retention. For the sleek pixie styles, use a lightweight leave-in conditioner followed by a small amount of texturizing paste or wax applied only to the ends to create separation and piecey-ness, avoiding product buildup at the roots. A quick blast of cool air from a blow dryer can enhance the lift on top layers. If you are sporting a tighter natural texture, the ‘how-to’ centers around hydration and defining creams. After washing, apply products like curl milk or rich defining custard while the hair is soaking wet, using the “shingling” method (applying product to small sections strand by strand) to ensure maximum definition and minimal frizz. For cuts featuring detailed designs or razor lines, use an alcohol-free edge control or gel to maintain sharp perimeter lines throughout the day. Regardless of texture, sleeping with a silk or satin bonnet is paramount to preserving shape, preventing frizz, and locking in the moisture applied during your styling routine.
Customization is what elevates a short natural cut from basic to chic. Consider incorporating elements like deep side parts for added drama, or exploring shaved geometric designs, as demonstrated in the middle column, which offer an architectural and personalized flair. When choosing a fade, decide whether you prefer a skin-close bald fade for maximum contrast or a softer shadow fade for a more subtle transition. The front pieces are crucial for framing the face; experiment with a soft, side-swept fringe for a romantic look, or embrace a blunt, micro-bang for a retro, avant-garde feel. Expert tip: Due to the precision required, short natural cuts need frequent maintenance, typically every 3-5 weeks, to keep the lines sharp and the shape intact. Invest in quality styling tools and products specifically formulated for your porosity level to keep your short natural hairstyle vibrant and healthy between appointments.
11 Versatile Medium Hair Cuts
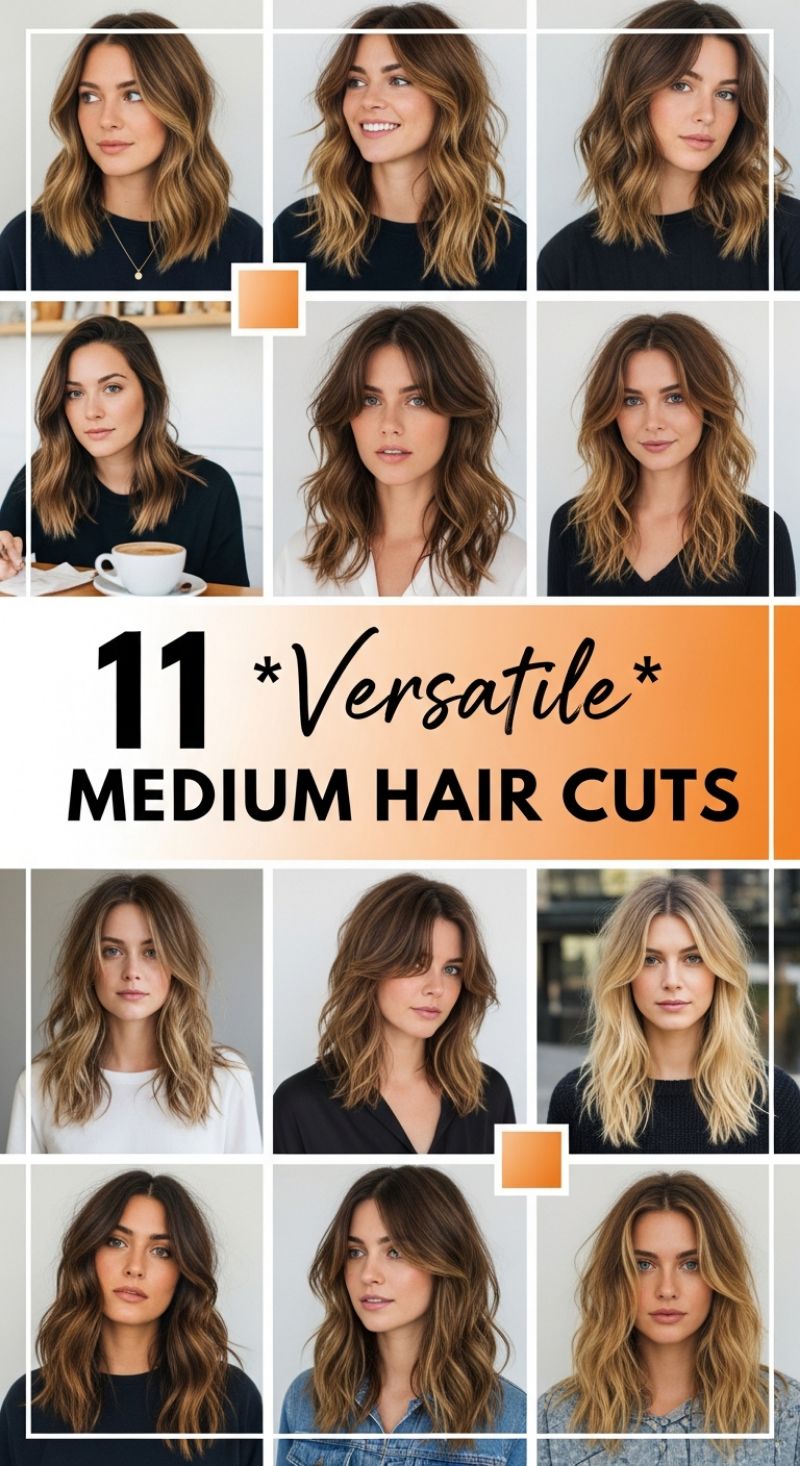
The medium-length haircut is universally flattering and highly adaptable, making it the ultimate choice for those seeking style without high maintenance. The examples here showcase the modern mid-length shag or textured lob, characterized by strategic, soft layering that hits between the collarbone and the chest. This cut relies heavily on ‘invisible layers’ created using slide cutting or point cutting techniques. These internal layers remove bulk and encourage natural movement and wave, preventing the style from looking blocky or heavy. For a truly versatile base, ask your stylist for long, seamless layers that start around the chin, ensuring the style looks chic whether worn straight, wavy, or pulled into an updo.
Achieving the signature voluminous, undone texture seen in these styles requires the right product application and minimal heat styling. After washing, prep damp hair with a root-lifting spray or volume mousse. If using heat, focus on achieving a soft wave rather than a tight curl; a 1.25-inch curling wand or iron is ideal. When wrapping sections around the iron, always leave the last inch of the ends untouched. This crucial step keeps the look contemporary and tousled, avoiding an overly manicured finish. Once cooled, spray a generous amount of lightweight texturizing spray or dry shampoo throughout the mid-lengths and ends, then vigorously shake the hair out or brush through with fingers to break up the waves and maximize volume.
A key component enhancing the versatility of these medium cuts is the integration of a flattering fringe, most often seen here as a soft curtain or ‘bottleneck’ bang. Curtain bangs require the shortest point to graze the bridge of the nose, sweeping out longer to merge seamlessly with the chin-length layers. This face-framing element instantly softens facial features and adds structure, especially crucial for styles relying on a center part. To maintain this lived-in movement, ensure regular trims every 6 to 8 weeks to preserve the shape of the layers, and opt for dimensional color techniques like balayage or subtle foiling to further highlight the texture and depth of the cut.
14 Voluminous Long Hair Inspiration
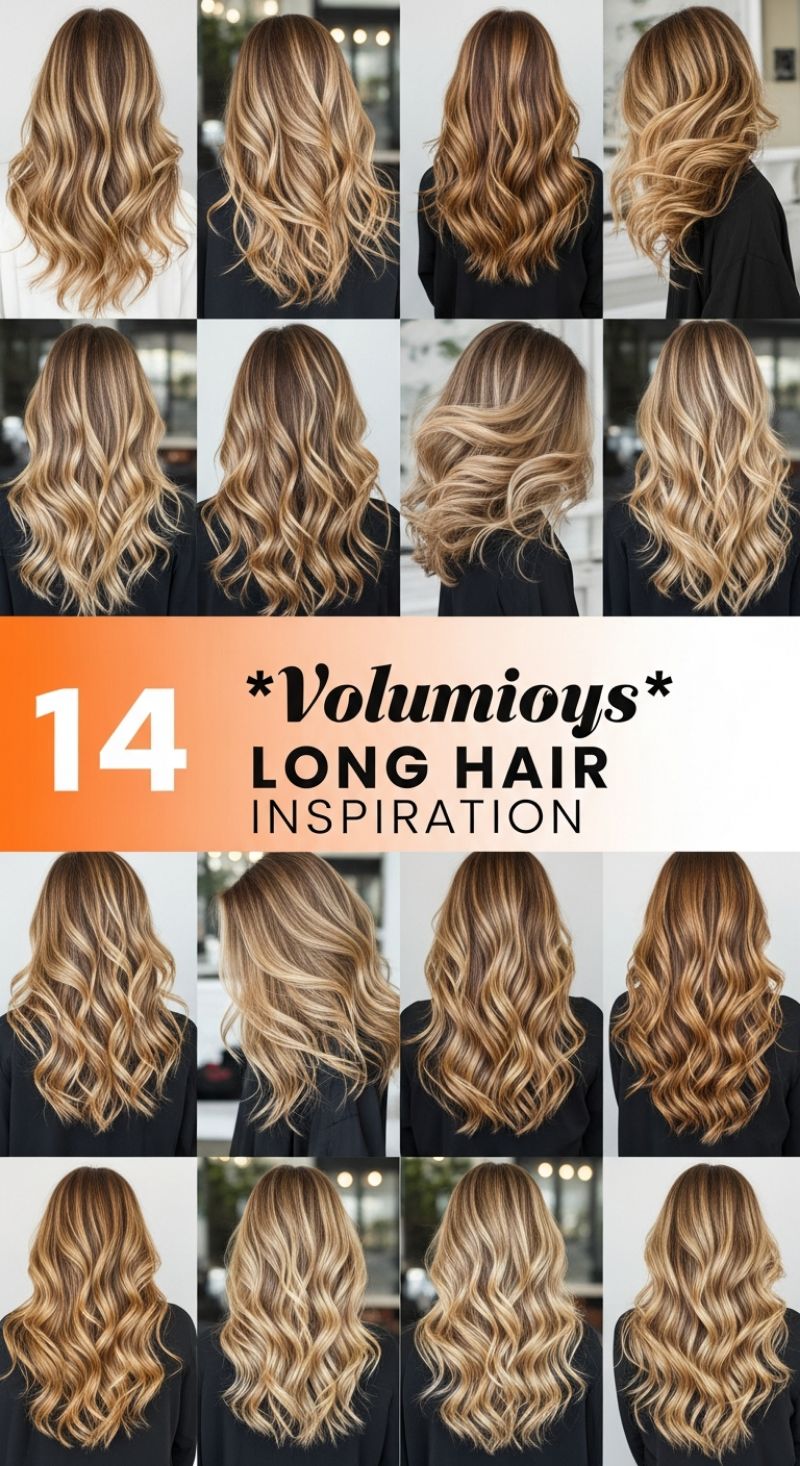
This compilation of 14 looks perfectly captures the essence of modern, voluminous long hair. The defining feature across all styles is the incredible dimension and movement achieved through expert color placement. These looks predominantly utilize variations of balayage and foilayage, seamlessly blending rich brown bases with stunning ribbons of caramel, honey blonde, and soft golden highlights. This strategic placement, often focusing on face-framing sections and the mid-lengths and ends, creates a visual effect of greater density and texture. The resulting dimensional color prevents the long hair from looking flat or monolithic, allowing the soft, tumbling waves to catch the light beautifully. If you seek hair that is dynamic and full of life, requesting deep, yet blended dimensional color with a natural root melt is essential to make the volume truly pop.
To replicate this voluminous long wave, the foundation begins with the cut. Long, internal layers are critical, as they lighten the bulk of the hair, allowing the ends to bounce and curl without sacrificing overall length. For styling, start with damp hair treated with a heat protectant and a root-lifting spray or lightweight volumizing mousse. Blow drying technique is paramount: use a large round brush to lift the hair at the root, directing the air upward. For maximum lift, consider flipping your head upside down during the initial drying stages. Once completely dry, use a large barrel curling iron (1.25 to 1.5 inches) or hot rollers. The key to these effortless waves is alternation—curl sections away from the face, then alternate directions with subsequent sections. Crucially, do not touch the curls until they are completely cool.
The final step is transforming those structured curls into soft, voluminous waves. Once cooled, lightly brush through the hair using a wide-tooth comb or a soft paddle brush to meld the curls together, creating that signature glamorous, lived-in texture. Finish with a flexible hold hairspray and a texturizing spray or powder applied at the roots for lasting lift throughout the day. For maintenance, protect your investment in dimensional color by using color-safe, sulfate-free shampoos. Long, highlighted hair requires diligent moisture treatment, so incorporating a weekly deep conditioning mask will keep the blonde pieces bright and the ends healthy, ensuring the hair retains its bounce and shine, making this high-impact style look fresh and sophisticated day after day.
The Transformative Power of the Pixie Cut: 8 Ways to Wear the Iconic Short Style

The pixie cut is the ultimate statement of confidence and style, offering unparalleled versatility captured beautifully in these eight distinct variations. Far from being a uniform, singular look, the modern pixie ranges from soft, feathered layers to bold, asymmetrical undercuts. To choose the right foundation, analyze your desired texture: fine hair benefits from the choppy, bleached layers seen in the upper left, adding dimension through precise slicing, while naturally wavy or curly hair can embrace volume with the soft, rounded shape shown in the auburn example. Key structural elements always involve keeping the back and sides closely cropped or tapered, which contrasts sharply with the length retained on top. This longer crown area (ranging from two to five inches) is what dictates the final style, whether it’s swept forward into piecey bangs (like the classic chocolate brown look) or dramatically slicked across the forehead for a high-fashion, graphic line (as demonstrated by the sleek black asymmetrical cut).
Styling the pixie is focused entirely on manipulating the top section to achieve volume or definition. For the high-texture, airy styles, start with a volumizing mousse at the roots of damp hair. Rough dry 90% of the way, then finish by applying a small amount of pliable texturizing paste or wax to define individual pieces. Work the product through the hair from the roots up to give the illusion of effortless height and movement, as seen in the white-blonde shaggy cut. If you are aiming for a highly specialized look, such as the dramatic teal undercut, styling is crucial: the shaved side requires minimal intervention, but the longer top needs root lift and strong-hold hairspray to maintain the gravity-defying wave structure and showcase the sharp contrast in length and color. For styles requiring smoothness, like the dark brown classic pixie, use a paddle brush and a blow dryer to smooth the hair down around the face, finishing with a drop of shine serum to reduce frizz and lock in sleekness.
Expert maintenance is non-negotiable for keeping a short style looking intentional rather than overgrown. Pixie cuts require shape maintenance every four to six weeks, particularly if the cut features an undercut or tight tapering that quickly loses its line. Furthermore, daring color choices—like vivid teal or intense platinum blonde—demand a rigorous color-safe hair care routine to prevent fading or brassiness. When experimenting with color, remember that the shorter length means dramatic color changes are less commitment; the teal hue can be grown out or swapped relatively quickly. Overall, the magic of the pixie lies in its ability to adapt: use product to create a fierce, structured look for evening (like the slick black style), or simply let the texture air-dry with minimal effort for a polished, day-time aesthetic (like the soft, natural brown look).
12 Effortless Chic Hairstyles: From Simple Braids to Elegant Buns
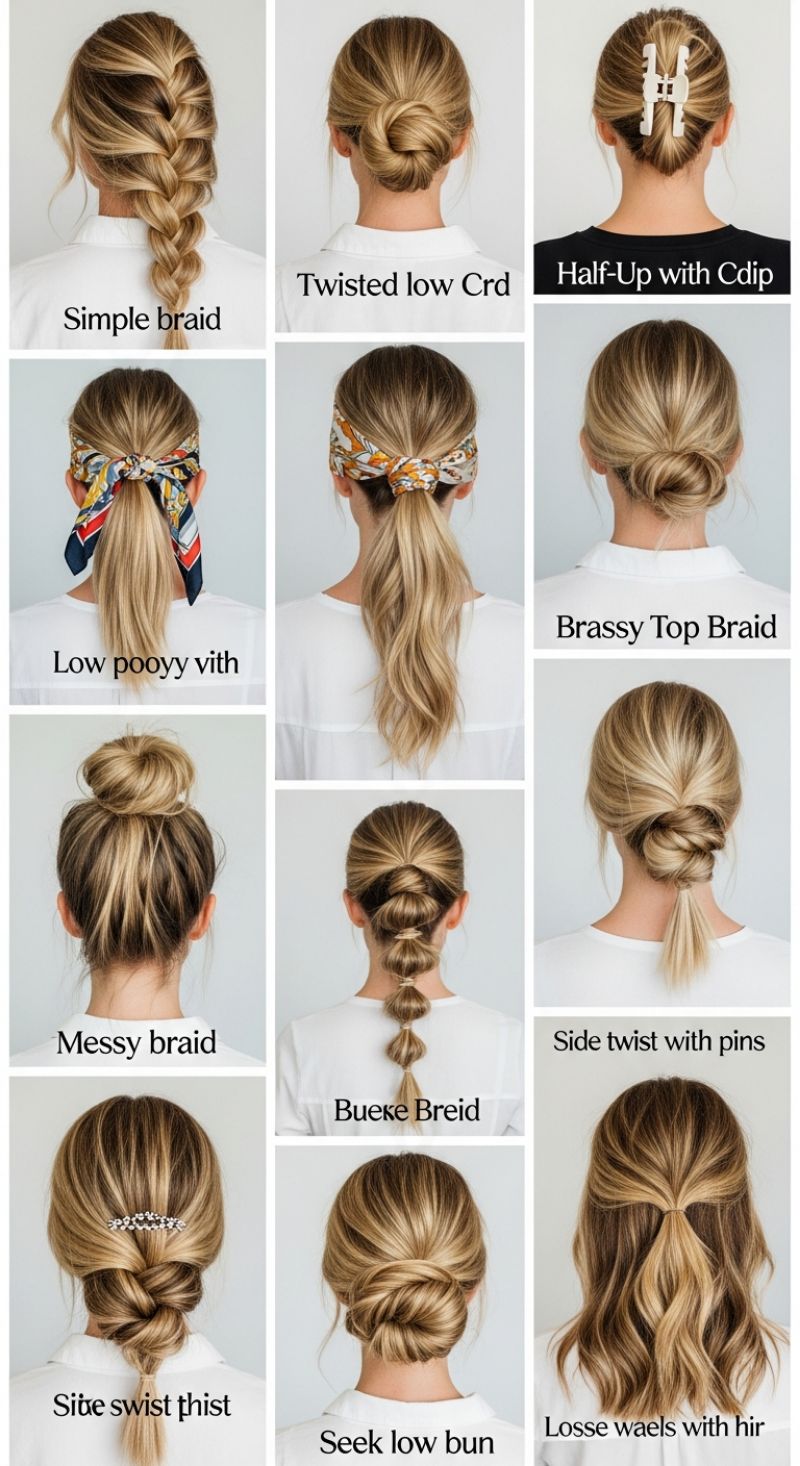
This collection provides a versatile guide to quickly achieving polished and beautiful hairstyles, suitable for everything from a busy workday to a casual weekend. The foundation of many of these looks relies on good texture, which is often achieved by starting with day-old hair or prepping fresh hair with a dry shampoo or texturizing spray. For classic styles, master the Simple Braid first, ensuring uniform tension and then gently pancaking (pulling apart the loops) for added volume and a softer finish. For a playful, modern twist, try the Bubble Pony (labeled ‘Bueke Breid’). To achieve this, secure a mid-height or low ponytail, then place clear elastics down the length every few inches. Once secured, gently puff out the hair between each elastic to create the rounded ‘bubble’ effect. Expert tip: These styles look exponentially more sophisticated when accessorized; elevate a simple low ponytail by tying a patterned silk scarf (like the ‘Low pooyy vith’ style) around the elastic, letting the ends drape dramatically down your back.
For sophisticated updos, the image showcases several variations on the low bun, which are ideal for professional settings. The Twisted Low Bun or ‘Seek low bun’ is achieved by creating a low ponytail, splitting it in half, twisting the two sections together tightly, and then wrapping the resulting rope around the base before securing with bobby pins. For the structured Side Twist looks, take sections of hair near your temples and twist them back towards the center nape of your neck, securing them either into a small knot (like the ‘Site swist thist’ or ‘Side twist with pins’ looks) or incorporating them into the base of a low bun. This technique maintains smoothness at the crown while introducing elegant detail at the back. When tackling a voluminous look like the Messy High Bun, focus on securing the base first. Use a clear elastic to create a high ponytail, then aggressively backcomb the tail for maximum texture before loosely wrapping it around the elastic and pinning it haphazardly, allowing strands to fall naturally for that intentional, undone aesthetic.
Finally, the Half-Up styles offer the quickest path to polished hair. The modern favorite is the Half-Up with Clip, where the top half of the hair is gathered and secured with a large, statement claw clip, providing structure and ease in seconds. Alternatively, the twisted half-up (like the ‘Losse waels with hir’) involves gathering the top two sections and either tying them into a simple knot or performing a twist-through (Topsy Tail) before securing the juncture with a pin or small elastic hidden underneath. When executing any of these styles, especially on highlighted hair, pay close attention to the direction of your hair flow; twisting sections away from the face helps emphasize the dimension in the color. Always finish updos with a flexible-hold hairspray focused primarily on the perimeter of the style, ensuring the look holds all day without feeling stiff or helmet-like.
7 Fabulous Easy Curly Hair Looks
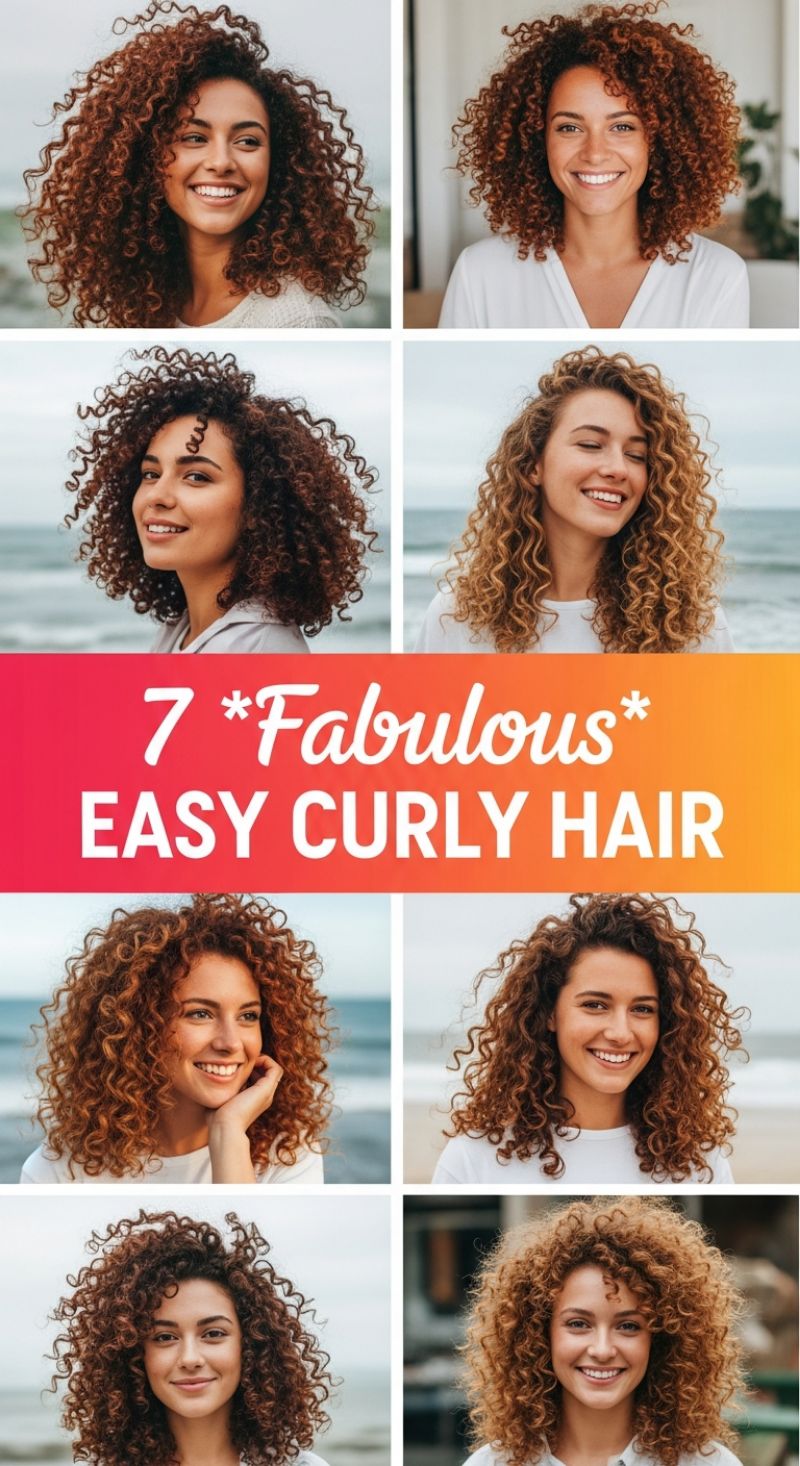
The seven beautiful examples showcased here illustrate the potential of naturally curly hair when properly cared for. These looks emphasize glorious volume, perfect definition, and minimal frizz, achieved through prioritizing moisture and gentle handling. The foundation of ‘easy’ curly hair lies not in complex styling, but in establishing a consistent, hydration-focused wash day routine that promotes curl clumping. Notice the varied curl patterns in the image, ranging from loose spirals (often Type 3A) to tighter corkscrews (3C); regardless of your specific texture, the key to replicating this vibrant bounce is ensuring the hair cuticle is sealed and the coils are uniformly coated with moisturizing and defining products. This approach is ideal for those seeking to maximize their natural texture without extensive heat application or intricate manipulation.
To achieve this level of effortless definition, you must start your routine in the shower with a sulfate-free cleansing wash and follow with a rich, moisturizing conditioner. Detangling should only occur when your hair is fully saturated with conditioner, using a wide-tooth comb or your fingers to gently work through knots, always starting from the ends and moving upward. The pivotal next step is product application on soaking wet hair. Immediately after rinsing the conditioner, apply a generous layer of leave-in conditioner or curl cream, ensuring even distribution from root to tip. Crucially, layer a strong-hold styler—such as a curl gel or mousse—over the leave-in product. Use the ‘praying hands’ method to smooth the products down the entire length of the hair, followed by gentle scrunching upward toward the scalp to encourage the natural curl pattern to spring into formation. This technique of layering styling products locks in both moisture and definition, setting the stage for a lasting, frizz-free look.
Proper drying is essential for defining and boosting the volume seen in these styles. Avoid rubbing your hair with a standard terry cloth towel, as this disrupts the cuticle and guarantees frizz; instead, gently ‘plop’ your curls using a microfiber towel or an old cotton t-shirt to absorb excess water without disturbing the curl pattern. The most effective way to dry and lock in volume is by diffusing. Set your diffuser on medium heat and low speed, gently cupping sections of hair and bringing them up toward the roots, holding until the hair is 80-90% dry. Once your hair is fully dry, if the gel has created a stiff residue or “cast,” gently ‘scrunch out the crunch’ (SOTC) by massaging the hair with hands lightly coated in a few drops of lightweight oil. For maintaining second-day curls, refresh them by spritzing with a mixture of water and leave-in conditioner, gently reforming the coils with your fingers, or by using the diffuser only at the roots for a quick volume boost. Always protect your definition overnight by sleeping with your hair loosely gathered in a ‘pineapple’ bun secured at the top of your head, preferably resting on a silk or satin pillowcase.
12 Sleek Straight Hair Ideas
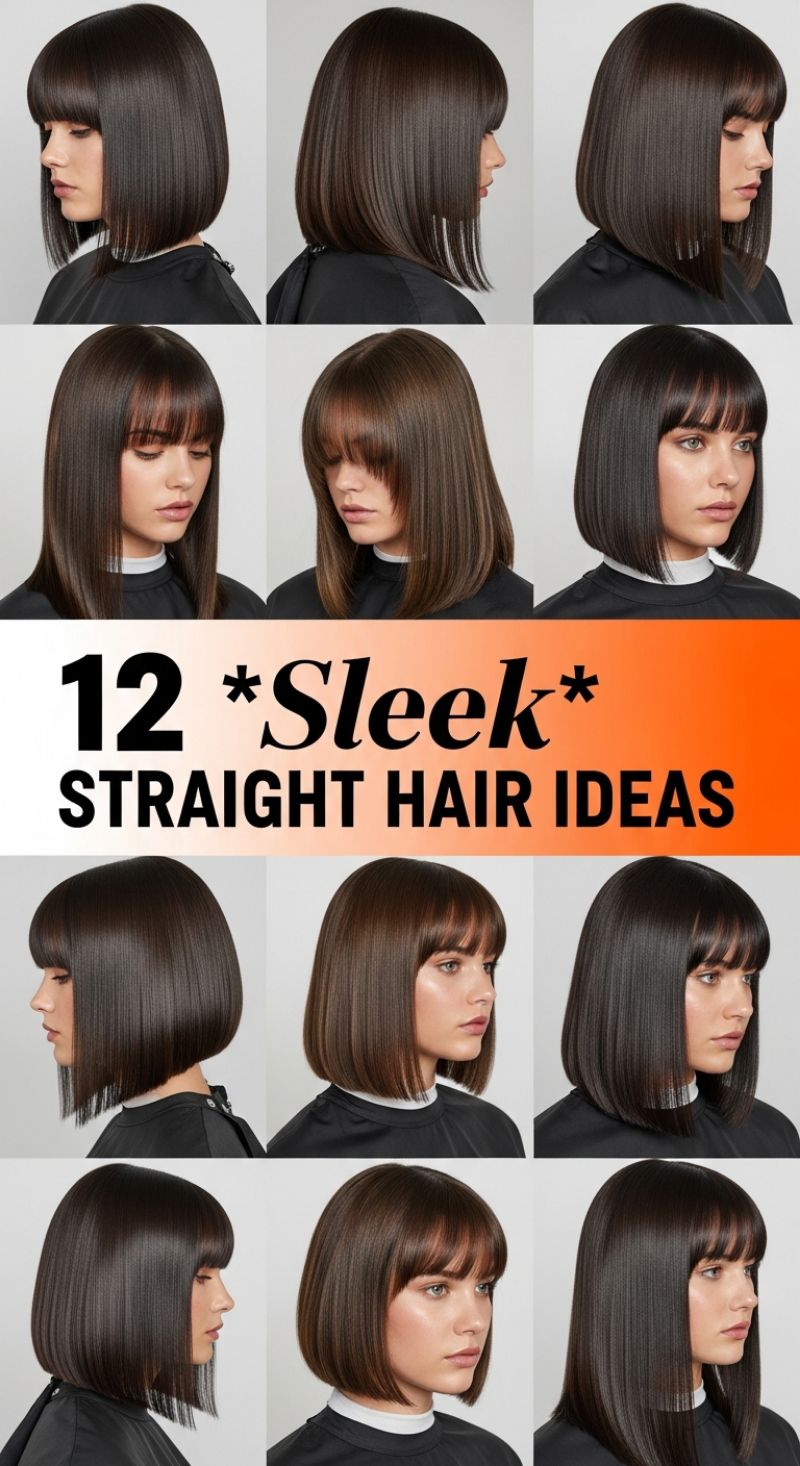
The cornerstone of these 12 sleek straight looks is flawless execution and unparalleled, high-wattage shine. This iconic style is characterized by its liquid-like smoothness, sharp, almost architectural lines (most commonly seen in blunt bobs or lobs), and often, a dense, statement-making fringe. To replicate this high-gloss finish, begin with freshly washed hair prepped with a moisturizing smoothing shampoo and conditioner designed to combat frizz. Before applying any heat, liberally saturate the hair with a professional-grade heat protectant spray, which is essential for maintaining hair integrity under high temperatures. Follow this with a small amount of shine-enhancing serum or lightweight oil, focusing primarily on the mid-lengths and ends. Blow-dry the hair using a concentrator nozzle and a paddle brush, pulling the sections taut against the head to effectively close the hair cuticle. This initial smoothing process minimizes frizz and creates the naturally reflective surface required for truly sleek straight hair, setting the stage for the final straightening passes.
Achieving the signature poker-straight perfection requires meticulous sectioning and precise temperature control. Divide the hair into thin, manageable 1-inch sections, ensuring the iron only touches clean, pre-smoothed hair. Use a professional-grade ceramic or titanium flat iron set to the optimal temperature for your hair type—typically between 350°F and 400°F for medium-textured hair. Glide the iron smoothly and consistently from root to tip in a single, fluid pass whenever possible, minimizing repeated heat exposure. For the classic bob shapes showcased here—ranging from chin-length blunt cuts to collarbone-grazing lobs—ensure the very ends are either held perfectly straight or gently guided inward for an exceptionally polished, tailored finish. The fringe, whether a blunt eye-grazing bank or a softer, wispy sweep, should be addressed last. Use a smaller flat iron or a low heat setting to lightly straighten the bangs, always guiding them slightly away from the root to maintain natural movement and prevent them from appearing flat against the forehead.
Maintaining this razor-sharp style and intense luminosity is vital for the look’s longevity. Once the hair is completely cooled down, apply a fine mist of anti-humidity or weather-proofing spray—sleek styles are highly susceptible to frizz caused by environmental moisture. If flyaways are an issue, use a light-hold, flexible hairspray or a dry oil spray to gently smooth them down without adding stiffness or weight. For added depth and dimension, which is particularly beautiful in the rich brunette shades featured, consider incorporating a professional gloss treatment or a temporary shine glaze into your routine every few weeks to boost reflectivity. Expert tip: To preserve the sleekness overnight, gently wrap the hair tightly around the head and secure it, or switch to a silk pillowcase or bonnet. This technique prevents kinks and friction frizz, extending the life of your pristine straight hairstyle.
8 Perfect Half Up Styles
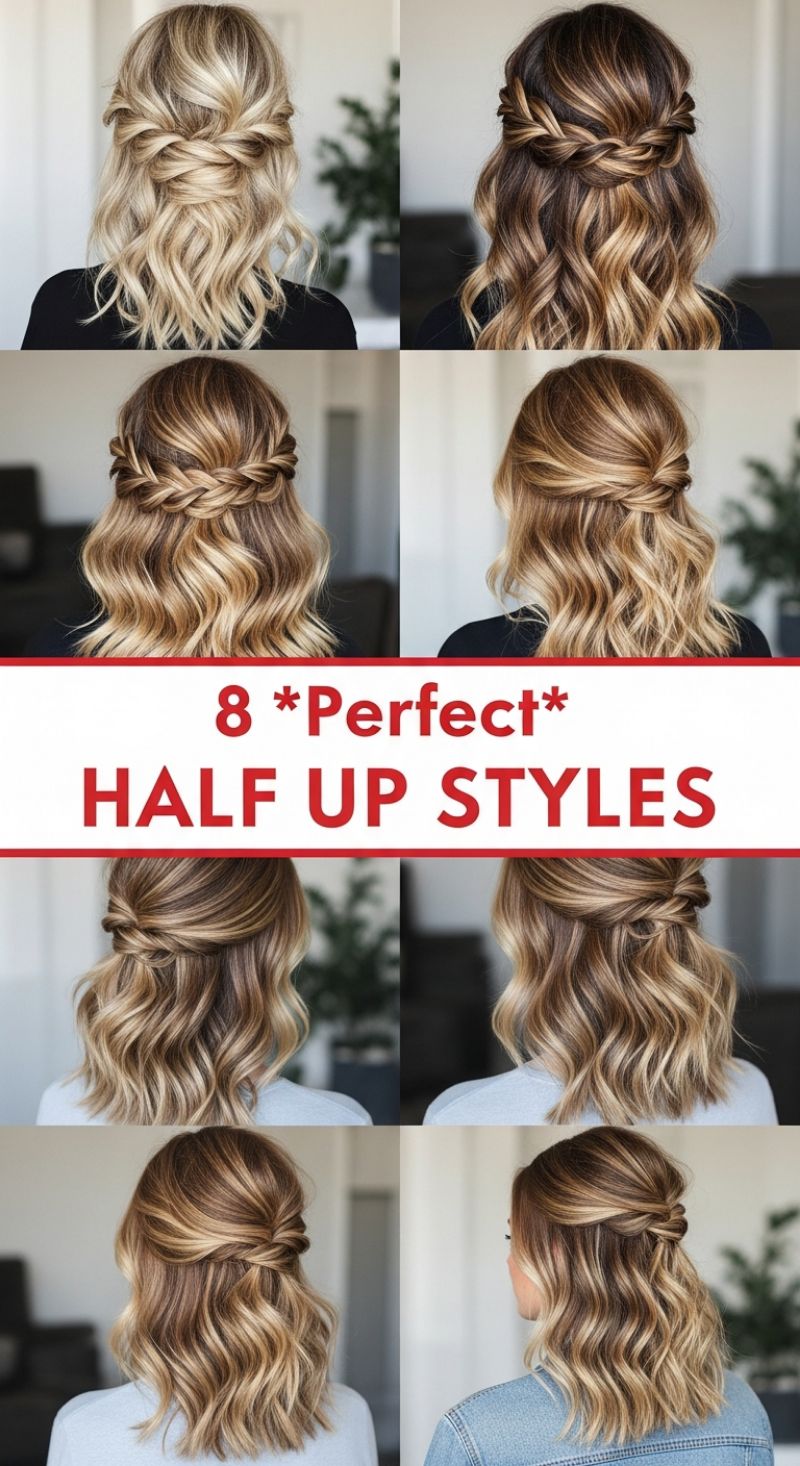
The half-up hairstyle is arguably the most versatile look in any hair arsenal, offering the formality of an updo while showcasing the length and texture of your flowing locks. These eight variations demonstrate how easily this style can transition from a casual daytime look to elegant event wear, especially when paired with soft, dimensional waves, as seen in the examples. To achieve the voluminous, effortless texture shown, start by curling your entire mane using a 1.25-inch curling iron, leaving the ends slightly straighter for a modern finish. Before beginning the updo, mist your roots and mid-lengths with a texturizing spray or dry shampoo. This provides the necessary grip and volume, ensuring your twists and knots hold securely without slipping, which is crucial for recreating these polished yet relaxed looks.
For the simpler, knotted or twisted styles (like the ones shown in the top left and bottom row), you will focus on gathering sections from above the ear line. To execute the basic twisted knot: take a section of hair from the right temple and twist it loosely backward, securing it temporarily near the center back of your head. Repeat this action with a section from the left temple. Bring both twisted sections together. Instead of tying them in a standard knot, twist them around each other once or twice and then secure the resulting knot flat against the back of your head using bobby pins crossed in an ‘X’ shape for maximum stability. The secret to achieving the beautiful volume visible in these photos is ‘pancaking’—gently pulling apart the edges of the twists and knots once they are pinned in place. This technique softens the line, maximizes fullness, and gives the style that coveted, undone elegance.
If you prefer the braided halo effect (as featured in the top right and middle left images), the technique requires slightly more precision. Start a Dutch braid (where strands are crossed underneath) or a simple French braid near the temple. Instead of braiding downward, direct the braid horizontally, following the curve of your head just above the ear. Braid only partially, adding small sections of hair to the braid as you move toward the back center. Once you reach the midpoint, secure the braid with a clear elastic, or seamlessly transition it into a simple three-strand braid before pinning it firmly across the back to meet the other side (if creating a full crown). Remember to keep the tension relatively loose while braiding so you can easily pull apart the loops for thickness afterward. Once your half-up style is complete, pull out a few face-framing strands around the temples for a softer profile, and finish with a medium-hold hairspray to lock your waves and your beautiful updo firmly in place.
5 Quick Messy Buns

The messy bun is the quintessential effortless hairstyle, capable of transitioning seamlessly from a workout to a wedding reception. This section outlines five quick variations, ranging from high-volume updos to chic, relaxed half-up styles. To master the classic high messy bun (seen in the top-left and bottom-right images), start by applying a generous amount of dry shampoo or texturizing spray to the roots and mid-lengths, even if your hair is clean; this foundation is crucial for texture and grip. Flip your head upside down and gather your hair into a high ponytail near the crown. Secure the ponytail once, then on the second loop, only pull the hair halfway through, creating a large loop or ‘base.’ Twist the remaining tail around the base and secure with a second elastic or several bobby pins. The secret to its quick, messy appeal lies in the final steps: gently tug on sections of the bun to increase volume and loosen strands around the hairline and nape to frame the face, giving that soft, undone finish.
For a more formal or business-appropriate look, adopt the low messy bun (center-left image). Begin with a low ponytail secured just above the nape of the neck. Instead of twisting the hair, try the ‘knotting’ technique: divide the ponytail into two or three sections, loosely knot them together against the head, and tuck the ends into the base, securing generously with pins. This creates a denser, flatter bun profile that looks refined yet relaxed. Alternatively, embrace the popular half-up, half-down messy bun, perfect for showcasing highlights or layered medium to long hair (top-right image). Section off the top quadrant of hair, starting from the temples and sweeping back to the crown. Secure this smaller section into a high mini-ponytail and create a small, tight messy knot or loop. The rest of the hair should be left down and styled with soft waves to maximize contrast between the polished lengths and the casual bun.
Expert stylists emphasize that the ‘quick’ element comes from focusing on security first and messiness second. Always ensure the base of your chosen style—whether high or low—is firmly secured before you begin pulling strands to create the messy effect. Use clear elastic bands or bands that match your hair color for the initial tie-off. Once the shape is established, finish with a flexible-hold hairspray applied directly to the bun and a fine-tooth comb used to back-brush the pieces you’ve pulled out at the crown and hairline. This subtle teasing provides lift and volume, preventing the style from flattening throughout the day while maintaining the desired ‘I woke up like this’ vibe.
10 *Fresh* MEN’S HAIRCUTS
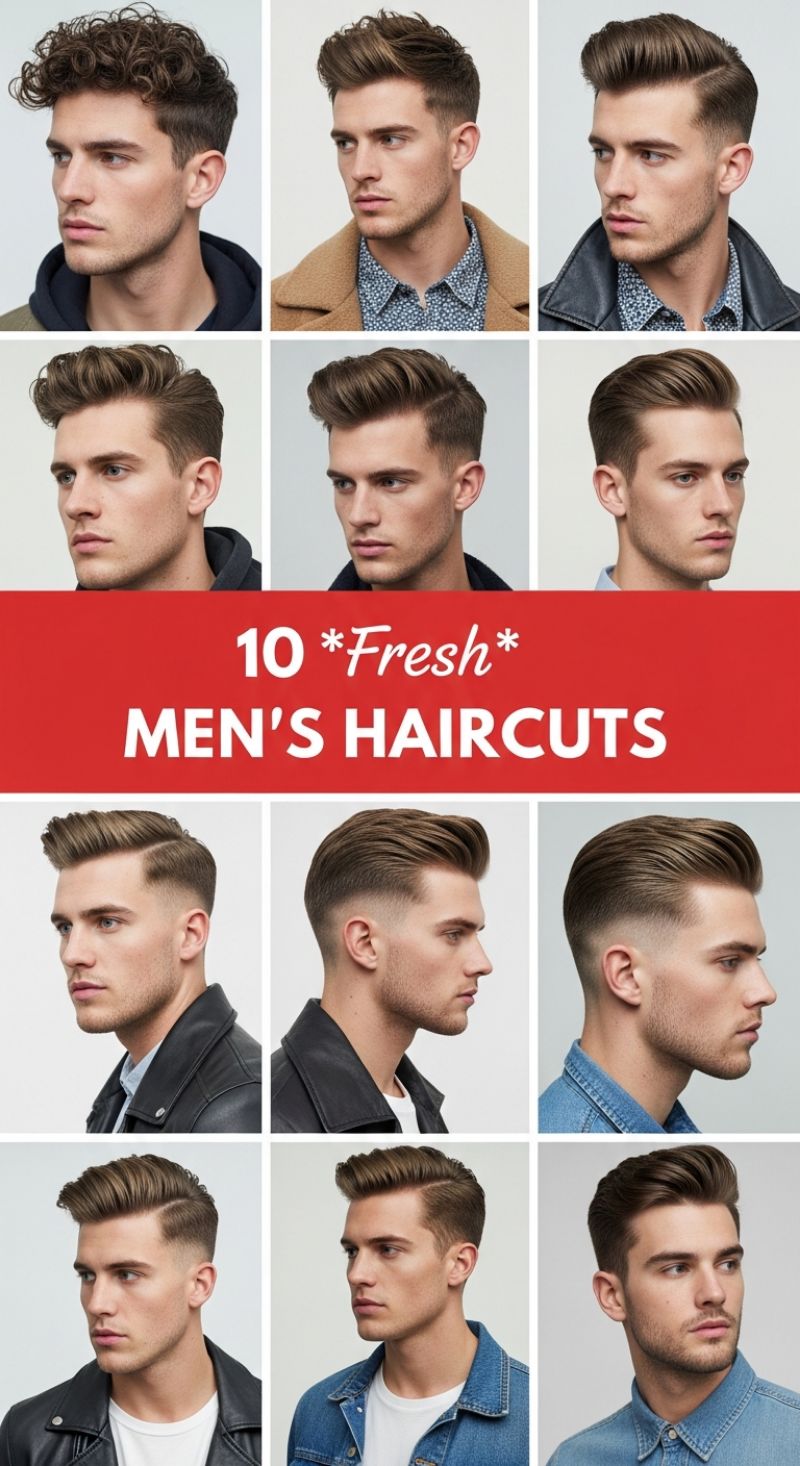
This curated collection highlights the definitive trends in modern men’s grooming: high-contrast short sides paired with adaptable, medium-length tops. The core feature uniting these 10 looks is the precision fade, ranging from skin-tight bald fades to subtle tapered cuts, which provides a clean, sharp framework suitable for professional and casual settings alike. To achieve the initial foundation, instruct your barber on the desired level of fade
a low fade follows the natural hairline near the ear, while a mid or high fade rises toward the temple, offering more dramatic contrast. Ensure the blend (the transition zone) is executed seamlessly; a common mistake is leaving a harsh shelf line. For those considering textured styles, like the curly crop seen in the upper left, specify a longer guard length (e.g., #3 or #4) starting higher up to allow the natural curl pattern to frame the face while maintaining shortness on the nape and sides. This structure ensures that no matter the top style chosen, the overall look remains tidy and meticulously maintained. The true versatility of these cuts lies in the styling of the substantial length left on the crown. To replicate the voluminous quiffs and defined comb-overs displayed here, preparation is key. Begin with damp hair and apply a pre-styler, such as a volume-boosting mousse or sea salt spray, distributing it evenly from root to tip. The next crucial step is the blow-dry: use a round or vent brush to lift the hair up and back, directing the airflow against the natural growth pattern. This technique builds maximum height and hold before any final product is applied. For the sleek, side-parted looks, utilize a high-shine pomade or wax, drawing a definitive part line and meticulously sweeping the hair into place. Conversely, if you prefer the modern, matte texture seen in several variations, opt for a dry clay or paste, warming the product in your palms before running it through the hair to enhance separation and provide flexible hold without the gloss. Maintaining these sharp, high-definition styles requires commitment to regular upkeep. Because the fade is the focal point, trims are essential every three to four weeks
any longer and the shortness will grow out, softening the crisp lines that define the look. Between barber visits, focus on preserving the health of the top length; regular deep conditioning prevents brittleness, especially when using high-hold products and heat styling tools. When styling the top length, remember to tailor the products to your hair type. Men with fine hair should prioritize lightweight, volume-adding tonics to prevent the hair from collapsing, whereas those with thicker or curlier hair may require heavier, oil-based pomades for maximum control and definition. Perfecting these modern looks is less about the cut itself and more about mastering the blow-dry and choosing the precise product combination for durable, structured volume.
15 Sweet Toddler Hair Styles: Easy and Adorable Looks for Little Ones

Styling toddler hair requires patience, gentleness, and prioritizing quick, comfortable styles that can withstand active play. The collection of 15 looks showcases fundamental techniques suitable for fine, medium, or curly hair textures. For parents new to styling, start with simple half-up/half-down techniques, which effectively keep hair out of the face while maintaining softness and reducing fussiness. Use soft, seamless hair elastics to minimize snagging and ensure parts are clean, as precise parting helps styles look polished, especially on fine hair. When introducing any new style, such as pigtails or small buns (as seen in the top row), ensure the tension is minimal to avoid discomfort on the sensitive scalp. Expert advice dictates using a wide-toothed comb or detangling brush specifically designed for children to minimize breakage and maximize comfort, always working from the ends upward when detangling.
Braids are a cornerstone of effective toddler hairstyling, offering a neat, durable solution for everyday wear. The examples here include French or Dutch braids tracing the hairline, small front twist braids integrated into half-up styles, and protective styles like box braids adorned with colorful beads, suitable for coily and kinky textures. To achieve the beautiful hairline braids seen on several children, practice the technique of starting a French or Dutch braid right above the ear and directing it across the forehead, securing it just behind the opposite ear or allowing it to cascade into a small ponytail. Remember that while tighter tension is required near the roots to ensure the braid lasts through a day of activity, the hair being woven should be loose enough to not pull uncomfortably. For naturally curly toddlers, moisture is key; utilize a cream-based leave-in conditioner before braiding or styling to define curls, prevent frizz, and make the overall look polished and much easier to manage.
Accessories are not just decorative; they are practical tools for completing and securing a toddler hairstyle. Large or small bows (as demonstrated beautifully in the half-up ponytails and high buns) instantly elevate a simple look, while also hiding elastics and adding a focal point. For a very fast yet stylish updo, the high, single bun or half-bun ponytail is ideal for keeping active toddlers cool and neat. Section off the top quadrant of the hair, pull it straight up to the crown, and secure it with an elastic before wrapping the hair into a small loop or bun. For toddlers with short or layered hair, tiny snap clips or decorative pins can be used to hold back small flyaways near the temples or ears. Crucially, always use accessories that are securely fastened and too large to be a choking hazard, prioritizing safety alongside style when selecting the finishing touches for these sweet and easy looks.
8 Flirty Shoulder Length Styles
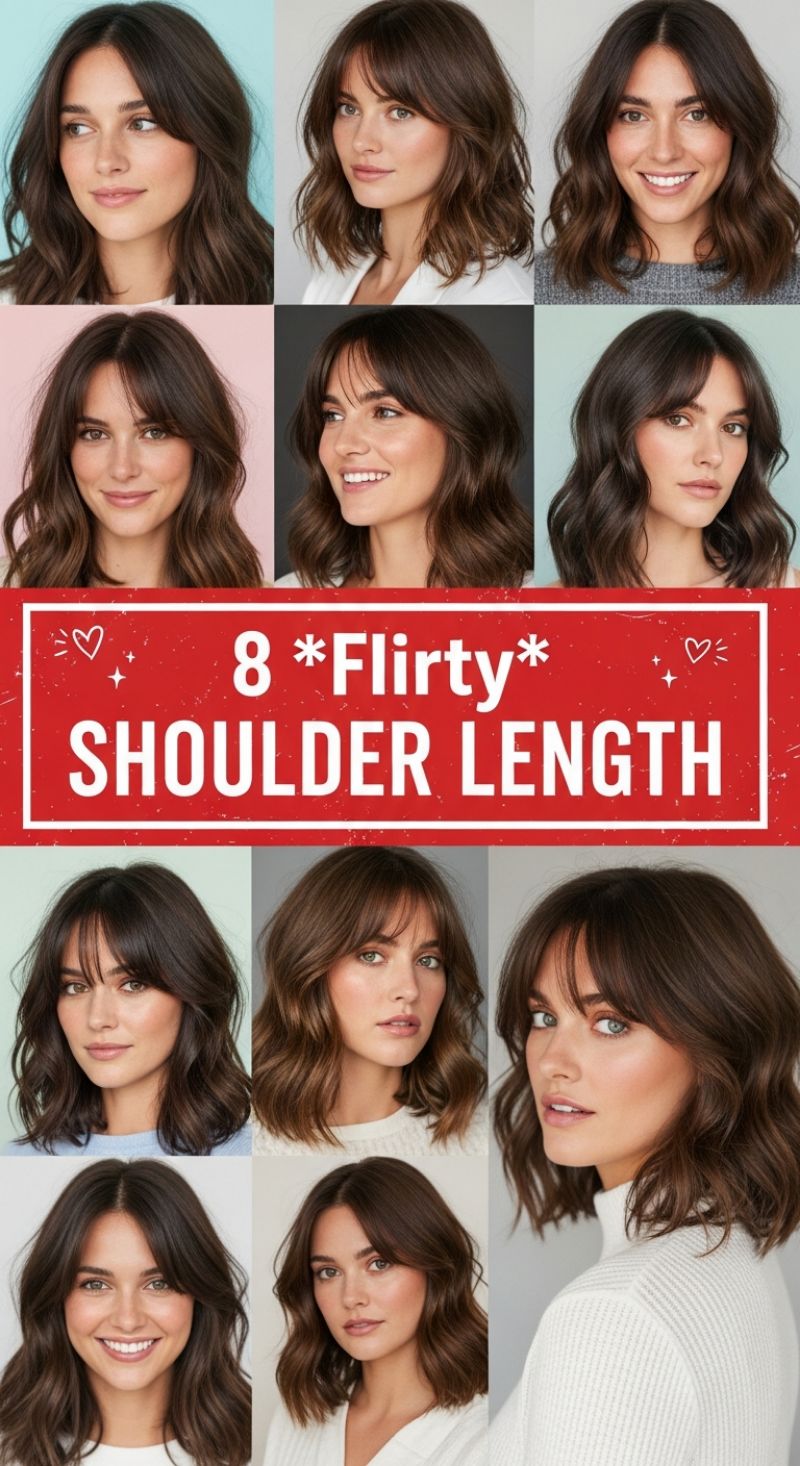
This comprehensive collection showcases the ultimate ‘midi’ cut: the versatile, flirty shoulder-length style. This length is universally flattering, hitting the collarbone to draw attention to the jawline and neck, while remaining extremely manageable for daily styling. The visual appeal of these eight looks centers on soft movement and touchable volume, achieved through subtle, well-placed layering and relaxed waves. The rich brunette color palette featured here is enhanced by natural dimension, such as subtle balayage, which catches the light beautifully and emphasizes the hair’s natural texture, giving the cut depth and bounce without appearing heavy or monotone. This medium length is perfect for anyone seeking a low-maintenance yet sophisticated look that retains volume and shape.
A critical element unifying many of these highly desirable styles is the deliberate incorporation of a fringe, ranging from full, feathery bangs to soft, cheekbone-grazing curtain bangs. These face-framing components are vital for adding youthfulness and structure, instantly elevating the cut’s ‘flirt’ factor. To achieve this airy, voluminous effect, instruct your stylist to implement seamless layers that begin around the chin and blend into the length, always complementing this with a customized fringe that suits your face shape. Styling the bangs correctly is key to the entire look; use a small round brush and a blow dryer to sweep the fringe forward and slightly outwards, creating that coveted, soft curve. Avoid excessive heat or heavy products on the bangs to ensure they maintain their natural lift and prevent them from separating awkwardly. Maintaining this precise length requires regular trimming, ideally every 6-8 weeks, to ensure the ends stay healthy and the shape doesn’t fall flat or curl under too much.
Replicating these effortless, beachy-wave styles at home requires prioritizing texture and protecting the hair during heat styling. Start with a volume-boosting mousse or a light sea salt spray applied generously from the mid-shaft to the ends on damp hair. Use a large barrel curling iron or wand (1.25 to 1.5 inches is ideal) and wrap sections of hair away from your face, crucial for achieving that open, breezy look. Importantly, leave the last inch of the ends uncurled; this ensures a modern, relaxed finish rather than a formal ringlet. Once the curls have cooled completely, gently run your fingers or a wide-tooth comb through the hair to soften the waves and break them up into an organic, undone pattern. Finish with a flexible-hold hairspray or a light texture powder applied at the roots to ensure maximum bounce and lasting movement throughout the day. For extra volume on the second day, a dry shampoo concentrated at the crown will help refresh the roots and maintain the desired shoulder-length lift.
10 Dreamy Wedding Guest Hair Ideas
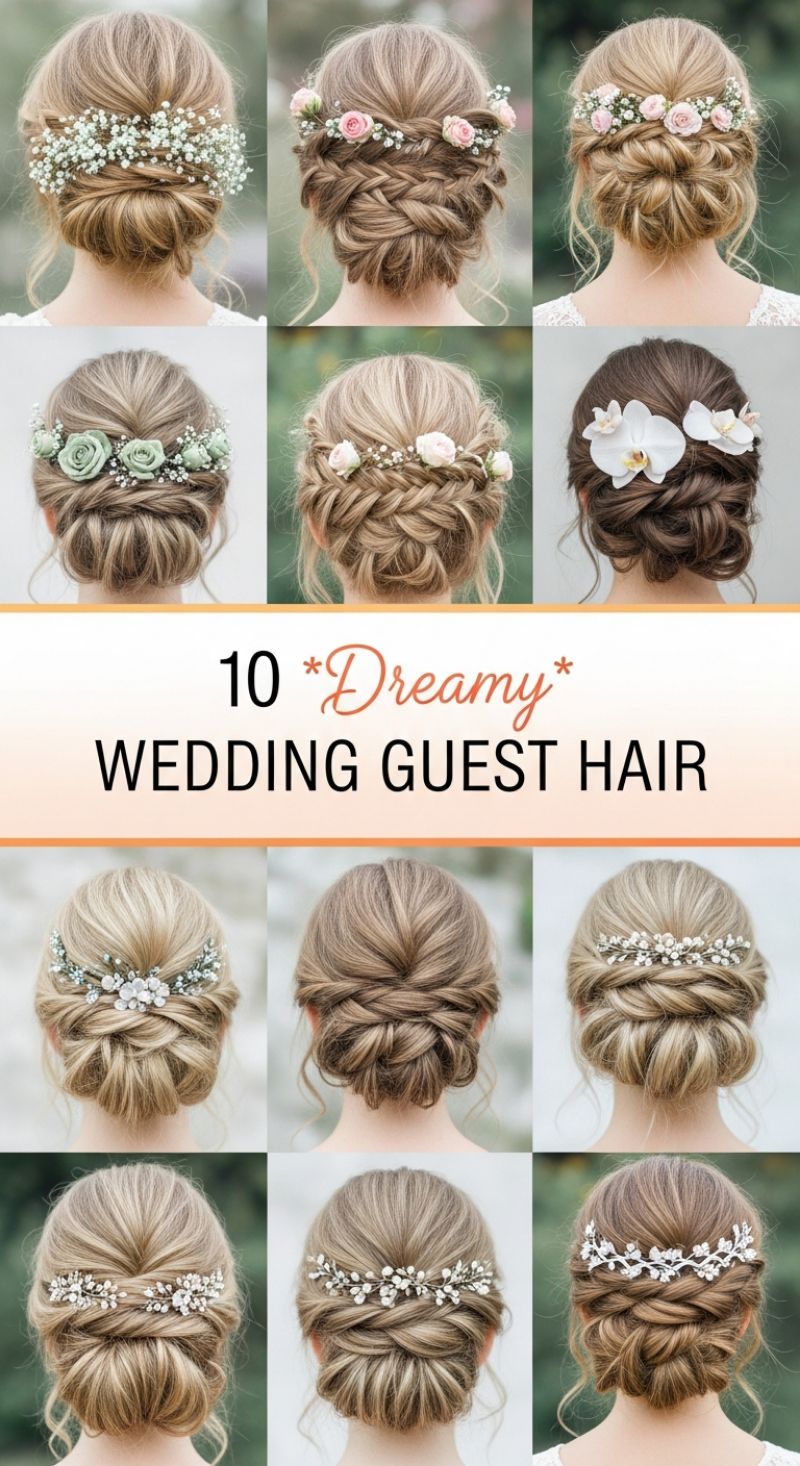
The wedding guest updo is all about achieving romantic elegance without overshadowing the bride. The gorgeous styles showcased here rely on intricate texture, volume, and artful accessory placement, making them universally flattering and perfect for any formal event. To replicate this level of dreamy volume, start by prepping the hair thoroughly. Whether your hair is short, medium, or long, dry texture spray or a light volumizing mousse applied to dry hair is essential. If your hair is naturally straight, adding loose waves with a large barrel curling iron will create the necessary grip and movement before starting the updo construction. The foundational element for nearly all these looks is a low chignon or bun, often created by gathering the hair into a loose ponytail base at the nape of the neck, then twisting, looping, or knotting sections around the base for a soft, intricate finish. Focus on keeping the top sections smooth but voluminous, gently backcombing at the crown before sweeping the sides back.
Many of these stunning styles integrate braiding techniques to add visual interest across the crown or sides. The most common technique employed here is the Dutch braid (which looks raised) or a simple three-strand braid woven horizontally before being wrapped into the central chignon. For the signature soft, bohemian look, it is crucial to ‘pancake’ or gently pull apart the sections of the braid once complete. Using a rat-tail comb, lightly tug on the outer loops of the braid to expand its width and enhance the texture, giving it that delicate, slightly undone appearance. When combining twists and braids, always secure each section independently with bobby pins hidden within the twist or beneath the braid before gathering the remaining length into the final bun structure. This modular approach ensures the hairstyle remains stable throughout a long wedding day and evening.
The crowning glory of these updos is the selection and strategic placement of accessories. The visual guide presents two main aesthetics: natural floral elements (like baby’s breath, pale roses, or orchids) for garden or rustic settings, and delicate metallic hair vines or pearlized clips for more sophisticated or black-tie occasions. Expert placement involves positioning the hair accessory immediately above the bun structure, ensuring it frames the intricate twists or braids. If using a flexible hair vine, weave it slightly into the existing texture rather than laying it flat on top. For fresh flowers, ensure the stems are trimmed short and secured with hairpins inserted *through* the accessory’s backing and into the densest part of the updo. Finalize the look with a medium-hold hairspray, focusing the spray primarily on the loose perimeter pieces to maintain softness while securing the foundational style.
9 *Juicy* CURL DEFINITION
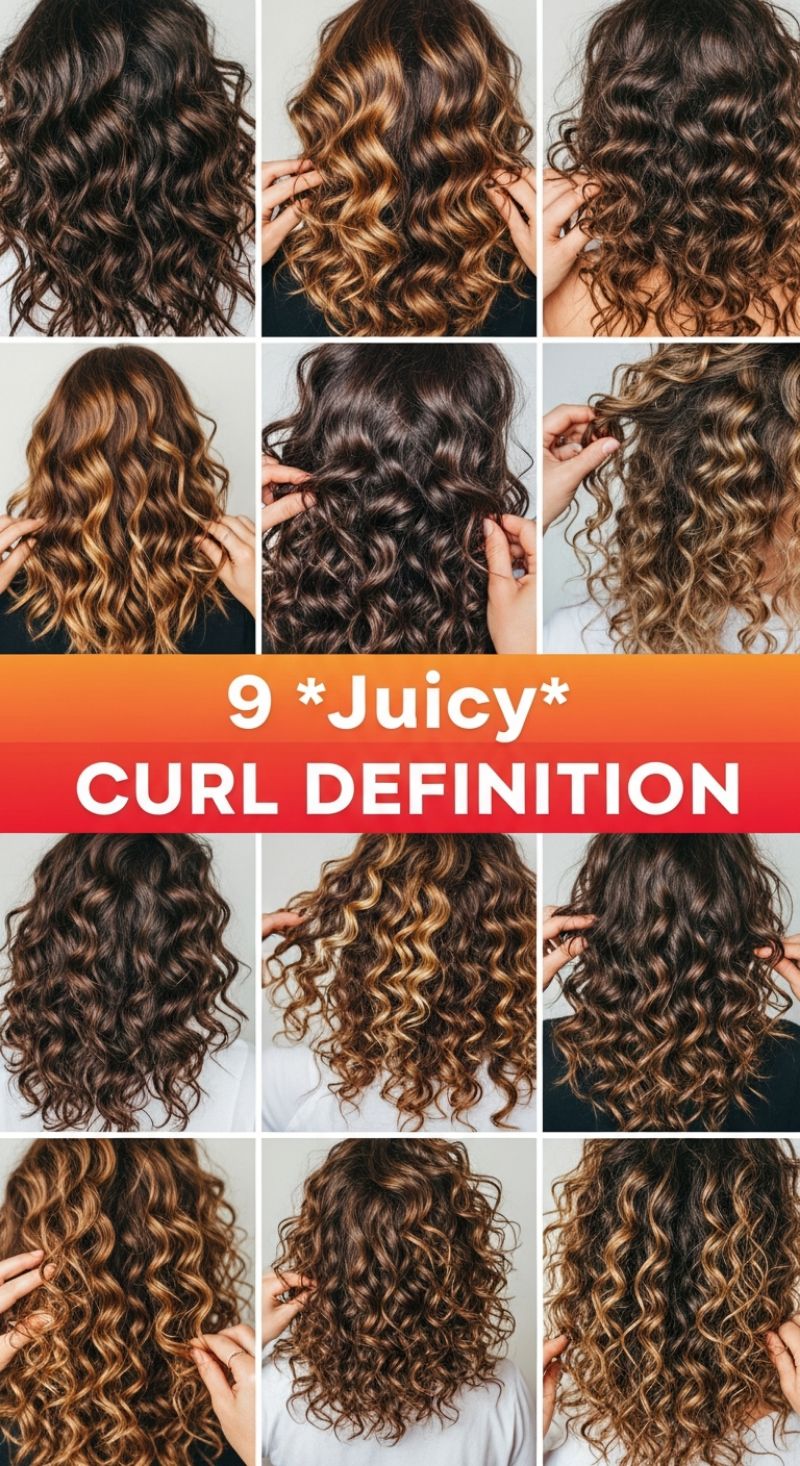
The images displayed represent the pinnacle of “juicy” curl definition—a style characterized by consistently formed, shiny, and frizz-free coils that possess excellent clump formation. These examples, ranging from rich mahogany tones to striking caramel highlights, showcase that premium curl definition is achievable across various curl patterns (2B to 3C) and color treatments. Achieving this look starts with building a foundation of deep hydration. Utilize a sulfate-free, moisturizing cleanser and follow with a rich, nourishing conditioning treatment. Before beginning the styling process, ensure the hair is thoroughly saturated—definition is best achieved on soaking wet hair, as this eliminates frizz and encourages the natural curl pattern to spring into tightly wound spirals.
The true secret to achieving this level of definition lies in meticulous product application and technique. Begin by sectioning the hair, working on small, manageable areas (about 1-2 inches wide). While the hair is still dripping wet, layer a leave-in conditioner followed immediately by a strong-hold styler, typically a botanical gel or thick defining cream. The method of application is critical: instead of merely raking the product through, employ specialized techniques such as ‘shingling’ (applying product to individual small clumps of curls, smoothing them from root to tip) or ‘finger coiling’ (gently wrapping small sections of hair around a finger to form perfect spirals). These precise movements ensure that every strand is coated and locked into its intended curl pattern, maximizing the definition before the drying process begins.
Improper drying can instantly undo meticulous styling work. After applying all products, gently scrunch the excess water using a microfiber towel or an old cotton t-shirt (a process known as “micro-plopping”) to absorb moisture without creating frizz. For drying, diffusing is highly recommended. Use a diffuser attachment on a hairdryer set to low heat and low speed, ensuring you dry the hair gently from the tips upward, cupping the curls in the diffuser bowl. This careful, gentle heat application sets the gel cast firmly. Once the hair is 100% dry, it will feel crunchy or stiff—this protective cast is crucial for definition. To finish, apply a few drops of lightweight oil (like jojoba or argan) to your hands and gently massage and scrunch the hair until the stiffness disappears (known as Scrunch Out The Crunch or SOTC), revealing the soft, voluminous, yet incredibly defined ‘juicy’ results seen in these stunning visuals.