Stop stressing over party planning! Get the ultimate decor checklist featuring stunning, trending ideas for bridal showers, bachelorette parties, and graduation celebrations. Make your next event unforgettable.
STUNNING BRIDAL SHOWER TABLE SETTINGS
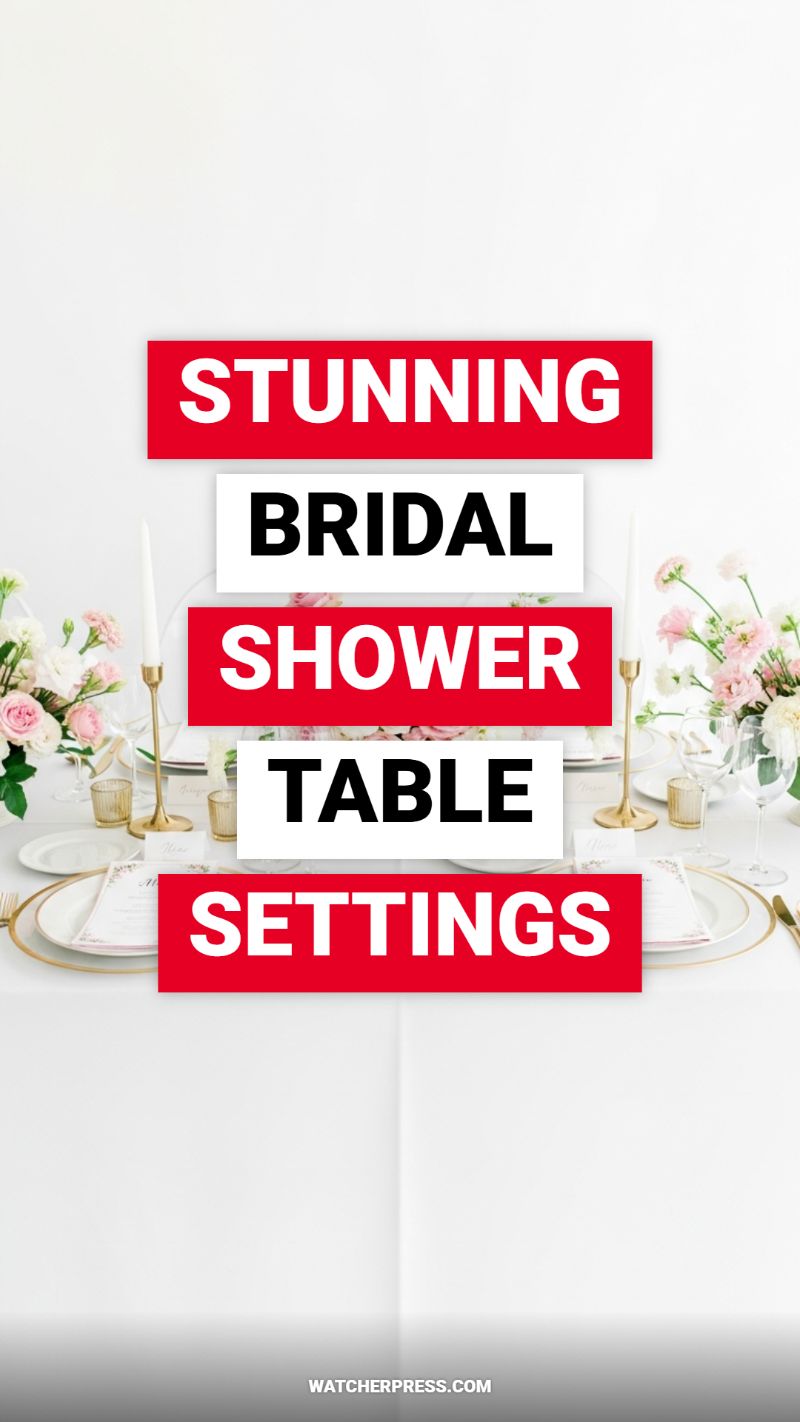
To create a stunning bridal shower table setting that embodies romance and elegance, start with a foundation of crisp white linen. As seen in this pristine example, the white tablecloth serves as a perfect, neutral canvas that allows other elements to truly shine. The critical design choice here is the introduction of warm metallics—specifically gold. Gold charger plates and slender gold candelabras immediately elevate the setting from casual to luxurious. Pair these glamorous accents with a soft, traditional color scheme for the florals, focusing on delicate pinks and whites. This blend of blush tones and shining gold creates a timeless and sophisticated atmosphere that is feminine without being overly fussy. This high-contrast yet soft palette ensures the table feels bright, airy, and celebratory, setting the perfect tone for honoring the bride-to-be.
Achieving this sophisticated look requires careful attention to the layered place setting. Start with the gold charger plate, then stack a standard white dinner plate, followed by a neatly folded linen napkin or a small salad plate. The key personalized element is the menu or place card, positioned centrally on the plate stack, which adds a custom, curated feel. For lighting and dimension, utilize tall, slender white taper candles set in elegant gold holders. These add significant vertical interest and dramatic height, while low floral arrangements ensure that guests can maintain eye contact across the table. Supplement the primary candles with small gold-rimmed votive holders positioned intermittently down the table to scatter soft, glittering light and enhance the romantic ambiance—a crucial step for transforming the space as the sun begins to set.
When executing this design, focus on achieving balance and flow. If you use tall candles, ensure your accompanying floral centerpieces are kept low—no higher than 6-8 inches—to prevent visual obstruction and facilitate easy conversation. A top expert tip for maintaining an elegant look is to ensure all glassware is clear crystal or plain glass; avoid patterned or colored glassware that might compete with the subtle color palette of the flowers. For a finishing touch, personalize the guest experience by investing in high-quality paper goods. Using uniform, professionally printed menus that incorporate small floral details (matching the actual arrangements) ties the entire look together, proving that careful curation of individual elements transforms a standard dinner setting into a truly memorable and stunning event.
Game Day! Super Bowl Party Decorations
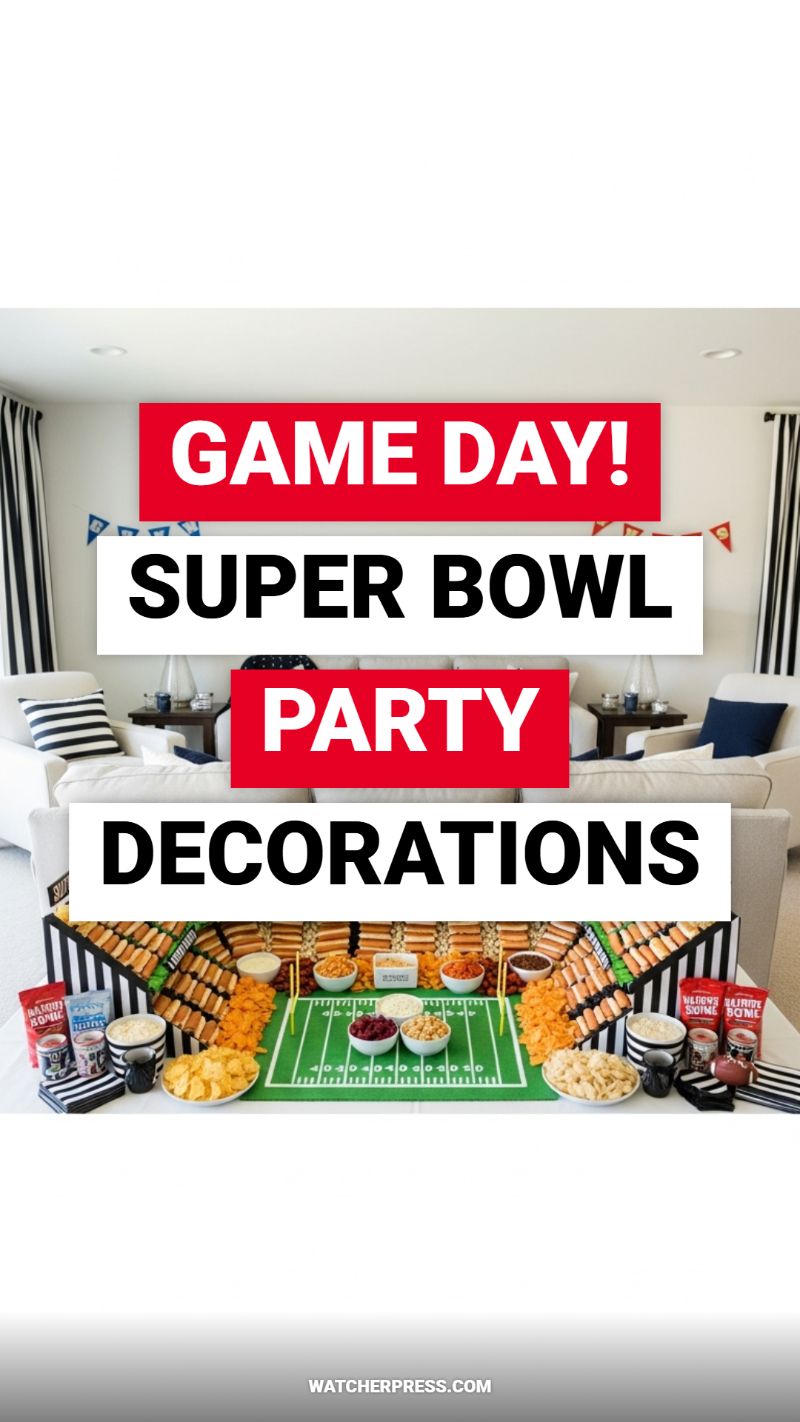
When tackling a highly specific theme like a major sports event, the goal is total immersion through structured décor. The centerpiece of this setup is the custom-built stadium snack bar, a dynamic visual element that immediately elevates the typical buffet table. To recreate this effect, start by constructing the ‘stands’ using elevated platforms or strategically stacked boxes draped in black and white striped fabric or paper to mimic spectator seating. These elevated sections not only provide visual appeal but also serve the practical function of holding long snack items, such as rows of mini hot dogs, pigs in a blanket, or stacked energy bars, giving the illusion of a filled stadium. Ensure that the heights vary slightly to create depth, drawing the eye down to the ‘field’ where the main action, the dips and smaller snacks, will take place.
The ‘field’ itself requires a commitment to detail. Use a green felt mat or runner marked with white yard lines and end zones, mimicking a professional football field. The placement of food on this surface becomes key to the thematic execution. Position smaller snack bowls containing bright, high-contrast items (like cranberries, chickpeas, or salsa) as ‘players’ or ‘markers’ on the field. Flank the field with large bowls of chips, pretzels, or popcorn to simulate the crowds or sidelines. For an expert touch, utilize white dipping sauces (such as sour cream or ranch dressing) to create edible goalposts or divisional lines within individual dips, reinforcing the theme down to the smallest detail. This structured layout minimizes visual clutter while maximizing the dramatic impact of the display.
Beyond the main serving structure, ensure the overall environment supports the theme with subtle background elements. In the living space shown, this is achieved through a cohesive color palette of reds, whites, blacks, and blues, featured in the scatter cushions and the strung pennant banners. Use black and white stripes extensively for supporting items—napkins, serving utensils, and beverage wrappers—to evoke the referee uniform and maintain consistency. When planning any highly themed event, like a bridal shower or graduation, these core principles hold true: identify one show-stopping central structure (the stadium); use contrasting colors for visual pop; and apply thematic details uniformly across all surfaces and serving pieces to ensure a seamless, professional presentation.
Ultimate Galentine’s Party Decor Checklist!
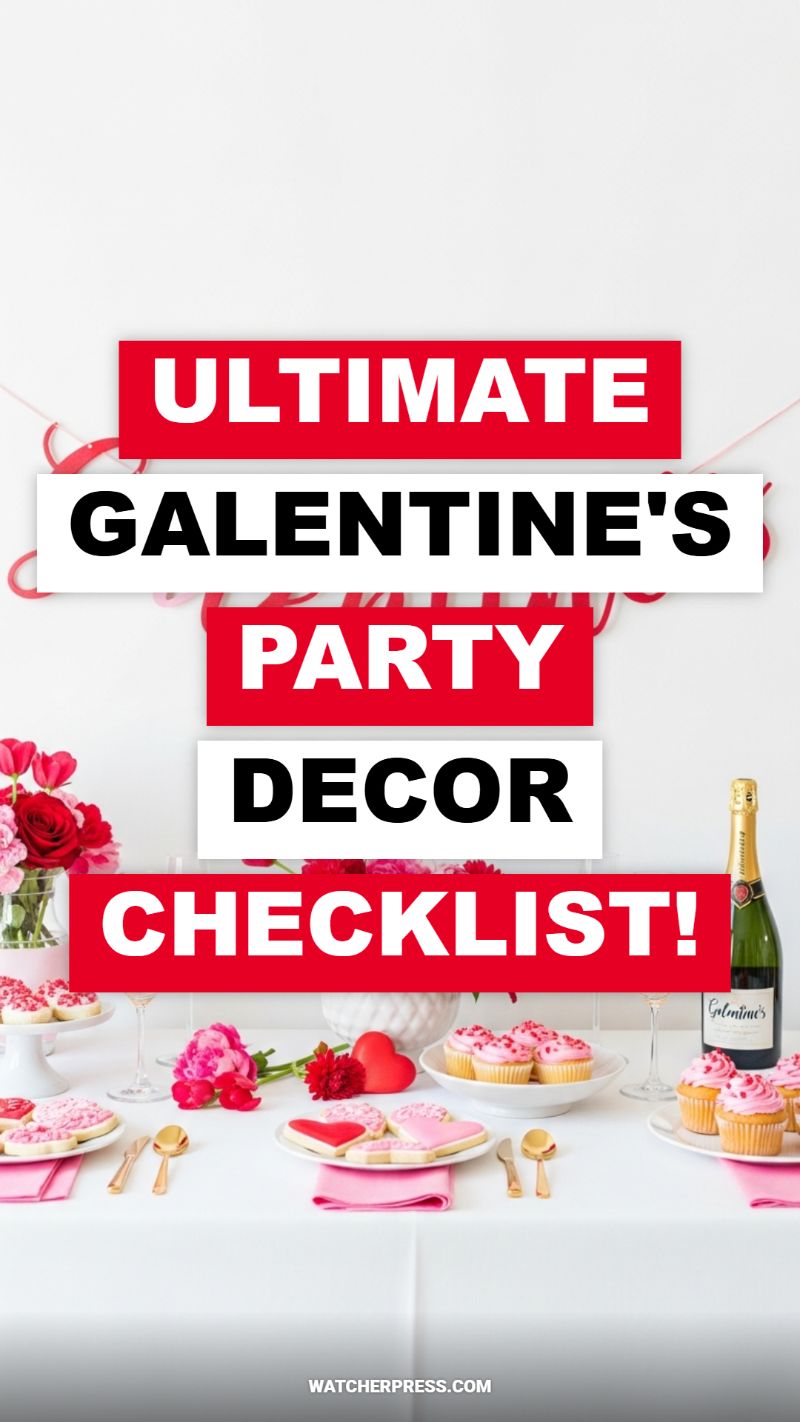
Begin by setting a clean foundation. A bright white tablecloth and backdrop, as seen here, instantly elevates the decor and allows your vibrant accent colors—the reds and pinks—to truly pop. For a successful Galentine’s or bachelorette party, the color palette is the most crucial element. Anchor the space using deep cherry reds (for drama, like the flowers and bold text blocks) and playful blush pinks (for sweetness, evident in the frosting and cookies). Incorporate these colors consistently via linens, dishware, and especially desserts. An essential expert tip is to layer your textiles: use pink napkins folded neatly beneath classic white plates to frame each setting and provide a sophisticated contrast to the white table surface, ensuring every element contributes to the cohesive theme.
Attention to detail transforms a simple gathering into a styled event. Elevate your individual place settings by swapping standard silverware for small, elegant gold flatware, adding a touch of luxury that shines against the pink linens. For centerpieces, keep florals low and voluminous to encourage conversation across the table. Use varying shades of red and pink roses, peonies, or carnations, placing them in clear glass or white ceramic vases. Crucially, utilize your party treats as part of the decor; heart-shaped, frosted sugar cookies and pink-swirled cupcakes are not just desserts—they are miniature, edible art installations. Arrange them on clean white cake stands or platters at varying heights to create compelling visual interest down the length of the table.
Complete the look by addressing the ambient details and festive refreshments. Ensure your backdrop continues the theme; a simple white wall decorated with floating red ribbons or a custom banner reinforces the festive atmosphere without overwhelming the setup. Incorporate small thematic props, such as scattered heart shapes or a dramatic single flower stem placed near each setting. Finally, the drink station should be both functional and decorative. Place a chilled bottle of champagne or sparkling cider prominently—bonus points if you can customize the label or use a themed name. Ensure clear, delicate flutes are ready at each setting, signaling that the celebration is ready to begin and guaranteeing plenty of truly Instagrammable moments for your guests.
BEST BABY SHOWER ACTIVITY: ONESIE STATION

The onesie decorating station, as beautifully displayed here, serves dual purposes: it is a delightful, hands-on activity for guests and provides the parents-to-be with unique, personalized wardrobe pieces. To set up this top-tier activity, begin with a foundation of pristine white onesies in a variety of sizes, ranging from newborn up to 12 months, which ensures the garments will be useful for the baby as they grow. Organize your supplies neatly, mirroring the image’s clean presentation: group high-quality fabric paints or permanent markers by color, arrange paintbrushes in a clear vessel, and crucially, supply ample stencils. The visual contrast of the bright red, white, and blue stencils against the crisp white table linens immediately draws guests in, making the station itself a centerpiece of your party decor. Ensure you provide disposable aprons or gloves to maintain a clean crafting environment, especially if using paints over markers.
Executing this activity smoothly requires preparation to ensure professional results and a positive guest experience. A key expert tip is to place a piece of cardboard or plastic cutting mat inside each onesie before decorating. This prevents the paint or marker from bleeding through to the back layer of fabric, protecting the design and the table surface. Offer a wide selection of shapes, letters, and motifs via stencils, catering to guests of varying artistic abilities. For advanced crafters, provide paint sponges, small brushes for detail work, and outline templates. Clearly label instructions regarding drying time or any necessary post-showering care (e.g., heat setting the fabric paint). This detail ensures the completed items are durable and truly useful long after the party ends.
To integrate the onesie station into your overall party decor checklist, treat the finished products as hanging artwork. As guests complete their masterpieces, use small clothespins to hang the freshly decorated onesies onto a decorative clothesline or string garland. Suspend this display across a wall or window. This transforms the collection of completed crafts into instant, heartfelt bunting, adding a splash of personalized color and texture to the venue. Ensure the station is placed in an area with excellent lighting and ample surrounding space so guests can comfortably gather and converse while they create, making the activity a naturally interactive and memorable part of the event.
EASY ST. PATRICK’S DAY DECOR IDEAS
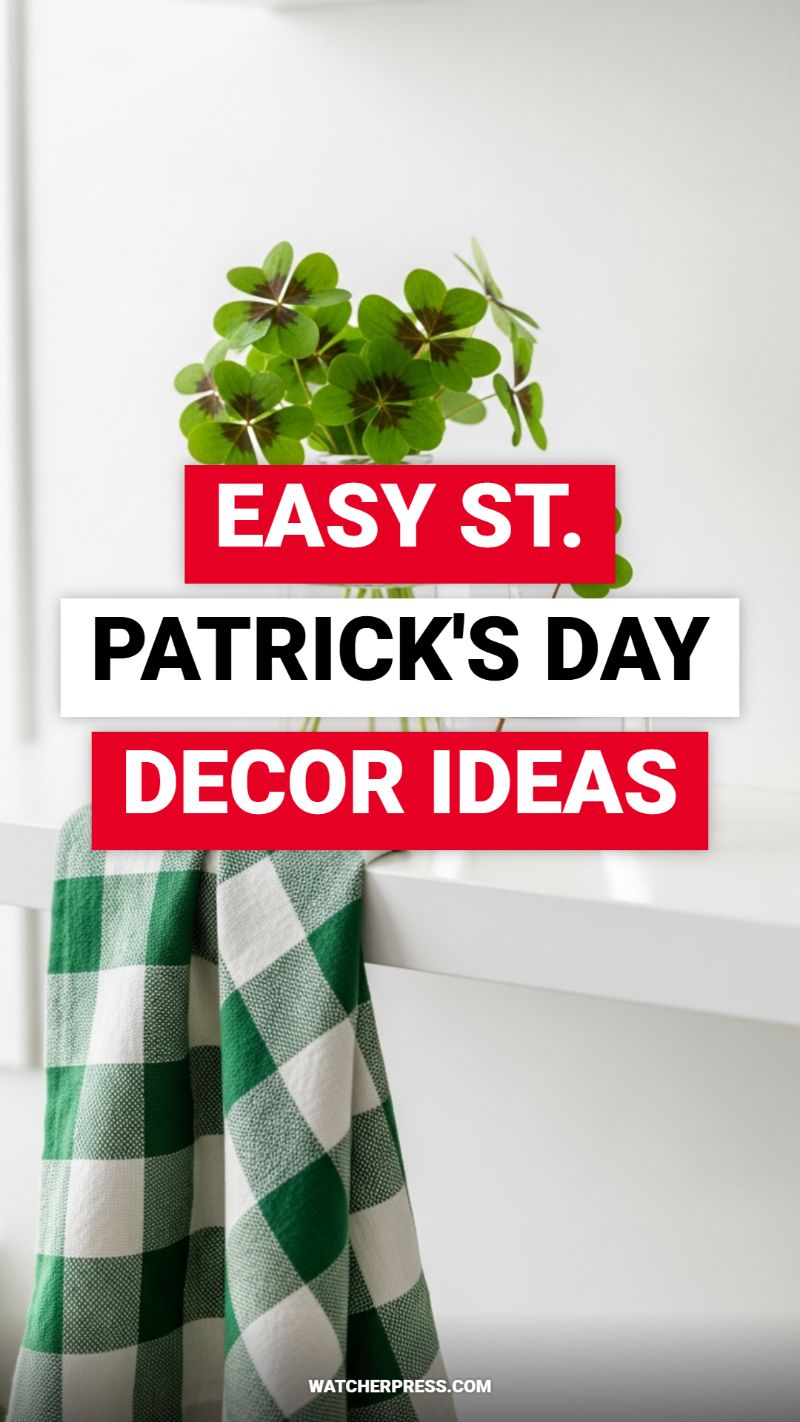
The sophisticated display captured in this image demonstrates that powerful party decor doesn’t require elaborate setups or overwhelming clutter. To recreate this elegant, focused aesthetic for any event, whether it’s a themed holiday, a graduation party, or a bridal shower, begin with high-quality textiles. The vibrant green and white checkered tea towel introduces both the primary color palette and essential texture. For party staging, utilize runners or statement linens draped dramatically over tables or shelving to immediately establish your theme. This technique is particularly effective for accenting a specific decor zone, such as a bar cart or a photo backdrop area. Choose contrasting patterns, like gingham or buffalo check shown here, to add visual depth, or select soft, luxurious solid fabrics if you are aiming for a more subdued, romantic atmosphere like a chic bridal luncheon. The strategic use of textiles is the foundational element that brings warmth and character to a predominantly clean, white space.
The true elegance of this display lies in the integration of fresh, natural elements. Using live plants, specifically the clusters of four-leaf clovers, instantly elevates the decor beyond typical novelty items, creating a sophisticated nod to the theme. When applying this principle to other events, substitute shamrocks with seasonal greenery appropriate for your celebration—think delicate florals or eucalyptus sprigs for a bachelorette brunch, or small potted succulents for a graduation celebration symbolizing new beginnings. Place these botanical accents in simple, clear vessels, such as the glass vase shown, to maintain an airy aesthetic and keep the focus purely on the color and form of the plant life. Experts suggest using an odd number of stems or vessels (three or five) when creating arrangements, as this often feels more balanced and visually appealing than even groupings.
Finally, focus on strategic placement to maximize impact within a minimalist design. This setup leverages a clean, white shelf—a critical staging area in any room. Utilize the principles of varying height and texture. The tall, upright plants provide a vertical counterpoint to the horizontal shelf, while the textile introduces a soft, cascading element that breaks the rigidity of the hard lines. Ensure your chosen decor zone is well-lit and clutter-free to draw the eye immediately. By combining clean surfaces, bold color (achieved through fabric), and natural elements, you create a refined yet celebratory ambiance that is highly customizable and easy to execute, proving that less decor, when chosen thoughtfully, often yields a more memorable and visually stunning result.
YOUR DREAM AESTHETIC BEAUTY ROOM

The key to incorporating a “Dream Aesthetic Beauty Room” vibe into your party decor, especially for events like bachelorette parties or bridal showers, is setting up a dedicated, high-end Glam Station. Emulate the clean, organized aesthetic seen here by utilizing a sleek, white table or vanity, perhaps topped with clear glass for added sophistication. The presentation is paramount: ditch cluttered drawers and opt for transparent or tiered acrylic risers to showcase essential products elegantly, mirroring the display of pressed powders, foundation bottles, and lip colors. Introducing a plush seating element, like the soft blush velvet chair shown, instantly elevates the space, transforming a functional area into a luxurious focal point for guests to prep and pose. Ensure the backdrop remains minimalist and bright—a simple, light-colored wall or a dramatic ring mirror will make the displayed cosmetics pop and maintain the sophisticated, photo-ready atmosphere.
Focus intently on curated organization, which is the cornerstone of achieving this aesthetic. Use tall, cylindrical glass or marble containers to group high-quality makeup brushes, standing them upright like artistic arrangements. This method not only keeps the workspace impeccably tidy but also adds textural interest and depth to the setup. For smaller items like single compacts, miniature fragrance bottles, or lip glosses, arrange them symmetrically on the countertop, treating them as decorative objects rather than utility tools. For a party setting, it’s wise to include small, high-quality, handheld mirrors for easy personal use, ensuring they are easily accessible without disrupting the overall display. Expert tip: Only display beautiful, high-quality products that match your chosen color scheme (neutrals, golds, or soft pinks work best for elegance), keeping actual party essentials and disposable items hidden below the surface to maintain the overall clutter-free luxury.
To fully integrate this beauty station into a bridal shower or graduation party decor scheme, personalize the area with subtle thematic touches. Instead of just functionality, treat this space as a prime photo opportunity. Incorporate a small, elegant sign reading, for example, “Glow Up Station” or add a fresh, small floral arrangement that matches the rest of the party decor. Crucially, ensure optimal, diffused lighting surrounds the station; while not visible in this specific visual, excellent lighting is essential for practical touch-ups and flawless guest photos. By creating this highly organized and luxurious aesthetic, you provide a memorable, functional service area for your guests while simultaneously adding a stunning visual element that perfectly complements a sophisticated party checklist.
CORNER KITCHEN DECOR SECRETS REVEALED
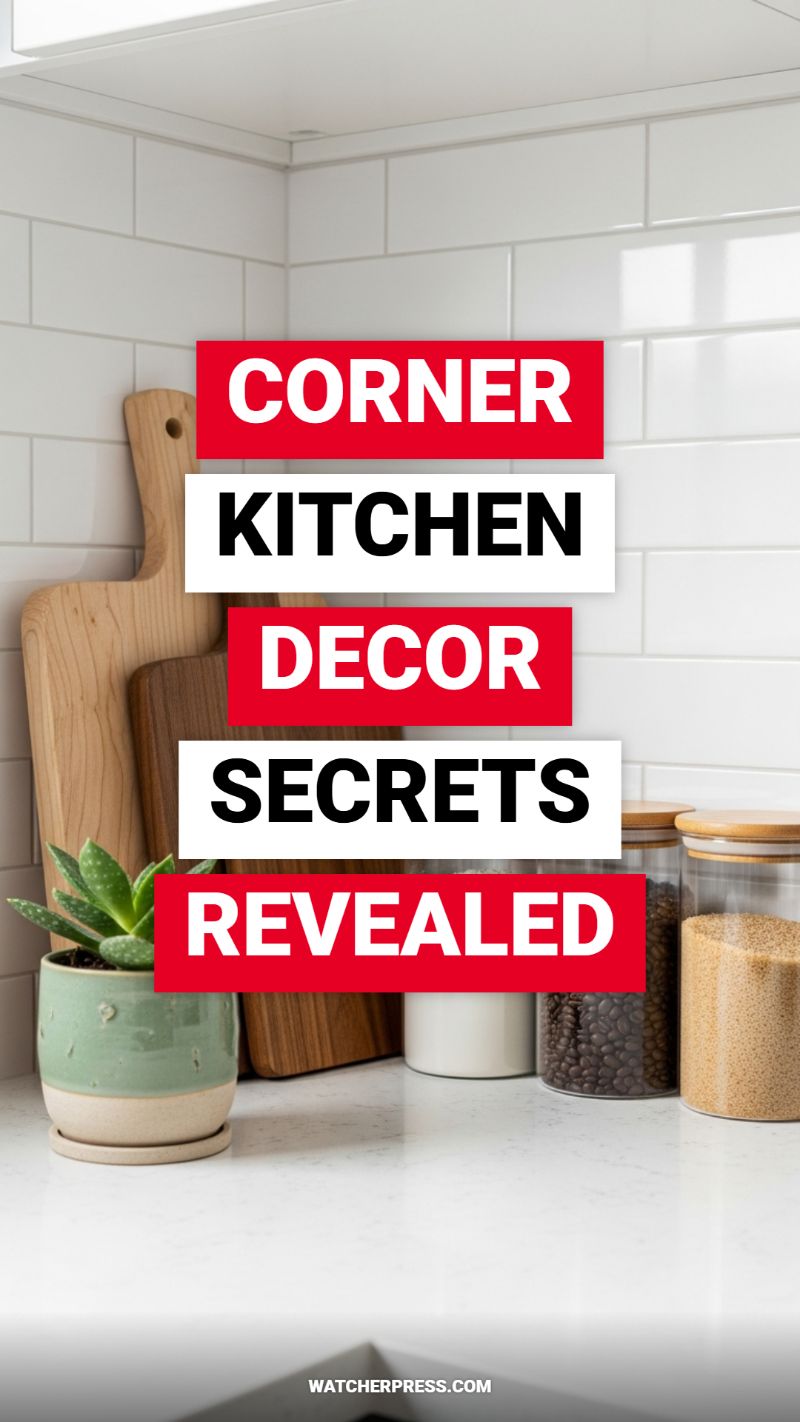
Even the most compact spaces, like a kitchen corner, can become a stunning focal point for your party spread. Dubbed the “Refreshment Nook,” the secret to maximizing this area, especially against a crisp, neutral backdrop like the white subway tile seen here, is utilizing vertical space and maintaining a high-contrast aesthetic. Start by clearing the area completely and use large, textural items, like the layered wooden cutting boards, to add warmth and direct the eye upward. This serves as an excellent foundation for placing tiered stands or essential servingware, such as stylish carafes or self-serve dispensers for iced tea, infused water, or a signature party cocktail. The clean countertop provides necessary breathing room, ensuring the display feels curated rather than cluttered, which is vital for sophisticated events like bridal showers or graduation brunches.
Elevate the corner’s functionality through carefully curated containers that double as decor. As demonstrated by the transparent glass jars holding coffee beans and sugar, everyday items look instantly elegant when they contain party staples or favors. For a graduation party, fill these jars with personalized treats like gourmet coffee beans or themed candies. For a chic bachelorette gathering, they could hold customized cocktail garnishes or delicate bath salts. Integrate living elements—a small, vibrant succulent or a miniature bouquet of seasonal flowers—to inject life and color, providing a refreshing contrast against the clean white and wood surfaces. Expert advice: Always adhere to the rule of odd numbers (groupings of three or five) when arranging items on the counter to achieve a visually balanced and professionally styled display.
Finally, the ultimate secret to successful corner decor is the seamless integration of function and flair, making it an intuitive self-service station. Ensure everything needed for guest use is within easy reach—mugs stacked neatly, stirrers placed in a chic ceramic holder, and small napkins folded artfully. If this corner is dedicated to a specialized bar (like a Mimosa Bar or Espresso station), clearly label each jar or dispenser with stylish, handwritten tags or modern minimalist labels that match your party theme. This attention to detail transforms a simple counter space into a designated, photogenic element of your celebration, ensuring guests feel catered to and that the decor contributes meaningfully to the overall sophisticated ambiance of your event.
5 TINY BATHROOM DECOR HACKS
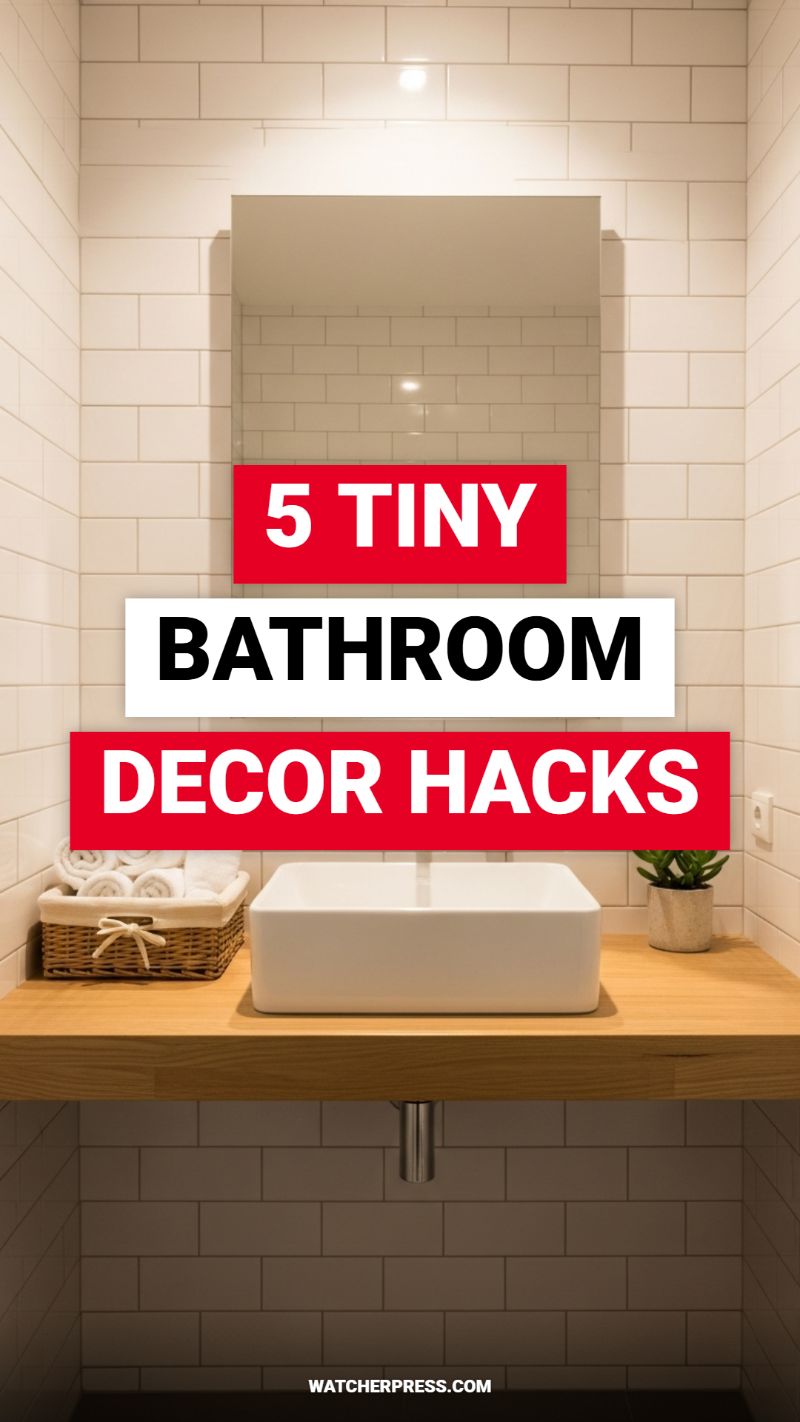
Achieving a spacious feel in a tiny bathroom starts with strategic foundational choices. Look to light colors and minimalist fixtures, as perfectly demonstrated by the clean aesthetic of white subway tile paired with a floating wooden vanity. The use of large-scale white tile, especially when extended floor-to-ceiling, helps reflect light and reduce visual breaks, effectively expanding the perception of the room size. Furthermore, installing a wall-mounted or ‘floating’ vanity, like the rich, warm-toned wooden slab shown, is a crucial hack. By leaving the floor visible beneath the counter, you trick the eye into thinking the room extends further, instantly enhancing the openness of the space. This minimalist approach requires careful plumbing (note the sleek chrome drain pipe) but delivers maximum impact on square footage.
In small bathrooms, every element must serve a dual purpose: function and decoration. Clutter is the enemy of small spaces, so implementing smart, open storage is key. Since this design utilizes a floating vanity rather than traditional cabinetry, decorative organization becomes paramount. Use chic, texture-rich containers, such as the woven basket seen holding rolled white towels, to corral essentials neatly while adding a touch of natural warmth. The choice of a contemporary, rectangular vessel sink, while stylish, also emphasizes clean lines and focuses attention upwards, away from the floor space. If opting for a similar setup, ensure the basket or container fits perfectly under the counter, or sits cleanly atop it, to avoid spilling over into the limited usable area.
The final, and perhaps most impactful, hacks involve mirrors and lighting. A large, frameless mirror, positioned vertically above the sink, is essential as it immediately doubles the visual width and depth of the room by reflecting the opposite walls and ambient light. Ensure your lighting setup is bright but diffuse; the reflected ceiling lights in the mirror suggest strategically placed downlights that brighten the walls without creating harsh shadows. Finally, inject life with minimal, high-impact decor. A small potted plant, like the succulent next to the sink, provides a necessary organic element and color contrast against the white backdrop, fulfilling the decor function without occupying precious real estate. Keep accessories limited to one or two well-chosen pieces to maintain the overall clean and airy atmosphere.
GORGEOUS SPRING TABLE SETTINGS YOU NEED
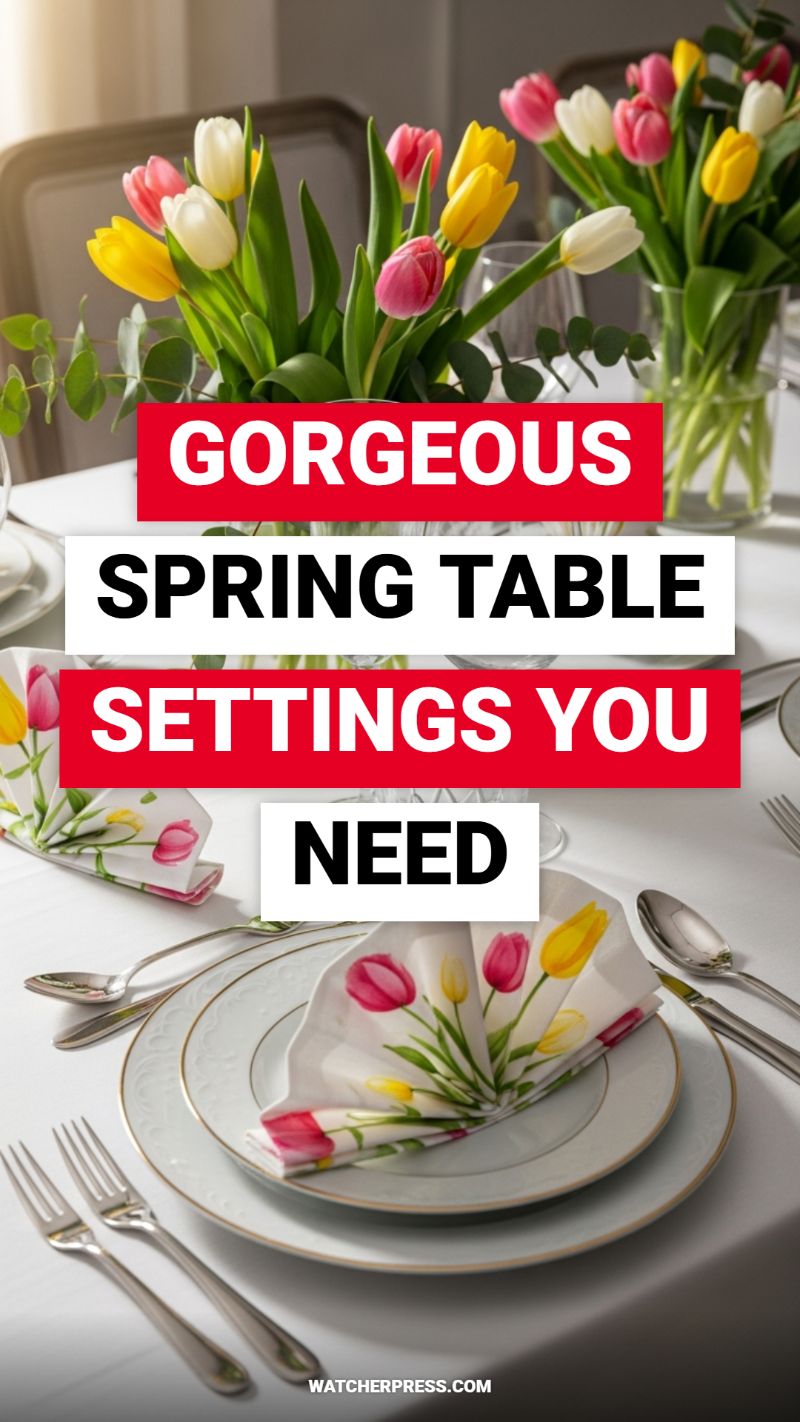
Achieving a gorgeous spring table setting begins with an intentional, light-filled floral display. Instead of monolithic centerpieces that impede conversation, use multiple clear glass vases filled with fresh, vibrant seasonal blooms like tulips (pink, yellow, and white, as pictured) scattered down the length of the table. This approach ensures every guest has a beautiful view and maintains an airy atmosphere essential for daytime events like bridal showers or graduation brunches. For added elegance, incorporate simple greenery like eucalyptus sprigs alongside the tulips; the muted green foliage provides depth and structure without overpowering the delicate blooms. When selecting colors for your spring party, ensure the flower palette either complements the event’s theme or utilizes classic, uplifting hues that symbolize new beginnings and celebration.
The foundation of elegance lies in the meticulous details of the place setting. Start with crisp white linen tablecloths, setting a clean canvas for your design. Opt for layered china—a charger or service plate beneath a salad/dessert plate—preferably featuring subtle detailing, such as the delicate gold rim seen here, which instantly elevates the formality required for a milestone event. The true décor impact, however, often comes from the napkin. Select a high-quality fabric napkin featuring a thematic spring pattern, like the bold tulip design shown, which directly ties the place setting back to the floral centerpiece. Master a sophisticated fold, such as the classic fan fold or the bishop’s hat, placing it artfully atop the plates to create a structured visual focal point that guests encounter immediately upon sitting.
While visually stunning, a successful table setting must also be practical for hosting. Ensure your silver cutlery is impeccably polished and placed according to standard formal rules, minimizing confusion and adding a touch of traditional refinement. Utilize sparkling, clear stemware to catch the natural light filtering into the room, contributing significantly to the bright, airy ambiance synonymous with successful spring gatherings. This specific setting is highly adaptable: for a refined bridal shower, lean heavily into soft pinks and white for romance; for a celebratory graduation lunch or bachelorette brunch, let the pops of yellow and bold pink take the lead. By prioritizing seasonal freshness, intentional floral design, and high-quality, coordinated place settings, you ensure the table serves as both a functional eating area and a stunning, photo-ready backdrop for your celebration.
Instant Curb Appeal: Creating the Ultimate Spring Porch Welcome
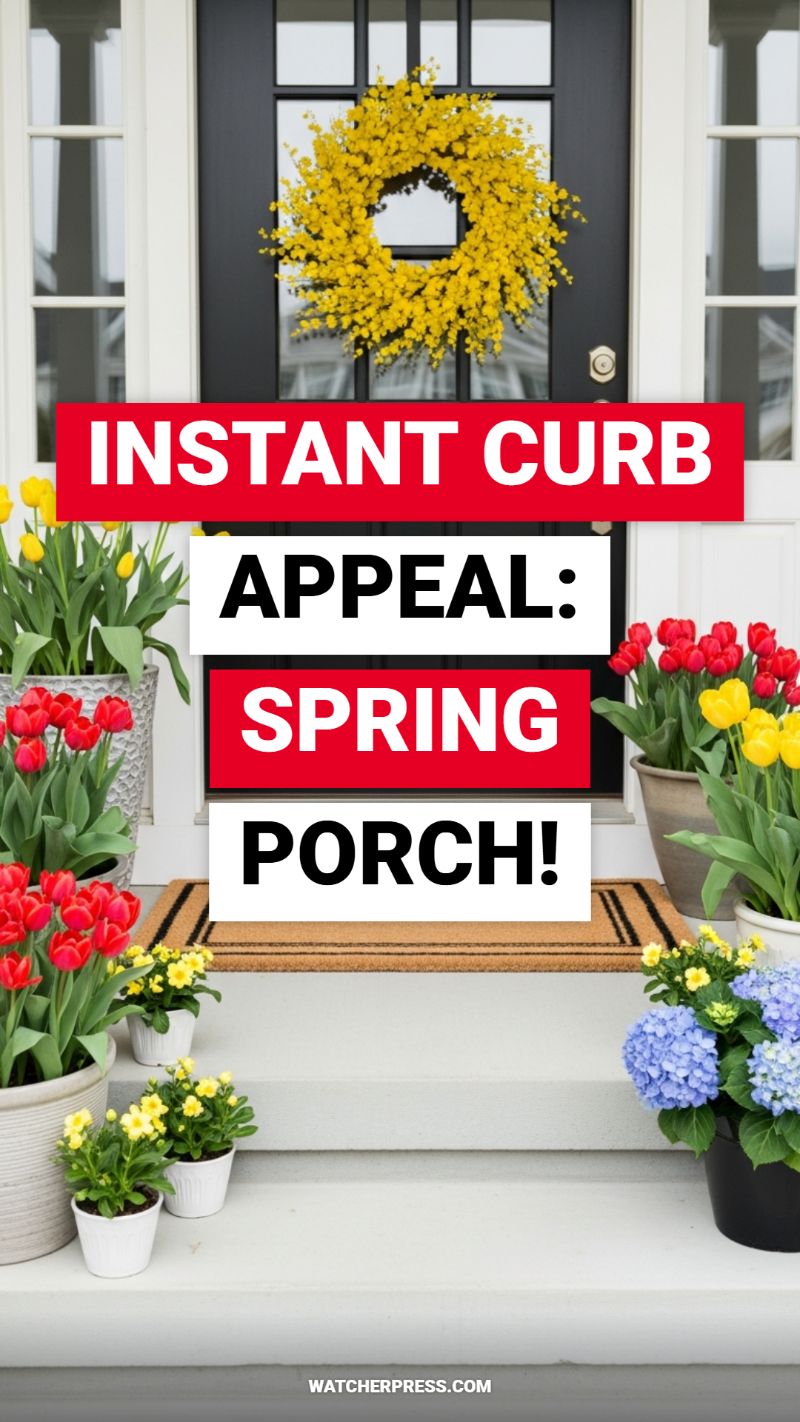
The entryway is the crucial first impression for any party, instantly signaling the excitement and theme awaiting inside, whether it’s a refined bridal shower or a lively bachelorette bash. To achieve “instant curb appeal,” as showcased in this design, start by capitalizing on seasonal vibrancy. The visual contrast created by the bold black door and clean white trim provides the perfect, high-contrast backdrop for colorful accents. Begin by strategically placing large container gardens. Opt for high-impact blooms like red and yellow tulips and blue hydrangeas, ensuring your color choices either complement or directly match the primary color scheme of your event. Grouping planters of varying heights and textures—like the woven grey containers next to smaller, smooth white ceramic pots—is a professional technique that instantly adds critical dimension and sophistication to the space. Ensure all plantings are robust and freshly watered to maintain a lush, inviting appearance throughout your celebration.
Mastering professional-level porch decor relies heavily on effective layering and focal points. Start with the most dramatic, high-visibility element: the front door wreath. A vibrant, monochromatic wreath (like the stunning yellow display shown) acts as a powerful focal point and should reflect one of the most dominant accent colors used in your party theme. Next, focus on anchoring the display at ground level. Choose a layered doormat setup—perhaps a patterned mat underneath a simpler, textural coir mat—to ground the arrangement and define the threshold. For optimal instructional success, apply the classic “Rule of Odds” when grouping planters; arranging items in groups of three or five helps achieve a balanced, asymmetrical look that feels intentionally styled rather than haphazardly placed. This structured approach guides the eye and maximizes the visual impact for arriving guests.
While vibrant spring florals provide an attractive baseline, effective party decor demands customization to elevate the welcome for events like bridal showers, graduations, or bachelorette parties. For a Bridal Shower, tailor the palette by incorporating soft pastels, whites, or blush tones, and adding delicate elements like personalized ribbons or subtle garlands onto the wreath or planters. For a Graduation party, swap the mixed seasonal colors for the school’s specific colors—imagine striking arrangements of deep purple and gold flowers to honor the achievement. Crucially, the entryway is the ideal location for temporary, themed signage; placing an elegant framed welcome sign, a personalized chalkboard easel, or thematic elements (like a small mailbox decorated with bachelorette clues) near the steps immediately confirms guests are at the right location and sets the desired celebratory mood, proving that attention to the transition zone significantly raises the perceived elegance and effort of your ultimate party setup.
ELEVATED EASTER MANTLE DECOR IDEAS
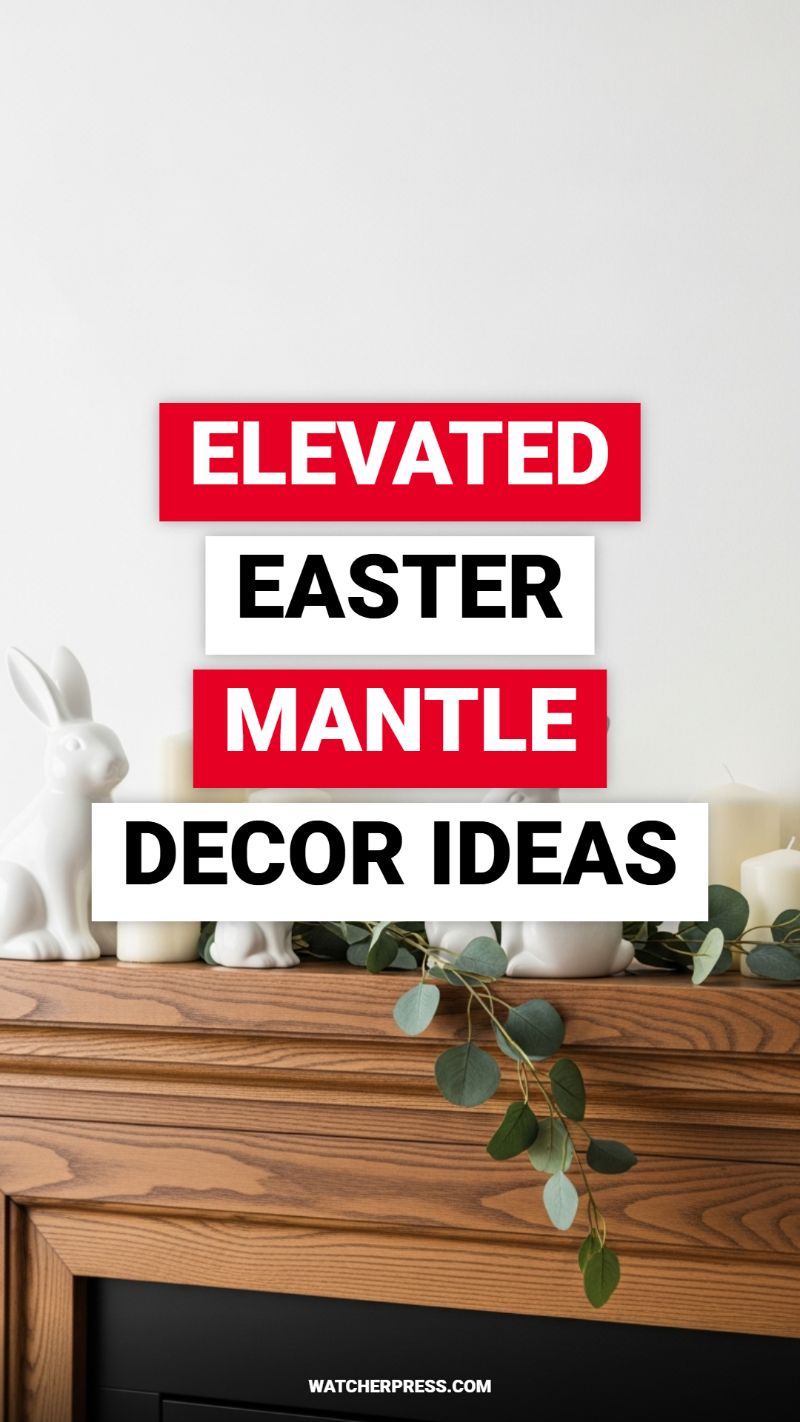
Creating an “elevated” seasonal vignette, such as this Easter mantle display, relies on sophisticated restraint rather than relying on bright, kitschy elements. To replicate this look, start with a monochromatic scheme that provides contrast against the backdrop. Here, the designer utilized bright white ceramics and candles against the warm tones of the natural wood mantle. The secret weapon for maturity is texture: incorporate varied materials like matte ceramic rabbits, smooth pillar candles, and the soft, dusty green leaves of a eucalyptus garland. Avoid overwhelming the space; if your main theme piece is repetitive (like the small bunny figurines), ensure they are uniform in color and material. Arrange them in small, asymmetrical groupings rather than strictly symmetrical lines to introduce visual interest and an organic feel.
The execution of the layering is crucial for transforming a simple collection of items into a cohesive display. Begin by establishing varied heights with your tallest components—the pillar candles or a significant central piece (like the large ceramic rabbit on the left). The placement of these tall elements should create a visual triangle that draws the eye across the display. Next, fill in the foreground using smaller, clustered items, such as the miniature ceramic rabbits seen here. Expert advice suggests ensuring at least three distinct planes of depth: the back (wall/mirror), the mid-ground (tall candles/large items), and the foreground (small accents/draping greenery). This layering effect prevents the decor from appearing flat and maximizes the visual impact of the mantle shelf.
Finally, integrate organic movement and softness using foliage. The cascading eucalyptus garland is essential here; its muted color palette complements the neutral scheme, and its gentle drape softens the hard lines of the mantle and the fireplace opening. Drape the garland loosely, allowing some sprigs to fall naturally over the edge of the wood for an artful, effortless appearance. While this specific inspiration focuses on Easter, the principles—minimalist color scheme, high-low layering, and the strategic addition of natural texture—are universally applicable. Translate this strategy to any party decor by utilizing a buffet or bar top as your focal point and substituting the ceramic bunnies with items relevant to your theme, such as vintage glass vases for a bridal shower or books and globes for a graduation celebration, always remembering to let quality texture and restrained color choices speak louder than excessive thematic clutter.
CUTE EASTER FRONT PORCH TRANSFORMATION
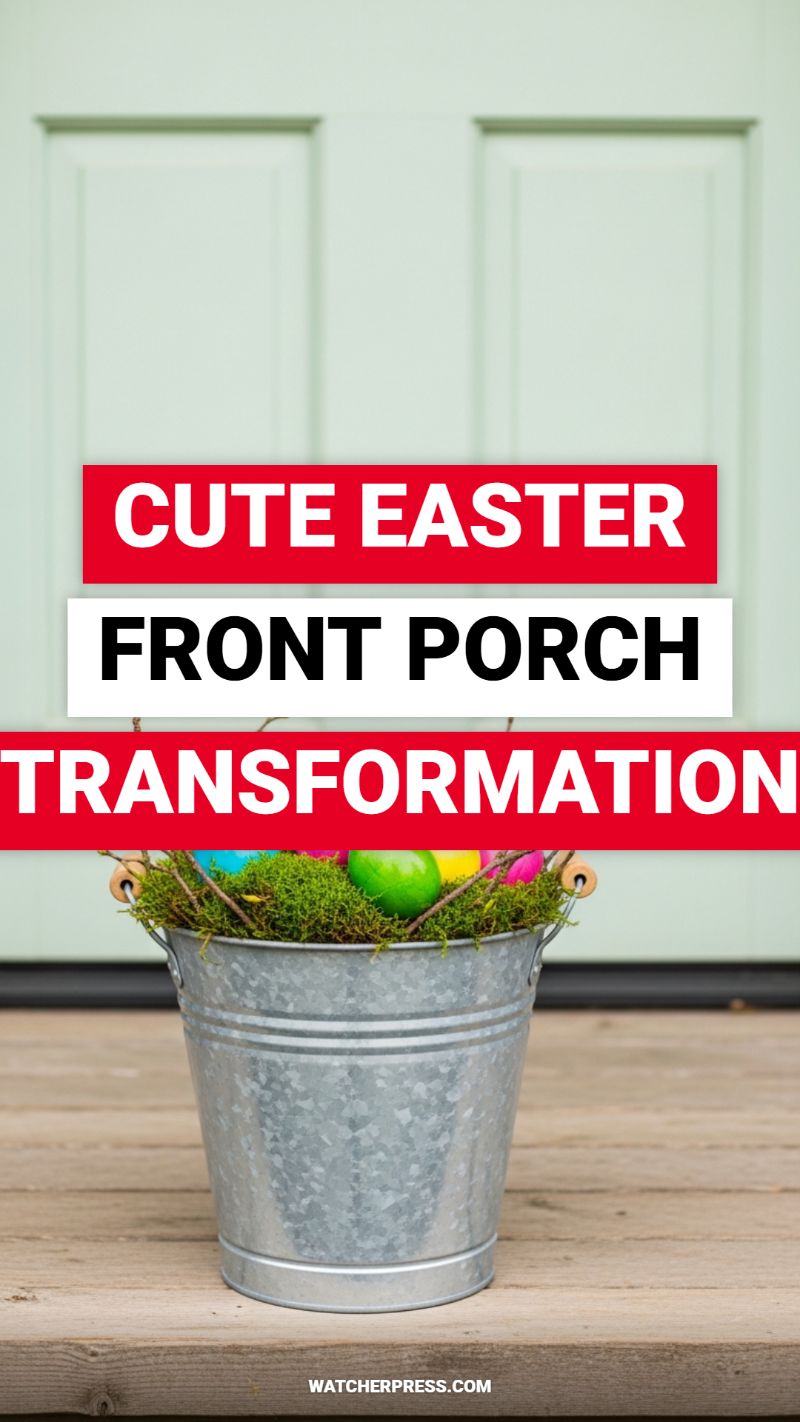
While this image showcases a charming Easter setup, the underlying principle—a stunning, rustic centerpiece featuring a galvanized container—is perfectly translatable to any modern party, including bridal showers, graduation open houses, and bachelorette parties. The galvanized bucket provides a chic, industrial-farmhouse counterpoint to the softness of the decorations, such as the vibrant moss and colorful fillers. For a spring bridal shower, replace the eggs with small potted succulents or bouquets of delicate pastel flowers like ranunculus or peonies. For a graduation party, fill the bucket with school colors, rolled-up diplomas tied with ribbon, or even personalized advice cards. This style of entryway decor immediately sets a welcoming, thoughtfully curated tone, suggesting that attention to detail extends throughout the event space.
To achieve this polished look, begin with selecting the right vessel. Galvanized metal offers texture and durability, making it ideal for outdoor or high-traffic areas like a front porch or buffet line. The key to making the display look lush and full is proper layering. Start with a solid base inside the bucket (like Styrofoam or a riser) to elevate the main decorative elements. Next, cover the base with natural fillers such as reindeer moss (as seen in the image), Spanish moss, or even shredded natural wood excelsior for a rustic flair. The goal is to create a nest-like cradle that makes the featured items pop above the rim. If using real flowers or greenery, ensure hidden water tubes or florist foam are used to maintain freshness throughout the event, neatly concealed by the moss or filler.
The placement of this focal point is crucial for party flow and visual impact. Using it as a front porch display, as shown, serves as the first impression for arriving guests. However, during the event, consider moving it to a central location, such as the gift table at a bridal shower or the sign-in station at a graduation. To truly customize this versatile decor element for your chosen theme, incorporate specific details. For a bachelorette bash, fill the bucket with mini bottles of champagne or custom-labeled survival kits, using shredded metallic paper instead of moss for a dose of glamour. For a graduation, paint the bucket handle or add a simple banner sticker featuring the graduation year. Remember, successful party decor leverages repeating visual motifs; ensure the colors and textures used in this galvanized arrangement are echoed in other areas of your venue for a cohesive, sophisticated celebration aesthetic.
HOW TO DECORATE YOUR CAR VIRAL STYLE

Car decoration is no longer just for high school graduation parades; it’s the ultimate mobile photo backdrop for bachelorette road trips, driving the bride to her shower, or making a grand entrance. To achieve a truly “viral style” look, as suggested by the image, the focus must be on high-impact, colorful, temporary decals and window paint that are easily visible and photograph beautifully. Start by selecting appropriate, car-safe materials. Look for vinyl clings or static decals, like the cheerful bunting flags and stars pictured here, as these adhere without heavy adhesive and peel off cleanly. Avoid anything that requires harsh scrubbing. For dynamic, abstract elements like the swirls and bursts of color, opt for liquid chalk markers or specific automotive window paint pens, ensuring they are explicitly labeled as temporary and safe for glass and paint surfaces. This preparation is key: never use house paint or permanent stickers, especially on the vehicle’s body or windshield, as residual damage defeats the purpose of celebratory decor.
Applying the decor requires strategic placement to maximize visual appeal without compromising driving safety. The best areas for large, graphic elements are the upper edges of the windshield (well above the driver’s sight line, as demonstrated by the flag placement), the passenger side windows, and the rear window. When applying vinyl or static clings, clean the glass surface thoroughly first with a streak-free cleaner; this ensures a smooth application and prevents early peeling. For painted elements, sketch your design lightly with a dry-erase marker first, then trace over it with the temporary paint pens. For graduation themes, use bold, block letters proclaiming the achievement; for bachelorette parties, consider glittery diamond rings or fun, thematic phrases. For truly viral appeal, remember symmetry and coordinating colors; choose two or three main colors that match your overall party palette to tie the mobile decor into the larger celebration scheme.
Expert advice dictates that safety is paramount when decorating a vehicle meant for driving. Always adhere to local traffic laws regarding window obstructions. As a rule of thumb, avoid placing large graphics within the area swept by the wipers or directly in the driver’s line of sight through the side mirrors or front window. Furthermore, if you are incorporating external elements, such as streamers, ribbons, or balloons attached to the antennae or mirrors, ensure they are secured tightly with zip ties or strong painter’s tape to prevent them from flying off and creating a hazard on the road. For the best photo opportunity, stage the car in natural light immediately after decorating, before dirt or wind compromises the pristine “viral” look. When it’s time to remove the decorations, peel off the vinyl slowly, and use a glass cleaner or a specialized window scraper for the temporary paint, following the product manufacturer’s removal instructions to protect your car’s finish.
EPIC PROM SEND OFF DECOR IDEAS
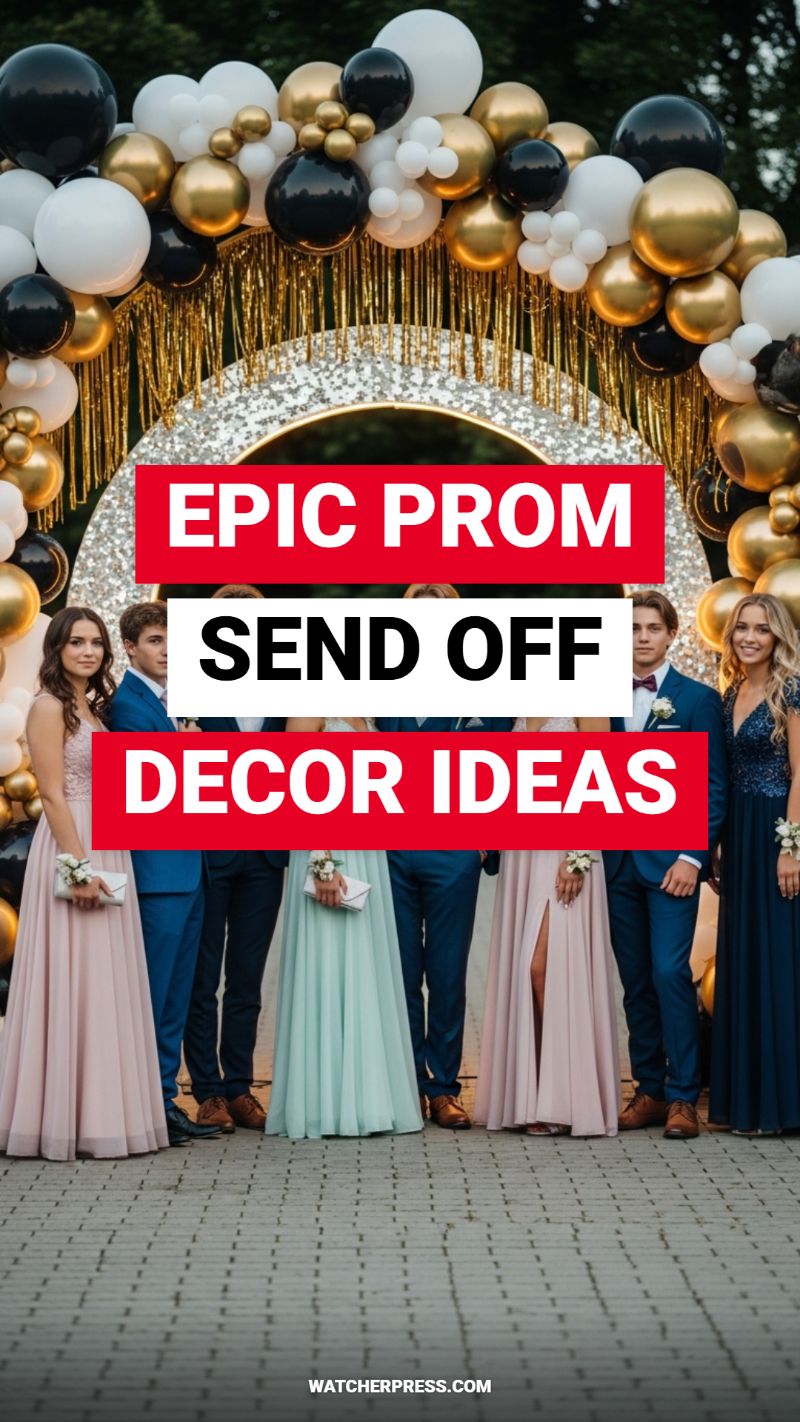
This setup showcases the ultimate in high-impact party architecture: the oversized, elaborate backdrop. The key to achieving this “epic” look is layering texture and dimension to create a visual feast. Start with a foundational structure, such as a circular metal hoop or segmented arch, which provides immediate height and focal point definition. The interior is given a glamorous edge with a shimmering material
here, a glittered silver surface
complemented by cascading metallic gold fringe or tinsel. This combination catches the light beautifully, making it perfect for photography (essential for any major milestone like a graduation, bridal shower, or bachelorette party). When replicating this design for your event, remember that the structure itself doesn’t need to be custom-built; sturdy PVC piping or rental arches can serve as the base, which you then customize with fabric drapes, glitter sheeting, or integrated LED light strings for evening events.
The true showstopper is the organic balloon garland surrounding the arch. This design technique moves beyond simple, evenly spaced balloons and incorporates varying sizes, finishes, and colors to create essential movement and depth. For this particular elegant theme, the color palette is restrained yet impactful: glossy black, crisp white, and metallic gold. The instruction for recreating this look is to use balloons in at least three different sizes (e.g., 5-inch, 12-inch, and 24-inch). The metallic or chrome finish (gold in this case) is crucial as it instantly elevates the entire appearance from playful to sophisticated. Expert advice suggests installing the main, larger portion of the garland first, and then tucking clusters of smaller, grouped balloons (“four-packs” or “five-packs” of the smallest size) into the gaps. This technique provides a rich, cohesive, and professional finish that ensures a seamless transition between the arch and the surrounding environment, creating a powerful framing effect.
When deploying such a substantial decoration piece, strategic placement is everything. Position the backdrop in an area with good, natural lighting (if outdoors) or near a clear wall (if indoors) to minimize distractions and ensure the structure remains the central focus. Because this arch serves as a dedicated photo opportunity, make sure there is ample space in front of it for guests to gather comfortably. The beauty of this design lies in its adaptability: for a graduation party, you might swap the black balloons for school colors; for a bridal shower, replace them with blush pinks and soft floral accents. The underlying principle
a shimmering central element framed by a voluminous, multi-textured balloon garland
is universally adaptable to any glamorous celebratory event.
MUST-HAVE GRADUATION PARTY DECORATIONS

Creating a celebratory and highly personalized atmosphere is key to a memorable graduation bash. As the visual suggests, the absolute must-have decoration is a custom photo backdrop, serving as the central focal point for your entire outdoor setup. To execute this perfectly, design a large banner featuring a collage of the graduate’s pictures—from childhood milestones to recent senior portraits. This not only elevates the decor significantly but transforms a plain wall or garage door into a sentimental journey. Ensure the banner is printed on durable, weatherproof material if hosting outdoors, and hang it tautly to prevent wrinkling. Position this backdrop in an area with good lighting, away from high-traffic zones, making it the designated and irresistible photo station for all guests.
Flanking your personalized backdrop with dramatic balloon displays is the fastest way to amplify the festive feel and incorporate your graduate’s specific school colors. The bright blue and yellow shown here illustrate a perfect application of this technique. When designing your balloon arch or garland, use high-quality latex balloons in varying sizes (5-inch, 10-inch, 18-inch) for a rich, professional texture. Use the official high school or college colors—or even the colors of the graduate’s future institution—to establish your color theme immediately. Expert Tip: If hosting outdoors, assemble the garland indoors the day before and use high-volume hand pumps or an electric inflater. To secure the outdoor display against wind, anchor the base points firmly to weighted objects or stakes concealed by foliage, and consider using balloon shine spray to keep the colors vibrant under the sun.
Beyond the central photo area, remember that effective graduation decor seamlessly blends high visual impact with functionality. Use your primary color scheme (e.g., the blue and yellow) to dictate other elements, such as table linens, serving ware, and floral arrangements. For instructional details, ensure your setup is scalable; if you have a large backyard, repeat smaller clusters of color-coordinated balloons or streamers near food stations or seating areas to tie the theme together. Finally, incorporate functional decor like a designated gift display or advice table, using small elements like cap-and-tassel confetti or graduation year cutouts to dress these areas up. The goal is to maximize the visual ‘pop’ while celebrating the graduate’s achievements in every detail.
BACHELORETTE PARTY DECOR HACKS!

Creating a high-impact bachelorette party atmosphere doesn’t require complex installation; it relies on strategic placement and a luxurious, cohesive color palette. As demonstrated in this setup, the key is leveraging large-scale items against clean, neutral backdrops, such as a crisp hotel bed. Start with your statement pieces: metallic foil balloons. Rose gold is the reigning champion for bachelorette celebrations, offering an elevated look far beyond basic pink. For maximum effect, layer two celebratory messages—such as “BRIDE TRIBE” strung across the ceiling line and “SHE SAID YES” centrally placed on the wall below—to anchor the space. These balloons serve as the primary photo backdrop, minimizing the need for extensive wall coverings. Ensure the balloon lettering is uniformly sized and inflated to maintain that polished, professional aesthetic.
The next crucial hack involves using personalized accessories as part of the decor staging. Rather than simply packing the sashes away, use them to elevate the room’s look upon arrival. Lay high-quality satin sashes (for the Bride, Maid of Honor, and Bridesmaids) neatly across the bedspread. This instantly signals the celebration and creates the perfect photo opportunity for the first round of arrival snapshots. Complement this arrangement with a small, tasteful welcome tray. Choose a metallic tray that matches your balloon tone (like the rose gold shown here) and arrange three to four pre-poured champagne flutes topped with simple garnishes. This setup creates an immediate sense of luxury and welcome, turning the necessary items (sashes and drinks) into sophisticated decorative elements that require zero complicated assembly.
To ensure your decor hacks translate into stunning photos, focus on the details that tie the room together. The secret to this clean, glamorous look is strict adherence to the rose gold and blush theme, contrasted against white linens. Avoid mixing metals or introducing distracting colors. For execution, this means everything from the sashes to the tray and the beverage color should fall within the blush/pink spectrum. A final expert tip: if you are decorating a rented space, utilize removable, non-damaging adhesive strips for securing the balloon banners, allowing for quick setup and tear-down. By choosing versatile, large-scale items and staging them thoughtfully, you can achieve a maximalist look with minimal effort, maximizing both time and budget.
5 Easy DIY Valentine Decor Ideas

While explicitly labeled for Valentine’s Day, this pastel paper heart garland is a fundamental and versatile piece for any celebration centered on love and sweetness—making it a perfect, budget-friendly decoration for bridal showers, engagement parties, or a romantic bachelorette brunch. This quick DIY transforms simple cardstock into an elegant, three-dimensional backdrop element. The image beautifully showcases the power of a muted, soft color palette: blush pink, pale robin’s egg blue, and creamy off-white. This choice moves beyond harsh traditional reds and whites, contributing to a sophisticated, airy aesthetic that pairs perfectly with spring, summer, or vintage-themed events. The technique is simple, but the visual result is one of delicate warmth and personalized charm, instantly elevating the party atmosphere with a touch of handmade artistry. It offers a wonderful contrast to heavier decor elements, adding lightness and movement to your display.
To recreate this charming look, the first step is material selection. For a professional finish, invest in quality, thick cardstock (65lb minimum) or textured paper, and crucially, use double-sided paper so the garland looks polished even when the hearts inevitably twist. You can achieve the perfect heart shape either by utilizing a large, consistent craft punch—which guarantees flawless uniformity and speeds up production—or by sketching and cutting them freehand for a slightly more whimsical, rustic feel. Once your hearts are cut, use a standard hole punch to create two small, equidistant holes near the top edges of each heart. The threading process requires thin, yet sturdy, white twine or baker’s string. The most stable threading method is to loop the string through the first hole, run it horizontally across the back of the heart, and thread it out the second hole. This technique ensures the heart lays flat against the string and prevents it from flipping or tilting awkwardly when hung.
The beauty of this garland lies in its light, delicate appearance, making careful placement crucial for maximum impact. Expert party styling suggests hanging these garlands in multiples, varying the lengths to create a dramatic waterfall or layered effect behind the main focal points, such as the dessert table, a gift station, or a designated photo booth area. For optimal visual flow, ensure a uniform distance between each paper heart—typically 1 to 2 inches—to allow the individual shapes and colors to stand out without the display looking cluttered. For evening celebrations, elevate the look by layering the garland over a strand of delicate micro-LED copper wire fairy lights; the soft illumination will backlight the pastel paper, casting a gentle, romantic glow over the entire setup. This handmade garland provides a level of personalization and warmth that expensive store-bought decorations simply cannot match, making your party decor uniquely heartfelt.
BEST CLASSROOM VALENTINE DOOR DECORATIONS

The pictured door showcases a festive and heartwarming approach to seasonal decoration, utilizing simple yet effective paper craft techniques. The primary visual element is a dense collage of layered hearts and small floral accents, predominantly in a vibrant palette of red, various shades of pink, and crisp white. To recreate this cheerful look, gather a variety of textured and patterned cardstock or heavy construction paper. Key materials include solid red paper (for depth), white paper (for contrast and outlining), patterned pink paper (polka dots, small hearts, or geometric prints), and optionally, foam or felt sheets to create dimensional elements like the layered flowers shown. The strategic use of multiple sizes and slightly offset layering provides crucial depth and avoids a flat, two-dimensional appearance, transforming a standard wooden door into a welcoming piece of art ideal for any communal gathering space.
Begin the process by cutting hearts in four to six different sizes and patterns. For example, cut a large, solid red heart, and layer a slightly smaller patterned pink heart on top, finished with a small, solid white heart outline. The “how-to” secret to achieving this rich, professional look is abundant clustering and intentional overlap. Do not spread the hearts thinly; instead, overlap them generously, focusing on framing the door’s window and the central body of the door. Incorporate inspirational messages using banner cutouts. Print these messages on strips of white paper and layer them over a contrasting red heart or use a contrasting color banner shape for maximum readability, such as “YOU ARE LOVED” and “SPREAD KINDNESS.” Use double-sided foam tape or rolled painter’s tape to secure the elements; giving them a slight lift off the door surface further enhances the three-dimensional quality of the installation.
For optimal execution and longevity, especially if this display is in a high-traffic area or a school setting, consider using durable cardstock or even laminating the individual paper elements. Expert advice for maximum impact involves achieving symmetry in the overall volume, ensuring the density of hearts is balanced across the upper and lower sections, while allowing for variation in individual heart design to maintain visual interest. While this specific design targets Valentine’s Day, the core technique of clustered, layered paper shapes and thematic banners is universally adaptable for any party decor checklist. For a graduation party, substitute stars and diploma shapes in school colors; for a bridal shower, use champagne flutes, floral bouquets, and diamond ring motifs. This approach offers a budget-friendly yet visually stunning method to instantly elevate any entry point for a celebration.
Spring Refresh! Home Decor Trends
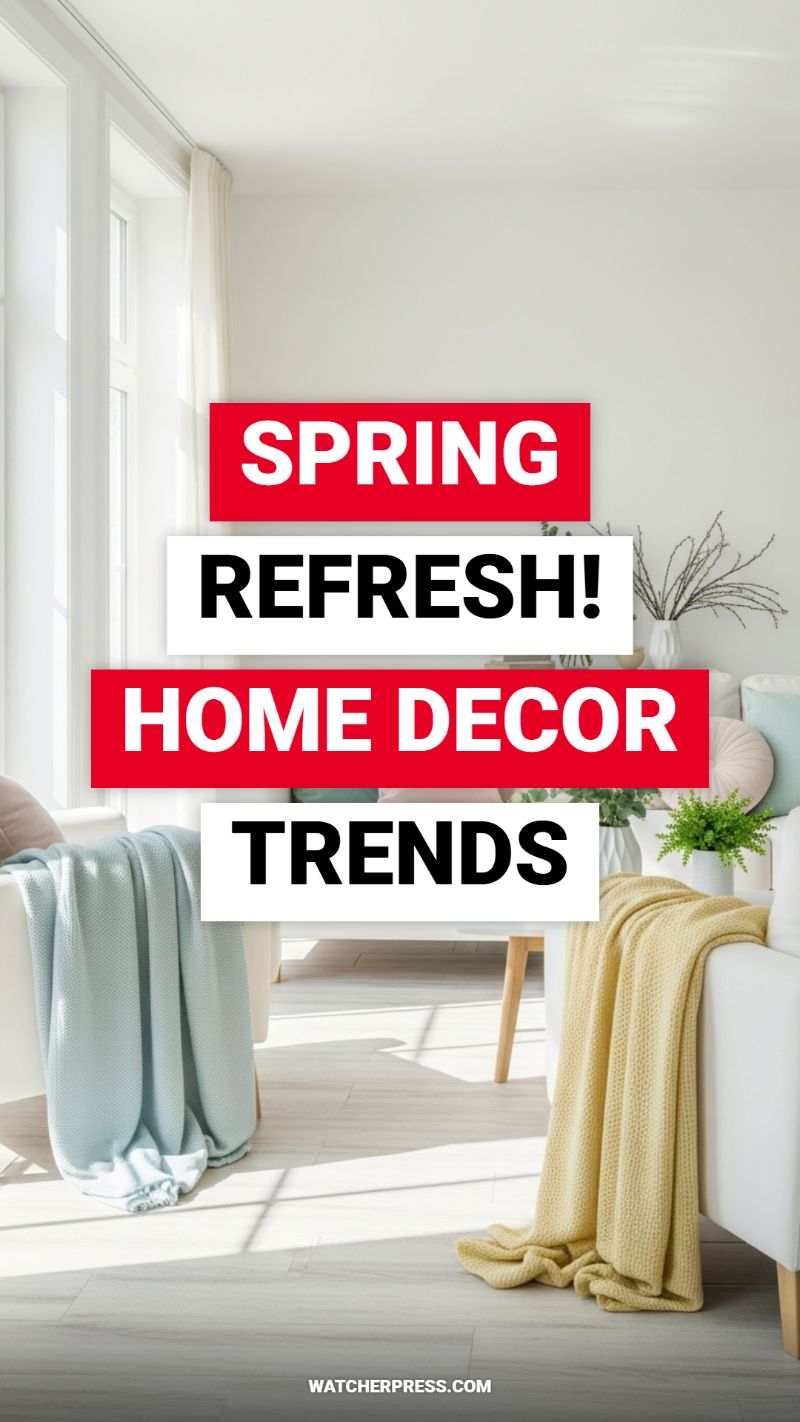
The arrival of spring signals the perfect opportunity to revitalize your living spaces, transforming them from cozy winter dens into bright, airy sanctuaries. To capture the serene aesthetic displayed in this image, start by maximizing natural light, which is the cornerstone of any successful spring refresh. Swap out heavy, dark drapes for sheer, light-filtering curtains—like the white panels shown here—which diffuse sunlight beautifully and make rooms feel instantly larger and more expansive. Focus on maintaining a clean, white, or neutral foundation for your walls and main furniture pieces, allowing the space itself to breathe. Consider reflective or pale flooring, such as the light wood planking visible, as this further enhances the room’s luminosity by bouncing light upward. This minimalist approach ensures that the focus remains on comfort and natural brightness, setting a calm, optimistic mood for the season.
Once the foundational light is established, introduce seasonal color and texture through strategically placed textiles. The key spring trend is incorporating gentle, nature-inspired hues—such as the sunny yellow and pale aqua blue throws pictured—which add necessary warmth without visual clutter. These colors should be soft and comforting, avoiding anything too saturated or loud. Utilize high-quality, tactile throws made of cotton or light knits, draped casually over seating to invite relaxation. Beyond throws, refresh accent cushions in linen or cotton textures, perhaps incorporating subtle botanical prints or soft circular shapes for visual interest, as seen on the sofa in the background. This method allows for an immediate seasonal update that is affordable and easily swapped out as the year progresses.
Finally, solidify your spring aesthetic by integrating biophilic elements and focusing on mindful styling. Biophilic design, the concept of connecting indoor spaces with nature, is essential for a spring refresh. Introduce fresh greenery, such as small ferns or potted herbs, utilizing minimalist white ceramic vases that keep the focus on the plant’s texture and color. Consider utilizing dried branches or delicate floral arrangements, which add sculptural height and a sense of effortless elegance. In terms of overall styling, embrace a philosophy of mindful minimalism: remove any excess winter clutter and ensure every piece of decor serves a purpose or provides profound aesthetic value. Keep side tables and surfaces sparse, showcasing the clean lines of light wood furniture and emphasizing flow, creating a truly serene and invigorating space for the season ahead.
CHIC “BABY IN BLOOM” SHOWER TABLE SETUP
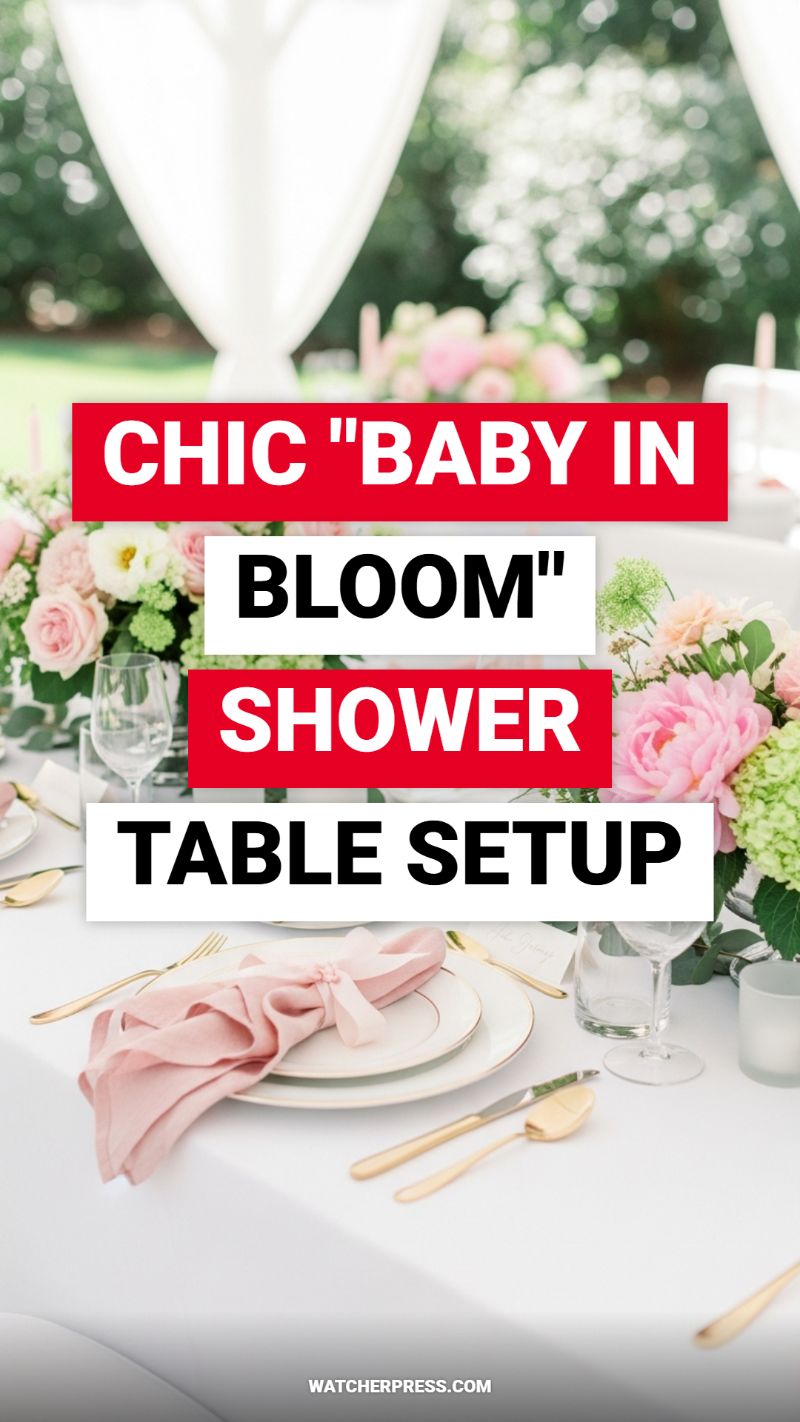
To achieve this sophisticated “Baby in Bloom” table design, the foundation must be pristine and light. Start with a crisp, seamless white linen tablecloth to serve as a bright backdrop, instantly elevating the celebration from casual to chic. The success of this theme relies on lush, voluminous floral arrangements centered around soft, feminine colors. Utilize high-impact flowers such as full garden roses, blush peonies, and light green hydrangeas. When placing centerpieces, ensure they are abundant enough to create a focal point but low enough that guests can maintain eye contact across the table. Incorporate varying textures of foliage, like soft eucalyptus, to break up the dense blooms and add movement. The final touch of refinement comes from strategic metallic accents—in this case, gold—which catches the natural light beautifully and provides a luxurious contrast to the soft pinks and creams.
The individual place setting is where meticulous attention to detail truly shines. Opt for elegant white china with a subtle gold rim, reinforcing the metallic theme established by the flatware. The key styling element is the napkin treatment: select a high-quality, dusty rose or blush linen napkin and avoid overly structured folds. Instead, gather it loosely into a gentle, flowing drape and secure it with a simple ribbon or twine bow. This soft, undone look enhances the romantic, organic “bloom” aesthetic. Pair this setting with polished gold flatware—a full set including fork, knife, and spoon—and minimal glassware, typically just a simple wine or water glass, allowing the centerpiece and plate setting to dominate the visual space.
This table setup is ideally suited for an outdoor or semi-outdoor venue, like a garden or a tented space, where ample natural light can maximize the effect of the white linens and reflective gold. If hosting indoors, aim for sheer white drapery around the perimeter to mimic that soft, ethereal glow. Expert party planning tip: maintain the subtle elegance by keeping auxiliary decor minimalistic. Small, frosted glass votives placed sparingly around the floral arrangements are preferable to large candelabras, ensuring the focus remains squarely on the beautiful place settings and the abundance of fresh flowers. This specific combination of soft blush, bright white, and warm gold creates a timeless setting that is perfect not only for baby showers but is easily adaptable for elegant bridal brunches or milestone anniversaries.