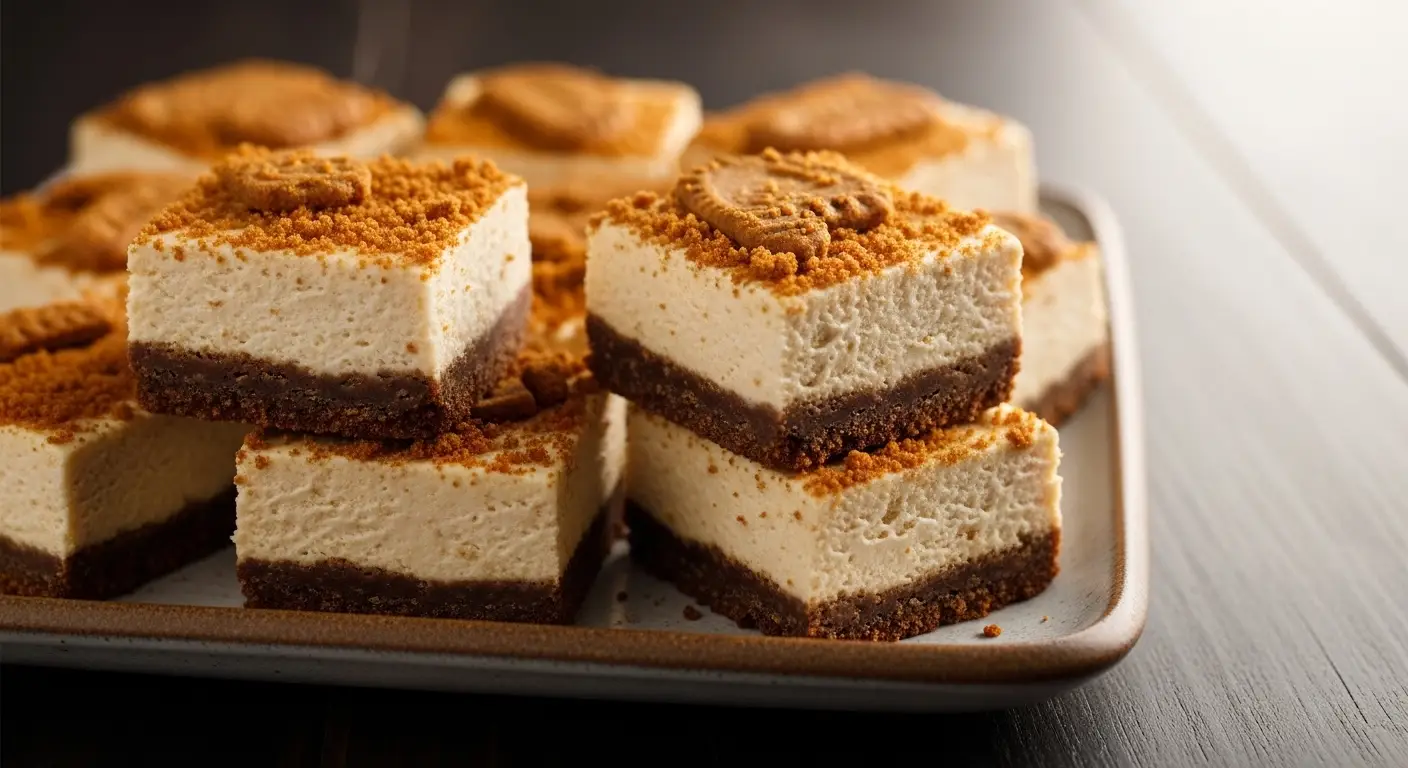
4 Ingredient Biscoff Cheesecake Bars for Easy Entertaining
Making dessert for a big group of friends can feel scary. I used to spend hours in my kitchen trying to make fancy cakes that always fell apart. One time, I tried to make a huge tiered cake for a birthday, and it leaned over like a tower in a cartoon. It was a mess! After that, I decided to find recipes that are simple but still look and taste great. These Biscoff cheesecake bars are my favorite way to make people happy without getting a headache.
You only need four things from the store to make these. They are creamy, crunchy, and full of that warm cookie flavor everyone loves. If you have a party coming up or just want a sweet treat on a Friday night, this is the recipe for you. I will show you exactly how to mix, bake, and cool these bars so they come out perfect every single time. You do not need to be a pro chef to make these look like they came from a bakery.
Get your baking pan ready because we are about to make something delicious. These bars are easy to carry and even easier to eat. Let us look at what you need to get started!
Recipe Quick Info
- Prep Time: 15 minutes
- Cook Time: 30 minutes
- Servings: 16 bars
- Difficulty: Very Easy
The Short Shopping List You Need
The best part about this recipe is that the grocery list is very short. You do not have to wander down ten different aisles to find weird ingredients. Most of these things are probably in your kitchen right now, or you can find them at any local shop. I love recipes that do not cost a lot of money but still feel like a total luxury. When you use fewer ingredients, the quality of those items really shines through in the final bite.
The Only 4 Ingredients Required

To make these bars, you need Biscoff cookies, Biscoff cookie butter, cream cheese, and eggs. The cookies make the crust, and the cookie butter goes into the filling. Biscoff cookies have a unique taste that is a bit like cinnamon and caramel. They are crunchy and hold up well under the heavy cheesecake layer. Using the cookies for the base means you do not need to add extra sugar or butter to the crust, which saves a lot of time and effort.
The cream cheese provides the tangy, smooth base that every good cheesecake needs. Make sure you buy the full-fat kind in the silver blocks. The spreadable kind in the plastic tubs has too much air and water in it, which can make your bars soggy. The eggs are the glue that holds everything together as it bakes. They help the cheesecake set so you can cut it into neat squares. FYI, make sure your eggs are at room temperature so they mix in smoothly without leaving lumps in your batter.
Why This Combination Works

Biscoff and cream cheese are a match made in heaven. The cream cheese is a little sour, and the Biscoff is very sweet. When you mix them, they balance each other out perfectly. It is not too sweet, and it is not too heavy. Many people find traditional cheesecake a bit plain, but adding the cookie butter gives it a deep, toasted flavor that reminds me of autumn or a cozy coffee shop. It makes the bars taste much more complex than they actually are.
The crust is also a big winner here. Since Biscoff cookies are already spiced, you get a built-in flavor boost. Some people use graham crackers for cheesecake, but IMO, Biscoff cookies are much better. They have a darker flavor that stands up to the rich filling. When you bake the crust for just a few minutes before adding the filling, it stays crispy. This creates a great contrast between the crunch on the bottom and the silkiness on top.
Step-By-Step Baking Guide
Baking can be tricky if you don’t have a plan. I have made the mistake of forgetting to line my pan with paper before, and the cheesecake stuck so badly I had to eat it with a spoon! It still tasted good, but it didn’t look like bars at all. To avoid that, follow these steps carefully. Taking your time with the prep work makes the rest of the process very smooth and stress-free. You will be surprised at how fast this comes together once you start.
How to Prepare the Biscoff Crust

- Preheat your oven to 350°F so it is hot when you are ready to bake.
- Line an 8×8 inch square pan with parchment paper. Leave some paper hanging over the sides like handles so you can lift the bars out later.
- Crush about 25 Biscoff cookies into fine crumbs. You can use a blender or put them in a bag and hit them with a rolling pin.
- Press the crumbs firmly into the bottom of the pan. You don’t even need butter because the cookies have enough oil to stick together!
- Bake the crust for 8 minutes. This helps it stay together when you add the wet filling.
If you find that your crumbs are too dry and won’t stay down, you can add one tablespoon of melted butter, but usually, the cookies do the job alone. I learned that pressing the crumbs down with the bottom of a flat glass helps get a very even surface. You want the crust to be the same thickness everywhere so every bite is the same. Let the crust cool for a few minutes while you make the filling. This prevents the bottom from getting mushy.
Mixing the Creamy Cheesecake Filling

- In a large bowl, beat two blocks of softened cream cheese until they are very smooth. Use a hand mixer or a stand mixer for this.
- Add half a cup of Biscoff cookie butter to the cream cheese and mix it again. It will turn a beautiful light brown color.
- Add two large eggs, one at a time. Mix on low speed just until you can’t see the yellow of the egg anymore.
- Do not overmix! If you beat it too much, you will get air bubbles that might pop and crack the top of your cheesecake.
The most important tip I can give you is to make sure your cream cheese is very soft. If it is cold, you will get tiny white lumps that never go away. I once tried to rush this and ended up with “polka dot” cheesecake. It was funny, but the texture was a bit weird. If you forgot to take your cream cheese out of the fridge, you can put the sealed foil packs in a bowl of warm water for ten minutes to soften them up quickly.
Baking and Cooling for Success

Pour the filling over your baked crust and smooth it out with a spoon. Put the pan in the oven and bake for about 30 to 35 minutes. You know it is done when the edges look set and firm, but the very middle still jiggles just a little bit when you shake the pan. It should look like Jell-O in the center. If the whole thing is stiff, you might have baked it too long. Don’t worry if it looks underdone; it will firm up a lot as it cools down in the fridge.
Now comes the hardest part: waiting. You must let the bars cool on the counter for an hour, then put them in the fridge for at least four hours. Overnight is even better. If you try to cut them while they are warm, they will turn into a messy pile of goo. Cooling allows the fats in the cream cheese and cookie butter to get solid again. This creates that perfect, dense texture that makes cheesecake so famous. I usually make these the night before a party so I don’t have to stress about the timing.
Pro Baking Tips
- Hot Knife Trick: Dip your knife in hot water and wipe it dry before every cut to get clean, professional squares.
- Room Temp Ingredients: Always use room temperature eggs and cream cheese to avoid lumps in your batter.
- No Peak Rule: Do not open the oven door too often. Every time you peek, the heat escapes and messes up the bake time.
Ways to Serve and Store Your Bars
Once your bars are cold and set, you can get creative with how you present them. These are great for “easy entertaining” because they are already in small pieces. You don’t need to stand there cutting slices of cake for everyone while they wait. You can just put them on a big plate and let people help themselves. They look very cute on a dessert table and are small enough that people can eat them with their hands if they want to.
Dressing Up the Bars for Guests

If you want to make these look extra special, you can add a few toppings. I like to melt a little bit of extra cookie butter in the microwave for twenty seconds. Then, I use a spoon to drizzle it in lines across the top of the bars. It makes them look like they came from a fancy shop! You can also crumble one or two extra cookies on top for some added texture. Another idea is to put a tiny dollop of whipped cream on each square right before you serve them.
For a party, you can cut these into 16 medium bars or 32 tiny “bite-sized” pieces. Small treats are usually a hit because people like to try a little bit of everything. If you are serving these at a summer BBQ, they are very refreshing when eaten straight from the fridge. They have a cool, creamy mouthfeel that everyone loves. Just make sure you don’t leave them out in the sun for too long, or the cream cheese will get too soft and lose its shape.
How to Store Your Leftovers

If you actually have leftovers, which is rare at my house, you need to keep them in the fridge. Put them in an airtight container so they don’t pick up any weird smells from other food like onions or leftovers. They will stay fresh and tasty for up to five days. In fact, some people think they taste even better on the second or third day because the flavors have more time to meld together. The crust might soften slightly, but it still tastes amazing.
You can also freeze these bars if you want to save them for later. Wrap each bar tightly in plastic wrap and put them in a freezer bag. They can stay in the freezer for up to two months. When you want one, just let it thaw in the fridge for an hour. This is a great trick if you want a sweet snack but don’t want to bake a whole new batch. It is also a good way to use up the bars if you made too many for your party.
Your Common Questions Answered
I know that even with a simple recipe, questions can pop up. Baking can feel like a science experiment sometimes! Here are the answers to the most common things people ask me when they make these Biscoff bars. I want to make sure you feel totally confident when you walk into your kitchen to start this project.
Can I use a different kind of cookie for the crust?
Yes! You can use graham crackers or ginger snaps. But Biscoff cookies give the best flavor for this specific recipe because they match the filling.
What if I cannot find Biscoff cookie butter?
Look for “speculoos spread” at the store. Many stores have their own brand version that tastes exactly the same as the name brand.
Why did my cheesecake crack on top?
Cracks usually happen from overmixing or cooling too fast. Don’t worry! You can hide any cracks with extra melted cookie butter or whipped cream.
Is there a way to make this dairy-free?
You can use vegan cream cheese, but the texture might be a little softer. Make sure the cookie butter you buy is also vegan-friendly.
Do I have to use a water bath?
No! That is the best part. These bars are small enough that they bake evenly without needing a messy water bath in the oven.
The Final Word on Biscoff Bars
These 4-ingredient Biscoff cheesecake bars are the ultimate shortcut to a happy crowd. They prove that you do not need a long list of ingredients or a whole day in the kitchen to make something people will talk about for weeks. With a crunchy crust and a spiced, creamy filling, they are a total win for any host. Just remember to let them cool completely, and you will have perfect, beautiful bars every time you bake.