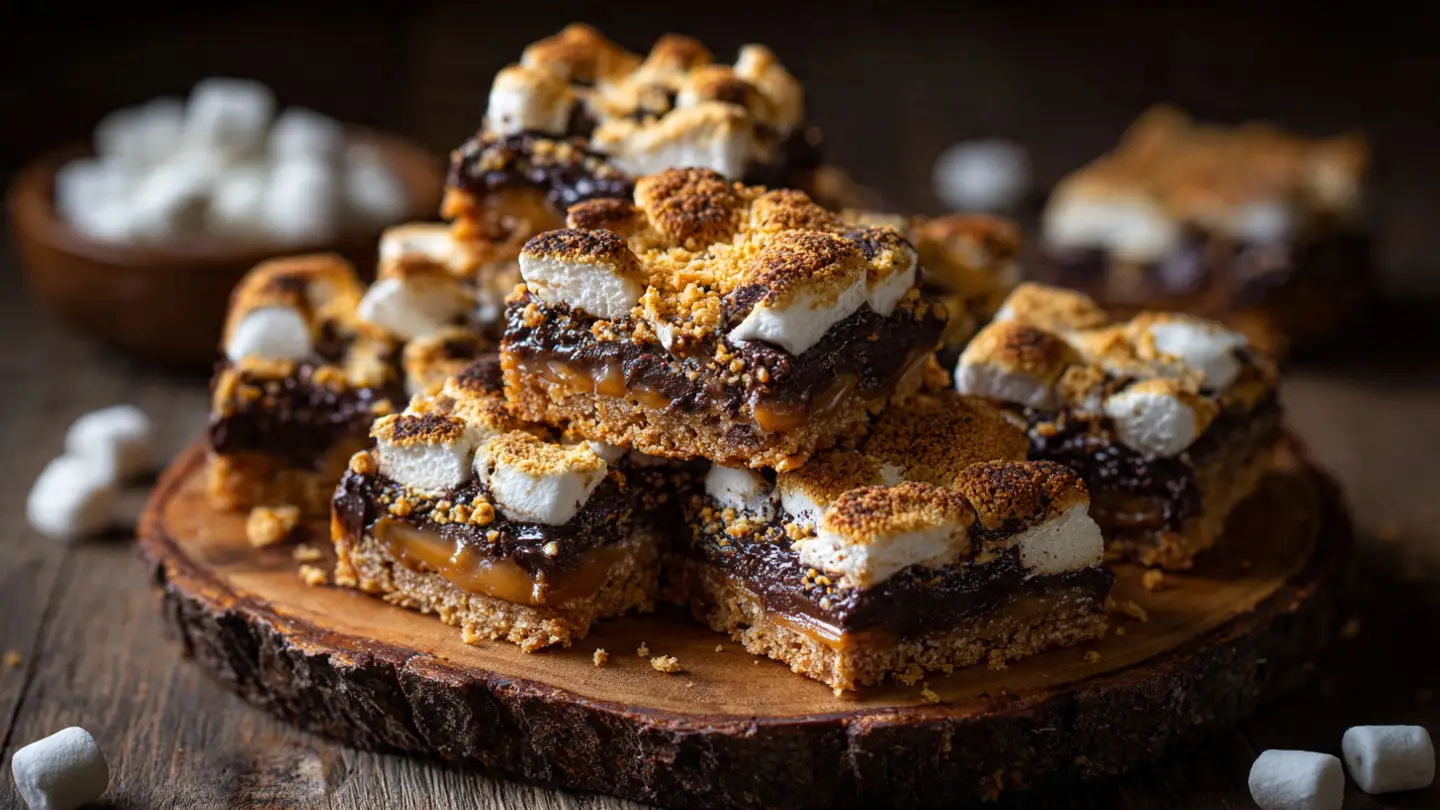
Gooey S’mores Bars with Toasted Marshmallows
Making s’mores is usually a messy job around a campfire. You have to find the right stick and hope you do not drop your marshmallow in the dirt. I love that smoky taste, but I do not always want to sit outside in the cold. That is why I made this recipe for gooey s’mores bars. These treats give you all the best parts of a s’more without the bug bites or smoke in your eyes.
In this article, you will learn how to bake a thick graham cracker crust that does not crumble. I will show you how to layer chocolate so it stays soft and gooey. We will also talk about how to get that perfect brown color on the marshmallows using your oven. These bars are great for parties or just a sweet snack at home. You will be able to make these like a pro by the time you finish reading.
Grab your apron and get ready to bake something amazing! Check out my tips below to get started.
The Secret to a Great S’more Bar
A good dessert bar needs to be strong enough to hold in your hand but soft enough to melt in your mouth. Many people make the mistake of making the crust too thin. If the bottom is thin, the heavy chocolate and sticky marshmallows will make it fall apart. I learned this the hard way when my first batch turned into a pile of crumbs. I had to eat it with a spoon! Now I make sure the crust is thick and pressed down hard.
You also need to think about the chocolate. If you use cheap chocolate, it might get hard or waxy when it cools down. I like to use a mix of milk chocolate and dark chocolate to keep it interesting. The milk chocolate is classic, but a little bit of dark chocolate makes it taste richer. It is all about finding that balance that makes your taste buds happy. IMO, the toasted top is the most important part of the whole thing.
The Ingredients You Need

To make these bars, you only need a few simple things. Most of these are likely in your pantry right now. You will need graham crackers, butter, sugar, and a pinch of salt for the base. For the middle, you need plenty of chocolate. I usually buy three or four large chocolate bars and break them into pieces. You can also use chocolate chips if that is what you have. They work just as well and melt quickly.
The stars of the show are the marshmallows. Use the big ones for a super gooey look, or mini ones if you want them to melt faster. I also like to add a tiny bit of vanilla to my crust. It makes the whole house smell like a bakery. Make sure your butter is melted but not boiling hot when you mix it with the crumbs. If it is too hot, it can make the sugar melt too soon and change the texture.
- 2 cups of graham cracker crumbs
- 1/2 cup of melted butter
- 1/4 cup of white sugar
- 2 cups of chocolate chips or broken bars
- 1 bag of large marshmallows
- A pinch of salt
How to Prep Your Baking Pan

Before you start mixing, you must get your pan ready. This is a step many people skip, and they regret it later. Marshmallows are like glue once they get hot. If you do not line your pan, you will never get the bars out in one piece. I always use parchment paper. I cut a piece that is long enough to hang over the sides of the pan. These are like little handles that help me lift the whole block of bars out once they are cool.
If you do not have parchment paper, you can use aluminum foil. Just make sure to rub a little butter or oil on the foil so nothing sticks. I prefer the paper because it stays flat and does not tear as easily. This simple trick saves you from a big mess in the sink later. Trust me, scrubbing burnt sugar off a metal pan is not a fun way to spend your evening. It is much better to just lift and slice!
Mixing the Perfect Crust

Now it is time to make the base. Put your graham cracker crumbs in a big bowl. If you are starting with whole crackers, put them in a plastic bag and hit them with a rolling pin. It is a great way to get out some energy! You want them to look like coarse sand. Add your sugar and salt to the bowl and stir it up. Then, pour in your melted butter. Stir it until all the crumbs look wet and dark golden.
The crust is the foundation of your bar. It needs to be sweet but also a little salty to balance the sugar. I once forgot the salt, and the bars tasted a bit flat. That tiny pinch makes a huge difference. When you put the mix into your pan, use the bottom of a flat cup to press it down. You want it to be very tight. If it is loose, the bars will crumble when you try to eat them. Bake this crust for about ten minutes first so it gets firm.
Recipe Quick Info
- Prep Time: 15 minutes
- Cook Time: 20 minutes
- Servings: 12 bars
- Difficulty: Easy
Adding the Chocolate Layer

Once your crust is out of the oven, it is time for the chocolate. While the crust is still hot, sprinkle your chocolate chips or bar pieces all over the top. Let them sit for a minute. The heat from the crust will start to melt the bottom of the chocolate. I like to take a spatula and gently spread the chocolate so it covers every single corner. You want a thick, even wall of chocolate in the middle.
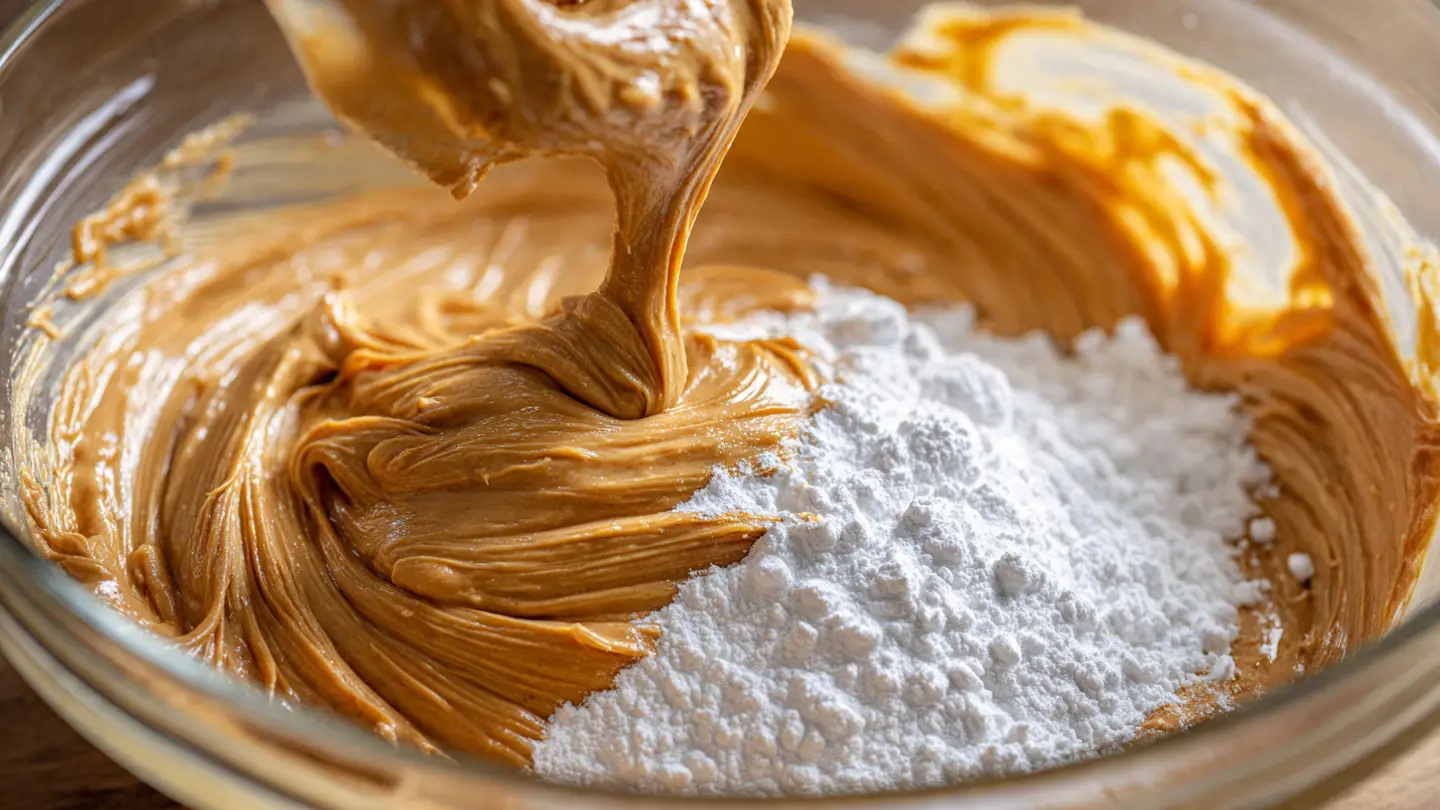
If you want to get fancy, you can add a layer of peanut butter under the chocolate. This is a great alternative if you love that flavor combo. Just be careful not to use too much, or it will get too oily. Some people also like to sprinkle a little extra sea salt on top of the chocolate. This makes it taste more like a grown-up dessert. Whatever you choose, make sure the chocolate layer is thick enough to stand up to the marshmallows that are coming next.
Toasting the Marshmallows

This is the part where you have to pay close attention. Put your marshmallows on top of the chocolate. You should pack them in so you cannot see any chocolate peeking through. Put the pan back into the oven under the broiler. The broiler is the setting that makes heat come from the top. It only takes a minute or two to turn them from white to golden brown. FYI, they can go from perfect to burnt in five seconds!
I usually sit on the floor and look through the oven window while this happens. It is actually quite fun to watch them puff up and change color. If you do not have a broiler, you can just bake them at a high heat, but they won’t get that same dark crust. A kitchen torch also works if you have one. It gives you more control over where the brown spots go. Just be careful not to set your kitchen on fire. That would definitely ruin the dessert!
Letting the Bars Cool

I know it is hard, but you must wait before you cut these. If you cut them while they are hot, the marshmallow and chocolate will just run everywhere. It will be a giant puddle of sugar. I usually let mine sit on the counter for at least an hour. If you are in a rush, you can put them in the fridge for thirty minutes. This helps the chocolate firm up so you get those nice, clean lines when you slice them with a knife.
To get the best cuts, I dip my knife in hot water and wipe it dry between every slice. The heat helps the knife slide through the sticky marshmallow without pulling it. If the knife gets too sticky, just wash it and start again. This is a small tip that most people skip, but it makes your bars look like they came from a fancy shop. You can cut them into big squares or small bite-sized pieces. Both ways taste just as good!
Pro Baking Tips
- Wet Your Knife: Use a warm, wet knife to cut through sticky marshmallows cleanly.
- Double the Crust: If you like a crunchy base, make 1.5 times the crust recipe for a thicker bottom.
- Watch the Heat: Never leave the room when the broiler is on. Sugar burns very fast!
Variations You Can Try

You do not have to stick to just graham crackers and chocolate. I love to experiment with different toppings. Sometimes I use Ritz crackers instead of graham crackers for the crust. This adds a salty, buttery taste that is really good. You can also mix some crushed pretzels into the crust for extra crunch. If you are a fan of fruit, try adding a thin layer of raspberry jam on top of the chocolate. It adds a nice tart kick to the sweet bar.
Another fun idea is to use flavored marshmallows. During the holidays, you can find peppermint or strawberry ones. This changes the whole vibe of the treat. If you are making these for a kids’ party, you could even add some colorful sprinkles on top of the marshmallows before they go into the oven. The possibilities are endless! Just remember that adding too many wet ingredients might make the crust soggy, so keep the balance right.
How to Store Your Leftovers

If you actually have leftovers, you need to store them the right way. These bars stay good for about three to four days if you keep them in an airtight container. I keep mine on the counter at room temperature. If you put them in the fridge, the marshmallows can get a bit tough and chewy. If that happens, you can pop a bar in the microwave for five seconds to soften it back up. It will taste like it just came out of the oven!
One thing to watch out for is humidity. If your house is very humid, the marshmallows might start to get weepy or sticky. In that case, the fridge might be your only choice. Just make sure the container is sealed tight so they don’t pick up any weird fridge smells. I usually put a piece of parchment paper between the layers so they don’t stick together. This makes it easy to grab one and go when you need a quick sugar fix.
Common S’mores Questions
People often ask me how to fix their bars if things go wrong. Most problems come down to heat or timing. If your crust is too hard, you might have baked it too long. If your marshmallows didn’t brown, your oven might not have been hot enough. Here are some of the most common things people want to know when they make this recipe for the first time.
Can I make these bars gluten-free?
Yes! You can buy gluten-free graham crackers at most stores. Just swap them in for the regular ones. The rest of the recipe stays exactly the same.
Why did my marshmallows melt into a puddle?
This usually happens if you bake them for too long at a low heat. Use the broiler for a quick blast of heat to brown the tops without melting the whole thing.
Can I use marshmallow fluff instead?
You can, but it won’t get that nice toasted crust on top. Fluff stays very soft and can be much messier to cut. Real marshmallows are better for this.
Do I have to use milk chocolate?
No way! You can use dark chocolate, white chocolate, or even peanut butter chips. Use whatever you like best. Dark chocolate is my favorite choice.
How do I keep the bars from sticking to the pan?
Always use parchment paper and let it hang over the sides. This lets you lift the bars out easily. Greasing the pan helps too, but paper is much safer.
Enjoy Your Homemade S’mores
These gooey s’mores bars are the perfect way to bring a little bit of the outdoors inside. They are easy to make and everyone loves them. Whether you are sharing them with friends or eating them all yourself, they are sure to be a hit. Just remember to watch that broiler and let them cool down before you dig in. Happy baking!