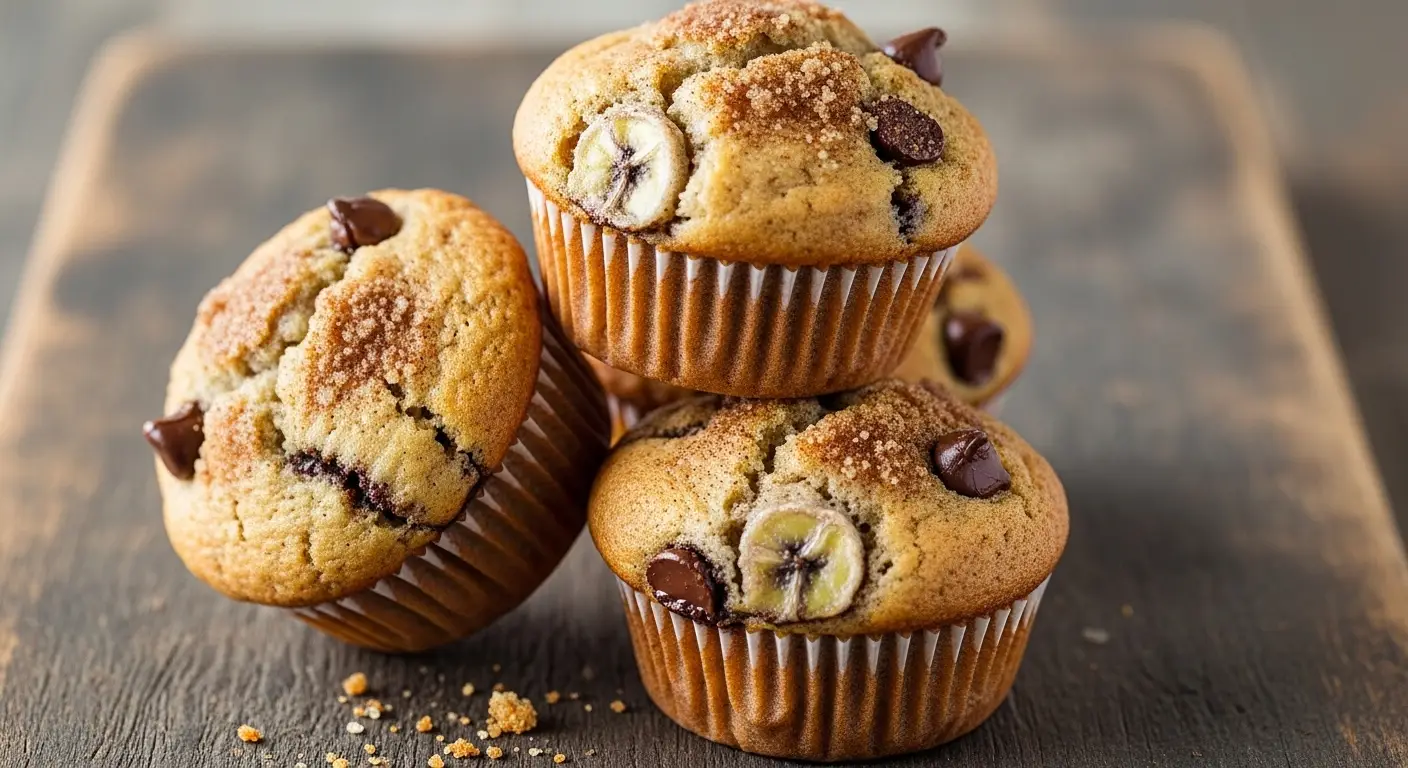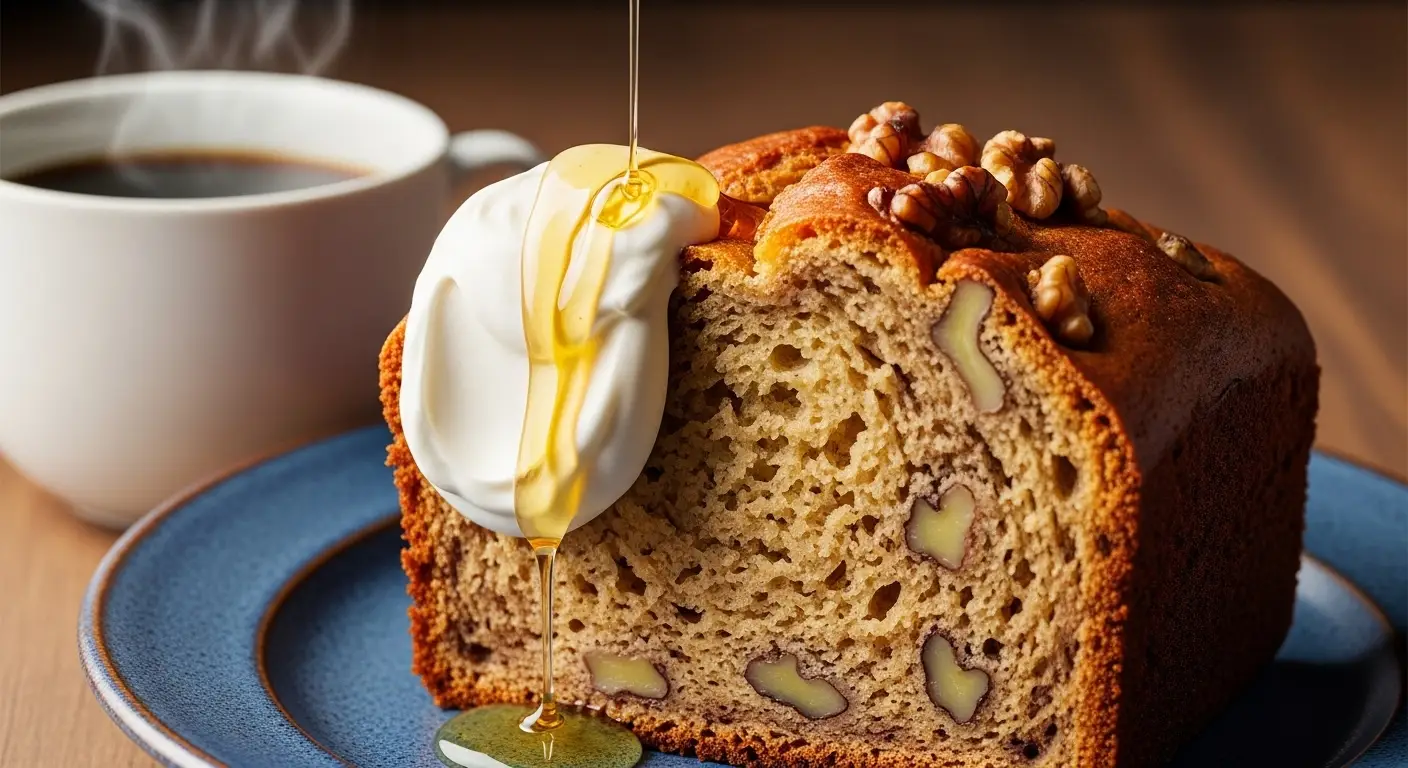
Banana Nut Bread
I love walking into my house when the smell of baking is in the air. There is nothing better than the sweet scent of cinnamon and warm bread. If you have a few brown bananas on your counter, do not throw them away. Those ugly, spotted fruits are actually a gift from the kitchen gods. They are the secret to making the softest loaf you have ever tasted.
Today, I am going to show you how to turn those old bananas into a treat. This banana nut bread is very easy to make. You do not need a fancy mixer or special skills. Just a bowl, a fork, and a little bit of time will get the job done. I have made this hundreds of times, and it always makes my family happy. It is great for breakfast or a late-night snack with a glass of cold milk.
You will learn how to mix the batter correctly and how to tell when the bread is done. I will also share some simple tricks to make sure your loaf never comes out dry. Let’s get our aprons on and start baking together! You can even let the kids help with the mashing part.
Ready to bake the best loaf ever? Let’s check our pantry first.
Getting Everything Ready for Your Bread
Before we start mixing, we need to make sure we have all our tools and food ready. Baking is like a science project, but you get to eat the results. I always pull everything out onto the counter first. This helps me see if I am missing anything before my hands get covered in flour. It is no fun to realize you are out of eggs when the oven is already hot!
Make sure your butter is soft. If it is hard like a rock, it won’t mix well with the sugar. I usually leave mine on the counter for an hour. If you are in a rush, you can put it in your pocket for a few minutes. I know that sounds silly, but the heat from your body softens it perfectly without melting it. Just don’t forget it is there!
Gather Your Simple Ingredients

You only need basic things from the store to make this bread. Most of these are probably in your kitchen right now. You will need three or four very ripe bananas. The more black spots they have, the sweeter your bread will be. You also need all-purpose flour, white sugar, and some brown sugar. The brown sugar adds a nice deep flavor that reminds me of caramel. It also keeps the bread moist for days.
For the fat, I use real butter because it tastes the best. You will also need one large egg, a splash of vanilla, and some baking soda. Do not forget the salt! Salt actually makes the sweet flavors stand out more. Finally, get some chopped walnuts. If you do not like walnuts, you can use pecans or even chocolate chips. IMO, the walnuts give it the best crunch.
Essential Baking Tools

You do not need a lot of gear to make a great loaf. A standard 9-by-5 inch loaf pan is the best size. If your pan is too big, the bread will be flat. If it is too small, the batter might spill over the sides and make a mess in your oven. I also use a large bowl for the wet stuff and a medium bowl for the dry stuff. Mixing them separately ensures you don’t overwork the dough.
A sturdy fork is the best tool for mashing bananas. You want some small chunks left so you get bursts of fruit in every bite. A rubber spatula is also very helpful. It lets you scrape every last drop of batter out of the bowl. I hate wasting even a little bit of this yummy mix! Make sure your oven rack is in the middle so the heat hits the pan evenly from all sides.
Recipe Quick Info
- Prep Time: 15 minutes
- Cook Time: 60 minutes
- Servings: 10 slices
- Difficulty: Very Easy
The Step-by-Step Way to Bake
Now we get to the fun part of the process. Mixing the batter is very relaxing. I like to turn on some music while I work. The key to a great loaf is how you handle the ingredients. You want to be gentle. If you stir too hard, the bread will become tough like a piece of rubber. Nobody wants to eat a rubbery banana! We want it to be light and soft.
I remember one time I forgot the baking soda. The bread came out looking like a flat brown brick. It still tasted okay, but it was very hard to chew. That mistake taught me to always double-check my list. I also learned that putting a piece of parchment paper in the pan makes it much easier to pull the bread out later. It acts like a little handle for your loaf.
Mashing and Mixing the Base

Start by peeling your bananas and putting them in your big bowl. Use your fork to mash them up until they look like a thick paste. It is okay if there are some lumps. Next, pour in your melted butter and stir it around. Once that is mixed, add your sugars, the egg, and the vanilla. Stir it until the egg disappears into the mix. It should look smooth and smell amazing already.
I once tried to use bananas that were still green. It was a total fail! The bread was not sweet at all and felt very dry. If your bananas are not ripe enough, you can put them in a paper bag for a day to speed things up. Or, you can bake them in their skins at 300 degrees for 15 minutes until they turn black. This softens them up and brings out the sugar instantly. It is a great trick if you have a sudden craving for bread.
Adding the Dry Ingredients

In your other bowl, mix the flour, baking soda, and salt. Use a whisk to get rid of any big flour clumps. Now, slowly pour the dry powder into the wet banana mix. This is the most important part: do not over-mix! Use your spatula to fold the flour in gently. Stop stirring as soon as you can’t see any more white streaks of flour. If you keep stirring, the bread will be heavy and dense.
Now it is time to add the nuts. Gently fold in your chopped walnuts. I like to save a small handful to sprinkle on the very top of the batter once it is in the pan. This makes the loaf look like it came from a professional bakery. If you are allergic to nuts, you can just skip this step. The bread will still taste great without them. FYI, adding a dash of cinnamon to the flour makes it smell even better while it bakes.
Baking to Golden Perfection
Pour your batter into the greased pan and smooth out the top. Put it in the oven and wait. This is the hardest part because the smell will make you very hungry! It usually takes about 50 to 60 minutes. Every oven is a little bit different, so start checking it at the 50-minute mark. You want the top to be a deep golden brown and the middle to feel firm when you press it gently.
To be 100% sure it is done, stick a toothpick or a thin knife into the center. If it comes out clean or with just a few crumbs, it is ready. If it has wet batter on it, give it five more minutes. If the top is getting too dark but the inside is still raw, cover the pan loosely with a piece of aluminum foil. This stops the top from burning while the middle finishes cooking. It is a lifesaver for thick breads!
Pro Baking Tips
- Don’t Peek: Keep the oven door closed for at least the first 45 minutes so the heat stays steady.
- Cooling: Let the bread sit in the pan for 10 minutes before moving it to a wire rack. This helps it stay together.
- Butter it Up: Serve a warm slice with a little bit of salted butter for the best flavor.
Making Your Bread Even Better
Once you master the basic recipe, you can start to get creative. I like to change things up depending on what I have in my pantry. Sometimes I add a handful of dark chocolate chips for my kids. Other times, I might add some shredded coconut or dried cranberries. This recipe is very flexible, which is why I love it so much. It is hard to mess up as long as you have the basic ratios right.
You can also turn this batter into muffins if you are in a hurry. Muffins only take about 20 minutes to bake. They are perfect for grabbing on your way out the door in the morning. Just make sure to grease the muffin tin well or use paper liners so they don’t stick. Whether you make a loaf or muffins, the taste is exactly the same—pure comfort in every bite.
How to Store Your Loaf

This bread actually tastes better the next day. The flavors have time to settle and the moisture spreads out evenly. I store mine by wrapping it tightly in plastic wrap. You can keep it on the counter for about three days. If you want it to last longer, put it in the fridge for up to a week. Just wrap it well so it doesn’t pick up any weird smells from the refrigerator.
You can also freeze this bread! I often bake two loaves at once and put one in the freezer. Wrap it in plastic and then a layer of foil. It will stay fresh for three months. When you want a slice, just let it thaw on the counter for a few hours. You can even pop a frozen slice right into the toaster. It comes out warm and crispy on the edges, which is my favorite way to eat it.
Creative Serving Ideas

Plain banana bread is great, but you can dress it up for a fancy brunch. I like to toast a thick slice and spread some cream cheese on it. The tangy cheese goes perfectly with the sweet banana. Another fun idea is to use it for French toast. Dip a thick slice into an egg and milk mixture and fry it in a pan. It is the most decadent breakfast you will ever have!
If you have some slices that have gone a bit dry, don’t worry. You can cube them up and use them to make bread pudding. Or, just zap a slice in the microwave for 10 seconds. It will soften right back up and taste like it just came out of the oven. My grandpa used to eat his with a big slice of cheddar cheese on top. It sounds strange, but the salty and sweet combo is actually pretty good!
Questions People Often Ask
Why did my bread sink in the middle?
This usually happens if you open the oven too early or if your baking soda is old. Make sure your soda is fresh and keep that door shut!
Can I use applesauce instead of butter?
Yes, you can use a 1-to-1 swap. The bread will be lower in fat but a bit more spongy. It is a healthy choice that still tastes good.
How do I keep the nuts from falling to the bottom?
Toss your chopped nuts in a spoonful of flour before adding them to the batter. This helps them stay floating in the bread while it bakes.
Can I make this bread gluten-free?
You can use a gluten-free flour blend. Look for one that says it is a 1-to-1 replacement for best results. The texture may be slightly different.
My bread is too dark on the outside but raw inside?
Your oven might be too hot. Next time, lower the heat by 25 degrees and cover the top with foil if it browns too fast.
Enjoy Your Homemade Treat
Baking banana nut bread is a simple joy that everyone should try. It fills your home with warmth and gives you a tasty snack for days. Just remember to use ripe bananas and don’t over-mix the batter. You’ve got this!