Banana Muffins
Making banana muffins is one of the best ways to use up old fruit. We all have those brown bananas sitting on the counter that look a bit sad. Instead of throwing them away, you can turn them into a warm and sweet treat. These muffins are very soft and smell like a dream when they come out of the oven.
I have made these many times for my family on Saturday mornings. It is a simple recipe that does not need a fancy mixer or special skills. You just need two bowls and a big spoon to get the job done. This guide will show you every step to make sure your muffins turn out tall and fluffy every single time.
Are you ready to start baking with me?
Check out the full list of items you need below.
Getting Ready to Bake
Before you start mixing, you need to set up your kitchen. Baking is much easier when you have everything in front of you. I like to clear off my counter and get my measuring cups ready first. It saves a lot of time and keeps the kitchen from getting too messy while I work. Making sure your oven is hot before the muffins go in is the most important part of the whole process.
Muffin Baking Facts
- Prep Time: 15 minutes
- Cook Time: 20 minutes
- Servings: 12 muffins
- Difficulty: Very Easy
Gather Your Ingredients

To make these muffins, you will need a few basic things from your pantry. The main star is the banana. You want them to be very ripe with lots of black spots. Darker bananas are sweeter and easier to mash up. If your bananas are still bright yellow, the muffins will not have much flavor and might feel a bit dry.
- 3 large ripe bananas
- 1/2 cup melted butter
- 3/4 cup white sugar
- 1 egg, beaten
- 1 teaspoon vanilla extract
- 1 teaspoon baking soda
- A pinch of salt
- 1.5 cups all-purpose flour
These simple items create a great taste. I sometimes use brown sugar instead of white sugar if I want a deeper flavor. It makes the muffins a bit more moist and dark. Both ways work well, so feel free to use what you have in the cupboard right now. IMO, the extra spots on the banana make the biggest difference in the final taste.
The Tools You Need

You do not need a big electric mixer for this recipe. In fact, mixing by hand is better because it keeps the muffins light. If you mix too much with a machine, the bread can get tough like a rubber ball. I learned this the hard way years ago when I tried to use my big stand mixer for everything. My muffins came out like hockey pucks!
Grab a large bowl for the dry stuff and a medium bowl for the wet stuff. You will also need a muffin tin that holds 12 muffins. You can use paper liners or just rub some butter inside the holes so the cake does not stick. A fork is perfect for mashing the bananas until they look like a thick soup. Having a wire rack to cool them later is also a good idea if you have one.
How to Make the Batter
Now comes the fun part where we mix everything together. The goal is to combine the wet and dry parts without stirring too much. This is called the muffin method. It is a basic trick that every baker should know. If you see a few small lumps of flour in the batter, that is actually a good thing. It means you did not over-mix the dough.
Pro Baking Tip
- Temperature Tip: Make sure your egg is at room temperature. It mixes better with the melted butter so the butter does not turn back into solid chunks.
Mash and Mix Wet Ingredients

First, peel your bananas and put them in your medium bowl. Use your fork to mash them until they are smooth. It is okay if there are a few tiny chunks left. Next, pour in your melted butter and stir it in. The butter should be warm but not hot enough to cook the egg. Add your sugar, the beaten egg, and the vanilla extract next.
- Peel 3 bananas and mash with a fork.
- Stir in 1/2 cup of melted butter.
- Mix in 3/4 cup sugar.
- Add the beaten egg and 1 teaspoon vanilla.
Stir these until they look even. The mixture will look a bit thin and very sweet. This is the base of your flavor. Some people like to add a tiny bit of cinnamon here too. It makes the house smell like a bakery while the muffins are in the oven. Does that sound good to you? I think it adds a nice touch of warmth to the fruit flavor.
Adding the Dry Ingredients

Now take your baking soda and salt and sprinkle them over the wet banana mix. Stir it just a little bit. Finally, pour in all of your flour at once. Use a big spoon or a spatula to fold the flour into the wet mix. To fold means to gently turn the batter over from the bottom to the top. Do this until you do not see any big white spots of flour anymore.
Stop stirring as soon as the flour is gone. If you keep stirring, the muffins will be flat and hard. This is the most common mistake people make. They want the batter to look perfectly smooth, but muffin batter should be a little lumpy. This keeps the air inside so they rise up tall in the heat. Just a few turns of the spoon is usually enough to get it right.
Filling the Muffin Tin

Grab your muffin tin and your batter. I find that using an ice cream scoop is the best way to do this. It keeps the muffins all the same size so they cook at the same speed. If some are big and some are small, the small ones will burn while the big ones are still raw in the middle. FYI, filling the cups about three-quarters full is the perfect amount.
If you have extra batter, do not try to cram it into the 12 holes. It will spill over the sides and make a mess. You can just bake the last bit in a small ramekin or discard it. Wipe away any drips on the top of the pan with a damp towel. Those little drips will burn and smoke in the oven, which smells bad and can ruin the taste of your fresh muffins. Clean pans make better food!
Baking and Serving
The oven does the rest of the work now. You want to place the pan right in the center of the oven. This helps the heat move all around the tin evenly. While they bake, try not to open the oven door too much. Every time you open it, the heat escapes and the muffins might fall down. Wait until you see them turn golden brown on top before you check them.
The Baking Process

Bake your muffins for about 20 minutes. At the 18-minute mark, you can take a small wooden toothpick and poke the center of one muffin. If it comes out clean or with just a few dry crumbs, they are done. If the toothpick is wet or has sticky batter on it, give them another 2 or 3 minutes. Every oven is a little bit different, so your time might vary.
I once forgot to check mine and left them in for 30 minutes. They looked okay but they were very dry and hard to eat. It is always better to check a little early than too late. Once they are done, take them out and let them sit in the pan for 5 minutes. This lets the edges firm up so they do not fall apart when you lift them out. Patience is key here!
Ways to Serve Your Muffins

These muffins are best when they are still a little warm. I love to cut one in half and put a small piece of butter inside. The butter melts into the soft bread and tastes amazing. You can also eat them cold as a quick breakfast on your way to school or work. They are a great snack because they give you a little energy from the fruit and sugar.
If you want to be fancy, you can serve them with a little bit of honey or peanut butter. My kids love putting peanut butter on theirs because it tastes like a sandwich. You can also pack them in a lunchbox. They stay soft for a few days if you keep them in a bag or a box with a lid. They are very easy to take on the go for a busy day.
How to Store Leftovers

If you do not eat all 12 muffins right away, you need to store them correctly. Put them in a plastic bag or a container with a tight lid. They will stay fresh on your counter for about 2 days. If you want them to last longer, you can put them in the fridge for up to a week. Just zap them in the microwave for 10 seconds before you eat them to make them soft again.
You can also freeze these muffins! This is a great trick if you live alone or have a small family. Wrap each muffin in plastic wrap and put them all in a big freezer bag. They will stay good for 3 months. When you want one, just let it sit on the counter for an hour or warm it up in the oven. It is like having a fresh bakery in your house whenever you want.
Adding Variations and Mix-ins

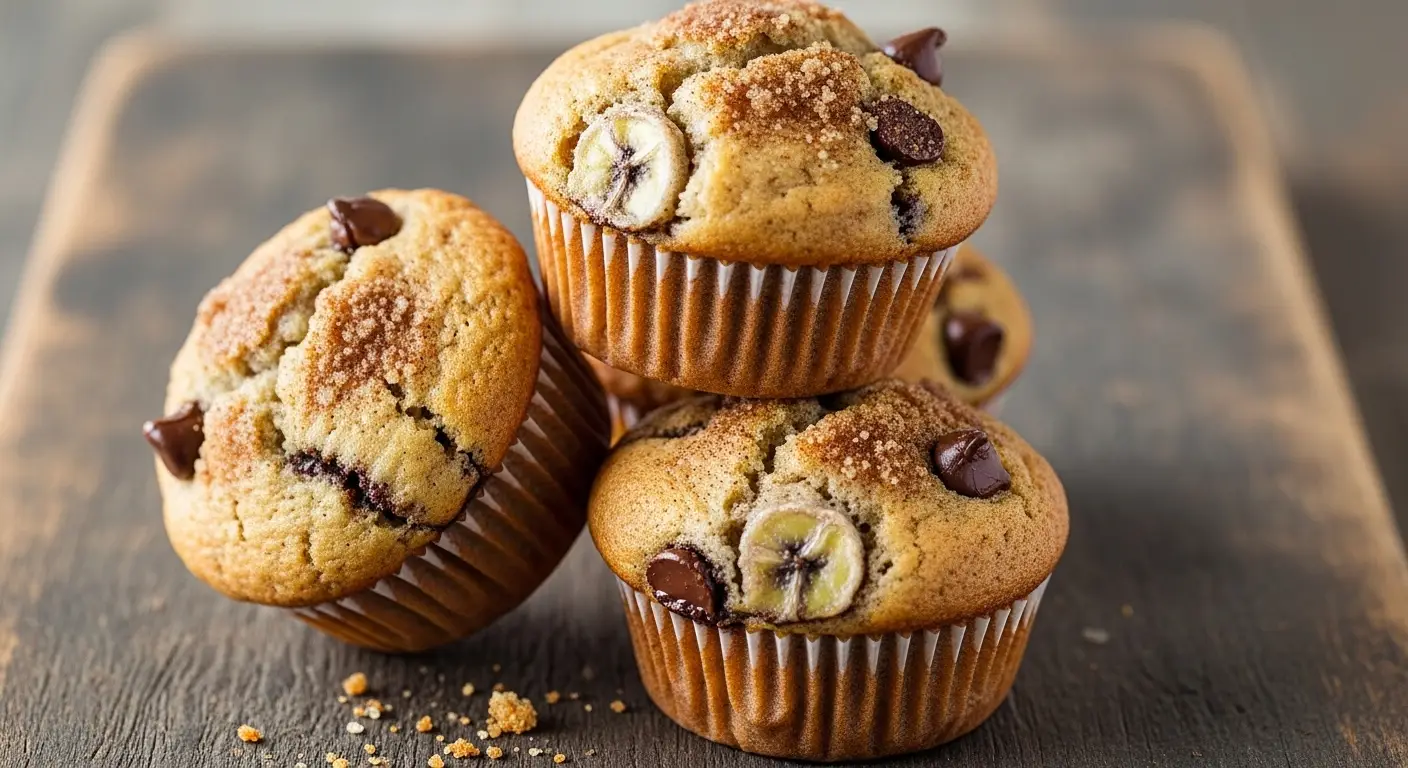
This is a basic recipe, but you can add other things to it if you want. A half-cup of chocolate chips makes these feel like a dessert. If you like a crunch, you can add chopped walnuts or pecans. I sometimes add a handful of blueberries if I have them in the fridge. Just remember not to add too many extra things or the muffin might fall apart.
- Chocolate chips (dark or milk chocolate)
- Chopped walnuts or pecans
- Dried cranberries
- A sprinkle of oats on top
Adding a little bit of lemon zest can also make the flavor pop. It makes the banana taste bright and fresh. If you use nuts, I suggest toasting them in a pan for 2 minutes first. It makes them much more crunchy and flavorful. There are so many ways to change this recipe to make it your own favorite. What will you add to your batch next time?
Questions People Ask Often
Can I use frozen bananas?
Yes! Thaw them first in a bowl. Pour out the extra water before mashing. They work great and are very sweet.
Why are my muffins flat?
Your baking soda might be old. Also, make sure your oven is hot before you put the pan inside. Do not over-mix!
Can I use oil instead of butter?
Yes, you can use vegetable oil. The muffins will stay moist longer, but they will not have that rich buttery taste.
How do I make them vegan?
Use oil instead of butter and a flax egg instead of a real egg. They will be a little more dense but still tasty.
Can I make these gluten-free?
Use a 1-to-1 gluten-free flour mix. Do not use almond flour alone or the muffins will not hold their shape.
Enjoy Your Fresh Muffins
Baking banana muffins is a smart way to save food and make a tasty treat. These are soft, sweet, and perfect for any time of day. I hope you have fun making these in your kitchen and enjoy the wonderful smell they create. Happy baking!