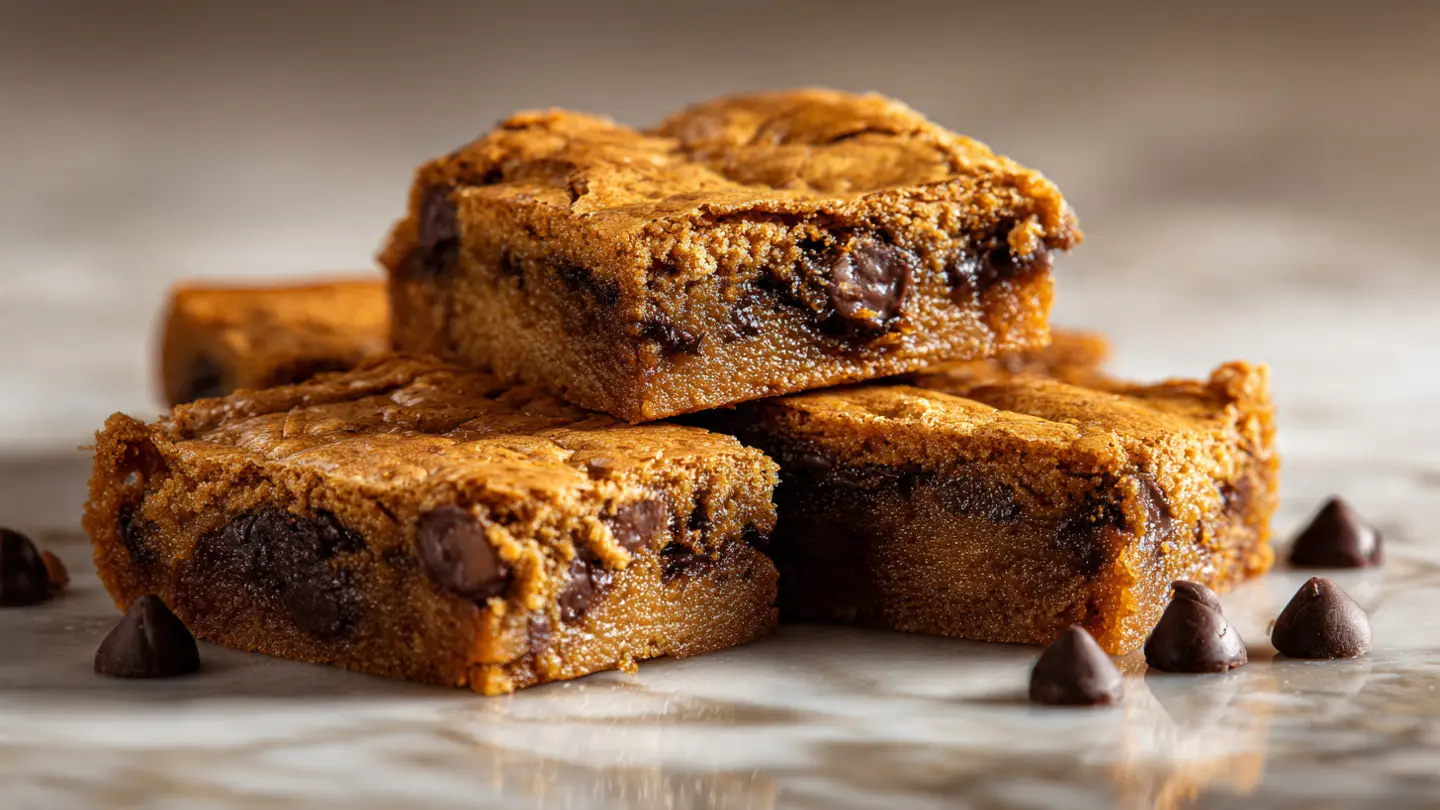
Blondies with Chocolate Chips
Making treats at home is a lot of fun. Today I want to show you how to bake blondies with chocolate chips. You might wonder what a blondie is. Think of it like a brownie but without the cocoa powder. It tastes like a big, soft chocolate chip cookie but in the shape of a bar. It is thick, chewy, and very sweet. I love making these because they are faster than scooping out individual cookies. You just put the dough in one pan and bake it all at once. It saves so much time when you are busy or just really want a snack.
I have baked these many times for my friends and family. Every time I bring them to a party, they disappear in minutes. They are great for school lunches, bake sales, or a dessert after dinner. You do not need any fancy tools to make them. A bowl and a spoon are usually enough. I will walk you through every step so your blondies come out perfect. You will learn what ingredients to use and how to tell when they are done. Let’s get into the kitchen and start baking together.
Try this recipe next time you want something sweet and easy.
Recipe Quick Info
- Prep Time: 15 minutes
- Cook Time: 25 minutes
- Servings: 16 bars
- Difficulty: Easy
Gathering Your Baking Supplies
Before you start mixing, you need to get your ingredients ready. This is called prep work. It makes the whole process much smoother. If you have everything on the counter, you won’t forget a key item. I once forgot the sugar in a cake, and it tasted terrible! Now I always double-check my list. Most of these things are likely in your pantry already. You need flour, butter, sugar, and eggs. These are the building blocks of almost every good dessert. We will also use some vanilla and salt to make the flavors pop.
Using the right kind of sugar is very important for blondies. We use brown sugar instead of white sugar. Brown sugar has molasses in it. This makes the bars soft and moist. It also gives them a taste like caramel or toffee. If you only use white sugar, they will be crunchy and dry. We want them to stay chewy for days. Using real butter also helps. Margarine can work, but the flavor is not as rich. I always choose unsalted butter so I can control how much salt goes into the mix. This ensures the balance is just right for your taste buds.
What You Will Need to Shop For

Here is the list of items you need to make these bars. Most are simple things you find at any grocery store. Check your cupboards before you go shopping. You might be surprised at what you already have. Having the right amount of each item ensures the texture is perfect. If you change the amounts too much, the bars might be too hard or too mushy. Stick to the list for the best results.
- 1 cup of unsalted butter (melted and cooled)
- 1 cup of light brown sugar (packed down in the cup)
- 1 large egg (at room temperature)
- 1 tablespoon of vanilla extract
- 1/2 teaspoon of salt
- 1 1/2 cups of all-purpose flour
- 1 cup of semi-sweet chocolate chips
I like to use semi-sweet chips because they are not too sugary. If you love very sweet things, milk chocolate chips work too. Some people even like dark chocolate chips for a slightly bitter taste. The choice is yours! Just make sure you use fresh flour. Old flour can sometimes smell dusty and ruin the taste of your bake. I keep my flour in a sealed jar to keep it fresh for a long time.
The Right Tools for the Job

You do not need an electric mixer for this recipe. In fact, mixing by hand is better. It keeps the bars from getting too much air. If they have too much air, they become cakey. We want them dense and fudgy. A large bowl and a sturdy spoon or spatula are perfect. You will also need an 8×8 inch square baking pan. This size makes the bars nice and thick. If you use a bigger pan, they will be thin and might burn easily.
Parchment paper is a great secret tool. I always line my pan with it. I leave a little bit hanging over the edges. This acts like a handle. Once the blondies are cool, I just lift the whole block out of the pan. It makes cutting them into squares so much easier. You won’t have to scrape the bottom of the pan and risk scratching it. If you don’t have paper, you can use butter and flour to coat the pan instead. This stops the dough from sticking to the metal while it cooks in the oven.
How to Bake Your Blondies
Now that you have your tools and food, it is time to bake. Baking is like a science experiment that you can eat. You must follow the steps in order. This ensures the butter and sugar mix properly with the flour. If you dump everything in at once, you might get lumps. Nobody wants to bite into a big clump of dry flour! I take my time with each step to make sure the batter is smooth. It only takes a few minutes, so don’t rush the process.
Preheating the oven is the first thing you should do. If you put the pan in a cold oven, the blondies will not rise correctly. They will come out oily and flat. Turn your oven to 350 degrees Fahrenheit before you start mixing. By the time you are done with the batter, the oven will be hot and ready. This is a small step that makes a huge difference in how the dessert turns out. I always set a timer so I don’t forget when to check on them.
Mixing the Wet Ingredients

First, melt your butter in a small bowl. You can use a microwave or a small pot on the stove. Let it cool down for a few minutes. If it is boiling hot, it might cook the egg when you add it. That would be gross! Once it is warm but not hot, pour it into your large mixing bowl. Add the brown sugar. Stir them together until you don’t see any big chunks of sugar left. It should look like smooth liquid caramel. This is where all the flavor starts.
Next, crack your egg into the bowl. Add the vanilla and the salt. The vanilla makes the blondies smell amazing while they bake. The salt is very important too. It doesn’t make them salty. Instead, it makes the sugar taste even better. Stir everything well until the egg is fully mixed in. The mixture should look shiny. This part of the process is very satisfying because it smells so good. FYI, the batter will look quite dark at this stage because of the brown sugar.
Adding the Dry Ingredients

Now it is time to add the flour. Pour it into the bowl with the wet mix. Use your spoon to fold it in gently. Folding means you go around the edge and through the middle. Do not stir too fast or too hard. If you over-mix, the blondies will become tough like bread. Stop stirring as soon as you cannot see any more white flour. It is okay if the batter looks thick. Blondie batter is much thicker than cake batter. It should be heavy and sticky.
Once the flour is in, grab your chocolate chips. Pour them into the bowl. Give it a few more stirs just to spread the chips around. I like to save a small handful of chips to sprinkle on top at the very end. This makes the finished bars look like they came from a professional bakery. If you like nuts, you could add some walnuts or pecans here too. IMO, the classic version with just chocolate chips is the best. The chips stay soft and melty inside the chewy dough.
Baking to Perfection

Scrape the batter into your prepared baking pan. Use your spatula to push it into the corners. Smooth out the top so it is flat. This helps it bake evenly. Put the pan in the middle of your oven. Bake them for 20 to 25 minutes. Every oven is a little bit different. Start checking them at 20 minutes. You are looking for the edges to be golden brown. The top should look set and not jiggly. It might even start to crack a little bit around the sides.
Do not over-bake these! This is the most common mistake people make. If you wait until the middle is hard, they will be dry. They will continue to cook a little bit after you take them out of the oven because the pan is still hot. This is called carry-over cooking. If a toothpick comes out with a few moist crumbs, they are perfect. If the toothpick is wet with batter, they need two more minutes. I usually pull mine out right at 22 minutes for the best fudgy center.
The Importance of Cooling

I know it is hard, but you must let the blondies cool completely before you cut them. If you cut them while they are hot, they will fall apart. They need time to firm up and get that chewy texture. I usually wait at least one hour. I put the pan on a wire rack so air can move underneath it. This stops the bottom from getting soggy. If you are in a rush, you can put them in the fridge for 30 minutes to speed things up.
Once they are cool, use the parchment paper handles to lift them out. Put the big square on a cutting board. Use a sharp knife to cut them into 16 smaller squares. I like to wipe my knife between cuts. This keeps the edges of each square looking clean and neat. You can make them bigger or smaller depending on how many people you are feeding. These bars are very rich, so a small square is usually enough to satisfy a sweet tooth.
Tips for Better Blondies
- Room Temp Eggs: Take your egg out of the fridge 30 minutes before baking. It mixes into the batter much better than a cold egg.
- Measure Flour Right: Do not scoop flour directly with the measuring cup. Use a spoon to fill the cup and level it off. This prevents using too much flour.
- Don’t Over-mix: Stop as soon as the flour is gone. Over-mixing makes the bars tough and less chewy.
Ways to Serve and Store Your Treats
Blondies are great because you can eat them in many ways. You can just grab one and go, or you can turn them into a fancy dessert. They stay fresh for a few days, so you can enjoy them all week. I like to keep a few in my bag for a snack during the day. They give me a nice boost of energy when I am feeling tired. Plus, they are a great way to make new friends if you share! Most people cannot say no to a homemade chocolate chip blondie.
If you want to save them for later, you have to store them correctly. Air is the enemy of soft treats. If you leave them out on the counter, they will get hard like a rock. I always use a container with a tight lid. You can also wrap individual bars in plastic wrap. This is perfect for putting in a lunchbox. They also freeze very well. You can keep them in the freezer for up to three months. Just let them thaw on the counter for an hour before you eat them.
Fun Serving Ideas

Want to make your blondies extra special? Serve them warm with a scoop of vanilla ice cream. The cold ice cream melts over the warm bar and creates a delicious sauce. You can also drizzle some caramel or chocolate syrup on top. This is what I do when I have guests over for dinner. It looks like a dessert from a high-end restaurant, but it only took you a few minutes to put together. It is a real crowd-pleaser every single time.
Another fun idea is to make a blondie sandwich. Take two small blondies and put some frosting or peanut butter in the middle. Press them together gently. This is a very big treat, so it is fun to share with a friend. You could even use them as a base for a sundae. Break a blondie into chunks and put them in a bowl with fruit, whipped cream, and sprinkles. There are no rules when it comes to enjoying your baking. Have fun with it!
How to Keep Them Fresh

To keep your blondies soft, store them at room temperature in a sealed box. They will stay fresh for about 3 to 5 days. If you want them to stay moist even longer, you can put a piece of white bread in the container. The blondies will pull the moisture out of the bread. It sounds strange, but it really works! Just make sure you don’t use flavored bread like garlic, or your blondies will taste very weird. Stick to plain white bread for this trick.
If you live in a very hot place, you might want to keep them in the fridge. This keeps the chocolate chips from melting. However, the fridge can make the bars a little bit firmer. If you like them very chewy, let them sit on the counter for ten minutes before you take a bite. You can also pop one in the microwave for 10 seconds. This makes the chocolate melty again and softens the dough. It tastes like it just came out of the oven!
Answers to Your Baking Questions
Can I use white sugar instead of brown sugar?
You can, but they will be crunchy like a cookie. Brown sugar is what makes them chewy and soft. I recommend sticking with brown sugar if possible.
What if I do not have unsalted butter?
You can use salted butter. Just leave out the extra 1/2 teaspoon of salt from the recipe. This prevents the blondies from being too salty.
Can I add other things like nuts or candy?
Yes! You can add 1/2 cup of nuts or M&Ms. Just make sure the total amount of mix-ins is about 1 to 1.5 cups so the batter holds together.
Why did my blondies come out dry?
You likely baked them for too long. Next time, take them out when the edges are gold but the middle still looks a little soft. They firm up as they cool.
Can I double this recipe for a big party?
Yes, you can double it. Use a 9×13 inch pan instead of an 8×8 pan. The baking time will be about the same, maybe 5 minutes longer.
Enjoy Your Sweet Homemade Blondies
You now know how to make amazing blondies with chocolate chips. They are simple, sweet, and perfect for any day of the week. Remember to use brown sugar for that chewy bite and don’t bake them too long. Baking is a skill that gets better with practice. Even if your first batch isn’t perfect, they will still taste great. Share them with your friends and enjoy the smell of fresh treats in your home. Happy baking!