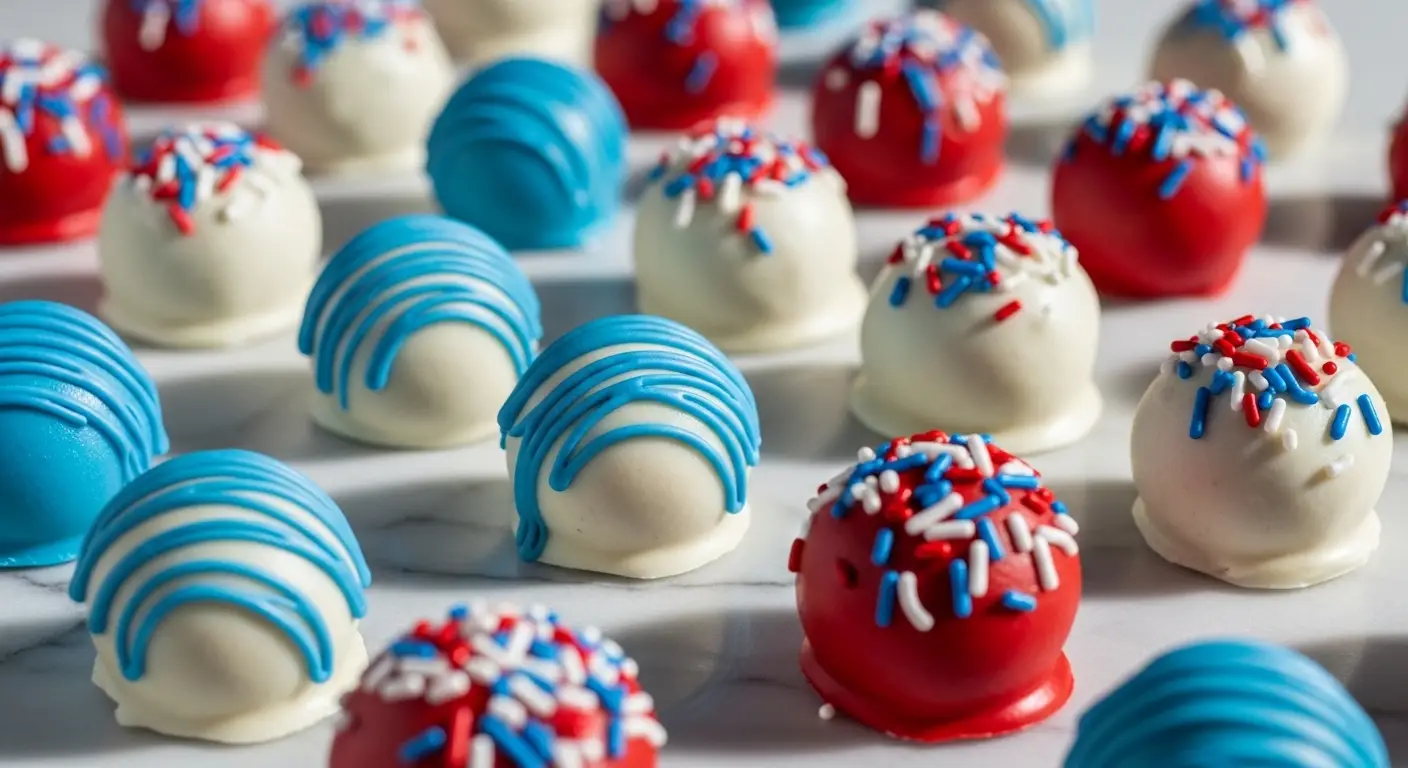
Red White Blue Cake Balls
Making treats at home is a fun way to spend a weekend afternoon. I remember the first time I tried to bake something for a big family party. I was very nervous! These red, white, and blue cake balls are the perfect project if you want something that looks fancy but is quite simple to put together. You do not need to be a professional baker to make these look beautiful. Everyone at your table will love the bright colors and the sweet taste.
By following these steps, you will learn how to bake a simple cake, mix it with frosting, and dip the balls in candy melts. These little bites are small, sweet, and hold their shape well. They are great for the Fourth of July, Memorial Day, or any time you want a fun, themed dessert. Let us get started on this kitchen adventure together!
Check out the details below to start your baking journey.
Recipe Quick Info
- Prep Time: 45 minutes
- Cook Time: 30 minutes
- Servings: 24 balls
- Difficulty: Easy
Preparing Your Cake Base
The foundation of a good cake ball is a moist, soft cake. You can use a boxed mix or a recipe from scratch. Either way works fine! I usually pick a white cake mix because it shows off the food coloring better if you choose to dye the inside, but a plain vanilla cake is just as delicious. Making sure the cake is completely cool before you move to the next step is the most important part of this whole process.
Ingredients List

- 1 box white cake mix plus the eggs and oil called for on the box
- 1 container of vanilla frosting
- 2 bags of bright white candy melts
- Small amounts of red and blue candy melts for decorating
- Red, white, and blue sprinkles for extra flair
Gathering all your items first makes the process much smoother. You will need a standard baking pan for your cake. Make sure you have plenty of parchment paper, as this keeps the sticky balls from staying stuck to your trays. Having a few extra bowls for melting your colors is also a good idea. Everything here is easy to find at any local grocery store.
Step-by-Step Instructions

- Bake your cake according to the box instructions and let it cool down all the way.
- Once it is cold, crumble the entire cake into a large bowl using your clean hands until it looks like fine crumbs.
- Add about half of your container of frosting to the crumbs and mix well until the dough holds together when you squeeze it.
- Roll the mixture into small balls, about one inch in size, and place them on a tray lined with parchment paper.
- Freeze these balls for at least 20 minutes to make them firm before dipping.
- Melt your white candy melts in the microwave in 30-second bursts, stirring until smooth.
- Dip each cold ball into the melted candy, tapping the fork on the side of the bowl to remove extra drips.
- Place them back on the parchment paper and decorate immediately with your red, white, and blue sprinkles before the candy hardens.
If you find that the balls are falling apart, you probably need a little more frosting. Just add a spoonful at a time until the texture feels like thick playdough. If the balls feel too greasy or soft, put them back in the freezer for a few extra minutes. Practice makes perfect, so do not worry if your first few look a bit messy!
Expert Tips and Finishing Touches
Getting the coating smooth can be a bit tricky at first. I once made the mistake of dipping the balls when they were too warm, and they just melted right into the bowl! That was a messy lesson to learn. Always keep them cold until the very second you are ready to dip. This keeps them round and helps the candy set fast.
Tips and Variations

You can change the flavor easily by using a chocolate cake mix or even a lemon cake mix. If you want the inside to be festive, you can divide your cake crumbs into three bowls and add a drop of red food dye to one and blue to another before mixing with frosting. This creates a surprise inside when you bite into them! FYI, candy melts can dry out if you overheat them, so keep the heat low.
Another tip I find helpful is using a fork to dip the balls. If you use a fork, the extra candy drips through the gaps. You will get a much smoother finish on your treats. Never leave the cake balls in the microwave for too long; they only need a short time to melt.
Serving Suggestions

These treats look great in clear cupcake liners. Placing them on a tiered tray makes them look like a fancy dessert display. You can also put them on lollipop sticks to turn them into cake pops. This makes them much easier for kids to hold and eat without getting chocolate all over their fingers. IMO, serving them chilled is the best way to enjoy them.
Since these are patriotic in theme, they work wonderfully at outdoor picnics or summer gatherings. Because they contain frosting, try not to leave them out in direct hot sun for too long. If you are taking them to a friend’s house, put them in a cooler bag to keep them firm and pretty during the drive.
Common Mistakes to Avoid
- Dipping Warm Balls: This causes the balls to fall apart in the warm candy. Always freeze them first!
- Overheating Candy: Too much heat makes the candy thick and clumpy. Stir often.
- Too Much Frosting: If you add the whole container at once, the balls will be too soft to handle.
Helpful Information
When you start making these, you might have a few questions about how long they last or what to do if you run out of supplies. Cooking is all about being flexible. Do not panic if things do not go exactly as planned. Most problems in the kitchen can be fixed with a little patience and maybe another chill in the freezer.
Frequently Asked Questions
Can I make these a day ahead?
Yes! They actually taste better if they sit in the fridge for a night. Keep them in an airtight container so they stay fresh.
Do I have to use candy melts?
You can use white chocolate chips, but they are softer and might melt faster. Candy melts work best for the smooth, hard shell.
How do I store leftovers?
Store them in the fridge for up to one week. You can also freeze them for a month if you wrap them tightly in plastic wrap.
Can I use a different color scheme?
Absolutely. You can change the sprinkles and the candy melts for any holiday, like green and red for Christmas or pink for birthdays.
What if my candy is too thick?
Stir in a tiny bit of vegetable shortening or coconut oil. This thins out the candy and makes it easier to dip.
Final Thoughts
Making these cake balls is a great way to celebrate special days with people you love. Do not be afraid to have fun with your sprinkles and designs. Now that you have the steps, you can bake these any time you want to share a sweet, colorful, and tasty treat with your friends or family.