Honduran Baleadas with Beans and Cheese
Honduran baleadas are one of the best comfort foods you will ever try. They are simple, filling, and very cheap to make at home. I first tried these at a small street stand and I could not believe how soft the bread was. If you love tacos or burritos, you are going to love this special treat from Honduras. It is basically a thick flour tortilla folded in half and stuffed with warm beans and salty cheese.
In this guide, I will show you how to make every part of a baleada from scratch. You will learn how to mix the dough so the tortillas stay soft and do not turn into hard crackers. We will also talk about the right kind of beans to use and what cheese tastes the most like the real thing. Once you learn the basic steps, you can add all sorts of extra toppings like eggs or meat.
Ready to bring a taste of Central America to your kitchen? Let’s get cooking!
What Makes a Baleada Special
A baleada is not just a regular taco. The biggest difference is the tortilla. Most tacos use thin corn or flour wraps you buy at the store. For a real baleada, the tortilla must be homemade and a bit thick. It has a fluffy texture that feels like a cloud when you bite into it. The heat from the beans helps soften the bread even more as it sits. It is a very cozy meal that people in Honduras eat for breakfast, lunch, or dinner.
The filling is also very specific. You always start with a base of red silk beans that have been mashed and fried. Then you add a special kind of dry, salty cheese called queso duro. Finally, a dollop of thick Honduran cream goes on top. Even with just these three items, the flavor is huge. It is salty, creamy, and savory all at once. I think the simplicity is why so many people love them.
Gather Your Ingredients

To make the perfect baleada, you need a few basic things from your pantry. For the tortillas, you need all-purpose flour, salt, and a little bit of baking powder. The fat you use is very important. I usually use vegetable shortening or coconut oil. Some people use lard, but I find that oil makes them smell great and stay very flexible. You will also need warm water or warm milk to bring the dough together.
- 3 cups of all-purpose flour
- 1 teaspoon of salt
- 1/2 teaspoon of baking powder
- 1/3 cup of vegetable shortening or oil
- 1 cup of warm water or milk
- 2 cups of cooked red silk beans (or pinto beans)
- 1/2 cup of crumbled salty white cheese
- 1/2 cup of thick sour cream or Honduran crema
If you cannot find red silk beans, pinto beans work just fine. I once tried using black beans because that is all I had in my cupboard. It tasted okay, but the color looked a bit strange compared to the classic version. For the cheese, look for something labeled ‘queso duro’ or use a dry feta if you are in a rush. The saltiness of the cheese is what makes the beans pop.
Mixing the Flour Tortilla Dough

Making the dough is the part where most people get nervous, but it is actually quite easy. Start by putting your flour, salt, and baking powder into a big bowl. Use a fork to mix them up so the salt is everywhere. Next, add your shortening or oil. I like to use my fingers to rub the fat into the flour. You want it to look like little crumbs before you add any liquid. This step is what makes the tortillas tender instead of chewy.
Slowly pour in your warm water or milk. Do not dump it all in at once! Sometimes the air is humid and you need less liquid. Other times it is dry and you need more. Use your hand to stir until a ball forms. The dough should feel soft like a marshmallow. If it sticks to your fingers too much, add a tiny bit more flour. If it feels tight and hard, add a splash of water. This is the stage where you find the perfect balance.
The Secret to Soft Tortillas

Here is a tip that most people skip: you must let the dough rest. If you try to roll out the dough right after mixing it, it will shrink back like a rubber band. This happened to me the first time I made these. I got so frustrated because my circles kept turning into tiny blobs! I learned that the gluten needs time to relax. After you mix the dough, knead it for about five minutes until it is smooth.
Divide the dough into about ten or twelve small balls. Place them on a tray and cover them with a clean towel. Let them sit for at least thirty minutes. I usually wait an hour if I have the time. This rest period makes the dough so much easier to stretch. You won’t even need a rolling pin if you do this right. You can just pull them into circles with your hands just like they do in the markets in Honduras.
Cooking the Perfect Beans

The beans are the heart of the baleada. In Honduras, they use small red beans called ‘frijoles seda.’ They have a very thin skin and a creamy inside. To make them, you first boil the beans until they are very soft. Then, you blend them or mash them until they are totally smooth. I like to leave a few tiny chunks for texture, but a smooth paste is more traditional. FYI, canned beans work if you are in a huge rush, but the flavor won’t be as deep.
Heat some oil or lard in a pan and throw in some chopped onions. Let the onions get brown and sweet, then pour in your mashed beans. This is called ‘refrying.’ You want to cook them until they get thick enough to stay on a spoon without sliding off. Season them with salt and maybe a little bit of garlic powder. These beans will act like the glue that holds your baleada together. Make sure they stay warm while you finish the bread.
Stretching and Firing the Tortillas

Now comes the fun part. Take one of your rested dough balls and flatten it with your palm. If the dough is relaxed, you can gently pull the edges outward. It should get thinner and bigger as you move your hands around the circle. Don’t worry if it isn’t a perfect circle. My baleadas often look like maps of different countries, and they still taste great! Aim for about eight inches wide and about as thick as a pancake.
Heat a flat pan or a griddle over medium-high heat. You don’t need oil for this part. Lay the dough onto the hot surface. It should start to bubble up within thirty seconds. Once you see brown spots on the bottom, flip it over. It only takes about a minute per side. Do not overcook them! If they stay on the heat too long, they will become crispy like a giant chip. You want them to be soft enough to fold in half without breaking.
Recipe Quick Info
- Prep Time: 45 minutes (includes resting)
- Cook Time: 15 minutes
- Servings: 10-12 baleadas
- Difficulty: Easy to Medium
Assembling Your Baleada

Putting the baleada together is very fast. While the tortilla is still hot from the pan, spread a big spoonful of beans over one half of it. The heat from the bread will keep the beans warm. Next, sprinkle a generous amount of your salty cheese over the beans. The cheese won’t melt completely like mozzarella, but it will soften and get a bit gooey from the heat. This is exactly what you want.
Add a drizzle of cream over the cheese. If your cream is too thick to drizzle, you can just put a dollop in the center. Fold the empty half of the tortilla over the filling to make a half-moon shape. Some people like to press it down a little bit so the flavors mix. Eat it while it is hot! There is nothing better than a fresh, warm baleada. It is a handheld meal, so you don’t even need a fork or knife.
Tasty Additions and Variations

The version I just described is called a ‘baleada sencilla’ or a simple baleada. But you don’t have to stop there. In Honduras, you can get a ‘baleada mixta’ which usually includes scrambled eggs. The eggs add a lot of protein and make it feel like a full breakfast. I love adding a few slices of ripe avocado because the creaminess goes so well with the salty cheese. IMO, avocado makes every dish better.
If you want a very big meal, you can add grilled meat like steak or chorizo. Some people even put pickled onions or spicy peppers inside for a kick. Just remember not to overstuff it. If you put too much inside, the tortilla might rip when you fold it. I learned this the hard way when I tried to put a whole salad inside one. Keep it simple and focus on the quality of your beans and your bread.
Kitchen Success Tips
- Water Temp: Use warm water (about 110°F) to help the fat melt into the flour.
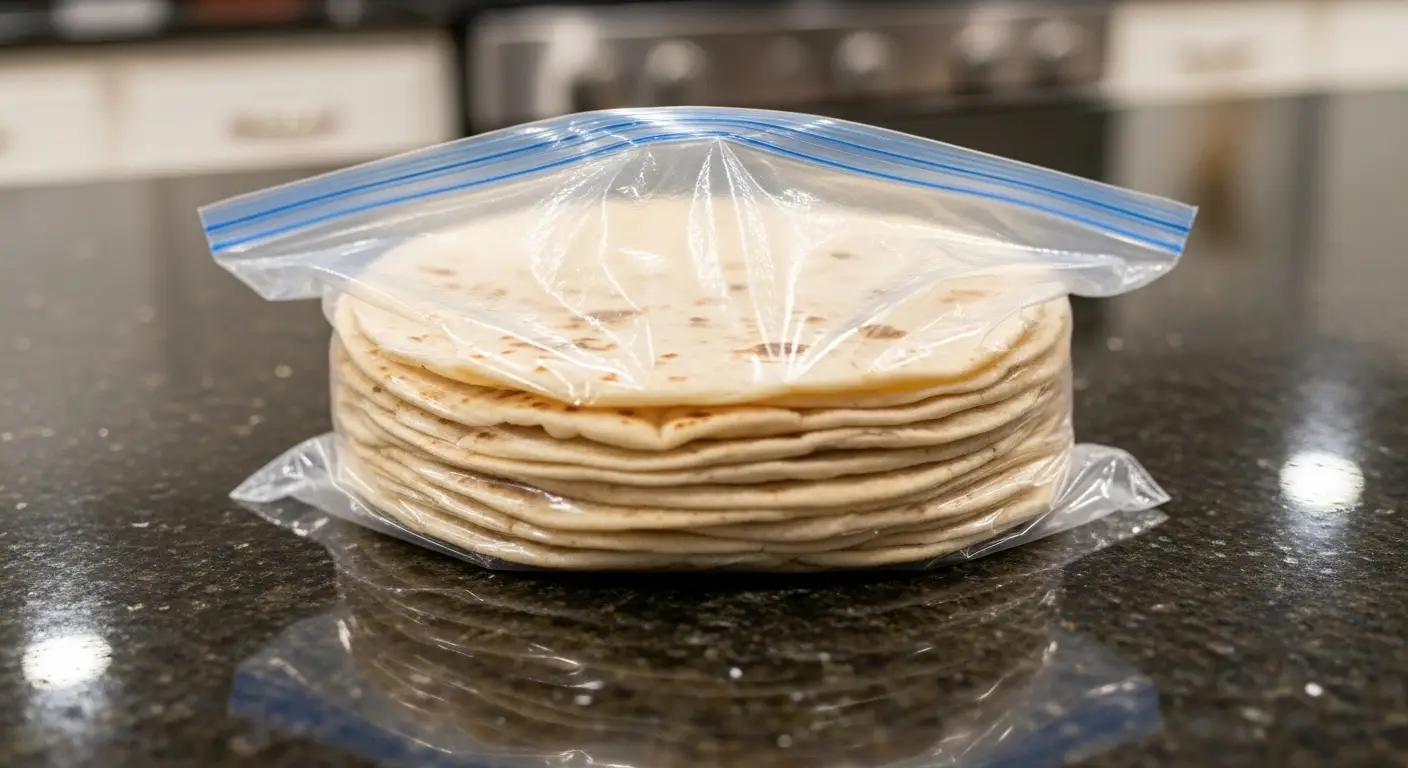
- Storage: Keep cooked tortillas in a sealed bag so they don’t dry out.
- The Bean Hack: If your beans are too dry, add a spoonful of the bean cooking liquid to make them creamy.
Common Mistakes to Avoid
Cooking is a learning process, and I have made many mistakes with baleadas. One big mistake is using cold water for the dough. Cold water makes the fat stay in chunks, which leads to a crumbly tortilla. Another issue is not kneading the dough enough. You want the ball of dough to look smooth like a baby’s cheek. If it looks shaggy and rough, keep kneading for a few more minutes. It is a good workout for your arms!
Also, watch your heat on the stove. If the pan is too cold, the tortilla will take forever to cook and will get tough. If it is too hot, the outside will burn before the inside is done. Aim for a medium-high heat where a drop of water sizzles and disappears instantly. Lastly, make sure your beans are seasoned well. Since the bread is plain, the beans need enough salt to carry the whole dish.
How to Store and Reheat

If you have leftovers, you are in luck. Baleadas reheat surprisingly well. I usually store the tortillas and the beans in separate containers in the fridge. The tortillas will stay fresh for about three days if you keep them in an airtight bag. To reheat the tortillas, don’t use the microwave if you can help it. The microwave can make them rubbery. Instead, put them back on a hot pan for thirty seconds on each side.
The beans might get very thick in the fridge. When you go to heat them up, add a tiny splash of water to the pan to loosen them up again. Once everything is warm, assemble your baleada fresh. If you have already built the baleada and folded it, you can wrap it in foil and warm it in the oven for a few minutes. This keeps the edges from getting too hard while the middle gets hot again.
Your New Favorite Meal
Baleadas are a wonderful way to feed a crowd without spending much money. They show that you don’t need fancy ingredients to make something amazing. Just some flour, beans, and cheese can create a meal that people will ask for again and again. I hope you give this recipe a try and enjoy the process of working with the dough. It is very satisfying to see those little bubbles pop up on the stove!
Frequently Asked Questions
Can I use store-bought tortillas?
You can, but it won’t be a real baleada. Store-bought ones are too thin and dry. Homemade dough is what gives it the soft, fluffy texture that defines the dish.
What can I use if I can’t find Honduran cream?
You can mix sour cream with a little bit of heavy cream and a pinch of salt. This mimics the thin, salty, and rich flavor of traditional Honduran mantequilla.
Why are my tortillas coming out hard?
This usually happens if you cook them too long or your heat is too low. They should only be on the pan for about 60-90 seconds total to stay soft and flexible.
Is this recipe vegetarian?
Yes, as long as you use vegetable oil or shortening instead of lard, and ensure your beans aren’t cooked with pork. It is a very filling vegetarian dinner option.
Can I freeze the dough balls?
Yes! Wrap each dough ball tightly in plastic wrap and freeze. Thaw them in the fridge overnight and let them come to room temperature before stretching and cooking.
Enjoy Your Homemade Baleadas
Making baleadas is a skill that gets better every time you do it. Don’t worry if your first few aren’t perfect. The mix of warm beans and salty cheese inside fresh bread is always a winner. You now have a classic Honduran recipe to share!