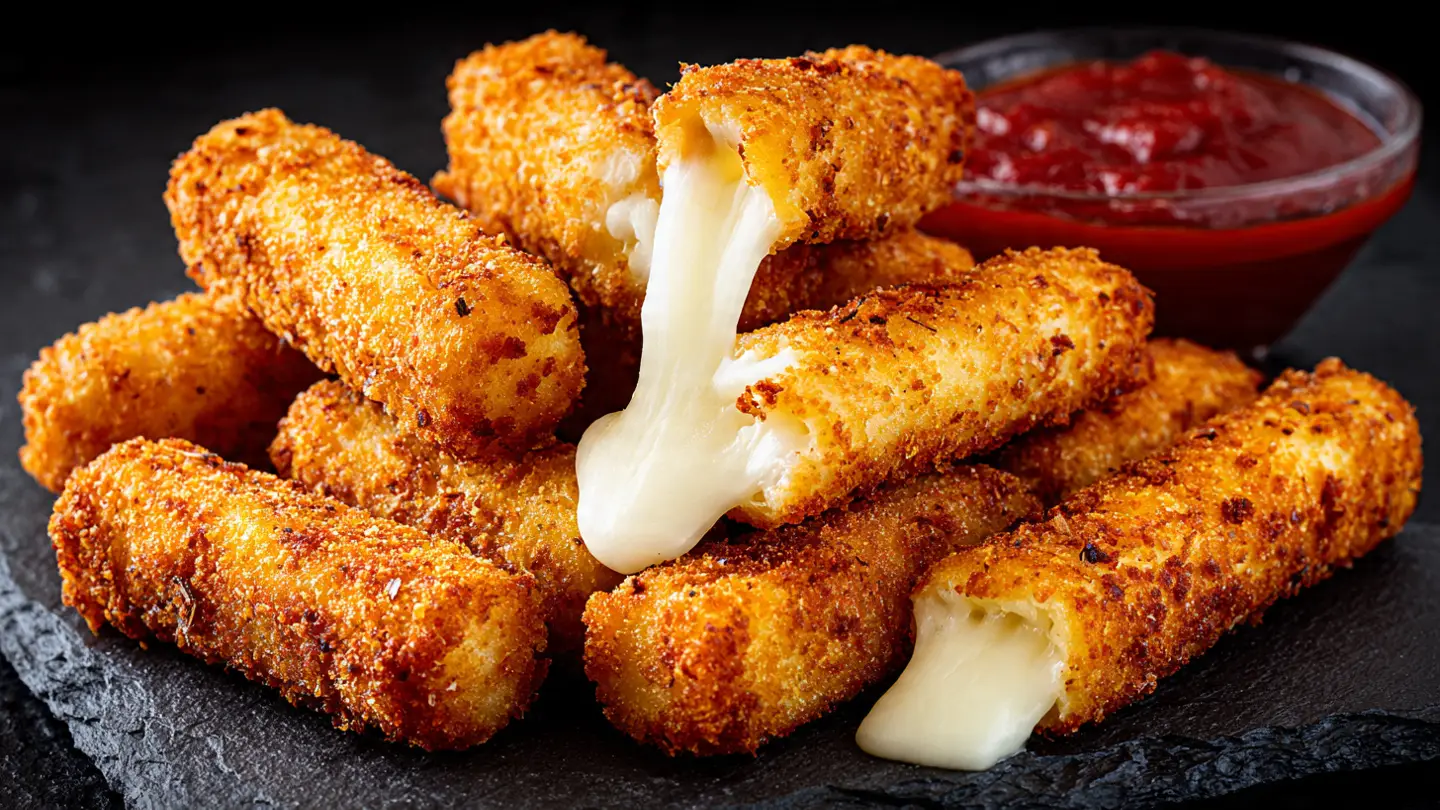
Easy Fried Mozzarella Sticks
Making fried cheese at home sounds hard. I used to think you could only get that perfect crunch at a big restaurant. It turns out that you can make them in your own kitchen with just a few simple things. These snacks are hot, salty, and very gooey inside. Once you try a fresh one, you will never want the frozen bags from the store again.
Today, I will show you exactly how to make these golden sticks of joy. You will learn the secret to keeping the cheese inside so it does not leak out into the hot oil. We will talk about the best breading and how to fry them safely. It is a fun project that kids and grown-ups both love to eat.
Check out the steps below to start your snack adventure!
What You Need to Get Started
Before we start cooking, we need to gather our tools and food. You do not need anything fancy to make this work. Most of these things are already in your pantry or fridge. Having everything ready makes the process much faster and keeps your hands cleaner while you work.
The Short List of Ingredients

To make these tasty sticks, you need simple items. First, get a pack of low-moisture mozzarella cheese sticks. These are the kind kids take to school in their lunch boxes. You also need some all-purpose flour to help the coating stick. This flour acts like a dry coat for the cheese before it gets its wet coat.
Next, you need large eggs. The eggs are the glue for our recipe. Without them, the breadcrumbs would just fall off in the pan. For the outside, I like to use Italian seasoned breadcrumbs. These have salt, pepper, and dried herbs already inside. If you only have plain crumbs, you can add your own spices later. Finally, you need a oil that can get hot without smoking, like vegetable oil or canola oil.
- 12 pieces of string cheese (mozzarella)
- 1/2 cup of white flour
- 2 large eggs
- 1 cup of seasoned breadcrumbs
- 2 cups of vegetable oil for frying
- A pinch of salt
Essential Kitchen Tools

You do not need a deep fryer for this recipe. A heavy pot or a deep frying pan works just fine. I like using a cast iron pan because it holds heat very well. You will also need three shallow bowls. These are for the flour, the eggs, and the breadcrumbs. It is like a little assembly line for your food.
A fork or a small whisk helps beat the eggs until they are smooth. You also want a plate lined with paper towels. This plate is where the hot cheese sticks go after they come out of the oil. The paper towels soak up the extra oil so the sticks stay crunchy. A pair of metal tongs is also helpful for moving the sticks around without burning your fingers.
Recipe Quick Info
- Prep Time: 20 minutes
- Cook Time: 10 minutes
- Servings: 4 people
- Difficulty: Easy
How to Make the Perfect Cheese Stick
The magic of a good mozzarella stick is the coating. If the coat is too thin, the cheese will melt and run away. We want a thick wall of breadcrumbs that stays strong. This part takes a little bit of time, but it is the most important step for a good snack. Let’s walk through the steps together so you get it right the first time.
Prepping the Cheese Sticks

Start by taking all the cheese sticks out of their plastic wrappers. I once forgot to do this for a split second because I was in a rush! It is much easier to unwrap them all at once at the start. If the sticks feel a bit wet or sweaty, pat them dry with a clean paper towel. This helps the flour stick better.
You can leave the sticks long, or you can cut them in half. I usually cut them in half to make bite-sized pieces. It makes the batch look bigger, too. Once they are ready, put them on a clean tray. If your kitchen is very warm, you can put the cheese in the freezer for ten minutes. Cold cheese is easier to work with than soft cheese. FYI, this little trick helps prevent the cheese from leaking later.
Setting Up Your Breading Station

Line up your three bowls in a row. This makes the work flow from left to right. Put the flour in the first bowl. Put the eggs in the second bowl and whisk them well with a fork. Add a tiny splash of water to the eggs to make them thinner. Put the breadcrumbs in the third bowl. Adding a little extra salt to the flour or crumbs is a good idea here.
I suggest using one hand for the dry steps and the other hand for the wet steps. This keeps your fingers from getting covered in thick dough. We call this the “wet hand, dry hand” rule. It keeps things much cleaner. If you use both hands for everything, you will end up with huge “club fingers” made of breading. It is funny to look at, but it wastes a lot of food!
The Double Coating Secret

Here is the most important part of the recipe. We are going to coat the cheese twice. First, roll a cheese stick in the flour. Shake off the extra. Then, dip it in the egg. After the egg, roll it in the breadcrumbs until it is fully covered. Most people stop here, but we are not most people. We want the best crunch.
Take that breaded stick and dip it back into the egg wash one more time. Then, roll it in the breadcrumbs again. This second layer makes a strong shell around the cheese. This shell is what keeps the cheese from blowing out when it hits the hot oil. It creates that thick, crunchy crust we all love. It may seem like extra work, but IMO, it is the only way to do it right.
The Big Chill

Once all your sticks are double-coated, do not cook them yet. This is a common mistake. Put the whole tray of breaded cheese into the freezer. Let them sit there for at least 30 minutes. An hour is even better. This makes the breading firm and the cheese very cold. If the cheese starts at room temperature, it will melt too fast in the oil.
I learned this the hard way when I first tried making these. I was hungry and put them right into the oil. Within one minute, the cheese turned into a flat puddle on the bottom of the pan. It was a mess! Freezing them is the secret to a perfect cheese pull. You can even make these a day early and leave them in the freezer until you are ready for a snack.
Frying to Golden Perfection

Heat your oil in a deep pan. You want about two inches of oil. The oil should be around 350 degrees. If you don’t have a thermometer, drop a few breadcrumbs in. If they sizzle right away, the oil is ready. Carefully drop a few sticks into the oil. Do not crowd the pan. If you put too many in at once, the oil temperature will drop too much.
Fry the sticks for about 1 to 2 minutes. They cook very fast! Use your tongs to turn them over so they brown on all sides. As soon as they look golden brown, take them out. If you see a little bit of cheese starting to poke through the crust, pull them out immediately. That means the cheese is melted and ready to go. Put them on your paper towel plate to drain.
Pro Frying Tips
- Oil Temperature: If the oil is too cold, the sticks get greasy. If it is too hot, the outside burns before the cheese melts.
- Small Batches: Only fry 3 or 4 sticks at a time to keep the oil hot.
- Safety First: Never leave hot oil alone on the stove. Keep a lid nearby just in case.
Serving and Enjoying Your Snack
Now that the hard part is done, it is time to eat! Fried cheese is best when it is very hot. The cheese is stretchy and the outside is very crisp. There are many ways to serve these, and you can get creative with your dipping sauces. This is the part where everyone gathers in the kitchen because the smell is so good.
The Best Dipping Sauces

The classic choice is marinara sauce. A warm red tomato sauce with herbs is perfect for cutting through the rich cheese. You can buy a jar at the store or make your own. I like to warm the sauce up in the microwave for a few seconds. Cold sauce on a hot cheese stick is not as good. It cools the cheese down too fast.
If you want something different, try ranch dressing. Many people love the cool, creamy taste of ranch with the hot cheese. Some people even like spicy buffalo sauce or honey mustard. You can put out a few different bowls so people can choose their favorite. My friend likes to dip hers in BBQ sauce, which sounds weird but is actually pretty good!
Making it a Meal

Mozzarella sticks are great on their own, but they also work well with other foods. You can serve them alongside a big green salad to make things feel a bit lighter. They are also the perfect side dish for a pizza night or a pasta dinner. I often make these when I am having friends over to watch a movie or a game.
If you are having a party, you can serve them on a big platter with other finger foods. Things like chicken wings, sliders, or vegetable sticks go great with them. Just remember that these disappear very fast. You might want to make more than you think you need! Everyone always wants just one more stick.
Storage and Reheating Tips

If you have leftovers, do not throw them away. You can keep them in the fridge for about two days. To keep them from sticking together, put a piece of wax paper between the layers in your container. However, do not use the microwave to heat them up. The microwave makes the breading soft and soggy, and the cheese might explode.
The best way to reheat them is in an air fryer or a toaster oven. Put them in at 350 degrees for about 3 to 5 minutes. This brings back the crunchy texture and melts the cheese perfectly. It is almost as good as when they were fresh. If you use a regular oven, put them on a baking sheet and bake until they sizzle.
Your Fried Cheese Questions Answered
Can I use different types of cheese?
Yes! You can use cheddar or pepper jack sticks. Just make sure the cheese is firm so it does not melt too fast in the oil.
Why did my cheese leak out in the pan?
This usually happens if you did not freeze the sticks or if the coating was too thin. Always do a double coat and freeze for 30 minutes.
What is the best oil for frying?
Vegetable oil, canola oil, or peanut oil are best. They can get very hot without burning or tasting bad.
Can I make these in an air fryer?
You can! Spray them with oil and cook at 400 degrees for 5-7 minutes. They will not be as golden as fried ones, but they are still good.
How do I know when the oil is hot enough?
Drop a small piece of bread into the oil. If it turns brown in 30 seconds, your oil is ready for the cheese sticks.
Enjoy Your Homemade Snacks
Making your own mozzarella sticks is a great way to save money and have a better snack. You now know the secret of the double coat and the freezer. These two steps will make you the hero of your next party or family dinner. Enjoy the crunch and that amazing melted cheese!