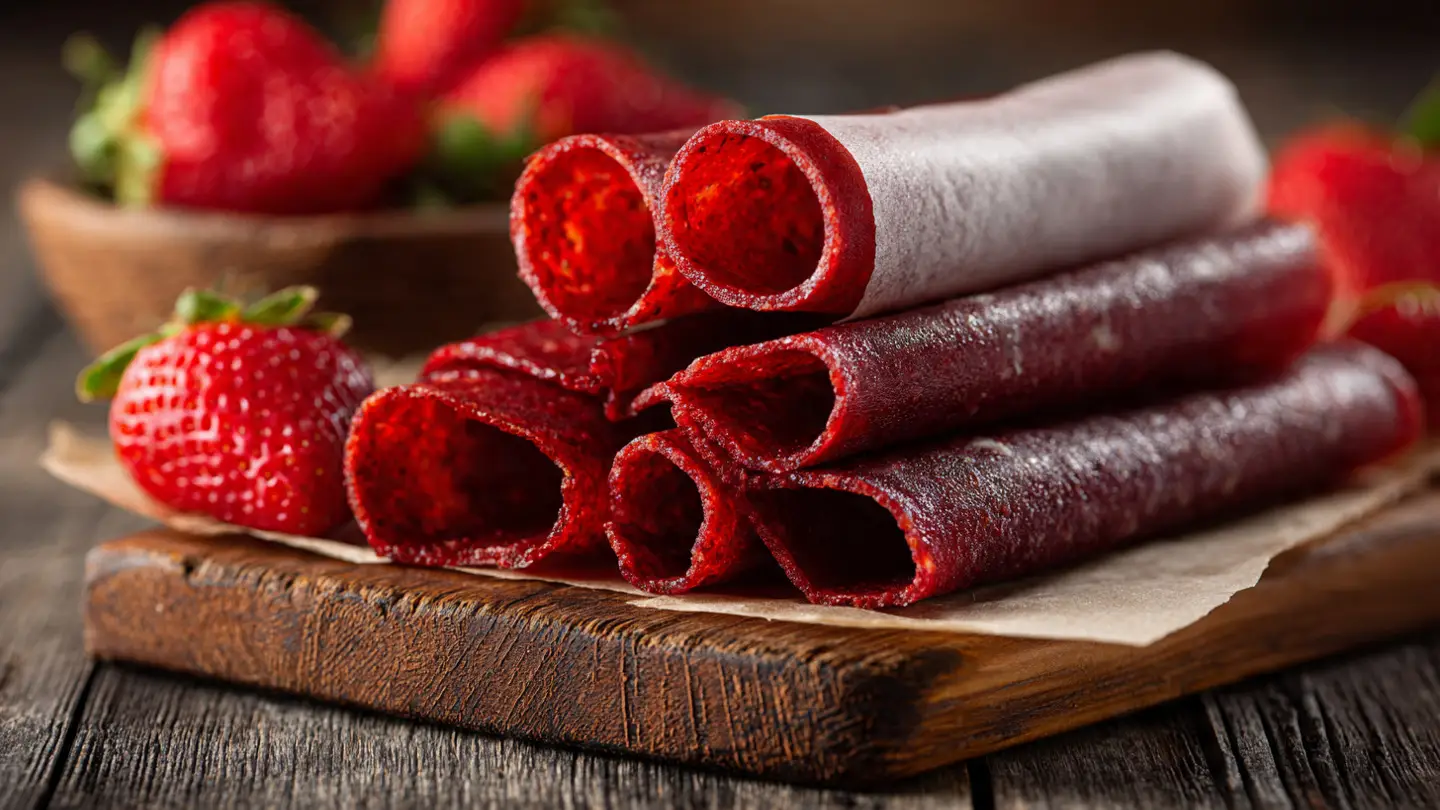
Homemade Low-Sugar Strawberry Fruit Roll-Ups for Kids
Do you remember eating fruit snacks when you were little? I used to love the ones that came in a long roll. They were bright red and very sticky. But now that I am older, I look at the box and see lots of words I cannot say. Most of those snacks are just corn syrup and fake colors. That is why I started making my own fruit roll-ups at home using real strawberries. It is a fun project and your house will smell like a giant berry candy while they bake.
In this guide, you will learn how to turn fresh fruit into a chewy snack that kids love. I will show you the exact steps to get the right texture every time. You do not need a fancy machine to do this. Your oven and a baking sheet are all you need. It takes some time to dry out, but the work is very easy. Once you try these, the store-bought ones will never taste the same again.
Check out the recipe below to get started on your fruit snack journey! This is a great way to use up berries that are getting a little too soft to eat plain.
Recipe Quick Info
- Prep Time: 15 minutes
- Cook Time: 4 to 6 hours
- Servings: 8 rolls
- Difficulty: Easy
Getting Ready for Healthy Snack Success
Before we start cooking, let’s talk about why these are better for you. Most fruit leather you buy at the store has a lot of extra sugar. Some even have food dye to make them look brighter. When you make them yourself, you control what goes inside. I only use three ingredients for my basic recipe. It keeps things simple and honest. You get the fiber from the fruit and the natural sweetness without a sugar crash later.
Cooking fruit leather is mostly about waiting. It is not like baking a cake where you need to be very precise. You just need to keep the heat low and stay patient. If you try to rush it by turning up the oven, you will end up with burnt fruit crackers. Trust me, I have made that mistake before. The goal is to dry the fruit, not bake it. Let’s look at what you need to gather in your kitchen.
The Simple Ingredients You Need

To make the best strawberry fruit roll-ups, you only need three things. First, get about two pounds of fresh strawberries. You want them to be very red and ripe. Ripe berries are naturally sweet, which means we can use less honey. Next, you need a squeeze of fresh lemon juice. This keeps the color bright and adds a little zing. Lastly, you need a sweetener. I like using honey or maple syrup.
If your berries are super sweet, you might not need any honey at all. I always taste my fruit puree before I put it in the oven. If it tastes a little sour, I add one tablespoon of honey. If it is still sour, I add one more. This is much better than the snacks from the store that have more sugar than fruit. You can also use frozen strawberries if it is winter. Just make sure to thaw them out first and drain the extra water.
Kitchen Tools for the Job

You do not need a dehydrator to make these. A regular oven works just fine! You will need a blender or a food processor to make the fruit smooth. If you do not have one, you could use a potato masher, but the rolls might be a little chunky. A smooth puree is the key to a roll that does not tear. You also need a large baking sheet with a rim. The rim is important so the liquid does not spill over the edges into your oven.
One tool I cannot live without for this is parchment paper. Do not use wax paper! Wax paper will melt in the oven and ruin your snack. Silicone mats also work very well. I learned the hard way that trying to grease a pan with oil does not work. The fruit just sticks to the metal and you have to scrub it off for hours. Stick to parchment paper or a silicone mat for an easy release.
How to Make the Perfect Fruit Leather
Now that we have our tools and ingredients, it is time to cook. This process is very satisfying. You start with a big pile of berries and end up with a thin, chewy sheet of fruit. It feels like a magic trick! The most important thing is to spread the fruit evenly. If one side is thick and the other is thin, the thin side will get crunchy while the thick side stays wet. We want it to be the same thickness all the way across.
I remember the first time I tried this. I poured the fruit on the pan and just left it. The middle was still sticky like jam after six hours. I realized I had to use a spatula to make it flat. Now, I take my time with that step. It makes a huge difference in how the snack feels when you bite into it. Let’s walk through the steps together so you can get it right on your first try.
Making the Strawberry Puree

Start by washing your strawberries. Pull the green tops off and cut the berries in half. Put them into your blender along with the lemon juice and your sweetener. Turn the blender on high and let it run until there are no lumps left. You want it to look like a smooth soup. If you see seeds and that bothers you, you can pour the mix through a fine mesh strainer. IMO, the seeds are fine and give it a little crunch.
Once it is blended, give it a taste. Is it sweet enough? If not, add a tiny bit more honey. This is also the time when you can get creative. Sometimes I add a little bit of vanilla or a dash of cinnamon. My kids love it when I mix in a few raspberries too. Just make sure the total amount of fruit stays the same so the drying time does not change too much.
Spreading and Baking the Fruit

Line your baking sheet with parchment paper. Pour the puree onto the center of the sheet. Use your spatula to push the puree out to the edges. Try to make it about 1/8 inch thick. You want it to be thin but not so thin that you can see the paper through it. If you have extra puree, do not try to force it onto one pan. It is better to use two pans than to make one too thick.
Set your oven to the lowest setting it has. For most ovens, this is around 140 or 170 degrees. Put the tray in and wait. This will take between 4 and 6 hours. You will know it is done when the top is no longer sticky to the touch. It should feel smooth and a little bit like plastic. If your finger leaves a dent or comes away wet, it needs more time. Keep an eye on the edges because they dry faster than the middle.
Cutting and Rolling the Snacks

When the fruit is done, take it out of the oven and let it cool down completely. This part is hard because it smells so good! Once it is cool, you can peel the whole sheet off the parchment paper. If it sticks, it might be a bit undercooked. You can put it back in for another 30 minutes. Once it is off, I like to use a pizza cutter to slice it into long strips. This is the easiest way to get straight lines without squishing the fruit.
To make them look like the store-bought ones, leave the parchment paper on the back while you cut. Then roll the strip up with the paper inside. This stops the fruit from sticking to itself in the container. You can use fun tape or a little string to hold the rolls shut. It makes them feel like a special treat in a lunchbox. Plus, kids love unrolling them! It is like a tasty piece of edible art.
Storage and Saving for Later

These fruit roll-ups will stay fresh for about two weeks if you keep them in an airtight container. I usually put mine in a glass jar or a zip-top bag. Keep them in a cool, dark place like your pantry. If you live somewhere very humid, they might get sticky again. In that case, the fridge is a better spot for them. They also freeze really well if you want to make a big batch for the whole month.
I usually find that these don’t last two weeks in my house anyway. My kids eat them as fast as I can make them. Since they are low in sugar, I don’t feel bad about letting them have an extra one. It is basically just a serving of fruit in a fun shape. If you notice they are getting a bit hard, you can put them in the microwave for five seconds to soften them up. Just five seconds! Any more and they will melt.
Pro Tips for Success
- Don’t Overcook: If the leather gets too dry, it will break when you try to roll it. It should be flexible like a rubber band.
- Level Oven: Make sure your oven rack is level. If it is tilted, the puree will run to one side and cook unevenly.
- Thin Edges: Try to make the edges a tiny bit thicker than the middle. Edges dry first, so this prevents them from getting crispy.
Customizing Your Homemade Treats
Once you master the basic strawberry recipe, you can try all sorts of flavors. Strawberry is a great base because it is sweet and has a lot of pectin, which helps it hold together. But you don’t have to stop there! You can mix strawberries with other fruits to make new colors and tastes. It is a fun way to experiment with the kids. My daughter likes to help me pick out the “mystery flavors” of the week.
I have tried mixing in greens like spinach before. I know it sounds weird, but if you only put a little bit in, the kids can’t even taste it. The fruit leather just turns a darker color. It is a sneaky way to get more veggies into their day. You can also try different spices. A little bit of ginger goes great with strawberry. Let’s look at some other ways to change things up.
Fun Flavor Variations to Try

One of my favorite mixes is Strawberry-Mango. Mango makes the texture very creamy and smooth. You just swap out half of the strawberries for fresh mango chunks. Another popular one is Strawberry-Banana. This one is very sweet and smells amazing while it bakes. Be careful with bananas though, as they can turn the color a bit brown. A little extra lemon juice helps keep the color bright and pretty.
If you want a very dark, rich snack, try adding blueberries or blackberries. These berries have a lot of juice, so they might take an hour longer to dry. For a tropical twist, you can even add a little bit of shredded coconut on top of the puree before you put it in the oven. It adds a nice texture and looks like snow on your fruit leather. The possibilities are endless when you use your imagination!
Ways to Serve and Enjoy

These are obviously great for school lunches. They fit perfectly in a small snack bag and they don’t get smashed like a fresh peach might. But you can use them for more than just a quick snack. Sometimes I chop them up into tiny pieces and put them on top of yogurt or oatmeal. It is like having healthy sprinkles! They are also great for hiking because they are light and give you a quick boost of energy from the natural fruit sugars.
I also like to use them for birthday parties. Instead of a bowl of candy, I put out a plate of colorful fruit rolls. Kids think they are cool because they are homemade. You can even use small cookie cutters to cut shapes out of the flat fruit leather before you roll it. Little hearts or stars are always a hit. FYI, these also make great gifts for neighbors or friends who are looking for healthy options for their families.
Common Questions About Fruit Roll-Ups
Why is my fruit leather still sticky after 6 hours?
It might be too thick or your oven temp is too low. Try giving it another hour. If the middle is wet, it just needs more time to dry out.
Can I use a dehydrator instead of an oven?
Yes! Set it to 135 degrees. It usually takes about 6 to 8 hours. Follow your machine’s manual for the best results on fruit leather trays.
My fruit leather is cracking, what happened?
It stayed in the oven too long and became a cracker. Next time, check it earlier. You can still eat the pieces like chips or grind them into a powder!
Do I have to peel the skin off the fruit first?
For strawberries, no. For fruits like peaches or apples, peeling makes a smoother snack. If you use a high-power blender, you can often leave skins on.
Is it okay to use frozen fruit for this recipe?
Yes, just thaw it first. Drain the extra liquid so the puree isn’t too watery. This helps the drying time stay around 4 to 6 hours.
Start Making Your Own Healthy Snacks
Making fruit roll-ups at home is a simple way to give your kids a treat you feel good about. It saves money and skips the fake stuff. Once you see how easy it is to blend and bake, you will want to try every fruit in the store! It is a great kitchen skill to have.