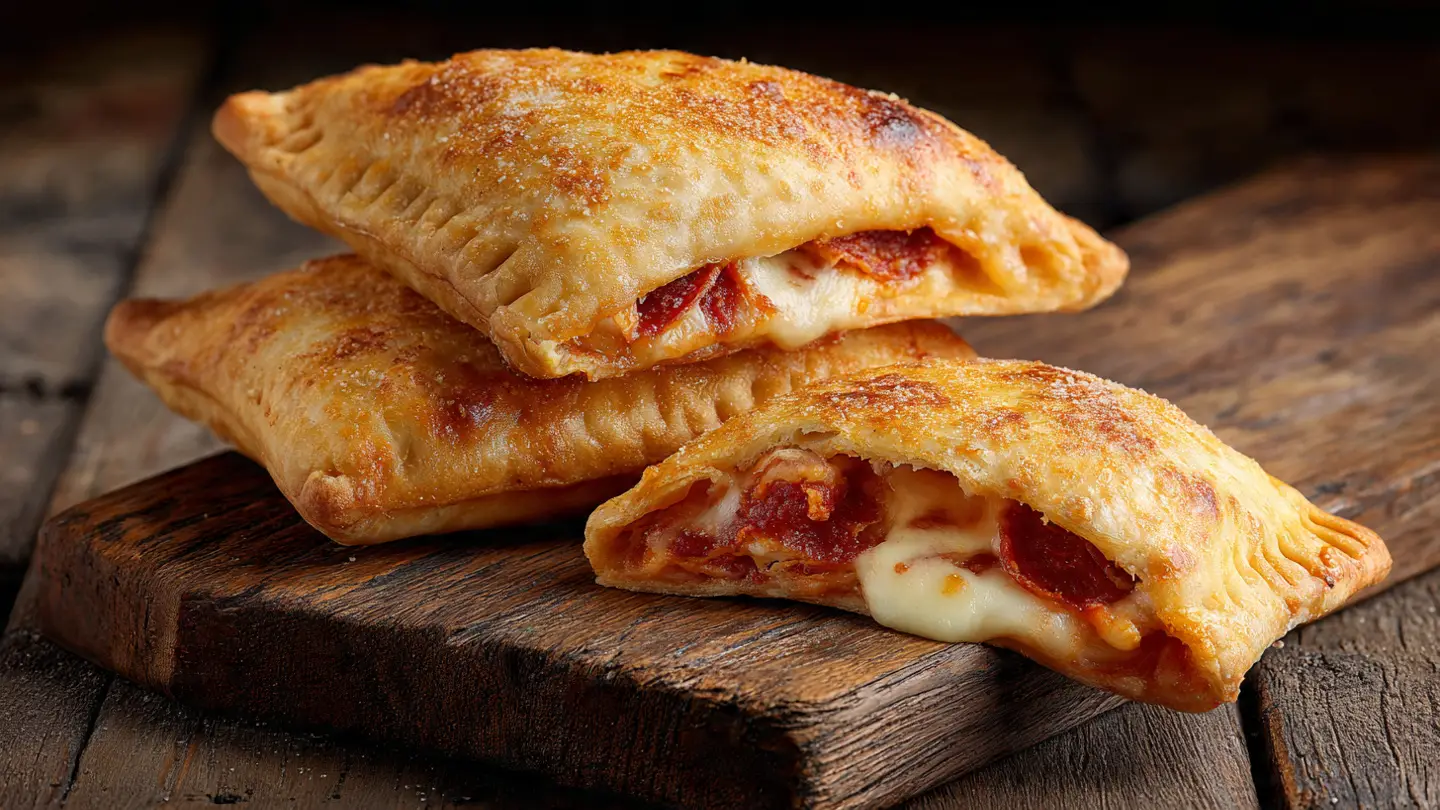
Easy Homemade Cheesy Pizza Pockets
Everyone loves a hot pizza snack after a long day at school or work. I used to buy the frozen ones from the store all the time, but they never tasted quite right. Sometimes the middle was still cold while the outside was burning hot. One day, I decided to try making them myself using simple dough and my favorite cheese. The result was so much better than the boxed kind.
In this article, you will learn how to make your own cheesy pizza pockets from scratch. I will show you the best dough to use and how to keep the sauce from leaking out. These are fun to make with your family, and they taste amazing when they are fresh from the oven. You do not need to be a pro chef to get these right on your first try.
Grab your apron and get ready to bake something delicious that your whole family will love!
Why You Should Make Your Own Pizza Snacks
Making food at home is always a good idea because you know exactly what is inside. When I first tried making these, I used too much sauce and they became a soggy mess. It was a big lesson for me! Now, I know the secret to a crispy crust and a gooey center every single time. Homemade snacks allow you to pick the best cheese and the freshest toppings without any weird chemicals.
These pizza pockets are also much cheaper than buying the pre-made ones. You can make a big batch and keep them in the fridge or freezer for later. They are the perfect size for little hands, but adults will love them too. Plus, you can change the fillings to match what everyone likes to eat. It is like having a tiny pizza party in every bite.
The Best Ingredients for Your Dough

The dough is the most important part of a good pizza pocket. You can buy pre-made pizza dough at the grocery store to save time. If you feel brave, you can make your own dough with flour, water, yeast, and a little bit of salt. I like using a dough that is soft but strong enough to hold all that cheese inside without breaking.
If the dough is too thin, the cheese will pop out and make a mess on your baking sheet. If it is too thick, it will taste like you are eating a giant loaf of bread. I find that rolling it out to about the thickness of a pancake works best. This keeps the snack light and crispy while still being tough enough to handle the heat of the oven.
Choosing the Right Cheese Blend

Cheese is the star of the show here. Most people just use mozzarella, but I think that is a bit boring. I love to mix mozzarella with a little bit of sharp cheddar or even some parmesan. Mozzarella gives you that long, stretchy cheese pull that everyone loves, while the other cheeses add a lot of extra flavor.
Make sure you use shredded cheese that you grate yourself if you can. The pre-shredded cheese in bags has a powdery coating that keeps it from sticking, but it also makes it melt less smoothly. IMO, fresh cheese makes a huge difference in how gooey the middle gets. Just a small handful inside each pocket is plenty to make them super cheesy and delicious.
The Secret to Perfect Pizza Sauce

You might think any tomato sauce will work, but that is not true. If the sauce is too watery, it will soak into the dough and make it mushy. I learned this the hard way when my first batch turned into a wet pile of dough. You want a thick sauce that stays where you put it. You can even simmer your sauce on the stove for a few minutes to let some of the water evaporate.
I also like to add a pinch of dried oregano and a tiny bit of garlic powder to my sauce. It gives it that classic pizza smell that makes your mouth water before you even take a bite. Remember, you only need a small spoonful of sauce for each pocket. If you add too much, the steam will build up inside and cause the pocket to explode while it bakes. Nobody wants a pizza explosion!
Adding Your Favorite Fillings

The best part about making these at home is that you can put whatever you want inside. My favorite is classic pepperoni, but you can use sausage, peppers, onions, or even pineapple if you are into that. Just make sure to chop everything into very small pieces. Since these pockets are small, giant chunks of meat or veggies will make them hard to close.
If you use vegetables that have a lot of water, like mushrooms or spinach, it helps to cook them a little bit first. This gets the extra water out so your pizza pocket stays crunchy. I usually stick to two or three fillings at most. If you try to pack too much in there, you will not be able to seal the edges properly. Keeping it simple is often the best way to go.
A List of Everything You Need

Before you start, make sure you have all your tools and ingredients ready. It makes the whole process much faster and less messy. You will need a baking sheet, some parchment paper, a rolling pin, and a fork to seal the edges. Having everything in one spot helps me stay calm while I cook, which always leads to better food.
- 1 pound of pizza dough (store-bought or homemade)
- 1 cup of thick pizza sauce
- 2 cups of shredded mozzarella cheese
- 1/2 cup of mini pepperoni slices or chopped veggies
- 1 egg (for the egg wash)
- 1 teaspoon of dried Italian seasoning
- A little bit of flour for your counter
Step-by-Step Instructions for Success

Now it is time to put everything together. This is the fun part! Follow these steps carefully to make sure your pizza pockets turn out perfect. It may take a few tries to get the shape exactly right, but even the ugly ones will taste great. Just take your time and do not rush through the folding process.
- Heat your oven to 400 degrees and line a baking sheet with parchment paper.
- Sprinkle flour on your counter and roll out the dough until it is thin.
- Cut the dough into circles or squares about the size of your hand.
- Put a spoonful of sauce in the middle, then add cheese and toppings.
- Fold the dough over the filling to make a pocket.
- Press the edges together with a fork to seal them tight.
- Brush the top with a beaten egg so they turn golden brown.
- Bake for 12 to 15 minutes until they are crispy and hot.
Recipe Quick Info
- Prep Time: 20 minutes
- Cook Time: 15 minutes
- Servings: 8 pizza pockets
- Difficulty: Easy
Tips for Extra Crispy Crust

If you want a really crunchy crust, there are a few tricks you can try. First, make sure your oven is completely heated before you put the tray in. A hot oven helps the dough puff up and get crisp right away. I also like to use a baking stone if I have one, but a regular metal tray works just fine too. Just don’t forget the parchment paper so they don’t stick!
Another tip is to sprinkle a little bit of cornmeal on the bottom of your baking sheet. This is what many pizza shops do to give the crust a nice texture. Also, the egg wash on top is not just for looks. It helps the crust get that beautiful golden color and adds a tiny bit of crunch. If you skip the egg, they might look a bit pale even when they are fully cooked.
How to Store and Reheat

If you have leftovers, you are lucky! These taste great the next day. You can store them in an airtight container in the fridge for up to three days. I have found that they stay freshest if you let them cool down completely before putting them in the fridge. If you put them in while they are still hot, the steam will make the dough soft and soggy.
When you want to eat one, try to avoid the microwave if you can. The microwave makes the dough chewy and tough. Instead, put them back in the oven or an air fryer for a few minutes. This will make the outside crispy again and melt the cheese inside. It takes a little longer, but it is totally worth it for that fresh-baked taste. FYI, these also freeze really well if you want to save them for next week!
Common Mistakes to Avoid
- Overfilling: Putting too much inside will cause the dough to rip.
- Wet Veggies: Not drying your toppings can lead to a mushy bottom.
- Poor Seal: If you do not press the edges hard enough, the cheese will leak out.
Fun Ways to Serve Your Pizza Pockets
Once your snacks are out of the oven, you can serve them in many ways. I love to put a small bowl of extra warm pizza sauce on the side for dipping. Some people like to dip theirs in ranch dressing or even garlic butter. If you are having a party, you can put out several different sauces so your guests can choose their favorite. It makes the meal feel more like an event.
You can also serve these with a simple side salad to make it a full meal. Since the pizza pockets are heavy and cheesy, a fresh salad with some vinegar dressing helps balance everything out. I sometimes serve them with carrot sticks or apple slices for my younger cousins. It is a quick and easy way to get some color on the plate while keeping the meal fun and relaxed.
Making a Mini Dipping Station

A dipping station is a great way to make this snack even better. I usually put out some marinara sauce, but ranch is also a huge hit. Some people even like spicy buffalo sauce for a little kick. If you have kids, they will love having the power to choose their own dip. It is a simple touch that makes a homemade meal feel special.
I once tried dipping mine in a honey mustard sauce just to see what would happen. It was actually pretty good! Don’t be afraid to try new things. You might find a combination that you love even more than the classic way. Just make sure the sauces are at room temperature or slightly warm so they don’t cool down your hot pizza pocket too fast.
Perfect for School or Work Lunches

These are great for packing in a lunchbox because they are not as messy as a regular slice of pizza. Since everything is sealed inside the dough, you don’t have to worry about cheese sliding off or sauce getting everywhere. I like to wrap mine in some foil to keep it from getting smashed. They still taste pretty good even when they are not piping hot.
If you are packing these for kids, you can even make them in fun shapes. Use a cookie cutter to make stars or hearts out of the dough. It might take a little more work, but it makes lunchtime a lot more exciting. Just make sure the edges are still sealed well so the lunchbox stays clean. It is a much better option than a plain old sandwich every day.
Your Questions Answered
Can I use frozen bread dough instead?
Yes, you can! Just make sure to let the frozen dough thaw completely and rise a little bit before you try to roll it out and fill it.
How do I stop the cheese from leaking?
Use a fork to press the edges very hard. You can also dab a little water or egg wash on the edge before folding to act like glue.
Can I make these in an air fryer?
Absolutely. Cook them at 375 degrees for about 8 to 10 minutes. They get extra crispy in the air fryer, which is my favorite way!
What is the best way to freeze them?
Freeze them on a tray first so they don’t stick together. Once they are hard, move them into a freezer bag. They stay good for a month.
Do I have to use an egg wash?
You don’t have to, but they will look pale. You can use a little bit of milk or melted butter if you don’t want to use an egg.
Enjoy Your Cheesy Creation
Making your own pizza pockets is a fun way to enjoy a classic snack. They are warm, cheesy, and much better than the store-bought kind. I hope you have a great time baking these in your kitchen. Remember to keep the sauce thick and the edges sealed tight for the best results. Happy eating!