Magic Crispy Baked Shrimp
Do you love fried shrimp but hate the big mess? I used to feel the same way. Every time I tried to fry food, my whole kitchen smelled like oil for days. Plus, cleaning up the greasy stove was never fun. I wanted a way to get that perfect crunch without the heavy oil and the big cleanup. That is how I found this magic way to bake shrimp in the oven.
In this article, you will learn how to make the crunchiest shrimp you have ever tasted. We are not just tossing them in breadcrumbs and hoping for the best. I will show you a special trick that makes the coating stick and stay crispy. You will also get a list of simple things you need and clear steps to follow. This is perfect for a quick snack or a fun dinner with friends.
Are you ready to make some magic in your kitchen? Let us get started with the basics of this crunchy treat!
What Makes This Shrimp So Magic?

You might wonder why I call this shrimp magic. Usually, when you bake breaded food, the bottom gets soggy. Or sometimes the breading just falls off before you even take a bite. This recipe is different because it stays firm and loud when you crunch into it. The secret is using panko breadcrumbs instead of the tiny, sandy ones you find in a can. Panko flakes are bigger and airier, so they catch the heat better.
Another reason it feels like magic is the speed. I can have a whole tray ready in under twenty minutes. This is great for those nights when you are tired but still want something that tastes fancy. It suits kids who love finger foods and adults who want a lighter meal. IMO, it tastes even better than the kind you get at a seafood shack because it is not greasy at all.
Setting Up Your Kitchen Space
Before you start touching the shrimp, you need to get your area ready. I learned this the hard way a long time ago. I once started breading shrimp with wet hands and ended up with more dough on my fingers than on the food! It was a sticky disaster. Now, I always set up a little station with my bowls in a row. This keeps things clean and fast.
Gather Your Simple Ingredients

You do not need anything fancy for this recipe. Most of these things are probably in your pantry right now. Keeping it simple is the best way to cook. Here is exactly what you should grab from the store or your cupboard:
- One pound of large shrimp (peeled and deveined)
- Half a cup of all-purpose flour
- Two large eggs
- One and a half cups of Panko breadcrumbs
- One teaspoon of garlic powder
- One teaspoon of dried parsley
- Half a teaspoon of salt
- A pinch of black pepper
Make sure your shrimp are totally dry before you start. If they are wet, the flour will turn into a paste. I like to pat mine down with a paper towel twice just to be sure. If you use frozen shrimp, let them thaw completely in the fridge first. Pushing the water out is the most important step for a good crunch.
Preparing Your Baking Sheet

How you bake the shrimp matters just as much as the breading. If you put them directly on a flat pan, the air cannot get underneath them. This makes the bottom side soft and sad. I always use a metal cooling rack placed inside a baking sheet. This lets the hot oven air flow all around the shrimp. It is like a mini air fryer effect right in your oven.
If you do not have a wire rack, you can use parchment paper. Just remember to flip the shrimp halfway through the cook time. I prefer the rack because it saves me a step and ensures every side is golden brown. Set your oven to 425 degrees Fahrenheit before you start breading. A hot oven is a must for that instant crisp.
Recipe Quick Info
- Prep Time: 15 minutes
- Cook Time: 10 minutes
- Servings: 4 people
- Difficulty: Easy
The Three-Bowl Breading Method
This is the part where the real work happens. To get that thick crust, you have to follow a specific order. If you skip a bowl, the breading won’t stick. I like to think of it like building a house. The flour is the foundation, the egg is the glue, and the panko is the roof. Without the glue, the roof just blows away in the wind!
Step 1: The Flour Coating

First, take your dry shrimp and drop it into the bowl of flour. Toss it around until it looks white and dusty. Shake off any extra flour so only a thin layer remains. This layer is very important because it dries out the surface of the shrimp. If the surface is dry, the egg will have something to grab onto.
I usually do about five shrimp at a time in the flour. It makes the process move faster. Just don’t crowd the bowl too much or they might clump together. Once they are all dusted, they are ready for the next bath. This step is fast but do not rush it. Every bare spot on the shrimp is a spot where the crunch won’t grow.
Step 2: The Egg Wash

Now, take those dusty shrimp and dip them into the beaten eggs. Use one hand for the dry flour and the other hand for the wet egg. This is a pro tip that keeps your hands from getting messy. If you use both hands for everything, you will end up with “club fingers” made of breading. It is not a good look and wastes a lot of food!
Make sure the egg covers the whole shrimp. The egg acts as the bridge between the flour and the crumbs. If you miss a spot here, the breading will peel off like a sticker. Lift the shrimp up and let the extra egg drip off for a second. You want it coated, but not swimming in liquid. This helps the panko stay light and airy instead of becoming a heavy dough.
Step 3: The Panko Press

This is the best part! Drop the wet shrimp into the panko bowl. Do not just roll it around. You need to actually press the crumbs into the shrimp with your fingers. This ensures a thick layer that won’t fall off in the oven. The more crumbs you can get to stick, the louder the crunch will be later on. I like to add my garlic powder and parsley to the panko bowl so the flavor is right on the outside.
Once the shrimp is fully covered, lay it gently on your prepared baking sheet. Leave a little space between each shrimp so they don’t steam each other. They need their personal space to get crispy! FYI, if you run out of panko, you can crush up some plain crackers as a backup. It won’t be exactly the same, but it works in a pinch.
Cooking Your Shrimp to Perfection
Now that your shrimp are breaded, it is time to bake them. The baking time is very short because shrimp cook so fast. If you bake them for too long, they will become rubbery. I always set a timer for eight minutes and check them. You want a bright pink inside and a golden brown outside. A perfect shrimp is a juicy shrimp!
Baking in the Oven

Slide your tray into the middle rack of the oven. This is where the heat is most even. Set your timer and don’t keep opening the door! Every time you open the door, the heat leaves and the shrimp won’t crisp up as fast. You will see the panko start to turn a light tan color. This means the magic is happening and the crunch is setting in.
When the timer goes off, peek inside. If they look a little pale, you can leave them for two more minutes. Sometimes I even turn on the broiler for the last sixty seconds. This gives them a super fast blast of heat for a dark golden color. Just watch them closely if you do this. They can burn in the blink of an eye!
The Resting Period

Wait! Do not eat them the second they come out. I know they smell amazing, but they need a minute or two. This lets the coating firm up even more as it cools slightly. It also saves the roof of your mouth from getting burned! I like to sprinkle a tiny bit more salt on them while they are still hot. This helps the salt stick to the crumbs better.
While they rest, you can get your dipping sauces ready. These shrimp are great plain, but a little sauce makes them a feast. You can use classic cocktail sauce or a spicy mayo. The cool sauce against the hot, crunchy shrimp is a perfect match. Your family will be impressed by how fast you made such a great snack.
How to Serve and Store Your Magic Shrimp
Serving the shrimp is the most fun part of the whole process. You can make them look like a fancy restaurant dish or just put them in a bowl for movie night. Since they are baked, they stay crispy for a decent amount of time. I have a few favorite ways to serve these up that everyone always loves.
The Best Side Dishes

These shrimp go with almost anything. I love serving them over a big bowl of white rice with some steamed broccoli. The rice catches any extra breadcrumbs that fall off, which is a yummy bonus. If you want something lighter, a fresh green salad with lemon dressing is perfect. The lemon cuts through the breading and makes it feel fresh.
For a party, I put them on a large platter with a bowl of tartar sauce in the middle. I also like to add some lemon wedges around the edges. A quick squeeze of lemon right before you eat makes a huge difference. It wakes up all the flavors and makes the shrimp taste even sweeter. You can even use these shrimp in a taco with some cabbage slaw!
Storing and Reheating Tips

If you have leftovers, do not throw them away. You can keep them in the fridge for up to two days. Put them in a container that seals tight so they don’t pick up other smells from the fridge. When you are ready to eat them again, do not use the microwave! The microwave will make them soft and soggy like a sponge.
The best way to reheat them is back in the oven or an air fryer. Put them in at 350 degrees for about five minutes. This will bring back most of the crunch without overcooking the shrimp. They won’t be quite as magic as the first day, but they are still a great lunch. I often make a double batch just to have some for the next day.
Common Mistakes to Avoid
- Wet Shrimp: If you do not dry the shrimp, the breading will slide right off.
- Too Much Flour: Thick flour layers make a gummy coating. Always shake off the extra.
- Low Oven Temp: If the oven is too cool, the shrimp cook before the crumbs get crunchy.
The Best Dipping Sauces
A good sauce can make a great dish even better. Since these shrimp are so simple, you can get creative with what you dip them in. I usually make two or three quick sauces so everyone has a choice. It makes the meal feel more special and fun to eat.
Zesty Cocktail Sauce

This is the classic choice for a reason. It is sweet and spicy at the same time. You can make it with ketchup, horseradish, and a splash of lemon juice. If you like it hot, add more horseradish. I love how the cold, spicy sauce hits the hot, crunchy shrimp. It is a very refreshing combo that reminds me of being at the beach.
If you have kids, you can leave out the horseradish and just use plain ketchup. It still tastes great with the garlic and parsley in the breading. This sauce is also very cheap to make. You probably have all the parts in your fridge right now. No need to buy a fancy jar from the store!
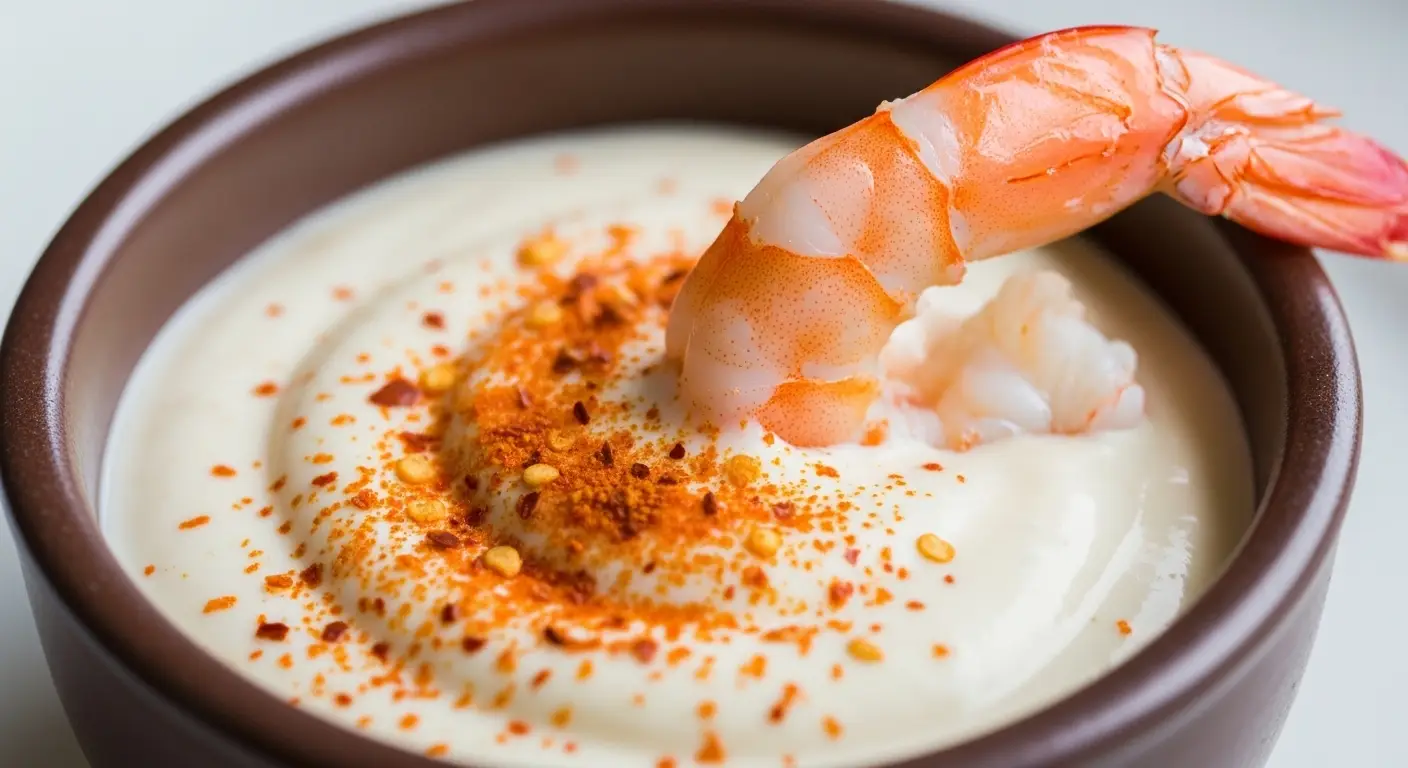
Spicy Garlic Mayo

This is my personal favorite sauce. It is creamy and has a little kick from sriracha or hot sauce. Mix half a cup of mayo with a teaspoon of hot sauce and a tiny bit of lime juice. It is very rich and goes perfectly with the airy panko crumbs. I often use this as a spread if I am making a shrimp sandwich too.
For a garlic twist, add some fresh minced garlic to the mayo. It makes the whole thing taste like fancy aioli. This sauce is a big hit at parties because it feels a bit more modern. It is also great for people who don’t like the strong taste of horseradish in cocktail sauce. IMO, this is the best way to enjoy magic shrimp.
Frequently Asked Questions about Baked Shrimp
Can I use frozen shrimp?
Yes! Just make sure you thaw them all the way first. Pat them very dry before you start breading so the flour sticks well.
What if I do not have panko?
You can use crushed crackers or regular breadcrumbs. It won’t be as crunchy, but it still tastes good. Panko is best for a big crunch.
Why did my breading fall off?
This usually happens if the shrimp were too wet or if you skipped the flour step. The flour helps the egg and panko stay on the shrimp.
Is this recipe healthy?
Yes! Since we bake the shrimp instead of frying them in oil, they have much less fat. It is a lighter way to enjoy a crispy meal.
Can I make these in an air fryer?
Yes, you can! Put them in at 400 degrees for about 6 to 8 minutes. They get very crispy in the air fryer because the air moves so fast.
Happy Cooking with Your Magic Shrimp
You now have all the tools to make the best crispy baked shrimp ever. It is a simple, fast, and fun recipe that saves you from a greasy mess. Remember to dry your shrimp, use the three-bowl method, and bake them on a rack. You will love how loud that crunch is when you take your first bite. I hope this becomes a new favorite in your home like it is in mine!