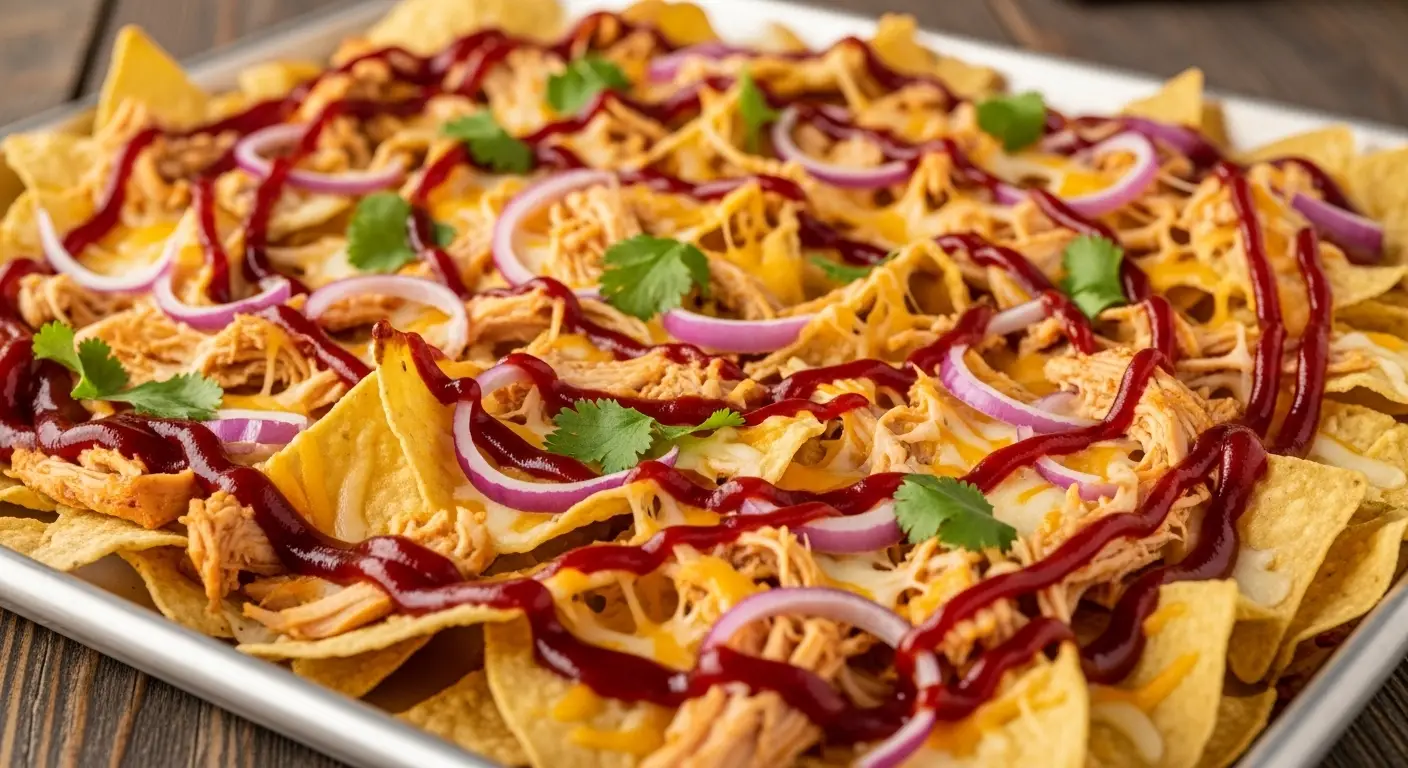
Sheet Pan BBQ Chicken Nachos
Making a big tray of nachos is one of my favorite ways to feed a hungry crowd. There is something so fun about putting a giant sheet pan in the middle of the table and letting everyone dig in. These BBQ chicken nachos are a twist on the classic beef version. They are sweet, tangy, and packed with melted cheese. I will show you how to make them perfectly so they stay crunchy and delicious every single time.
You are going to learn how to layer your chips and cheese so every bite is good. We will also talk about the best chicken to use and how to keep your nachos from getting soggy. This recipe is great for a busy weeknight or a big game day. It takes very little work but looks like a total feast. Let’s get into the kitchen and start building this tasty meal.
Ready to see how easy it is to make a restaurant-style snack at home?
The Secret to Great Sheet Pan Nachos
Most people just throw chips and cheese on a tray and hope for the best. That usually ends with a pile of dry chips on the bottom and a big clump of cheese on top. To make really good nachos, you have to think about the layers. I learned this the hard way after serving many plates of sad, naked chips to my friends. Now, I make sure every chip gets some love from the toppings. Using a sheet pan is the best tool because it gives you a large surface area. This means you can spread things out instead of stacking them too high.
Another big thing to think about is the balance of flavors. Since we are using BBQ sauce, the nachos will be a little bit sweet. You need something salty, something creamy, and maybe a little bit of spice to balance that out. I like to use a mix of cheeses to get that perfect melt. Sharp cheddar gives a big punch of flavor, while Monterey Jack melts smoothly. Together, they make the perfect cheesy blanket for your chicken and chips.
What You Will Need

Gathering your ingredients before you start is a smart move. For the base, you need a sturdy bag of tortilla chips. Do not get the thin, light ones because they will break under the weight of the chicken and cheese. You need the thick, restaurant-style chips. For the chicken, I usually use a rotisserie chicken from the store. It is already cooked and tastes great. You just have to shred it with two forks. If you have leftover grilled chicken, that works perfectly too.
You also need a good BBQ sauce. Pick one that you really like because it provides a lot of the flavor here. For the cheese, please grate it yourself if you can. The pre-shredded cheese in bags has a powder on it that stops it from sticking together, but it also stops it from melting as well as fresh cheese. You will also want some red onion for a little crunch and cilantro for a fresh finish at the end. Don’t forget the extras like sour cream or jalapeños if you like things spicy. FYI, these are very easy to change based on what is in your fridge.
- 1 large bag of thick tortilla chips
- 3 cups of shredded cooked chicken
- 1 cup of your favorite BBQ sauce
- 2 cups of sharp cheddar cheese (grated)
- 1 cup of Monterey Jack cheese (grated)
- half of a red onion, diced small
- 1 can of black beans, rinsed and drained
- Fresh cilantro and sour cream for topping
Preparing the BBQ Chicken

Before you even touch the chips, you have to get the chicken ready. Take your shredded chicken and put it in a medium bowl. Pour about half of your BBQ sauce over it. Use a fork to mix it until every piece of chicken is coated. You don’t want the chicken to be swimming in sauce, but it should be nice and wet. This ensures that the meat stays juicy while it bakes in the oven. If the chicken is too dry, it can get tough when it hits the heat.
I once made the mistake of just putting plain chicken on the chips and drizzling sauce over the top. It did not taste as good! The sauce didn’t reach all the meat, and some parts were bland. Mixing it beforehand is a much better way to do it. If you want a little more kick, you can add a pinch of chili powder or garlic powder to the chicken mix right now. This is where most of your flavor comes from, so make it count. Once it is mixed, set it aside while you get the oven hot.
How to Layer Like a Pro

Now comes the most important part of the whole process. Turn your oven to 400 degrees. Line a large rimmed baking sheet with parchment paper or foil. This makes cleanup so much easier later. Spread about half of your bag of chips in a single layer across the pan. It is okay if they overlap a little bit, but try to cover the whole surface. Now, sprinkle half of your cheese over those chips. This acts like “glue” to hold the next layer in place.
Next, add half of your BBQ chicken and half of the black beans. Now, repeat the whole thing. Add the rest of the chips, followed by the rest of the chicken, beans, and finally, the rest of the cheese. By doing two layers, you ensure that even the chips at the bottom have toppings. Most people only do one layer, which is why the bottom chips stay dry. This double-layer method is the secret to restaurant-quality nachos at home. It ensures a perfect ratio of chip to cheese in every single bite.
Recipe Quick Info
- Prep Time: 15 minutes
- Cook Time: 10-12 minutes
- Servings: 4-6 people
- Difficulty: Easy
Baking to Perfection

Slide your tray into the center of the oven. You want to bake them until the cheese is completely melted and starting to bubble. This usually takes about 10 to 12 minutes. Keep a close eye on them! Tortilla chips can go from perfectly toasted to burnt very quickly. You are looking for the edges of the chips to turn a very light golden brown. The chicken is already cooked, so we are really just heating everything through and getting that cheese gooey.
If you like your cheese a little bit crispy, you can turn on the broiler for the last minute. But be careful! The BBQ sauce has sugar in it, and sugar burns fast under a broiler. I usually skip the broiler because the 400-degree oven does a great job on its own. While the nachos are baking, this is the perfect time to chop up your onion and cilantro. Having your cold toppings ready to go as soon as the pan comes out is key. Hot nachos wait for no one!
Adding the Fresh Toppings

Once you pull the pan out of the oven, let it sit for just one minute. This lets the cheese set slightly so it doesn’t all slide off when you pick up a chip. Now, it is time for the fresh stuff. Sprinkle your diced red onions all over the top. The sharp bite of the raw onion is a great contrast to the sweet BBQ sauce. Next, add a generous amount of fresh cilantro. If you are one of those people who thinks cilantro tastes like soap, you can use green onions instead.
I also like to take the leftover BBQ sauce and drizzle a little bit more over the top in a zig-zag pattern. This makes them look professional. If you have a squeeze bottle, that works great, but a spoon works just fine too. The fresh toppings add color and make the dish feel lighter. Without them, the nachos can feel a bit heavy and brown. Those pops of red and green really make the dish look appetizing and bright. Now you are ready to serve!
The Best Side Dips

Even though these nachos have a lot of flavor, a few side dips can make them even better. I always serve mine with a big bowl of cool sour cream. The creaminess cuts through the tangy BBQ sauce perfectly. Guacamole is another great choice because it adds a healthy fat and a nice buttery texture. If you want more heat, a side of spicy salsa or pickled jalapeños is the way to go. IMO, you can never have too many dipping options.
When I serve these for a party, I put the dips in small bowls right on the sheet pan if there is room. Otherwise, just set them next to the tray. Some people like to dollop the sour cream right onto the nachos, but I prefer to keep it on the side. This prevents the chips from getting soggy if you don’t eat them all in five minutes. Plus, it lets everyone control how much they want. It is all about making the meal work for your specific tastes.
Pro Nacho Tips
- Don’t Over-Sauce: Too much sauce on the chicken will make the chips wet. Stick to the measurements!
- Fresh Cheese: Grate your own cheese for the best melt and stretch.
- Sturdy Chips: Use round or triangular chips that feel heavy in the bag.
Variations to Try

You can change this recipe in so many ways. If you don’t have chicken, you can use pulled pork or even ground turkey cooked with a little taco seasoning. If you want to make it vegetarian, swap the chicken for extra black beans and maybe some roasted corn. Pineapple is another fun addition if you like that sweet and savory combo. Just chop it into small pieces and add it before you bake. It tastes like a BBQ chicken pizza but on chips!
For a lower-carb version, some people use sliced bell peppers instead of chips. You just cut the peppers into “scoops” and pile the toppings inside. It won’t be as crunchy, but it is a fun way to eat your veggies. I have also tried this with sweet potato chips, but they tend to get soft very fast, so be careful with that. The classic tortilla chip is still my favorite, but don’t be afraid to experiment with what you have in your pantry. This is a very forgiving recipe.
How to Avoid Soggy Chips

The biggest enemy of the nacho is sogginess. Nobody wants a wet, limp chip. To avoid this, make sure your beans are very well drained and dried. If you use canned beans, rinse them in a colander and let them sit for a few minutes. Also, don’t put “wet” toppings like salsa or sour cream on the chips before they go into the oven. Save those for the very end as a cold topping or a side dip. The heat of the oven will help keep the chips crisp as long as you don’t add too much liquid.
Another tip is to make sure your oven is fully preheated. If you put the chips in a cold oven, they will just sit there and absorb the moisture from the chicken as the oven warms up. A hot oven crisps the chips and melts the cheese fast. One time, I was in a rush and didn’t wait for the oven to beep. The result was a tray of soft nachos that were hard to eat. Lesson learned: patience leads to crunchiness. A hot oven is your best friend when it comes to snack food.
Common Questions About Nachos
People often ask me how to save leftovers or what the best cheese is. Nachos are best eaten fresh, but you can save them if you follow a few simple rules. Since this is such a popular dish, I have gathered the most common questions here to help you out. Cooking should be fun and easy, and knowing these little details helps you feel more confident in the kitchen.
Can I reheat leftover nachos?
Yes, but use the oven or an air fryer at 350 degrees. Never use a microwave or the chips will get very soggy and chewy.
What is the best cheese for melting?
Monterey Jack is the best for melting. Combining it with Sharp Cheddar gives you both great texture and a strong, cheesy flavor.
Can I make these ahead of time?
You can prep the chicken and grate the cheese early. However, do not build the nachos until you are ready to bake them or they will get soft.
Is rotisserie chicken better than canned?
Rotisserie chicken has much better flavor and texture. Canned chicken can be very salty and mushy, so I suggest avoiding it for nachos.
How do I stop the cheese from sticking to the pan?
Always use parchment paper or a silicone mat. This prevents the cheese from sticking and makes cleaning the sheet pan very easy.
Time to Start Cooking
Sheet pan BBQ chicken nachos are a simple and happy meal. They bring everyone together and satisfy those cravings for something crunchy and cheesy. Now that you know the secrets of layering and baking, you can make the perfect tray every time. Just remember to use sturdy chips and melt that cheese until it bubbles. Happy snacking!