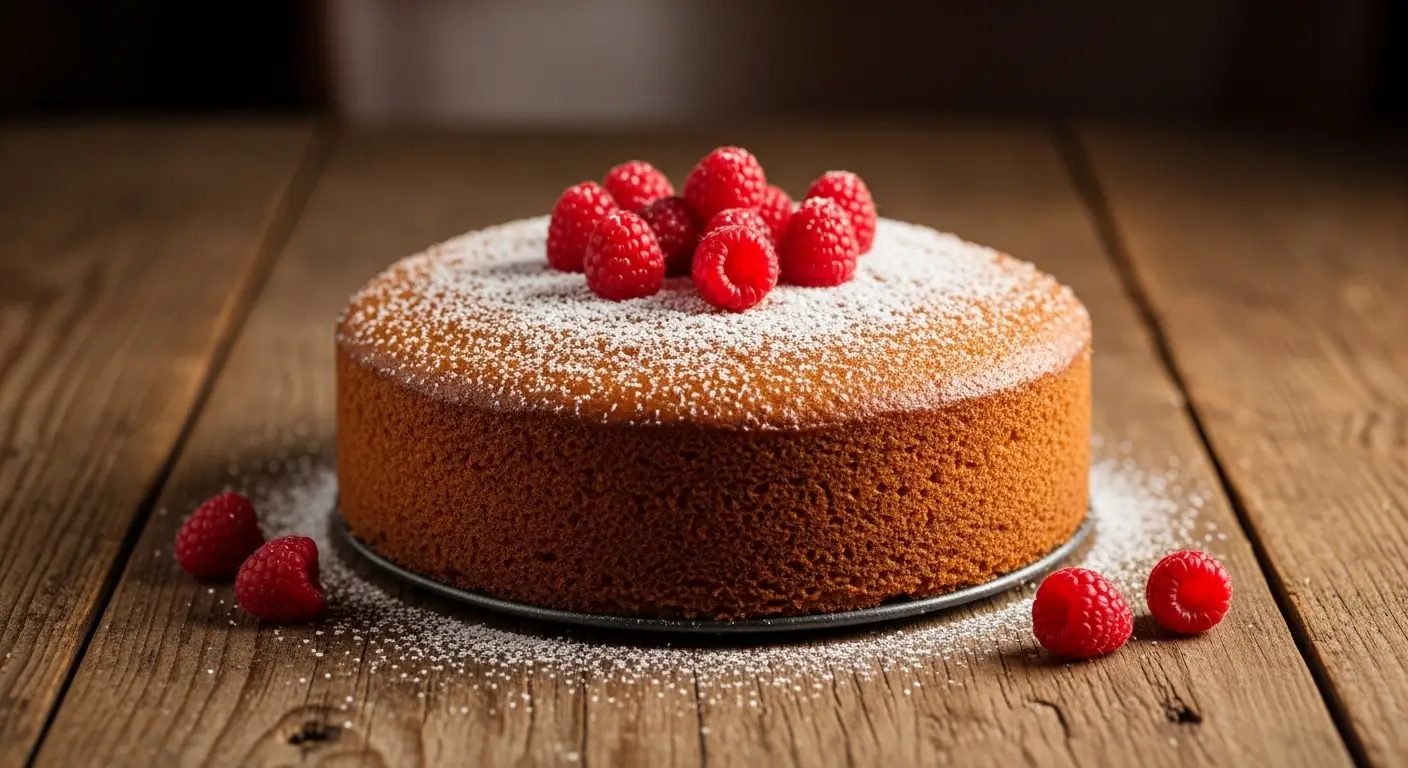
Chocolate Caramel Molten Lava Cake
I love chocolate more than almost anything. There is something so special about a cake that looks solid on the outside but holds a sweet surprise inside. When you poke your fork into a warm lava cake, the middle flows out like a river of gold and brown. It feels like magic every single time I make it in my own kitchen.
Today, I am going to show you how to make a Chocolate Caramel Molten Lava Cake. This is not just a regular chocolate cake. We are adding a soft caramel middle that makes it extra tasty. You do not need to be a pro cook to get this right. I will walk you through every step so your cakes come out perfect and gooey.
Ready to bake something amazing? Let’s get your apron on and start mixing!
Getting Ready to Bake Your Lava Cakes
Before we start mixing flour and sugar, we need to talk about why this cake works. A lava cake is basically a cake that we do not bake all the way through. The outside gets firm enough to hold its shape, but the inside stays liquid. Adding caramel makes it even better because the textures mix together in a way that feels very fancy.
The Ingredients You Will Need

You only need a few simple things from the store to make these cakes. I always tell people to buy the best chocolate they can find. Since there are so few ingredients, the taste of the chocolate really stands out. Use a bar of baking chocolate instead of chocolate chips if you can. Baking bars melt much smoother and give you that glossy look we want.
- 6 ounces of high-quality dark chocolate (60% cacao is best)
- 1/2 cup of unsalted butter (one full stick)
- 2 large eggs plus 2 egg yolks (at room temperature)
- 1/4 cup of granulated white sugar
- 1/4 teaspoon of salt
- 2 tablespoons of all-purpose flour
- 4 tablespoons of thick caramel sauce (store-bought or homemade)
- Butter and cocoa powder for coating the ramekins
Tools for the Job

You will need some small ceramic bowls called ramekins. These are usually 6 ounces in size. If you do not have those, you can use a muffin tin, but the cakes might be a bit smaller. I prefer ramekins because they hold the heat well and make the cakes easy to flip over onto a plate without breaking them apart too soon.
A whisk is your best friend here. You do not even need a big electric mixer for this recipe. A simple hand whisk helps you fold the flour in gently so the cake stays light. You also need a microwave-safe bowl or a small pot to melt your chocolate and butter together. Keeping things simple makes the cleanup much faster later on.
How to Make the Perfect Molten Cake
Making the batter is the easy part. The real trick is the timing in the oven. I remember the first time I made these, I left them in for two minutes too long. They just turned into regular chocolate muffins! They still tasted good, but there was no lava. That taught me to watch the clock very closely and get to know how my oven heats up.
Step by Step Instructions

Follow these steps carefully to get that perfect flow. First, heat your oven to 425 degrees Fahrenheit. This high heat is important because it cooks the outside fast while leaving the middle raw. Grease your ramekins with butter and dust them with cocoa powder. This helps the cake slide out easily when you are ready to serve it.
- Melt the chocolate and butter together in a bowl until smooth. You can do this in the microwave in 30-second bursts.
- In a separate bowl, whisk the eggs, egg yolks, sugar, and salt together until the mixture looks a bit pale and thick.
- Slowly pour the melted chocolate into the egg mixture. Whisk it gently so you don’t scramble the eggs with the heat.
- Sift the flour over the batter and fold it in with a spatula. Stop as soon as the white streaks disappear.
- Fill each ramekin halfway with batter. Drop a big spoonful of caramel sauce right into the center.
- Cover the caramel with the rest of the chocolate batter until the ramekin is about three-quarters full.
- Bake for 12 to 14 minutes. The sides should be firm, but the top should still look a little soft and jiggly.
Tips for Success Every Time

One secret tip most people miss is letting the cakes rest. Once you take them out of the oven, let them sit in the ramekins for exactly one minute. This lets the outer walls firm up just enough so they don’t collapse when you flip them. If you flip them immediately, the weight of the lava might burst through the side too early. FYI, patience is the hardest part of this recipe!
Expert Baking Advice
- Temperature Check: Make sure your eggs are not cold. Room temperature eggs mix better and help the cake rise.
- The Cocoa Trick: Use cocoa powder instead of flour to dust the molds. This prevents white spots on your dark cake.
- Don’t Over-mix: Once you add the flour, stir slowly. Too much stirring makes the cake tough like bread.
Another thing to watch is the caramel. If your caramel is too thin or watery, it might sink to the bottom and stick to the dish. I like to use a thick caramel that stays right in the middle. If you are worried, you can even freeze little balls of caramel for 20 minutes before putting them in the batter. This keeps them solid longer while the cake starts to bake around them.
Common Mistakes to Avoid

The biggest mistake is overbaking. Every oven is different. My oven at home runs a little hot, so I usually pull mine out at 11 minutes. Your oven might need 15. The first time you make these, try baking just one cake first as a test. This helps you figure out the exact timing for your specific kitchen without ruining the whole batch. IMO, it is better to be safe than sorry.
Do not forget to grease the ramekins all the way to the top. If the cake sticks to even one small spot, it will tear when you try to flip it. A torn cake means the lava leaks out on the tray instead of on the plate. I use a pastry brush to make sure the butter covers every tiny corner of the dish. It makes a huge difference in how the final dessert looks.
Recipe Quick Info
- Prep Time: 15 minutes
- Cook Time: 12 minutes
- Servings: 4 cakes
- Difficulty: Medium
Making Your Dessert Look Beautiful
A lava cake looks nice on its own, but a few small touches make it look like it came from a fancy restaurant. You want people to go “wow” when you bring the plates to the table. Since the cake is very dark and rich, adding something bright or creamy on the side helps balance the flavors and the look of the dish.
How to Serve Your Cake

I always serve these warm. You cannot really eat a lava cake cold because the middle will turn solid again. To serve, place a small plate upside down over the top of the ramekin. Use an oven mitt to hold both and flip them over quickly. Lift the ramekin slowly. If you greased it well, the cake should slide right out onto the center of the plate.
Add a big scoop of vanilla ice cream right next to the hot cake. The way the cold ice cream melts into the warm chocolate is the best part. You can also add a few fresh berries like raspberries or strawberries. The sour taste of the fruit cuts through the heavy sweetness of the caramel and chocolate. It makes the whole dessert feel lighter and more exciting to eat.
Storing and Reheating Tips

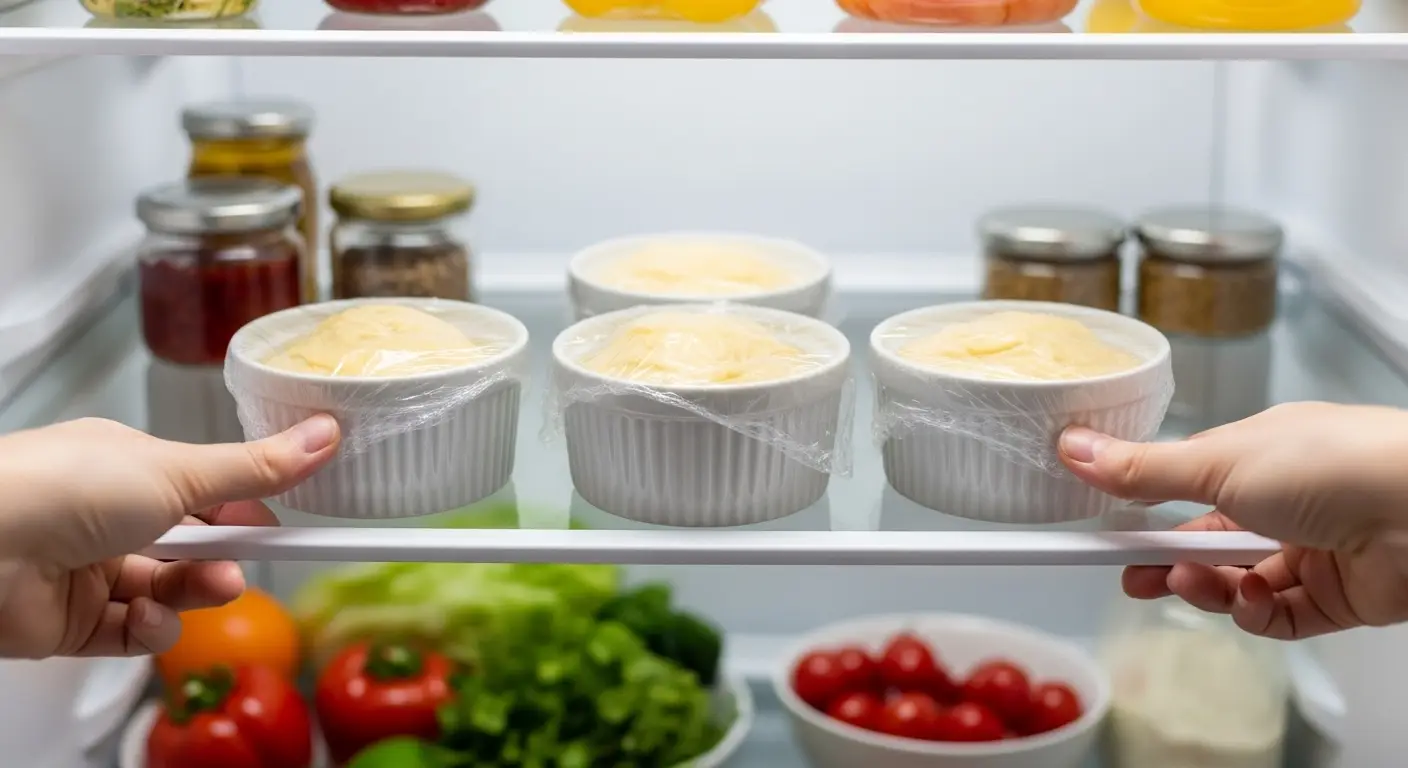
If you have extra batter, you can actually keep it in the fridge! You can fill the ramekins, cover them with plastic wrap, and bake them the next day. Just add 2 extra minutes to the baking time since the batter will be cold. This is a great trick if you are having friends over for dinner. You can do all the messy work in the morning and just pop them in the oven when you are ready for dessert.
If you already baked the cakes and have leftovers, they won’t have a liquid center anymore if you reheat them too much. I suggest eating them within a day. To warm one up, put it in the microwave for only 15 seconds. It will be more like a soft, moist fudge cake than a lava cake, but it will still taste delicious with a cup of milk or coffee.
Your Questions Answered
Baking can be tricky, especially when you are trying to leave the middle of a cake raw on purpose! Here are some of the most common things people ask me when they try this recipe for the first time.
Can I use milk chocolate instead of dark?
You can, but the cake will be very sweet. Dark chocolate provides a better structure and balances the sugar in the caramel better. If you use milk chocolate, use less sugar in the batter.
What if I do not have ramekins?
Use a muffin tin! Grease the holes well. Since they are smaller, bake them for only 8 to 10 minutes. Use a spoon to gently lift them out after they rest for a minute.
How do I know if it is done?
The edges should look dry and firm. The very center of the top should still look a little shiny and soft. If the whole top looks dry, it is likely overbaked and won’t have lava.
Can I make this gluten-free?
Yes! You only use two tablespoons of flour. You can swap the all-purpose flour for a 1-to-1 gluten-free flour blend or even almond flour. It works very well in this specific recipe.
Why did my cake collapse?
It was probably underbaked or not rested long enough. The outer walls need to be strong enough to hold the liquid. Try baking for one more minute next time and let it rest for a full 60 seconds.
Enjoy Your Homemade Treat
Making a Chocolate Caramel Molten Lava Cake is a great way to show your friends and family that you have some serious kitchen skills. Even though it looks hard, it is really just about timing and using good ingredients. Once you see that golden caramel mix with the dark chocolate on your plate, you will know all the effort was worth it. Happy baking!