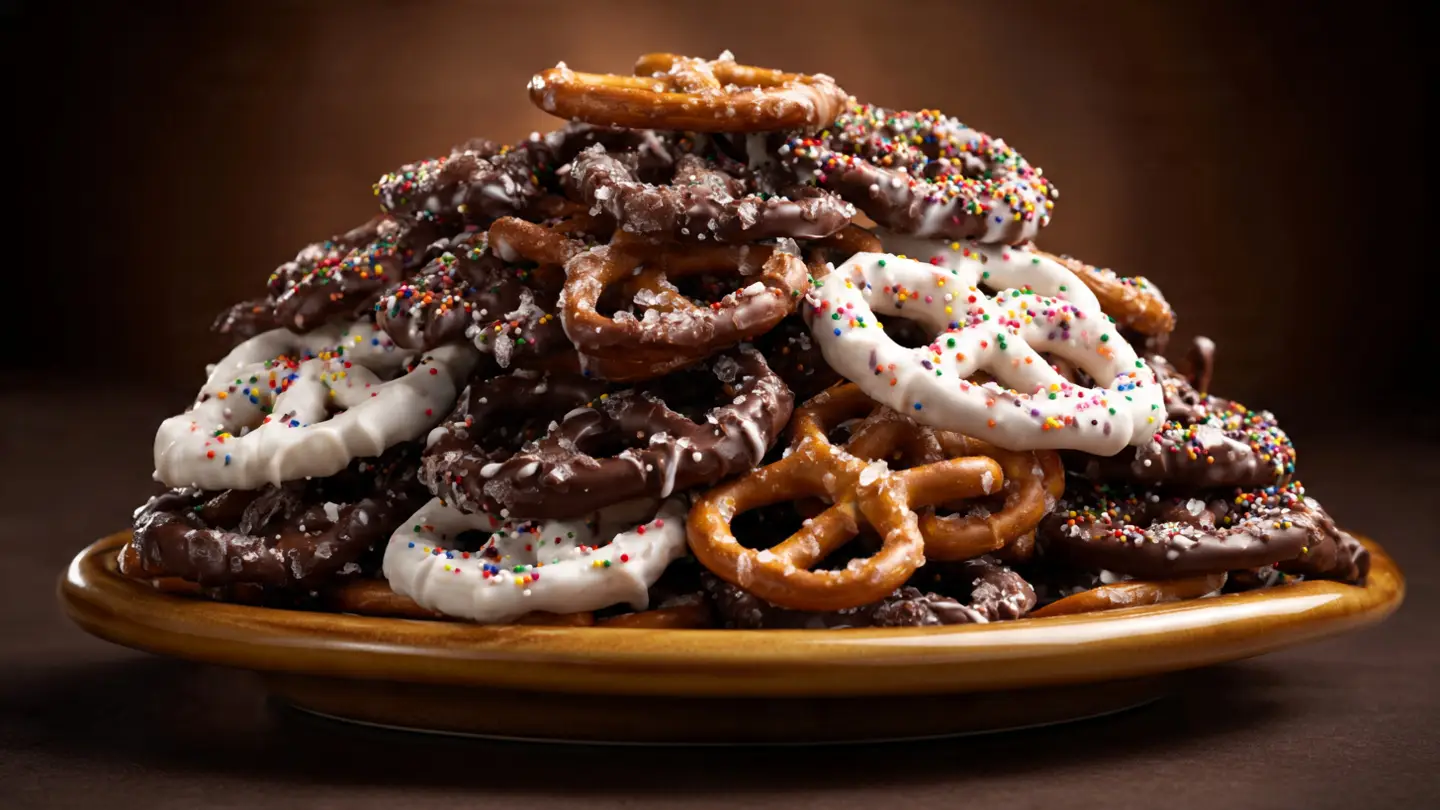
Chocolate Covered Pretzels
Making snacks at home is one of my favorite things to do on a rainy Sunday. There is something so special about the smell of melting chocolate in a warm kitchen. Today, I am going to show you how to make chocolate covered pretzels. This treat is the perfect mix of salty and sweet. You only need a few things to get started, and it does not take a lot of time. If you have kids, they will love to help you with the dipping and the sprinkles.
I remember the first time I tried to make these. I was very young and thought I could just throw everything in a big bowl. It turned out to be a giant sticky mess! I learned that you need a little bit of patience and the right tools. Once you know the tricks, you can make these for birthdays, holidays, or just because you want a treat. It is a great way to save money because the fancy ones at the store cost way too much money.
You will learn how to melt chocolate without burning it. You will also see how to pick the best pretzels for the job. By the end of this page, you will be a snack pro! Let us get into the kitchen and start cooking.
Grab your apron and check your pantry for these simple items!
Getting Ready for Snack Success
Before you start melting anything, you need to set up your space. My kitchen is small, so I have to be very neat. I like to clear off the whole counter so I have room to move. You do not want to be searching for a spoon while your chocolate is getting hard. Set out some wax paper or a silicone mat first. This stops the pretzels from sticking to the table. It makes cleanup much easier later on too.
If you do not have wax paper, you can use parchment paper. Do not use tin foil because the chocolate might stick to it. I made that mistake once and had to peel metal off my snack. That was not fun at all! Also, make sure your bowls are completely dry. Even one tiny drop of water can ruin a whole pot of melted chocolate. It makes the chocolate turn into a thick, dry paste that you cannot use. FYI, this is called seizing, and it is the biggest enemy of a snack maker.
The Short List of Ingredients

You do not need a long shopping list for this recipe. The main thing you need is good chocolate. I like to use chocolate melting wafers because they melt very smoothly. You can also use chocolate chips from the baking aisle. If you use chips, adding a tiny bit of coconut oil helps them stay shiny and smooth. You will also need pretzels. I think the big twists look the best, but the small ones are easier to eat in one bite. Some people like pretzel rods because they are like long magic wands.
- 1 bag of pretzel twists or rods
- 12 ounces of dark or milk chocolate melting wafers
- 12 ounces of white chocolate for drizzling
- 2 teaspoons of coconut oil (optional)
- Sprinkles, crushed nuts, or sea salt for the top
Using different types of chocolate makes the tray look very pretty. I usually buy one bag of dark chocolate and one bag of white chocolate. This gives people choices. Some people love the bitter taste of dark chocolate, while others want the super sweet taste of white chocolate. You can even use food coloring to turn the white chocolate into pink or blue for a party. Just make sure the food coloring is oil-based, or the chocolate will get lumpy.
Picking the Best Tools

You probably have most of what you need in your cupboards right now. A microwave-safe bowl is the most important tool. Glass or ceramic works best because they hold heat well. You will also need a fork or a special dipping tool. I find that a normal dinner fork works just fine for lifting the pretzels out of the bowl. A rubber spatula is great for stirring. It gets every last drop of chocolate off the sides so nothing goes to waste.
I also recommend using a baking sheet. This gives you a flat place to put the pretzels while they dry. If you have a cooling rack, you can put that on top of the paper. This lets the extra chocolate drip off so you don’t get a big flat puddle on the bottom of your snack. It makes them look much more professional. Most blogs skip telling you about the cooling rack, but it really helps with the shape.
Melting Chocolate the Easy Way

Melting chocolate can be tricky if you go too fast. I always use the microwave because it is fast. Put your chocolate in the bowl and heat it for 30 seconds. Take it out and stir it even if it looks like nothing happened. The bowl is hot, and that heat will help melt the pieces. Put it back in for another 20 seconds and stir again. Keep doing this until it is smooth and runny. If you heat it for two minutes all at once, the chocolate will burn and smell terrible.
If you don’t like the microwave, you can use a double boiler. This is just a bowl sitting on top of a pot of hot water. The steam warms the bowl gently. This method is slower but it is safer. You have more control over the heat. My lesson learned is to never let the water touch the bottom of the bowl. If it gets too hot, the chocolate gets grainy. A smooth chocolate is a happy chocolate! This works for almost any brand you buy at the store.
Recipe Quick Info
- Prep Time: 15 minutes
- Cook Time: 5 minutes (melting)
- Servings: 24 pretzels
- Difficulty: Easy
The Best Way to Dip and Decorate
Now comes the fun part! Dipping the pretzels is where the magic happens. You want to work somewhat fast so the chocolate stays warm. If it starts to get thick, just pop it back in the microwave for ten seconds. I like to do one color at a time. Start with the milk chocolate and finish all those pretzels before moving to the white chocolate. This keeps your colors clean and bright.
When you dip, try to cover the whole pretzel. Some people like to leave a little bit of the handle showing so their fingers do not get messy. That is a smart move! If you are making these for a gift, covering the whole thing looks a bit fancier. It is really up to you and how much chocolate you like. Personally, I think more chocolate is always a better choice. Just be sure to tap the fork on the side of the bowl to get the extra off.
Step-by-Step Dipping Guide

Follow these steps to get a perfect coat every time. I have done this hundreds of times, and this way works best. It keeps the mess low and the quality high. You will be done in no time!
- Line your baking sheet with parchment paper so nothing sticks.
- Drop one pretzel into the melted chocolate.
- Use your fork to push it under so it is fully covered.
- Lift the pretzel up with the fork held flat.
- Tap the fork gently against the side of the bowl. This lets the extra chocolate fall back in.
- Slide the pretzel onto the paper. Use a toothpick if it gets stuck to the fork.
- Repeat until you run out of chocolate or pretzels!
If the chocolate starts to feel like sludge, it is cooling down. Just give it a quick stir. Sometimes I add a half-teaspoon of coconut oil halfway through to keep it thin. This makes the coating thinner and easier to eat. If the coating is too thick, it can be hard to bite into. You want a nice snap when you eat it. This is a simple trick that makes a big difference in how they feel in your mouth.
Adding Fun Decorations

You must add your decorations while the chocolate is still wet. If you wait too long, the sprinkles will just roll right off and end up on the floor. I like to dip five pretzels and then stop to decorate them. Then I dip five more. This way, I know the chocolate is still sticky enough. You can use anything you like for the top. Sea salt is amazing if you like that salty-sweet combo. Crushed candy bars or oreos also taste great.
For a fancy look, try a drizzle. Wait for the first layer of chocolate to get hard. Then, melt a different color of chocolate. Dip a spoon into it and wave it back and forth over the pretzels. It creates thin, pretty lines. It looks like something you bought at a candy shop! This is my favorite way to make them look like I spent hours on them, even though it only took a few minutes. IMO, the drizzle is what makes people go “wow” when they see the tray.
Tips for the Best Texture

The best pretzels have a great crunch. If your pretzels are old and soft, the snack won’t be good. Always buy a fresh bag for this project. Another tip is to let them dry at room temperature if you have time. If you are in a rush, you can put the tray in the fridge for ten minutes. Do not leave them in the fridge too long, or the chocolate might get a weird white mist on it. This is called bloom. It still tastes fine, but it doesn’t look as pretty.
One limitation to remember is the weather. If it is a very hot and humid day, the chocolate might stay soft for a long time. In that case, the fridge is your best friend. Just make sure to take them out and put them in a cool spot once they are hard. If you are using real chocolate bars instead of melting wafers, you might need to learn about tempering. But for beginners, the melting wafers are much easier and work every time without the stress.
Pro Dipping Tips
- The Tap Method: Always tap the fork 5-10 times to remove excess chocolate for a smooth finish.
- Temperature Control: If the chocolate gets too hot, let it sit for a minute. If it is too cold, heat for 10 seconds.
- Clean Lines: Use a plastic sandwich bag with the corner snipped off to make perfect drizzles.
Serving and Storing Your Treats

Once the pretzels are hard, you can move them. I like to put them in a glass jar with a lid. They look so nice sitting on the counter. They will stay fresh for about two weeks if you keep the air out. If you live in a hot place, keep them in a cool pantry. You can also put them in little plastic bags with a ribbon to give to your friends. It is a very cheap and sweet gift for teachers or neighbors.
This snack suits everyone because you can change the ingredients. If someone cannot eat dairy, you can use vegan chocolate chips. If someone is gluten-free, there are many gluten-free pretzels at the store now. They taste almost exactly the same once they are covered in chocolate! This makes it a very safe snack for school parties. Just be sure to check the labels on your sprinkles too. Most of the time, this is a very budget-friendly treat that everyone can enjoy together.
Common Questions About This Snack
Why did my chocolate get thick and lumpy?
This usually happens if a tiny bit of water gets into the bowl. It can also happen if you overheat the chocolate. Stir in a little coconut oil to try and fix it.
Can I use regular chocolate bars?
Yes, you can! Just chop them into small pieces first so they melt evenly. High-quality bars taste better but can be harder to work with than melting wafers.
How long do these take to dry?
At room temperature, they take about 30 to 60 minutes. In the fridge, they can harden in about 10 to 15 minutes. Make sure they are totally hard before touching them.
Can I freeze chocolate covered pretzels?
I do not recommend it. The pretzels can get soft and lose their crunch when they thaw out. It is better to store them in a cool, dry place in an airtight container.
Time to Enjoy Your Snack
You now know everything about making chocolate covered pretzels. It is a simple task that brings a lot of joy. Whether you make them for a big party or just for a movie night, they are sure to be a hit. Remember to take your time with the melting and have fun with the decorations. Happy snacking!