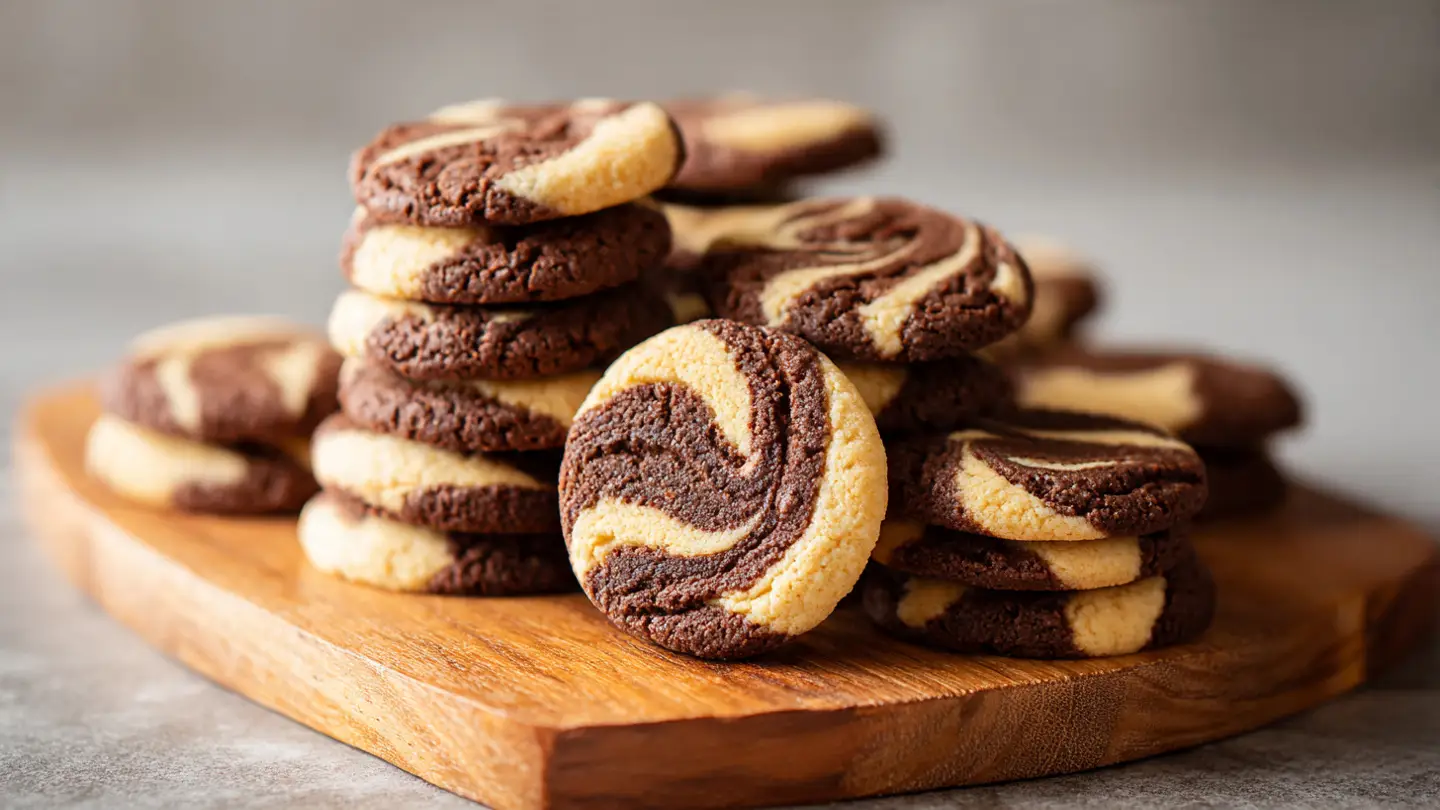
Chocolate Peanut Butter Swirl Cookies
You are about to learn how to make the best cookies ever. These cookies have two flavors mixed together in every bite. One part is rich chocolate and the other part is salty peanut butter. They look like art but they are very easy to bake. Even if you are new to the kitchen, you can do this. I will show you every step to get that perfect swirl every time.
Many people think making swirl cookies is hard. They worry the colors will just turn into a brown mess. I used to think that too. But I found a trick that makes it simple for anyone. This article covers everything from picking the right peanut butter to making sure your cookies stay soft for days. You will be a cookie pro by the time you finish reading this.
Are you ready to make your house smell like a bakery? Let’s get started on these tasty treats!
Try making these for your next school bake sale or family movie night!
The Best Way to Mix Two Flavors
Making a swirl cookie is like doing a fun craft project that you can eat. Most cookies use one bowl of dough. For this recipe, we make two small batches. One is dark and chocolatey. The other is light and nutty. When you push them together, magic happens. You get a pattern that looks fancy but only takes a minute to create. It is the best way to get both flavors without one taking over the other.
I remember the first time I tried this. I just threw all the ingredients in one big pot. It was a total fail. The peanut butter disappeared into the chocolate. The cookies tasted okay, but they looked like plain blobs. That is why we keep the doughs separate at first. It makes a huge difference in how they look on the plate. Trust me, the extra bowl is worth the wash later.
Gather Your Cookie Tools

Before you start, you need to get your tools ready. You will need two mixing bowls. This is very important so the doughs do not mix too early. You also need a baking sheet and some parchment paper. Parchment paper is a life saver. It stops the cookies from sticking to the metal pan. If you do not have it, you can use a little bit of butter to grease the pan. But parchment paper makes cleanup way faster.
You will also need a whisk and a sturdy spoon. A rubber spatula is great for scraping the sides of the bowl. Make sure your measuring cups are clean. Using the same cup for flour and sugar is fine, but wash it before you measure the wet stuff. Having everything in front of you makes the process stress-free. It stops you from running around the kitchen with flour on your hands looking for a fork. IMO, being organized is the secret to happy baking.
Simple Ingredients for Big Flavor

- Butter: Use softened butter so it mixes well with the sugar.
- Sugar: We use both white and brown sugar for a chewy texture.
- Peanut Butter: Creamy works best for a smooth swirl.
- Cocoa Powder: This gives the chocolate side its deep color.
- Flour: All-purpose flour is the base of our dough.
- Egg: One large egg holds everything together.
- Baking Soda: This helps the cookies puff up in the oven.
Most of these things are likely in your pantry right now. I always check my baking soda to make sure it is fresh. If it is too old, your cookies will be flat like pancakes. For the peanut butter, I suggest using the regular kind you find at the store. The natural kind that has oil on top can be too runny for this recipe. It might make the dough greasy and hard to handle. Stick to the classic creamy stuff for the best results.
Recipe Quick Info
- Prep Time: 15 minutes
- Cook Time: 10 minutes
- Servings: 24 cookies
- Difficulty: Easy
How to Bake the Perfect Swirl
Now we get to the fun part of the process. This is where the dough turns into actual cookies. You need to preheat your oven to 350 degrees. If the oven is not hot enough when the cookies go in, they will spread out too much. A hot oven locks the shape in place. While the oven warms up, you can start mixing. It is a very quick process once you get going.
I like to set a timer for the oven. Sometimes my oven takes a long time to get hot. If I put the cookies in too early, the edges get crispy while the middle stays raw. This happened to me last Thanksgiving and I learned my lesson. Always wait for that little beep from the stove! Once the oven is ready, your dough should be ready too. Let’s look at the steps to get that beautiful swirl pattern.
Mixing the Two Doughs

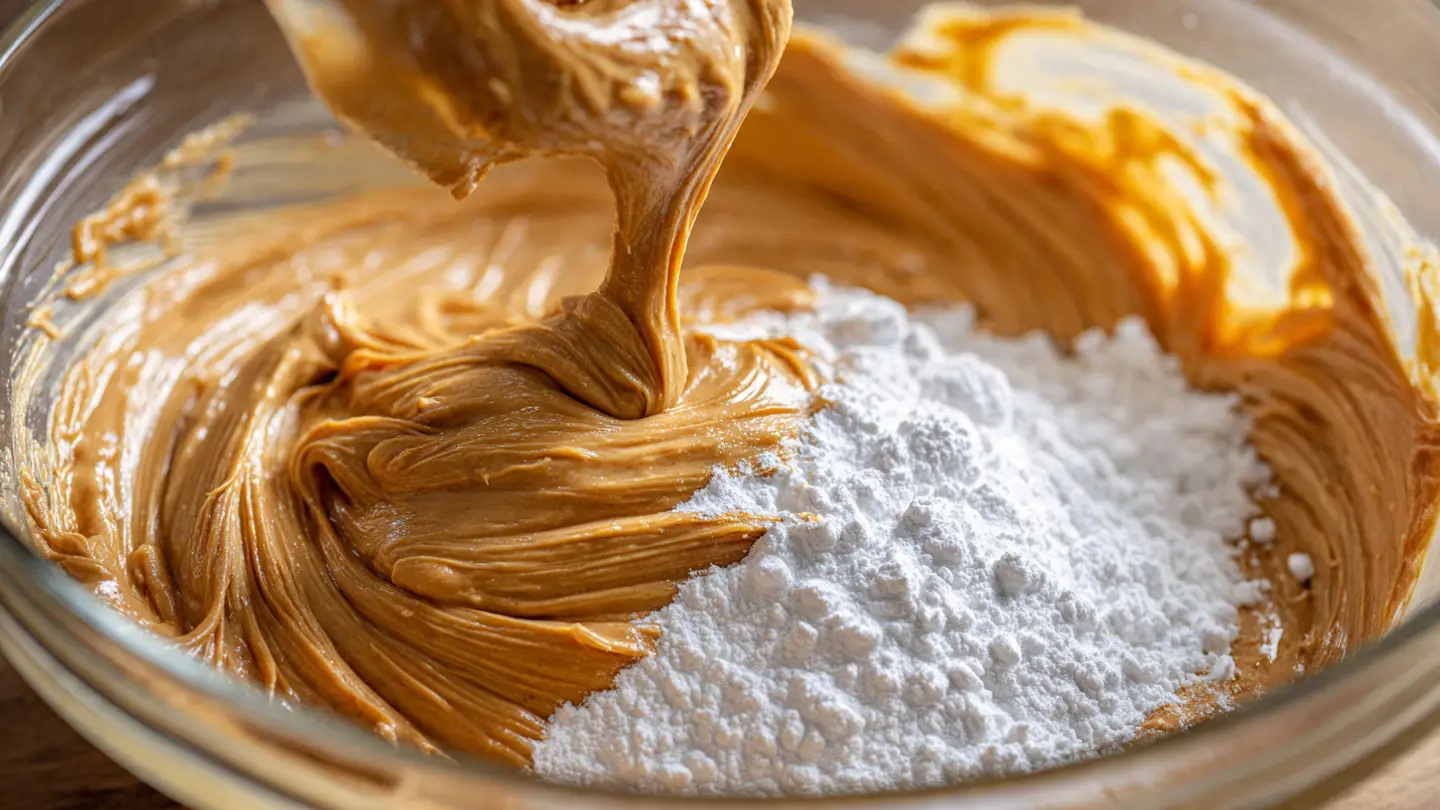
Start by mixing your butter and sugars until they are fluffy. Then, split this mixture into two different bowls. In the first bowl, you will add the peanut butter and a little flour. This creates the tan dough. It smells amazing and is very soft. In the second bowl, you add the cocoa powder and the rest of the flour. This makes the dark chocolate dough. It will look like a big ball of fudge.
Make sure you do not overmix the dough. If you stir it too much, the cookies will be tough and hard to chew. Just stir until you do not see any more white flour streaks. If the chocolate dough feels too dry, you can add a tiny splash of milk. Usually, the cocoa powder makes it a bit thicker than the peanut butter side. Keep them side by side on your counter so you can work with both at the same time.
Rolling and Swirling

- Take a small piece of peanut butter dough about the size of a marble.
- Take a piece of chocolate dough the same size.
- Press the two pieces together in your palm.
- Gently roll them into a ball. Do not over-roll or the colors will mix too much.
- Place the ball on the baking sheet and flatten it just a little bit with your thumb.
This is the secret to the look. You want to see thick stripes of both colors. If you roll the ball too many times, it will just turn into a light brown cookie. One or two quick turns in your hand is all it takes. It is okay if every cookie looks different. That is what makes them look homemade and special. I think the ones with the big swirls of chocolate are the prettiest.
Baking and Cooling

Put your tray in the oven for about 9 to 11 minutes. You want the edges to look set, but the middle should still look a bit soft. Cookies keep cooking for a few minutes even after you take them out of the oven. This is called carry-over cooking. If they look totally done in the oven, they will be too hard once they cool down. I usually take mine out at the 10-minute mark exactly.
Let them sit on the hot pan for five minutes before you move them. If you try to pick them up right away, they might break. After five minutes, move them to a wire rack. This lets air get under the cookies so the bottoms do not get soggy. The smell in your kitchen will be incredible at this point. FYI, it is very hard to wait for them to cool, but your tongue will thank you for not burning it!
Storage Tips
- Airtight Container: Keep cookies in a sealed jar to stay soft for 3 days.
- Freezing: You can freeze the baked cookies for up to a month in a bag.
- Microwave: Heat a cold cookie for 5 seconds to make it gooey again.
Expert Tips for Success
Even simple recipes have small tricks that make them better. Over the years, I have made many batches of these cookies. I have found out what works and what does not. Sometimes the smallest change can make a cookie go from okay to amazing. For example, using room temperature eggs helps the dough stay smooth. If the egg is too cold, it can make the butter clump up.
I also want to talk about salt. Peanut butter is already salty, but adding a tiny pinch of sea salt on top of the cookies before they bake is a pro move. It makes the chocolate taste even better. It is these little details that will make your friends ask for the recipe. Let’s look at a few more ways to make these cookies the best they can be.
Avoiding Common Mistakes

One mistake people make is using butter that is too melted. If your butter is like liquid, the cookies will spread out and touch each other on the pan. You want butter that is soft enough to dent with your finger but still holds its shape. If you forget to take your butter out of the fridge early, do not microwave it until it melts. Just cut it into small cubes and let it sit for ten minutes. It will soften much faster that way.
Another thing to watch is your flour measurement. Do not scoop the flour directly with the measuring cup. This packs the flour down and you end up using too much. Instead, use a spoon to fill the cup and then level it off with a knife. This keeps the dough light. If your dough feels crumbly, you probably used too much flour. Don’t worry though, they will still taste good with a glass of milk!
Fun Variations to Try

Once you master the basic swirl, you can get creative. You could add mini chocolate chips to the chocolate dough. Or you could add crushed peanuts to the peanut butter dough for some crunch. Some people like to press a chocolate kiss into the center right after they come out of the oven. This makes them look like little blossoms. The possibilities are endless when you have a good base dough.
If you have a nut allergy in the house, this may not work with peanut butter alternatives like sunflower butter. Sunflower butter is often much thinner and might change the shape of the cookie. If you use it, you might need to add a tablespoon more flour to that half of the dough. Always keep an eye on how the dough feels. It should feel like play-dough, not like paste. If it is sticky, add a tiny bit of flour until it behaves.
Sharing these with neighbors is always a great idea!
Answers to Your Cookie Questions
Can I use chunky peanut butter?
Yes, you can! It will add a nice crunch to the peanut butter side. Just know the swirl might look a bit bumpier.
How do I keep cookies soft?
Put a slice of white bread in the container with the cookies. The cookies will soak up the moisture from the bread and stay chewy.
Why did my cookies turn out flat?
Your butter was likely too warm or you didn’t use enough flour. Try chilling the dough balls in the fridge for 20 minutes before baking next time.
Can I make the dough ahead of time?
Yes! You can keep the dough in the fridge for up to two days. Just let it sit out for a few minutes so it is soft enough to roll.
Do I have to use cocoa powder?
You need it for the chocolate half. If you don’t have it, you could use melted chocolate chips, but the dough will be much stickier.
Enjoy Your Homemade Treats
You now have all the tools and tips to make amazing Chocolate Peanut Butter Swirl Cookies. These treats are perfect because they offer the best of both worlds in every single bite. Remember to keep your doughs separate, roll them gently, and don’t overbake them. Baking is all about having fun and sharing something sweet with the people you love. Happy baking!