Cozy Pumpkin Cheesecake for Fall Celebrations
Fall is finally here, and that means it is time for pumpkin everything. I love this time of year because the air gets cool and the leaves turn pretty colors. It is also the best time to bake something warm and sweet in the kitchen. Today, I want to show you how to make a pumpkin cheesecake that will make your whole house smell amazing.
This cake is very thick and smooth. It tastes like a mix of a classic cheesecake and a spicy pumpkin pie. It is the perfect treat for a big family dinner or a cozy night in. You do not need to be a professional baker to make this look and taste great. I will walk you through every single step so you can feel proud of what you make.
You are going to learn how to make a crunchy crust, a creamy filling, and how to keep the top from cracking. By the end of this, you will have a dessert that looks like it came from a fancy bakery. Let us get our aprons on and start baking together!
Check out the full list of what you need below to get started.
Getting Your Kitchen Ready for Baking
Before we start mixing, we need to make sure we have everything in the right place. Baking a cheesecake is a bit different than baking a regular cake. It takes a little more time and some special care. I remember the first time I made one, I rushed it and the middle was still wiggly. It was a big mess! Now I know that patience is the most important part of the recipe.
One thing to keep in mind is that this recipe might not work well if your ingredients are too cold. If you use cold cream cheese, you will get little lumps in your cake. Nobody wants a lumpy cheesecake! Make sure your cheese and eggs sit out on the counter for a while before you start. This makes everything blend together like a dream.
The Ingredients You Will Need

To make the perfect crust and filling, you will need a few basic things from the store. Most of these are easy to find during the fall months. I like to buy the best pumpkin I can find because it makes a big difference in the flavor. Here is your shopping list for the store:
- 1.5 cups of Graham cracker crumbs
- 5 tablespoons of melted butter
- 1 tablespoon of white sugar
- 24 ounces of full-fat cream cheese (3 blocks)
- 1 cup of canned pumpkin puree (not pie filling!)
- 3 large eggs
- 1 cup of granulated sugar
- 1 teaspoon of vanilla extract
- 1.5 teaspoons of ground cinnamon
- 0.5 teaspoon of ground ginger
- 0.25 teaspoon of ground cloves
- 0.5 cup of sour cream
Using real pumpkin puree is better than using the pre-mixed pie filling. The pie filling has extra sugar and water that can change how the cake sets. If you want a deeper flavor, you can use dark brown sugar instead of white sugar for the crust. It adds a nice molasses taste that fits fall very well. IMO, the Graham cracker crust is the classic choice, but ginger snaps are a fun twist too.
Tools for a Successful Bake

You will need a few specific tools to get the job done right. The most important one is a 9-inch springform pan. This is a pan where the sides pop off so you do not have to flip the cake over to get it out. If you try to use a regular cake pan, you might break the cheesecake into pieces when you try to serve it. I learned that lesson the hard way a long time ago!
A stand mixer or a hand mixer is also a huge help. You have to beat the cream cheese until it is very smooth. Doing that by hand with a spoon would be a very hard workout! You also need some aluminum foil. We use the foil to wrap the bottom of the pan so water does not leak in while it is in the oven. Having a big roasting pan or a deep baking sheet is also good for the water bath step.
Recipe Quick Info
- Prep Time: 30 minutes
- Cook Time: 60 minutes
- Servings: 12 people
- Difficulty: Medium
Building the Perfect Crust

The crust is the base of your whole dessert. It needs to be strong enough to hold the heavy filling but crumbly enough to melt in your mouth. Start by mixing your crumbs, melted butter, and sugar in a small bowl. It should look like wet sand. If it is too dry, it will fall apart when you cut the cake later. You want it to stick together when you pinch it.
Pour the crumbs into your pan and press them down firmly. I like to use the bottom of a flat measuring cup to get it nice and even. You can even push some of the crumbs up the sides of the pan if you like a lot of crust. Bake the crust for about 10 minutes first. This helps it stay crunchy even after you add the wet filling on top. Let it cool down while you work on the next part.
Mixing and Baking Your Masterpiece
Now comes the fun part where we make the actual cheesecake. This is where all those yummy smells come from. Mixing the filling takes a little bit of focus because you do not want to whip too much air into the batter. If there is too much air, the cake will puff up like a balloon in the oven and then sink and crack when it cools down. We want a flat, pretty top for our cake.
When you add the eggs, do it one at a time. This is a common trick that many people skip. It ensures each egg is fully mixed in before the next one goes in. I usually turn my mixer to a low speed for this part. It keeps the batter thick and creamy. Once the pumpkin and spices are in, the color will turn a beautiful bright orange that just screams autumn.
Making the Creamy Pumpkin Filling

Start by beating your room-temperature cream cheese and sugar until it looks like clouds. It should be very soft. Add your pumpkin puree, vanilla, and all those warm spices. The cinnamon and ginger will make your kitchen smell like a cozy candle. FYI, if you do not have all the separate spices, you can just use 2 teaspoons of pumpkin pie spice instead. It works just as well!
Next, add the sour cream. This adds a little bit of tanginess that balances out the sweet sugar. Finally, mix in the eggs on low speed. Stop the mixer as soon as the yellow streaks disappear. You do not want to over-mix at this stage. Pour the orange batter over your cooled crust and smooth the top with a spatula. It is now ready for the heat!
The Secret of the Water Bath

A water bath sounds fancy, but it is just a tray of water that sits in the oven with your cake. This creates steam. The steam keeps the oven moist so the cheesecake does not dry out. It also helps the cake cook evenly from the edges to the middle. This is the best way to prevent big cracks on the surface. Wrap the outside of your pan in two layers of heavy-duty foil to keep the water out.
Place the wrapped cake pan inside a larger roasting pan. Carefully pour hot water into the roasting pan until it reaches halfway up the sides of the cake pan. Be careful not to splash any water into the cheesecake batter! Slide the whole thing into the oven. It is a bit heavy, so move slowly. This extra step is what makes the difference between a good cake and a great one.
How to Tell When It Is Done

Knowing when to stop baking is the trickiest part. You do not want to bake it until it is solid all the way through. If you do, it will be dry and grainy. Instead, look for the “jiggle.” The edges of the cake should look firm and set, but the center 2 or 3 inches should still wobble a little bit like Jell-O when you gently shake the pan. This is perfect.
Once it reaches that point, turn off the oven. Do not take the cake out yet! Open the oven door just a tiny bit and let the cake sit inside for an hour. This slow cooling helps the structure stay strong. If you take it out into the cool air too fast, it might shrink and crack. Patience is your best friend here. After an hour, you can move it to the counter to cool completely.
Finishing Touches and Serving
Your cheesecake needs to spend some time in the fridge before you eat it. It needs at least 6 hours, but overnight is even better. This time allows the flavors to meld and the texture to become firm enough to slice. I know it is hard to wait when the house smells so good, but trust me, a warm cheesecake is not very tasty. It needs to be cold!
When you are ready to serve, you can get creative with decorations. You can leave it plain, but a little bit of flair makes it feel more like a celebration. Whether you are bringing this to a party or just eating it at home, how you present it matters. It is the final step in your baking project, and it is the most rewarding part.
Serving Suggestions for Your Guests

A big dollop of whipped cream is the best friend of a pumpkin cheesecake. You can make your own by beating heavy cream with a little sugar. I like to add a tiny bit of maple syrup to my whipped cream for a fall twist. It tastes amazing with the pumpkin. You can also drizzle some caramel sauce over the top if you want something extra sweet and gooey.
For a bit of crunch, try adding some chopped pecans or walnuts on top of the cream. If you want it to look like a professional photo, sprinkle a tiny bit of extra cinnamon or nutmeg over the whole plate. This cake is very rich, so small slices are usually enough for most people. Serve it with a hot cup of coffee or a glass of cold milk to round out the treat.
Pro Baking Tips
- No Cracks: Never open the oven door during the first 45 minutes of baking.
- Clean Slices: Dip your knife in hot water and wipe it dry between every single cut.
- Storage: Keep the cake covered in the fridge so it does not pick up other food smells.
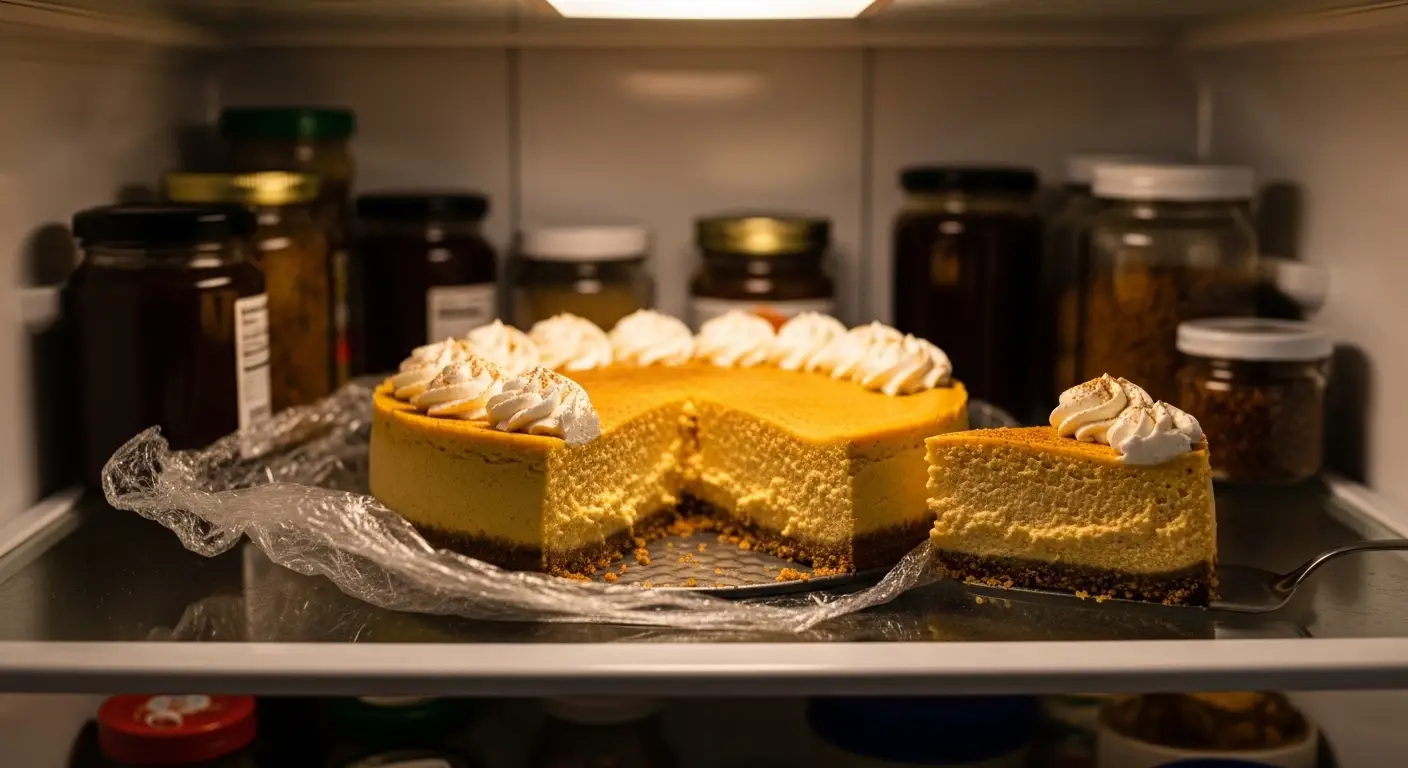
Storing Your Leftovers Safely

If you have any cake left over, you need to keep it in the refrigerator. Cheesecake has a lot of dairy and eggs, so it cannot sit out on the counter for more than two hours. It will stay fresh and delicious for about 4 or 5 days if you keep it covered. I usually use plastic wrap or a cake carrier to keep the air out so the edges do not get dry.
Did you know you can also freeze cheesecake? It actually freezes very well. Wrap individual slices in plastic wrap and then put them in a freezer bag. They will stay good for up to 2 months. When you want a treat, just let a slice thaw in the fridge for a few hours. This is a great way to save a little bit of fall magic for later in the winter when you need a pick-me-up.
Common Questions About Pumpkin Cheesecake
Can I use fresh pumpkin instead of canned?
Yes, you can use roasted and pureed fresh pumpkin. Just make sure to drain it well with a paper towel so the batter is not too watery.
What if I do not have a springform pan?
You can use a deep pie dish, but you will have to serve it like a pie. You won’t be able to remove the sides to show off the whole cake.
Why did my cheesecake crack on top?
Cracks usually happen from over-baking or cooling too fast. Using a water bath and letting it cool in the oven helps prevent this problem.
Can I make this recipe gluten-free?
Yes! Simply swap the Graham cracker crumbs for gluten-free crumbs or crushed gluten-free ginger cookies. The filling is already naturally gluten-free.
How long does it take to set in the fridge?
It needs at least 6 hours to become firm. For the best flavor and texture, I recommend letting it chill overnight before you cut into it.
Enjoy Your Fall Baking
This pumpkin cheesecake is a wonderful way to celebrate the season. It is creamy, full of spice, and brings people together. I hope you have a great time making it and sharing it with the people you love. Happy baking!