How to Make Silky Smooth Chocolate Chia Pudding
Are you looking for a healthy snack that tastes like a treat? Chocolate chia pudding is a great choice because it is full of good things for your body. Many people do not like the bumpy texture of tiny seeds, but I have a secret trick to fix that. In this guide, I will show you how to make the smoothest pudding ever using a simple blender. You will learn the right steps to turn hard seeds into a creamy dream.
Making this dish is very fast and does not require a stove. It is perfect for busy mornings when you need to grab something and go. I started making this for my family because we wanted a dessert that did not have too much sugar. Once you try this silky version, you might never go back to the bumpy kind. Let us get started with the tools and items you need in your kitchen.
Ready to make a snack that tastes like frosting but is actually good for you? Let’s go!
What You Need to Get Started
Before we jump into the mixing, we need to talk about what goes into the jar. Using high-quality items makes a big difference in how it tastes. Since we are not cooking anything, the flavor of the milk and cocoa will really stand out. Most of these things are likely in your pantry right now. If you are missing one, do not worry because I will share some easy swaps you can make.
The Short List of Ingredients

To make this pudding, you only need a few simple things. You will need chia seeds, which are the stars of the show. You also need a liquid like almond milk or oat milk to help the seeds grow soft. For the chocolate flavor, we use unsweetened cocoa powder. To make it sweet, I like using maple syrup or honey because they mix in very easily. A tiny pinch of salt and some vanilla will help make the chocolate taste even better. Check your cupboards for these items before you begin.
- 1/4 cup chia seeds (black or white both work fine)
- 1 cup milk of your choice (I love creamy cashew milk)
- 2 tablespoons cocoa powder
- 2 tablespoons maple syrup
- 1/2 teaspoon vanilla extract
- A tiny pinch of salt
Why These Ingredients Work Together

Chia seeds are special because they can soak up a lot of liquid. When they get wet, they grow a soft coating that turns into a gel. This is what makes the pudding thick without using flour or eggs. The cocoa powder adds that deep dark color and rich flavor we all love. By adding vanilla and salt, we wake up the chocolate so it does not taste flat or boring. It is a simple science project that happens right in your fridge.
Using a milk with a bit of fat, like coconut milk from a carton, makes the result even richer. If you use water, the pudding will be thin and not very tasty. I once tried using just water because I ran out of milk, and it was a big mistake! It tasted very plain and the texture was not right. Stick to a creamy milk for the best results every single time.
Choosing the Right Blender

The secret to the silky texture is a blender. Most people just stir the seeds into the milk and wait. That leaves the seeds whole, which some people find a bit slimy or weird. If you put everything into a blender, it breaks the seeds into tiny bits. This creates a texture that is exactly like the chocolate pudding you buy at the store. You do not need a very expensive blender, but a strong one helps get it perfectly flat.
If you do not have a blender, you can use a small food processor. Just make sure you let it run for at least a full minute. You want to see the color change to a light brown as air gets whipped in. This step is the most important part of my recipe. It turns a healthy snack into a real gourmet dessert that feels fancy to eat.
Recipe Quick Info
- Prep Time: 5 minutes
- Cook Time: 0 minutes (needs 2 hours to chill)
- Servings: 2 people
- Difficulty: Very Easy
How to Mix and Chill
Now that we have everything ready, it is time to put it all together. This part is very fast and takes less than five minutes of work. The hardest part is waiting for the pudding to get cold and thick in the fridge. I usually make this at night so it is ready for me when I wake up the next morning. It is a great way to save time when you are in a rush to get to school or work.
Step-by-Step Mixing Guide

- Put your milk, maple syrup, vanilla, and salt into the blender first. Putting the liquid at the bottom helps the blender run smoothly.
- Add the cocoa powder and the chia seeds on top of the liquid.
- Put the lid on tight and turn the blender on a low speed to start.
- Slowly turn the speed up to high. Blend for about 45 to 60 seconds.
- Stop the blender and look at the mix. It should look like a dark chocolate milk with no big seeds visible.
- Pour the liquid into two glass jars or small bowls.
I learned the hard way that you must put the liquid in first. One time I put the seeds and powder in first, and they got stuck at the bottom in a big dry clump. The blender just spun and made a loud noise, but nothing mixed! Always start with your milk to keep things moving. This keeps the blades happy and makes your cleanup much easier later on.
The Importance of Chilling Time

Even though the blender makes the seeds small, the pudding still needs time to set. Right after blending, the mix will be quite thin. It needs to sit in the fridge so the chia bits can soak up the milk and get firm. I recommend leaving it for at least two hours. If you can wait four hours or even overnight, the texture will be even better and more like a thick mousse. FYI, the longer it sits, the thicker it gets.
Make sure you cover the jars with a lid or some wrap. This prevents the pudding from picking up smells from other food in your fridge, like onions or leftovers. Nobody wants chocolate pudding that tastes like yesterday’s pizza! Keeping it covered also keeps the top from getting a dry skin. If you are in a huge rush, you can put it in the freezer for 20 minutes, but the fridge is much better for the right feel.
Perfecting the Texture

Sometimes you might find the pudding is too thick after it sits. This can happen if your chia seeds are very fresh or if the milk was extra creamy. If it looks like a solid block, just stir in one extra tablespoon of milk. Stir it gently until it reaches the thickness you like. It should be easy to scoop but not runny like water. Getting it just right makes it feel very luxurious on your tongue.
On the other hand, if it is too thin, you can add a teaspoon more of chia seeds and pulse it in the blender again. This is why I love this recipe. It is very hard to ruin because you can always fix it at the end. IMO, a thicker pudding is better because it feels more like a treat. Just remember that it will always get a little firmer as it stays cold, so do not add too much extra stuff right away.
Pro Kitchen Tips
- Blender Power: If your blender is weak, let the seeds soak in the milk for 10 minutes before you turn it on. This softens them up so they break apart easier.
- Sifting: Sift your cocoa powder through a small screen if it has big lumps. This stops you from getting bitter chocolate balls in your mouth.
Serving and Storage Tips
Once your pudding is cold and thick, it is time for the fun part. Eating it plain is fine, but adding toppings makes it a real meal. You can also make a big batch of this at the start of the week. It stays fresh for a long time, so you can have a healthy snack ready whenever you feel hungry. Let’s look at how to dress up your jars and keep them fresh.
Yummy Topping Ideas

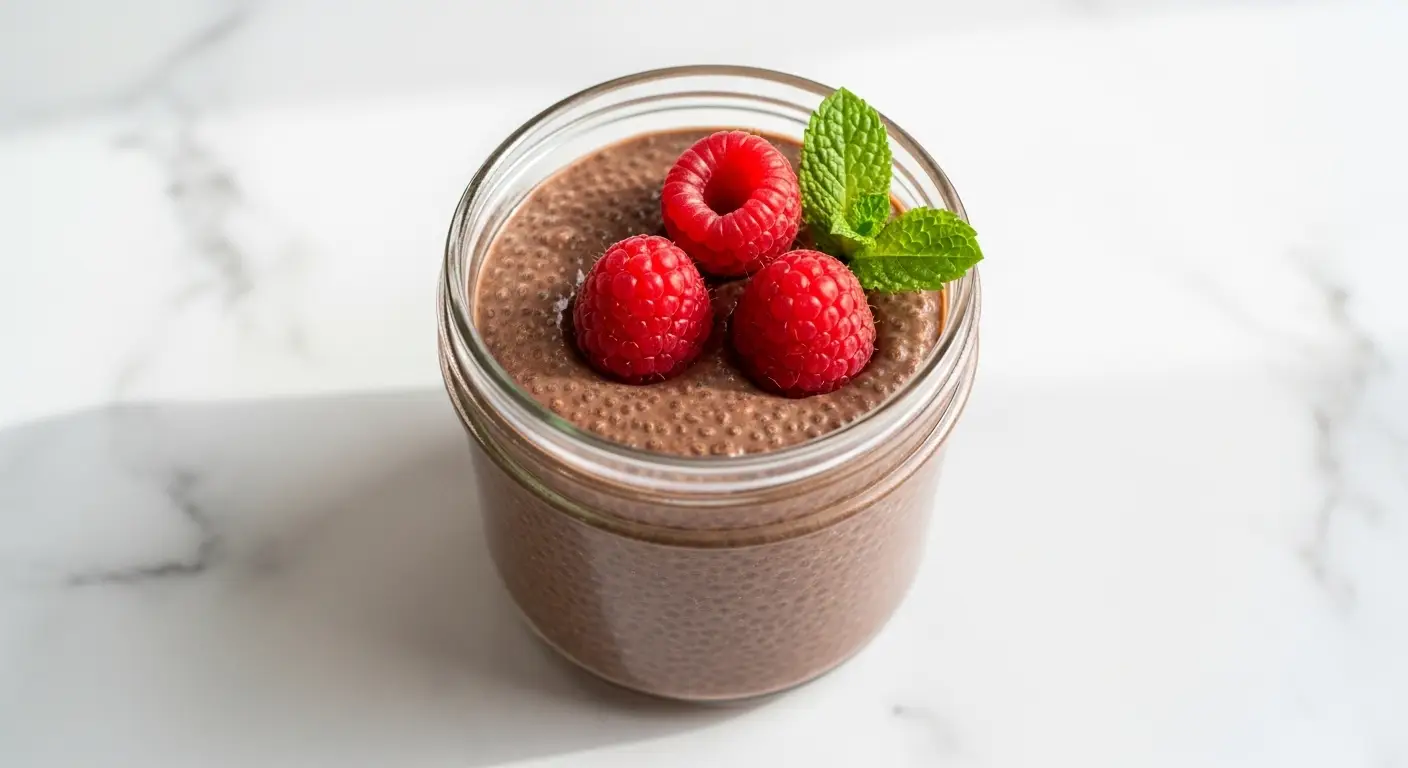
Toppings add crunch and extra flavor to your smooth pudding. I love adding fresh berries like raspberries or strawberries because they are a little sour and go great with chocolate. You could also add a dollop of peanut butter or almond butter for more protein. If you want it to feel like a real dessert, add a few mini chocolate chips or a sprinkle of shredded coconut. The options are endless!
For a crunchier feel, try adding some granola or chopped walnuts right before you eat it. Do not add the crunchy things too early, or they will get soggy in the fridge. I like to keep a little bowl of toppings on the counter so everyone can pick what they want. It makes breakfast feel like a party. My kids love adding colorful sprinkles to theirs, which is a fun way to get them to eat healthy seeds.
How to Store for Later

This pudding is a champion for meal prep. You can keep it in the fridge for up to five days. This means you can make a big jar on Sunday night and have breakfast ready until Friday. Just make sure the lids are on tight so it stays moist. If you notice a little liquid on top after a few days, just give it a quick stir with a spoon. It is still perfectly good to eat.
You can also freeze chia pudding, though the texture changes a little bit. If you freeze it, it tastes like a healthy fudge pop! Just put it into popsicle molds instead of jars. This is a great trick for hot summer days when you want something cold but healthy. Most people don’t know you can freeze it, but it is a total lifesaver when you have too much left over.
Substitutions and Variations

If you have an allergy or just don’t like an ingredient, you can change things up easily. If you cannot have nuts, use soy milk or oat milk. If you want it to be even more chocolatey, you can add a teaspoon of instant coffee powder. The coffee makes the chocolate taste much stronger but does not make it taste like a latte. For a sugar-free version, you can use a few drops of liquid stevia instead of maple syrup.
You can also change the flavor entirely. Instead of cocoa, try using a scoop of protein powder or some mashed banana. Just remember that the blender is your best friend for keeping it smooth. I once tried making a vanilla version with whole seeds, and it just wasn’t as good as the blended chocolate one. The cocoa really helps mask any tiny bits that didn’t get fully crushed by the blades.
Your Questions Answered
Here are some common questions people ask when making this recipe for the first time. I want to make sure you feel like an expert before you start your blender.
Can I use white chia seeds instead of black ones?
Yes! They taste exactly the same. White seeds are just harder to see in the pudding. Since we are blending them with dark cocoa, it does not matter which color you choose.
Is this pudding good for weight loss?
Chia seeds have a lot of fiber which helps you feel full. If you use a low-calorie milk and not too much syrup, it is a very healthy and filling snack.
My pudding is still grainy, what did I do wrong?
You might need to blend it longer. If your blender is not very strong, try soaking the seeds in the milk for ten minutes before blending to make them softer.
Can I make this without a blender?
You can, but it will not be “silky smooth.” It will have a bumpy texture like small beads. It still tastes good, but the texture is very different.
How long does it stay fresh in the fridge?
It stays fresh for about 5 days if kept in a sealed jar. Always smell it before eating to make sure the milk hasn’t gone bad.
Time to Enjoy Your Pudding
You now know the secret to making the best chocolate chia pudding. By using a blender and high-quality milk, you can create a smooth and healthy treat that tastes like a dream. It is a simple way to eat better without giving up the flavors you love. Give it a try tonight and enjoy a delicious breakfast tomorrow!