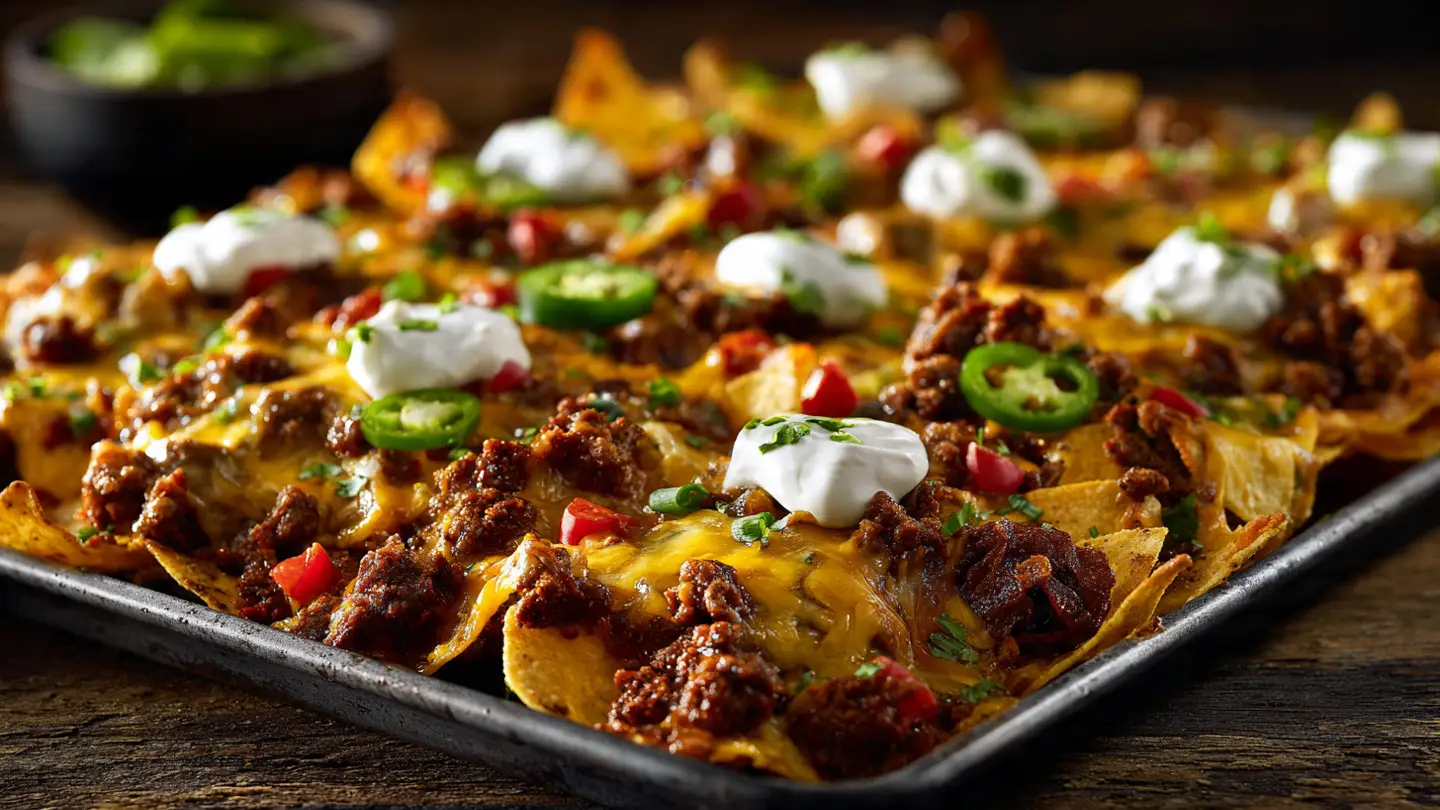
Loaded Nachos Tray
Making a tray of nachos is one of my favorite things to do. It is fun, fast, and everyone loves it. You can put almost anything on top of crunchy chips. I like to make mine very big so there is enough for everyone to share. This guide will show you how to build the best nacho tray ever without making the chips soggy.
We are going to talk about the best chips to buy and how to cook the meat. I will also tell you my secret for the cheesiest layer. Most people just throw cheese on top, but I do things a little differently. You will learn how to balance the salty, spicy, and cool flavors all in one pan.
Check out the full list of steps below to get started on your snack masterpiece!
Recipe Quick Info
- Prep Time: 15 minutes
- Cook Time: 10 minutes
- Servings: 6 people
- Difficulty: Very Easy
The Best Way to Build Your Nachos
The secret to a great tray is how you stack it. If you put all the heavy stuff on top, the bottom chips stay dry and plain. Nobody wants a boring chip at the bottom of the pile. I learned this the hard way at a party once when all the good stuff was gone in two minutes. Now, I make sure every single chip has a little bit of love on it.
Using a big flat sheet pan is better than a deep bowl. A flat pan lets the heat hit every chip at the same time. This keeps them crisp and makes the cheese melt perfectly. Plus, it looks amazing when you pull it out of the oven. Your friends will think you are a pro cook even though it only took a few minutes of work.
The Ultimate Shopping List

You need the right stuff to make these taste good. First, buy thick tortilla chips. Thin chips will break under the weight of the cheese and meat. I look for the bags that say ‘restaurant style’ or ‘thick cut.’ They hold up much better in the oven. If the chips feel light like air, they are probably too thin for this recipe.
- One big bag of thick corn tortilla chips.
- One pound of ground beef or ground turkey.
- Two cups of shredded cheddar or Monterey Jack cheese.
- One can of black beans, rinsed and drained.
- A jar of pickled jalapeños for some heat.
- One small onion, diced small.
- Fresh toppings like sour cream, salsa, and avocado.
Make sure you grate your own cheese if you can. The pre-shredded kind in the bag has a dusty coating that stops it from melting smoothly. IMO, fresh cheese tastes way better and gets much more stretchy. It only takes a minute to grate it yourself, and it makes a huge difference in the final result.
Cooking the Perfect Meat Topping

The meat gives the nachos a lot of flavor and protein. I start by browning the beef in a large pan over medium heat. Make sure to break it up into small pieces with a wooden spoon. You do not want giant chunks of meat because they will fall off the chips. Smaller crumbles stick to the cheese much better.
Once the meat is no longer pink, pour off the extra fat. I usually tip the pan over a small bowl to catch the grease. Then, add taco seasoning and a splash of water. Let it simmer for a few minutes until the sauce is thick. If the meat is too watery, it will soak into the chips and make them soft. We want the meat to be juicy but not runny.
If you do not like beef, you can use shredded chicken or even taco-flavored tofu. The goal is to have a savory base that tastes good with the salty chips. I once forgot to drain the fat from the meat and the whole tray turned into a greasy mess. Learn from my mistake and keep that meat lean and dry before it goes on the tray.
Assembling the Layers

This is where the magic happens. Do not just dump the whole bag of chips on the tray. Start with one single layer of chips that covers the bottom of the pan. Sprinkle half of your cheese and half of your meat over this first layer. Add some beans too. This ensures that the people eating the bottom chips still get the good stuff.
Now, add a second layer of chips on top of the first one. Add the rest of the cheese, meat, and beans. I like to add some diced onions or jalapeños at this stage so they get warm in the oven. This double-layer method is a total win for everyone at the table. It is like finding a hidden treasure under the top layer of chips.
FYI, you can also add corn or olives if you like them. The beauty of a nacho tray is that you can change it every time. Just remember to keep the layers even. If you pile everything in the middle, the edges will burn and the center will stay cold. Spread it out all the way to the corners of the baking sheet.
The Melting Process

Put your tray into an oven heated to 400 degrees. You only need to bake them for about 8 to 10 minutes. Watch them closely because chips can burn very fast. You are looking for the cheese to be completely melted and bubbly. The edges of the chips should look just a tiny bit darker than when they started.
I usually check mine at the 7-minute mark. If the cheese is still looking like separate shreds, give it more time. If it is all one big gooey blanket, it is ready to come out. Cooking them at a high heat for a short time keeps the chips crunchy while the cheese gets soft. This is much better than cooking them at a low heat for a long time.
One thing to note is that this tray will be very hot. Use oven mitts to take it out. Let it sit for just one minute before you start adding the cold toppings. If you put sour cream on burning hot chips, it will melt into a liquid and run everywhere. Giving it a second to cool down helps the cold toppings stay in place.
Adding Fresh Toppings

Now it is time for the cold stuff. This part adds a nice crunch and a cool feeling to the hot chips. I love adding big scoops of cold salsa and fresh guacamole. Diced tomatoes and green onions add a bright color that makes the tray look like a work of art. It is the best part of the whole process because it smells so good.
Try to spread the toppings out so every bite has a bit of everything. I like to put my sour cream in a small plastic bag and snip the corner off. Then I can drizzle it in lines across the whole tray. It looks fancy and makes sure no one gets a giant mountain of sour cream on just one chip. It is a simple trick that makes the dish look much better.
Fresh cilantro is another great addition if you like the taste. Some people think it tastes like soap, so I usually keep it on the side just in case. Always use fresh lime juice squeezed over the top right before you serve. The acid from the lime cuts through the heavy cheese and makes the whole tray feel lighter and fresher.
Serving and Storage Tips

Nachos are best eaten right away. As they sit, the moisture from the meat and salsa will start to make the chips soft. I always tell my guests to dig in while it is hot. If you are having a party, you can prep the meat and chop the veggies ahead of time. Just do not build the tray and bake it until people are actually ready to eat.
Pro Serving Tip
- Pre-Heat the Pan: Put your empty baking sheet in the oven for 5 minutes before adding chips. A hot pan helps crisp the bottom of the chips even faster!
If you have leftovers, they can be tricky. Putting them in the microwave usually makes them very soggy. The best way to reheat nachos is in the toaster oven or the big oven at 350 degrees. It will never be as crunchy as the first time, but it is still a tasty snack the next day. Sometimes I even chop up leftover nachos and put them inside an omelet for breakfast!
Great Ideas for Your Nachos
You do not have to stick to just beef and cheese. There are so many ways to change this recipe. You can make it healthy by using lots of veggies and black beans. You can also make it spicy by using different peppers. I once made a version with BBQ pulled pork and it was amazing. The sweet sauce with the salty chips was a great combo.
Think about who is eating with you. If you have kids, you might want to keep the jalapeños on the side. If you have friends who do not eat meat, double up on the beans and add some roasted corn. The sheet pan is like a blank paper and you are the artist. Here are a few more ideas to help you get creative in your kitchen.
Vegetarian Nacho Options

You can make a meatless tray that tastes just as good as the beef version. Instead of meat, I use extra beans like pinto or black beans. You can also use ‘soy crumbles’ that taste like ground beef. My favorite veggie topping is roasted corn. You can buy it frozen or cut it off the cob and pan-fry it until it gets brown spots.
Adding peppers like poblano or bell peppers adds a lot of flavor without adding much fat. I also like to add radishes sliced very thin on top after baking. They give a cool crunch that is really nice. Even people who love meat will enjoy a well-made veggie tray if it has enough cheese and fresh salsa on it.
Spicy Kick Variations

If you like things hot, you can really turn up the heat on a nacho tray. Use spicy chorizo instead of plain beef. Chorizo is a type of sausage that has a lot of paprika and chili powder in it. It makes the whole tray turn a bright orange color and tastes very bold. I also like to use pepper jack cheese instead of cheddar for an extra zing.
For the toppings, you can use fresh habaneros or serrano peppers. Be careful with those because they are much hotter than jalapeños! A drizzle of spicy hot sauce or Sriracha over the top is another way to make your mouth tingle. Just make sure you have plenty of sour cream nearby to help cool things down if it gets too spicy for your guests.
Your Nacho Questions Answered
How do I stop my nachos from getting soggy?
Always drain the liquid from your meat and beans. Bake the chips and cheese first, then add wet toppings like salsa and sour cream at the very end right before eating.
What is the best cheese for nachos?
Freshly grated sharp cheddar or Monterey Jack are best. They melt very smoothly. Avoid pre-shredded cheese because it has a coating that prevents it from melting well.
Can I make nachos in an air fryer?
Yes! You can make smaller batches in an air fryer. Cook them at 350 degrees for about 3 to 5 minutes. Just be careful the air doesn’t blow the chips around!
Can I use something other than chips?
Sure! Some people use sliced bell peppers or tater tots (called totchos). The cooking time might change, but the cheese and toppings will still taste great.
How long do leftovers last?
They stay safe to eat for about 3 days in the fridge. However, they will be soft. Reheat them in an oven to get some of the crunch back.
Time to Start Snacking
Making a loaded nacho tray is all about having fun and sharing good food. If you follow my tips for layering and use fresh cheese, you will have a perfect snack every time. Go grab your tray and start building your masterpiece today!