Salted Caramel Cupcakes with a Rich Caramel Center
Are you looking for the best treat to make for your friends? I love baking things that hide a surprise inside. These salted caramel cupcakes are exactly that kind of dessert. They look like normal cakes on the outside, but when you take a bite, sweet gold sauce flows out. It is a fun and tasty way to make people smile. You do not need to be a pro chef to make these. I will show you every step so your kitchen stays clean and your cakes stay fluffy.
Making these cupcakes is a great way to spend a rainy afternoon. I have spent a lot of time trying different ways to get the caramel just right. Some recipes are too hard, and others are too sweet. This one hits the spot. It uses a soft cake base and a salty-sweet frosting that balances everything out. You are going to learn how to bake the cake, make the filling, and pipe the frosting like a star. Let us get our aprons on and start baking together.
Try making these for your next birthday party or school bake sale!
Getting Ready to Bake Your Sweet Treats
Before we start mixing, we need to make sure we have everything. I once tried to make these and realized halfway through that I was out of eggs. It was a big mess! Now, I always line up my bowls and tools before I turn on the oven. You want your butter and eggs to be at room temperature. This helps them mix better so your cake does not have lumps. It makes a huge difference in how soft the final cupcake feels in your mouth.
Recipe Quick Info
- Prep Time: 30 minutes
- Cook Time: 20 minutes
- Servings: 12 cupcakes
- Difficulty: Medium
What You Need to Buy

You do not need anything too fancy for this recipe. Most of these things are likely in your cupboard right now. For the cake, you need all-purpose flour, sugar, baking powder, and a little salt. You also need wet things like milk, eggs, and unsalted butter. I like using unsalted butter because I want to control exactly how much salt goes in later. If you use salted butter now, the cake might taste a bit too much like a pretzel, which is not what we want yet.
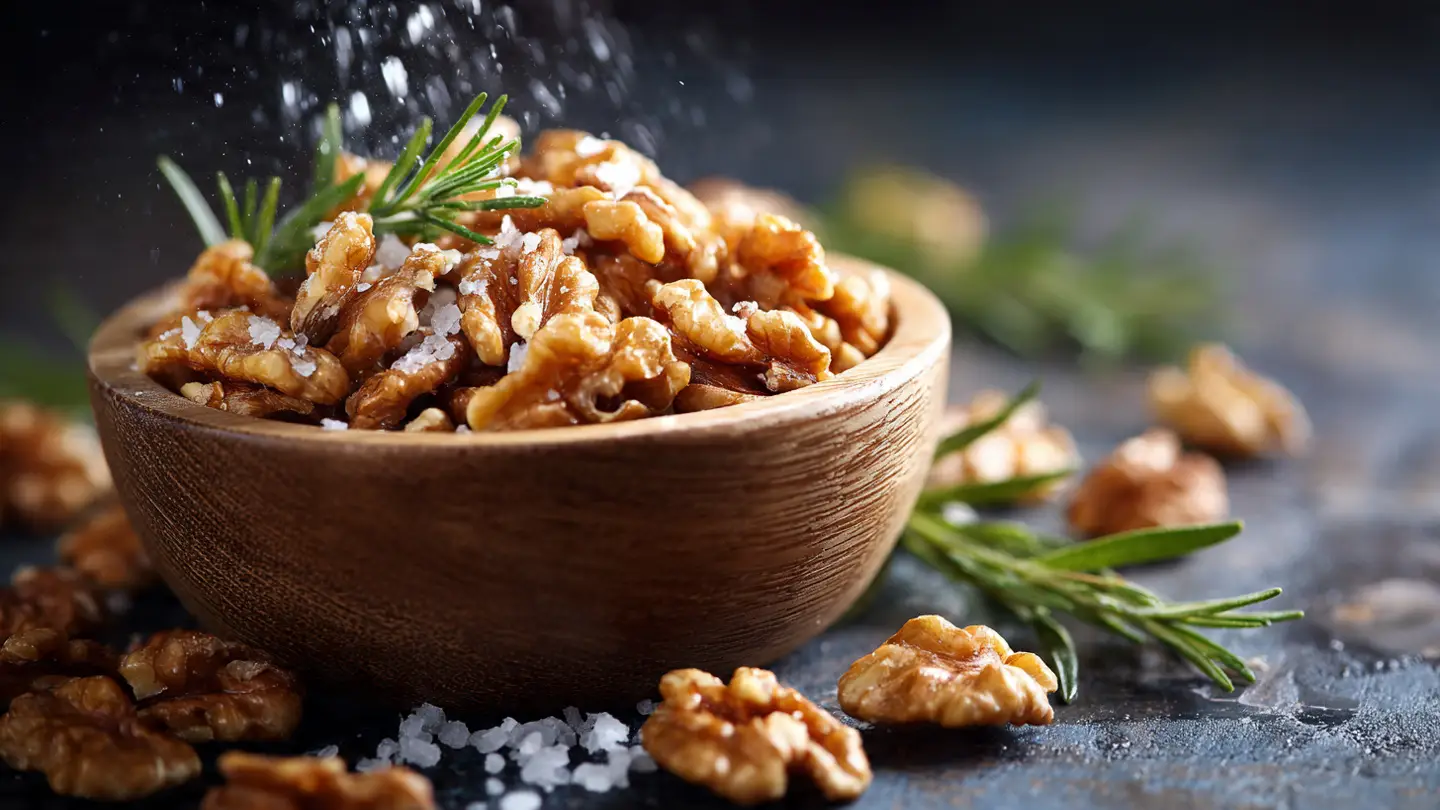
For the caramel part, you need heavy cream and more sugar. You can buy a jar of caramel at the store if you are in a rush. IMO, making it yourself tastes way better. It has a deeper flavor that store-bought jars just can’t match. You also need a nice bag of sea salt. The flaky kind is the best because it looks pretty and gives a little crunch. Make sure your vanilla is the real kind and not the fake stuff for the best smell in your house.
Setting Up Your Kitchen Space

First, turn your oven to 350 degrees. This is the magic number for most cakes. While the oven gets hot, put paper liners into your cupcake tin. This keeps the cake from sticking to the metal. I learned the hard way that if you forget the liners, you have to dig the cake out with a spoon. It tastes the same but looks like a heap of crumbs! Having a clean space helps you stay calm while you work.
Get out two big bowls. One is for the dry stuff and one is for the wet stuff. You also need a whisk or an electric mixer. If you use a hand mixer, keep it on a low speed so flour does not fly all over your face. I usually put a towel under my bowl so it does not slide around while I am mixing. It is a simple trick that keeps things steady. Once your pans are ready and your oven is hot, you are ready to make the batter.
How to Make the Perfect Cupcake Base
The base of this treat is a simple vanilla cake. We want it to be strong enough to hold the caramel but soft enough to melt in your mouth. Many people over-mix their batter. If you mix too much, the cake becomes tough like bread. We want to be gentle. Think of it like folding a soft blanket. You want to mix just until you don’t see any more white flour streaks. This keeps the air inside so the cupcakes rise up tall and proud in the oven.
Step by Step Cake Instructions

- Whisk your flour, sugar, and baking powder in the first bowl.
- In the other bowl, beat your soft butter and eggs together.
- Slowly add the milk and vanilla to the wet bowl.
- Pour the dry stuff into the wet stuff and stir slowly.
- Fill each cupcake liner about two-thirds of the way full.
- Bake for 18 to 20 minutes until a toothpick comes out clean.
When you fill the liners, do not fill them to the very top. If you do, the batter will spill over the edges and make a flat muffin top. It makes it hard to add the frosting later. I use a large ice cream scoop to put the batter in. This makes sure every cupcake is the same size. That way, they all finish cooking at the exact same time. It is a great way to make sure nobody gets a burnt cupcake while someone else gets a raw one.
Letting the Cakes Cool Down

This is the hardest part of the whole recipe. You have to wait! If you try to put the caramel or frosting on a hot cake, everything will melt. It will turn into a sticky soup. I usually wait at least one hour. Move the cupcakes from the hot pan to a wire rack after five minutes. This lets air get under them so the bottoms don’t get soggy. A soggy cupcake is a sad cupcake, and we want happy cupcakes today.
While they cool, you can look at them and be proud. They should be a light golden color on top. If they look a bit pale, that is okay too. As long as they bounce back when you poke them gently with your finger, they are done. This is a good time to wash your bowls. Cleaning as you go makes the final job much easier. Trust me, you don’t want a pile of sticky dishes waiting for you after you eat your dessert.
Creating the Gooey Caramel Center
Now we get to the fun part. The “hidden” center is what makes these special. You are basically making a little cave inside the cake and filling it with gold. It sounds like a fairy tale, but it is just baking! You can use a small knife or a special tool called a cupcake corer. If you don’t have one, the bottom of a large frosting tip works great too. Just push it in, twist, and pull out a little plug of cake. Save those cake plugs for a snack later!
Making the Salted Caramel Sauce

If you are making the sauce from scratch, be very careful. Hot sugar is like lava! Melt your sugar in a pan until it turns into a brown liquid. Then, slowly add your butter and cream. It will bubble up a lot, but don’t be scared. Just keep stirring until it is smooth. Add a big pinch of sea salt at the end. The salt makes the sugar taste even better. It wakes up your tongue so the sweetness isn’t too heavy.
If your sauce feels too thin, let it sit for a bit. It thickens up as it cools down. You want it to be like thick honey. If it is too watery, it will soak into the cake and disappear. We want a solid pool of caramel in the middle. FYI, if you burn the sugar, just throw it out and start over. Burnt sugar tastes bitter and will ruin the whole batch. It happens to everyone at least once, so don’t worry if you have to try again.
Filling Your Cupcakes

Take your cooled cupcakes and make a hole in the top. Go down about halfway. Don’t go all the way to the bottom or the caramel will leak out the paper. Use a spoon or a squeeze bottle to put the caramel inside. Fill it right up to the top of the hole. It looks like a little volcano of sugar. This is the part where I usually eat one of the cake scraps dipped in the leftover caramel. It is a baker’s treat!
Once all the holes are full, you can put the cake “lids” back on if you want. I usually don’t bother because the frosting will cover it anyway. If you are worried about the caramel being too runny, you can put the filled cupcakes in the fridge for ten minutes. This sets the center so it stays put while you work on the decorations. Just make sure the cakes don’t stay in there too long or they might get dry.
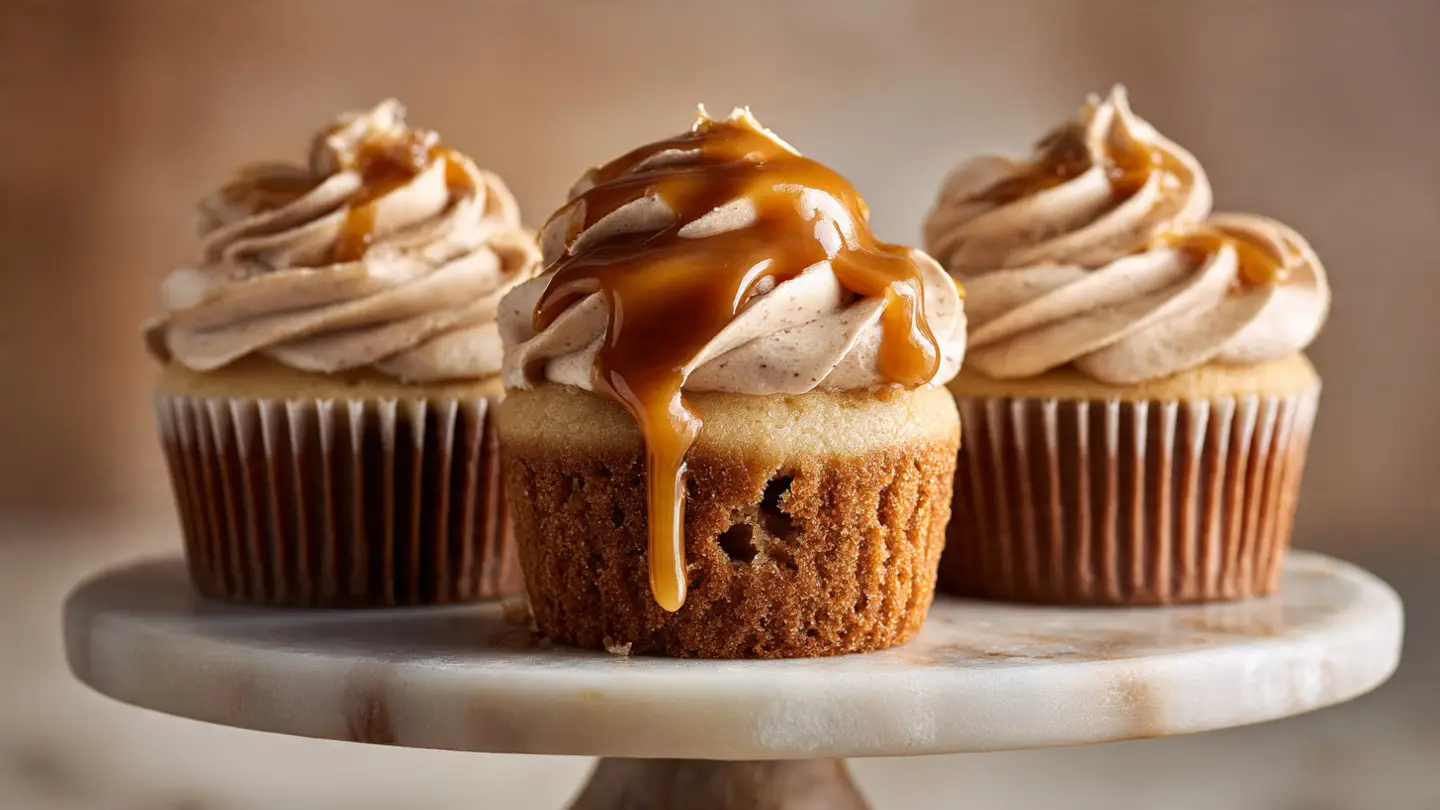
The Final Touch: Salted Caramel Frosting
A cupcake is not finished without a big swirl of frosting. For these, we are making a buttercream. It is mostly butter and powdered sugar. It is very sweet and very fluffy. We add a little bit of our caramel sauce into the frosting too. This ties the whole thing together. When people look at the cupcake, the light brown frosting tells them exactly what flavor to expect. It is like a delicious hint for their taste buds.
Pro Baking Tips
- Sift the Sugar: Always push your powdered sugar through a sieve. This stops those tiny white lumps from ruining your smooth frosting.
- Temperature Check: Make sure your butter is soft but not melted. If it is greasy, the frosting will slide right off the cake.
Whisking the Buttercream

Beat your butter until it looks white and fluffy. This usually takes about three minutes. Then, add your powdered sugar one cup at a time. If you dump it all in at once, a giant cloud of sugar will cover your kitchen. It looks like a snowstorm! Once the sugar is in, pour in a few spoons of caramel and a tiny bit of salt. Beat it on high for another minute until it looks like a cloud. If it is too stiff, add a splash of milk.
The secret to great frosting is how long you whip it. I used to stop too early. Now I know that more air makes it lighter. You want it to be easy to spread but strong enough to hold its shape. If you have warm hands, the frosting might get soft while you hold the piping bag. If that happens, just put the bag in the fridge for a minute. It will firm up quickly so you can keep going with your beautiful swirls.
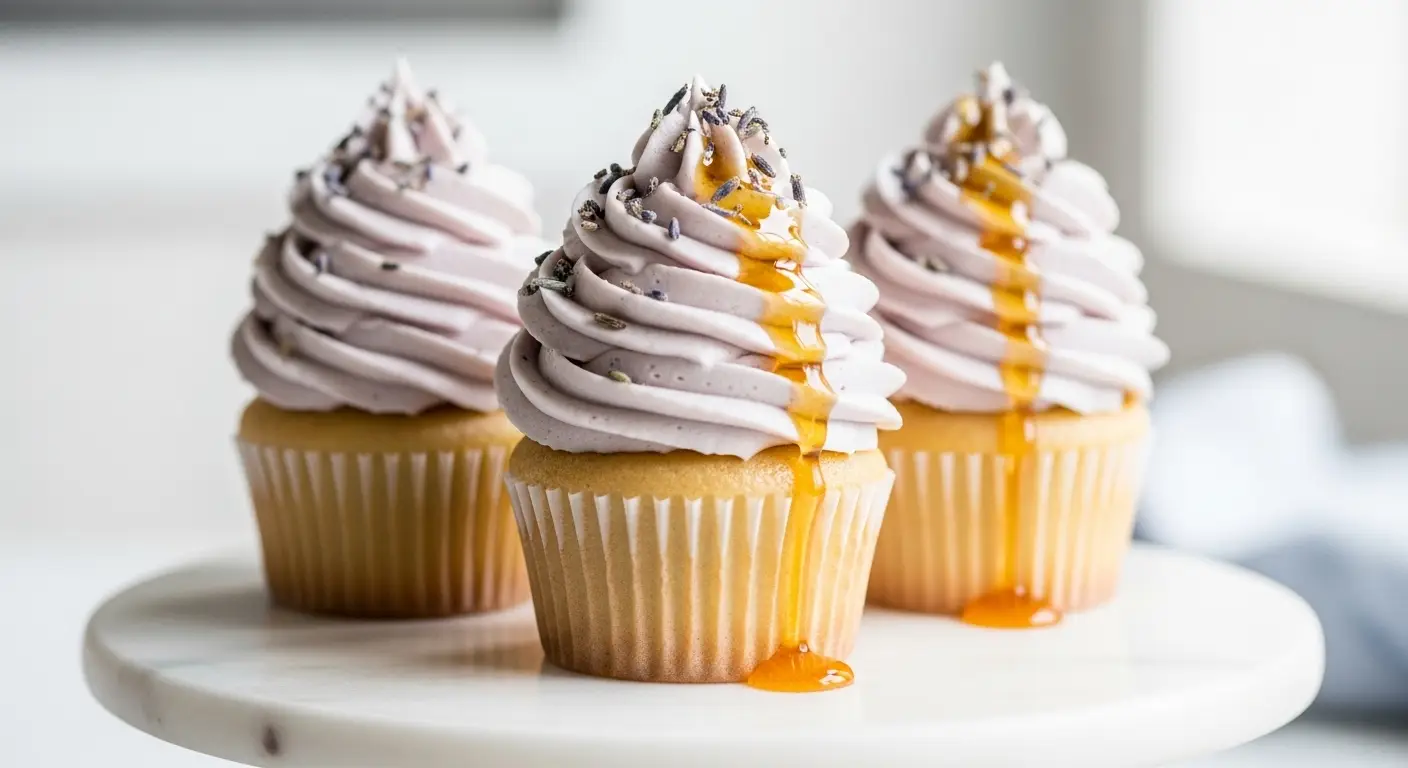
Decorating Like a Pro

I like to use a big star tip for my frosting. Start in the middle of the cupcake, move to the edge, and swirl around in a circle as you go up. It makes a tall tower of frosting that looks very fancy. If you don’t have a piping bag, you can just use a butter knife to spread it on. It will still taste amazing! To make them look extra special, drizzle a little extra caramel over the top and sprinkle a tiny bit of salt.
Don’t add too much salt at the end. A little goes a long way. Use the flaky sea salt if you have it. It glitters in the light and looks like diamonds. This is the moment where your cupcakes turn from a snack into a work of art. I love seeing the look on people’s faces when they see a tray of these. They look like they cost five dollars each at a bakery, but you made them in your own home for way less money.
Keeping Your Cupcakes Fresh
You might have some leftovers, though they usually disappear fast! Cupcakes are best on the day you make them. However, you can keep them for a few days if you store them right. Because of the butter in the frosting and the cream in the caramel, you need to be careful with heat. If your house is very warm, the frosting might get too soft. It is best to keep them in a cool spot or a sealed box so they don’t dry out.
Storage and Saving for Later

Put your cupcakes in a container with a tight lid. This keeps the air out so the cake stays soft. They will stay good at room temperature for about two days. If you want them to last longer, put them in the fridge for up to five days. Just remember to take them out an hour before you eat them. Cold buttercream tastes like a cold stick of butter, which isn’t very fun. They need to warm up so the frosting gets creamy again.
You can even freeze these cupcakes! If you want to bake ahead of time, freeze the cakes without the frosting or filling. Wrap them tightly in plastic wrap. When you are ready for a party, let them thaw out and then add your caramel and frosting. This is a great trick if you have a busy week coming up. I do this for holidays so I don’t have to do all the work in one single day. It makes baking much more relaxing.
Common Baking Questions
People often ask me about what can go wrong. Baking is a science, so sometimes things happen! The most common issue is the caramel leaking. This usually means the hole was too deep or the caramel was too hot when you poured it in. Another thing is the cake sinking in the middle. This happens if you open the oven door too early to peek at them. Keep that door shut until the timer goes off!
Can I use store-bought caramel sauce?
Yes! Just make sure it is a thick dessert sauce and not a thin coffee syrup. It saves time and still tastes great.
Why did my cupcakes sink in the middle?
You might have opened the oven too soon or used too much baking powder. Keep the door closed while they bake!
How do I make the frosting stiffer?
Add more powdered sugar one tablespoon at a time. This will help it hold its shape for tall swirls.
What if I don’t have sea salt?
You can use regular table salt, but use only half as much. Table salt is much stronger than flaky sea salt.
Can I make these gluten-free?
Yes, use a 1-to-1 gluten-free flour blend. The texture might be slightly different, but the caramel flavor is the same!
Time to Enjoy Your Sweet Creation
You did it! You made a complex dessert that looks and tastes incredible. These salted caramel cupcakes are the perfect mix of soft cake, gooey center, and salty frosting. I hope you feel proud of what you baked today. Share them with your family and enjoy every single bite. Happy baking!