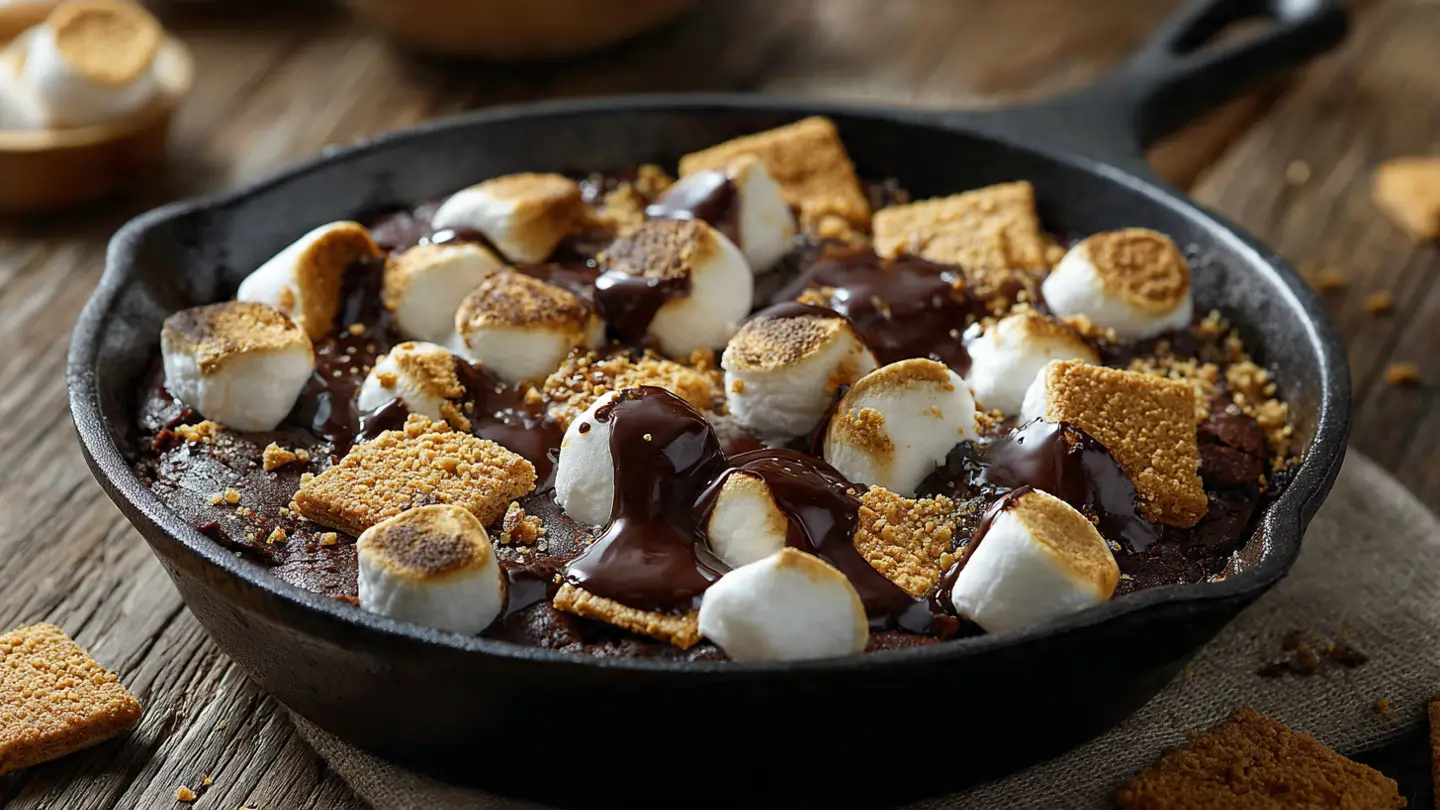
Smores Brownie Skillet
Making dessert should be fun and easy for everyone. I love a warm treat that looks fancy but does not take all day to bake. This Smores Brownie Skillet is my favorite thing to make when friends come over because it feels like a campfire party right in my kitchen. You get thick chocolate brownies, crunchy crackers, and stretchy marshmallows all in one pan. It is the best way to get that summer feeling any time of the year.
Today, I will show you how to bake this gooey mess from start to finish. You do not need to be a pro cook to get this right. We will go over the simple things you need and how to put them together so it looks amazing. By the time we are done, you will have a warm pan of chocolate heaven that everyone will want to eat with a big spoon. If you love chocolate and sticky marshmallows, you are in the right place.
Grab your favorite apron and let’s get baking!
Recipe Quick Info
- Prep Time: 15 minutes
- Cook Time: 25 minutes
- Servings: 8 people
- Difficulty: Easy
The Best Way to Start Your Skillet
Before we mix anything, we need to talk about why a skillet is so good for brownies. A heavy metal pan like a cast iron skillet holds heat very well. This means the edges of your brownie get nice and chewy while the middle stays soft and fudgy. I used to use regular glass pans, but they just do not give that same crunch on the bottom. FYI, a skillet also looks really cool on the table when you serve it.
You want to make sure your pan is ready so the chocolate does not stick. I always rub a little butter all over the inside before I start. If you do not have butter, a little bit of oil or baking spray works too. This small step makes a big difference when you try to scoop out that first bite later on. It is much better than having half of your dessert stuck to the metal pan!
Gather Your Sweet Ingredients

You do not need anything fancy to make this delicious treat. Most of these items are probably in your kitchen right now. I always keep cocoa powder and sugar on hand for times when I need a quick sugar fix. You will also need some graham crackers and marshmallows to give it that true smores taste. These are the stars of the show that make it different from a plain old brownie.
- 1/2 cup of melted butter
- 1 cup of white sugar
- 2 large eggs
- 1 teaspoon of vanilla
- 1/3 cup of cocoa powder
- 1/2 cup of all-purpose flour
- 1/4 teaspoon of salt
- 1 cup of graham cracker pieces
- 1 cup of chocolate chips
- 2 cups of large marshmallows
Make sure your eggs are at room temperature before you start mixing them in. I learned this the hard way because cold eggs can make the melted butter turn back into little hard chunks. If you forget to take them out of the fridge, just put them in a bowl of warm water for a few minutes. It works like magic and saves your batter from looking lumpy. IMO, the extra five minutes is totally worth it for a smooth brownie.
How to Mix Your Brownie Batter

Mixing the batter is the best part because you can smell the chocolate right away. First, you take your melted butter and whisk it with the sugar. You want to stir until it looks a bit grainy but combined. Then, add the eggs one at a time and keep whisking. I find that the more you whisk the eggs, the cracklier the top of the brownie becomes. It creates that thin, papery crust that everyone loves to bite into.
Next, you stir in the vanilla and the cocoa powder. Be careful when you add the cocoa powder so it does not fly all over your shirt! I usually do it slowly. Once the dark chocolate color is all through the mix, gently fold in the flour and salt. You do not want to stir too much here. If you over-mix the flour, your brownie will turn out tough like bread instead of soft like fudge. Stop as soon as you do not see any more white streaks of flour.
Adding the Graham Cracker Crunch

Now we get to turn this into a smores treat. I like to break the graham crackers by hand into medium pieces. You do not want tiny crumbs that disappear, but you also do not want huge chunks that make it hard to eat. Aim for pieces about the size of a postage stamp. Stir about half of these pieces into your batter along with some chocolate chips. This gives you a surprise crunch inside the soft brownie.
I once tried to use chocolate cookies instead of graham crackers, but it was just too much chocolate. The graham crackers have a honey taste that cuts through the rich cocoa. It balances the flavor so you can eat more than one piece without feeling overwhelmed. Pour the batter into your greased skillet and smooth it out with a spoon. Then, press the rest of the cracker pieces into the top of the batter before you put it in the oven.
The First Bake in the Oven

Put your skillet into an oven set at 350 degrees. It usually takes about 20 to 25 minutes for the brownie part to cook. You want the edges to look firm and pulled away from the sides just a little bit. The middle should still have a tiny bit of wiggle when you shake the pan. This is the secret to a fudgy brownie. If you bake it until it is totally hard, it will be dry after it cools down.
One mistake I made before was putting the marshmallows on at the very beginning. Please do not do that! The marshmallows will melt into sticky puddles and then burn before the brownie is even done. They only need a few minutes under the heat to get toasted. So, set a timer and wait for the brownie base to be almost finished. This keeps the marshmallows big and puffy instead of flat and brown.
How to Get Toasty Marshmallows

Once your brownie is almost done, take the skillet out of the oven. Now it is time to cover the whole top with marshmallows. I like to pack them in tight so you can’t even see the chocolate underneath. You can use mini marshmallows if that is all you have, but the big ones look much better for photos. Put the pan back in the oven for about 2 to 3 minutes. Keep a very close eye on them because they go from white to burnt very fast!
If you want them to look like they came off a campfire, you can turn on the broiler for the last 30 seconds. This gives them those dark brown spots and a crispy skin. Just stay right there and watch through the oven door. I have burned many batches by walking away to check my phone for just a second. When they look golden and gooey, take them out and let the pan sit for a few minutes so you don’t burn your tongue.
Baker Tips for Success
- Don’t Overbake: Take it out when the middle is still soft for the best fudge texture.
- Butter the Sides: Make sure you grease the pan well so the marshmallows don’t glue themselves to the metal.
- Fresh Crackers: Use a new box of graham crackers so they stay crunchy inside the warm batter.
Making Your Dessert Extra Special
Even though this skillet is great on its own, you can always add more to it. I think dessert is a time to be creative. You can change the toppings or even the type of chocolate you use. Some people like it very sweet, and some like a bit of salt. Since you are the chef, you get to decide how it turns out. That is the fun part about cooking at home instead of buying a treat at the store.
I usually serve this straight out of the pan while it is still warm. It makes the house smell like a chocolate shop. If you have leftovers, you can reheat them, but it is never quite the same as that first fresh bite. Below are some ideas on how to serve this to your family or friends to make them go wow. You might want to have some napkins ready because it can get a little messy!
Top it with Vanilla Ice Cream

The absolute best way to eat a warm brownie is with a cold scoop of ice cream. The heat from the pan starts to melt the cream, and it creates a delicious sauce that mixes with the chocolate. I love the way the cold and hot feel together in one bite. Vanilla is the classic choice, but you could also try coffee or salted caramel ice cream if you want to be fancy. It turns a simple skillet into a giant sundae.
If you are serving this for a birthday, you can even put a candle right in the middle of the ice cream. It is much more exciting than a regular cake. Just make sure everyone has their own spoon so they can dig in together. This is a “family style” dessert, which means it is meant for sharing. Just be prepared to fight over the last toasted marshmallow because those are usually the first things to go!
Try Different Toppings and Mix-ins

You do not have to stick to just graham crackers and marshmallows. Sometimes I like to add a handful of walnuts or pecans for an extra crunch. If you like salty and sweet things, try sprinkling a little bit of sea salt over the top after it comes out of the oven. It makes the chocolate taste even stronger. You could also swap the milk chocolate chips for white chocolate chips to give it a different look and flavor.
Another fun idea is to use peanut butter cups instead of chocolate chips. You just chop them up and stir them into the batter. Peanut butter and chocolate are a match made in heaven. I have also seen people use pretzels instead of graham crackers. The salt from the pretzels is a great way to balance all that sugar. This recipe is very forgiving, so do not be afraid to experiment with what you have in your pantry.
Perfect Serving Suggestions

When you bring this to the table, make sure you have a thick towel or a trivet to put it on. That cast iron stays hot for a long time! I like to place the whole skillet in the middle of the table and give everyone a spoon. It feels like a real campfire experience. If you want to be more polite, you can scoop portions onto small plates, but the marshmallows can be hard to cut through cleanly. Using a knife dipped in hot water helps slice through the sticky parts.
Pair this with a big glass of ice-cold milk. The milk helps wash down the rich chocolate and makes the whole experience feel like a childhood memory. For the adults, a hot cup of coffee is also a great partner for this dessert. I find that this skillet serves about 6 to 8 people comfortably. It is very filling, so a small portion usually goes a long way. Just make sure to eat it while the marshmallows are still stretchy!
Frequently Asked Questions
Can I make this without a skillet?
Yes! You can use an 8×8 inch square baking pan. It will still taste great, but the edges might not be as crispy as they are in cast iron.
How do I store the leftovers?
Cover the pan with foil or put pieces in an airtight container. They stay fresh for 2 to 3 days at room temperature. Heat them up for 10 seconds before eating.
Can I use a boxed brownie mix?
Totally! If you are in a rush, use a box mix. Just add the graham crackers and marshmallows as the recipe says to get that smores flavor.
What if I do not have a broiler?
Just leave the marshmallows in the oven for a few extra minutes on the middle rack. They will still melt and turn a light tan color.
Are the marshmallows gluten-free?
Most marshmallows are gluten-free, but you must check the bag. You would also need gluten-free graham crackers and flour for the whole dish to be safe.
Time to Enjoy Your Smores Brownie
This Smores Brownie Skillet is a guaranteed hit for any night of the week. It combines the best parts of a summer campfire with the comfort of a warm kitchen. You now have all the steps to make a sticky, chocolatey masterpiece that your friends and family will love. Just remember to watch those marshmallows closely and serve it with plenty of napkins. Go grab your skillet and start baking this sweet treat today!