Vegan Coconut Treats
I love snacks that taste like a vacation. These vegan coconut treats are exactly that. They are sweet, chewy, and full of tropical flavor. You do not need to be a pro chef to make these. In fact, they are so simple that I often make them when I am tired but still want something sweet. I will show you how to mix, chill, and dip these little bites of joy today.
Coconut is one of my favorite things to use in the kitchen. It is naturally oily and sweet, which makes it perfect for vegan baking. You do not need eggs or butter to make these stay together. I used to think vegan desserts were hard to make, but this recipe proved me wrong. It is fast, cheap, and very hard to mess up.
By the end of this page, you will know how to make the perfect coconut ball. I will share my best tips for getting the right texture. We will also talk about how to store them so they stay fresh for days. Let’s get our bowls ready and start making some treats!
Check out my step-by-step guide below to get started right now.
Why These Coconut Bites Are the Best Choice
These treats are a winner because they fit so many different diets. Whether you eat plant-based food or just want a cleaner snack, these work. They do not have any weird chemicals or fake sugars. Most of the time, I have all these things in my pantry already. It feels good to know exactly what is going into my food. My friends always ask for the recipe when I bring them to parties because they taste just like a famous candy bar.
I first made these when I was trying to eat less processed sugar. I realized that shredded coconut has a lot of natural flavor. When you mix it with a little maple syrup, it becomes like magic. I also like that you do not have to turn on the oven. That makes this a great recipe for summer days when it is too hot to bake. It is a fun project for kids too since there is no heat involved in the mixing part.
Simple Ingredients You Need

You only need four main things to make these. The star is shredded coconut. Make sure you buy the unsweetened kind. If you get the sweetened one, the treats will be way too sugary. The second thing is coconut oil. This helps the balls stay firm when they are cold. It acts like the glue for our recipe. Without it, the treats would just crumble into a mess in your hands.
The third thing is maple syrup. This adds sweetness and a nice smell. You could also use agave syrup if that is what you have. I also like to add a tiny bit of sea salt. Salt actually makes sweet things taste even better. It brings out the nutty flavor of the coconut. Sometimes I add a drop of vanilla, but that is totally up to you and how fancy you feel today.
How to Mix and Shape Your Treats

First, you want to melt your coconut oil if it is solid. I usually just put it in the microwave for twenty seconds. Then, you mix the oil, syrup, and salt in a big bowl. Once that is smooth, pour in all the shredded coconut. I use a big spoon to stir it until every piece of coconut looks shiny and wet. If it feels too dry, you can add one more spoonful of syrup. It should feel like wet sand that you can press together.
Now comes the fun part. I use my hands to roll the mixture into small balls. They should be about the size of a bouncy ball. If the mixture is sticking to your hands, just wet your palms with a little water. This trick saved me a lot of frustration! I once tried to do this with dry hands and ended up with more coconut on my fingers than in the bowl. Press the balls firmly so they do not fall apart later. Lay them out on a plate with parchment paper so they do not stick to the bottom.
The Importance of Chilling Time

You cannot eat these right away, even though you might want to. They need to sit in the fridge for at least one hour. This is because coconut oil turns into a solid when it gets cold. When you first roll them, they are a bit soft and greasy. After an hour in the cold, they become firm and chewy. This texture is what makes them so satisfying to bite into. I usually make a big batch on Sunday night and let them chill while I watch a movie.
If you are in a rush, you can put them in the freezer for twenty minutes. This works well, but do not leave them there too long or they will turn into rocks. I have made that mistake before! I forgot a batch in the freezer overnight and almost broke a tooth the next morning. FYI, the fridge is much safer if you are forgetful like me. Once they are hard, you can move them into a container or a bag. They will stay good for about a week if you keep them cold.
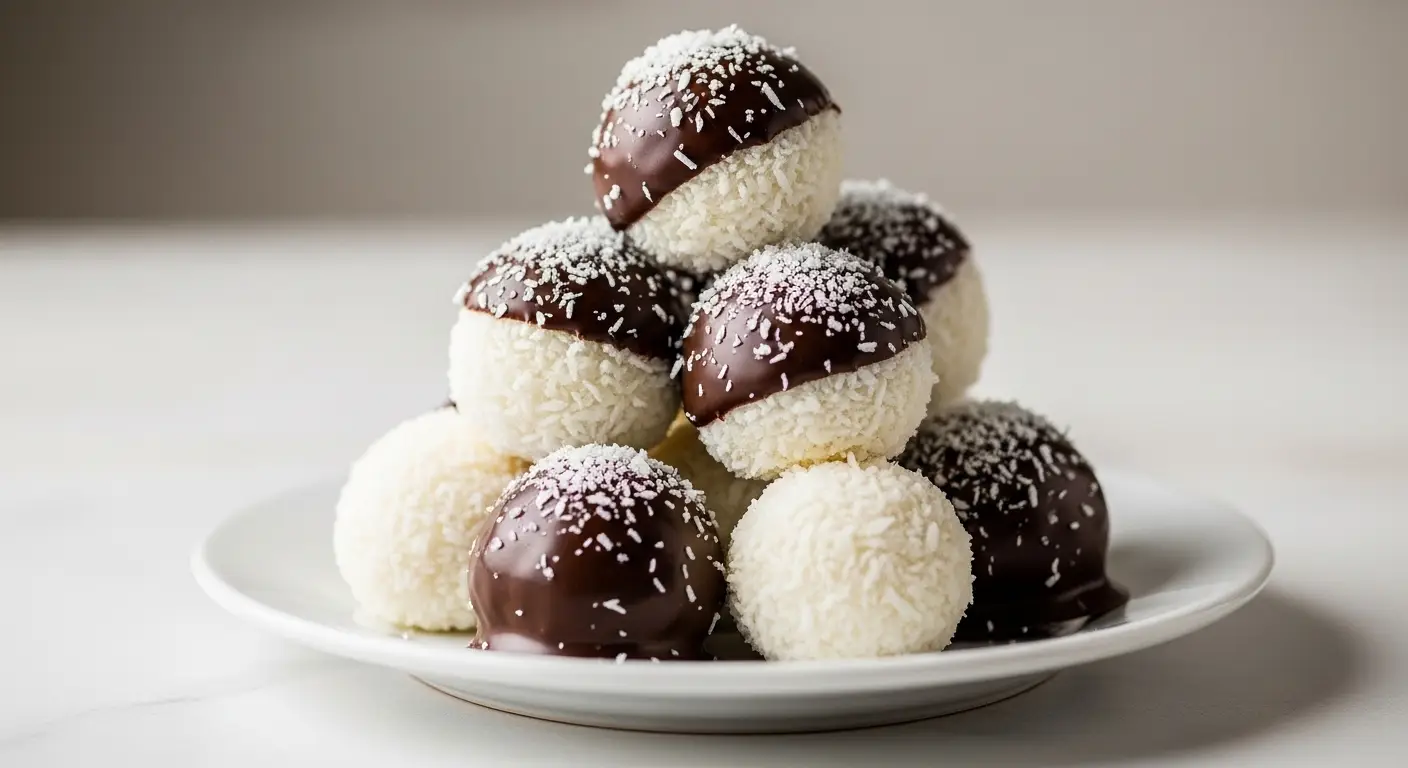
Adding a Chocolate Coating

If you want to make these extra special, you can dip them in chocolate. This is my favorite way to eat them. I melt some vegan dark chocolate chips with a tiny bit of coconut oil. Then, I use a fork to dip each chilled coconut ball into the chocolate. Let the extra chocolate drip off before putting them back on the parchment paper. It makes them look like they came from a fancy candy shop. It also adds a nice crunch when the chocolate sets.
Dark chocolate is best because it is not too sweet. It balances the rich coconut flavor perfectly. You can cover the whole ball or just drizzle some stripes on top. If you want to be really healthy, you can skip the chocolate, but IMO, everything is better with a little cocoa. After dipping, you have to put them back in the fridge for another ten minutes. This lets the chocolate shell get hard. It is the hardest part because the smell of chocolate makes you want to eat them instantly!
Recipe Quick Info
- Prep Time: 15 minutes
- Cook Time: 0 minutes (No-bake)
- Servings: 12 treats
- Difficulty: Very Easy
Fun Ways to Change the Flavor

You do not have to stick to just plain coconut. I like to experiment with different flavors. One of my favorite tricks is adding lime zest. It makes the treats taste like a tropical drink. You just grate the green skin of a lime into the mix. Another great idea is adding a little cocoa powder directly into the coconut. This makes the whole treat chocolatey from the inside out. It is a great way to change things up without buying more ingredients.
Sometimes I press a whole almond into the center of the ball before I roll it. This gives a nice surprise crunch in the middle. You could also roll the finished balls in crushed nuts or even more coconut flakes. If you like spicy things, a tiny pinch of chili powder and lime is amazing. Just remember that if you add wet things like fruit juice, you might need more coconut to keep it thick. I learned that the hard way when I added too much orange juice and ended up with coconut soup!
Best Tips for Success

The biggest tip I can give you is to use fine shredded coconut if you can find it. If your coconut pieces are very long and thick, the balls might fall apart. If you only have the long kind, just pulse them in a blender for five seconds. This makes them smaller and easier to shape. Also, do not skip the salt! It might seem weird to put salt in a dessert, but it really changes the whole taste. It makes the coconut taste toasted even though it is raw.
Another tip most people forget is to keep your hands cool. If your hands are very warm, the coconut oil will melt while you are rolling. This makes the balls fall apart before they even get to the fridge. I sometimes hold an ice cube for a second to cool my palms down. It sounds funny, but it works! Also, make sure your maple syrup is at room temperature. Cold syrup can make the melted oil turn back into clumps too fast. If that happens, the mixture will be lumpy and hard to stir.
How to Store and Serve

These treats must live in the fridge. If you leave them on the counter on a hot day, they will turn into a puddle of oil and coconut. I keep mine in a sealed glass jar. They stay fresh and tasty for up to two weeks, but they usually get eaten way faster than that. You can also keep them in the freezer for a month. I like to eat them straight from the freezer because they are extra chewy and refreshing on a warm day.
When you serve them, you can put them in little paper muffin liners. This makes them look cute for a party. It also keeps people’s fingers from getting oily. I think they are best served with a cup of hot coffee or tea. The bitterness of the coffee goes so well with the sweet coconut. If you are taking them to a potluck, keep them in a cooler bag until it is time to eat. They are a great gift too! Put them in a nice box with a ribbon, and your friends will think you spent hours on them.
Pro Storage Tips
- Cold Storage: Always keep these in the fridge or they will melt.
- Freezer Friendly: They last 30 days in a freezer bag.
- Layering: Use wax paper between layers so they do not stick together.
Common Questions About Coconut Treats
Can I use honey instead of maple syrup?
Yes, you can use honey, but then the treats will not be vegan. Honey is a bit thicker, so you might need a tiny bit less. The taste will also be different but still very good.
Why are my coconut balls falling apart?
This usually happens if the coconut is too dry or the oil was not mixed well. Try adding one more teaspoon of syrup or oil. Make sure to press them very hard with your hands when rolling.
Do I have to use coconut oil?
Yes, coconut oil is necessary because it hardens when cold. This is what keeps the treats in a ball shape. Other liquid oils like olive oil will stay liquid and the treats will stay soft.
Can I use fresh coconut instead of dried?
Fresh coconut has a lot of water in it. If you use it, the treats might be too mushy. It is best to stick with dried shredded coconut for the right chewy texture.
Are these treats healthy for kids?
Yes! They have healthy fats and no refined white sugar. They are much better than store-bought candy. Just watch out if they have any nut allergies if you add toppings.
Time to Enjoy Your Treats
Making these vegan coconut treats is a simple way to bring a little sweetness into your day without a lot of work. They are healthy, tasty, and fun to make. I hope you enjoy every chewy bite as much as I do. Keep them cold and enjoy!