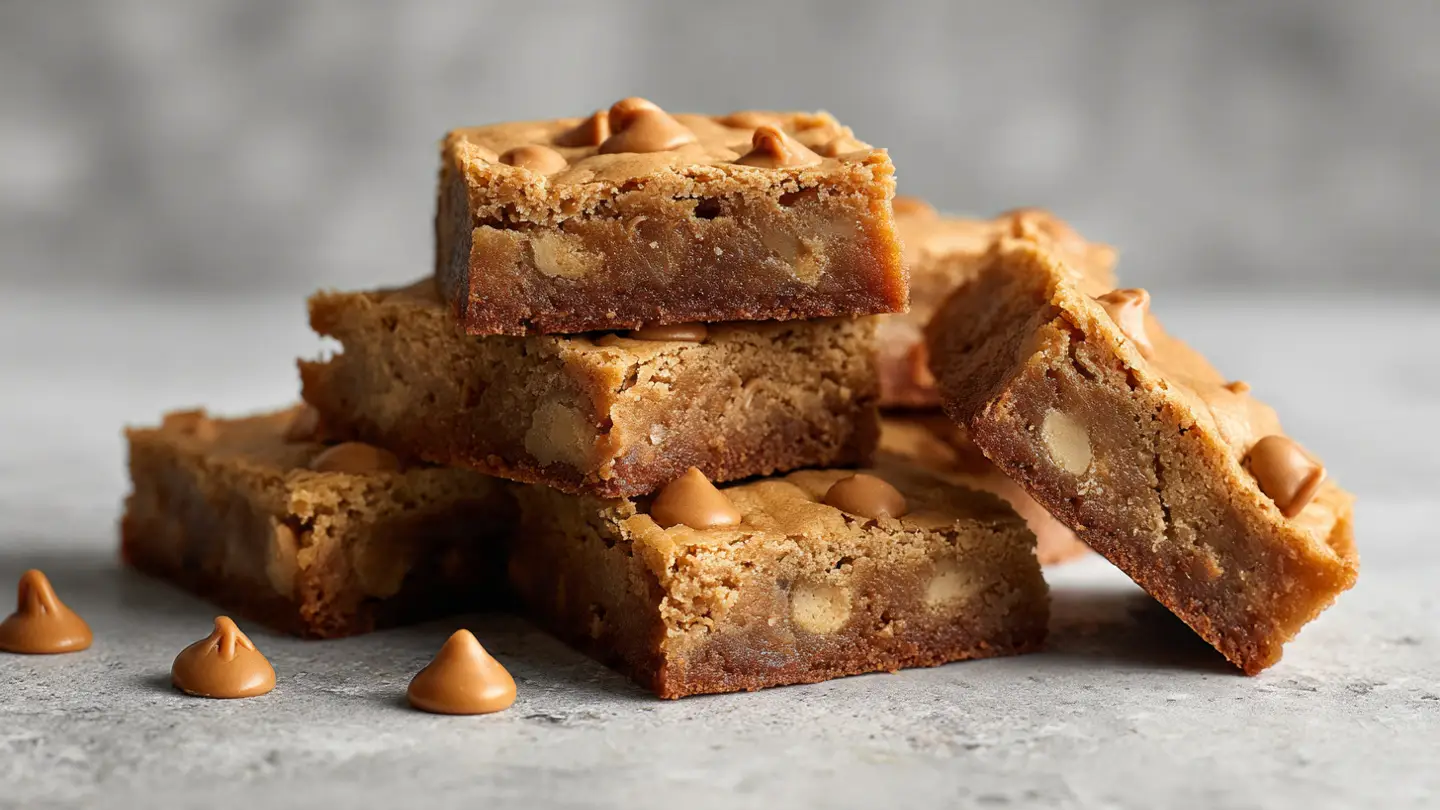
Blonde Brownies (Blondies) with Butterscotch Flavor
Are you looking for a treat that is sweet, chewy, and full of flavor? You might know about dark chocolate brownies, but have you ever tried a blondie? Blonde brownies are like the golden cousins of the classic brownie. Instead of using cocoa powder, they use brown sugar and butter to create a deep taste that reminds me of butterscotch candy. These bars are easy to make and even easier to eat!
In this guide, I will show you how to bake the best blondies from your own kitchen. You do not need any fancy tools or rare items from the store. Most of these ingredients are likely in your pantry right now. I love making these because they are tough to mess up. Even if you are just starting to learn how to bake, you can get these right on your first try. Let us get ready to bake something wonderful together.
Check out the steps below to start your baking adventure!
Recipe Quick Info
- Prep Time: 15 minutes
- Cook Time: 25 minutes
- Servings: 16 bars
- Difficulty: Very Easy
The Magic of the Blonde Brownie
Blondies are special because they have a very different texture than a normal cake. A good blondie should be dense and a little bit sticky in the middle. They do not use baking powder or baking soda in large amounts because we do not want them to rise like a fluffy cake. The goal is a flat, rich bar that feels heavy when you pick it up. The main star here is brown sugar. When brown sugar melts with butter, it creates a flavor that tastes just like caramel.
Many people ask me if a blondie is just a giant cookie. It is close, but the way we mix the dough makes it different. We do not whip the butter and sugar for a long time. Instead, we just stir them until they are combined. This keeps the air out so the bars stay chewy. My first time making these, I tried to whip them like a cake, and they came out too puffy. I learned that simple stirring is the secret to that perfect fudgy bite. If you like treats that melt in your mouth, you will love these.
Gather Your Baking Supplies

Before you turn on the oven, you need to make sure you have everything ready. This makes baking much more fun and less stressful. You will need a big bowl for mixing and a smaller bowl for melting your butter. A sturdy spoon or a rubber spatula is best for stirring. You do not even need an electric mixer for this recipe! Using a hand whisk or a big spoon is actually better for the texture. You will also need an 8-inch square baking pan. I like to line mine with parchment paper so the bars do not stick to the bottom.
For the ingredients, you will need the basics. Grab some all-purpose flour, salt, and two large eggs. The most important part is the brown sugar. Make sure it is soft and fresh. If your brown sugar is hard like a rock, the recipe will not work well. You also need some butter. I prefer using unsalted butter so I can control how salty the bars taste. Vanilla extract is also a must-have. It helps bring out that sweet butterscotch smell that fills your whole house while they bake. Lastly, we will add some butterscotch chips to give them an extra boost of flavor.
A List of Simple Ingredients

Here is exactly what you need to get from your kitchen cupboards. Make sure to measure everything carefully. Baking is like a science experiment, so the amounts matter!
- 1 cup of melted butter (let it cool down for a few minutes)
- 1 cup of packed light brown sugar
- 1 large egg (at room temperature)
- 1 tablespoon of vanilla extract
- 1/4 teaspoon of salt
- 1 cup of all-purpose flour
- 1/2 cup of butterscotch chips
This list is short and sweet. If you do not have butterscotch chips, you can use chocolate chips or even chopped nuts. However, the butterscotch chips really make the flavor pop. IMO, they are the best part of the whole treat. If you are watching your sugar, you can use a little less, but the texture might change. Brown sugar is what gives the bars their moisture. Without enough sugar, they might end up a bit dry or crumbly.
Step by Step Baking Instructions

Follow these steps to make your perfect batch of blondies. First, heat your oven to 350 degrees. While the oven gets hot, grease your baking pan with a little butter or spray. Or, you can use parchment paper. I think parchment paper is the best way to go because you can lift the whole block of brownies out once they are cool. This makes cutting them into perfect squares very easy. Now, take your melted butter and pour it into your big mixing bowl.
- Add the brown sugar to the melted butter. Stir them together until you see no lumps.
- Add the egg and the vanilla extract. Stir again until the mixture looks smooth and shiny.
- Gently stir in the salt and the flour. Do not stir too much! Just go until the white flour disappears.
- Fold in your butterscotch chips using your spatula.
- Spread the thick batter into your prepared pan. Use the back of your spoon to make the top flat.
- Bake for 20 to 25 minutes. The edges should look golden brown, but the middle should still look a little soft.
One mistake I made once was baking them for 40 minutes. They turned into hard bricks! You have to remember that they keep cooking for a few minutes even after you take them out of the oven. If the center looks a tiny bit jiggly when you shake the pan, that is usually a good sign. Let them sit on the counter until they are completely cold before you try to cut them. If you cut them while they are hot, they will fall apart and look messy.
Tips for the Best Texture

Do you want your blondies to have that cool, crackly top? The secret is in the sugar and the egg. When you stir the egg into the warm butter and sugar, it creates a thin layer on top that gets crispy in the oven. It is a small detail, but it makes the bars look like they came from a fancy bakery. Another tip is to use room temperature eggs. If the egg is too cold, it might make the melted butter turn back into solid chunks. This makes the batter lumpy and hard to spread.
If you want them to be extra chewy, try adding one extra egg yolk. The fat in the yolk makes the bars very rich. Also, make sure you pack your brown sugar into the measuring cup. This means you should press it down with your hand or a spoon until the cup is full. If you just scoop it loosely, you won’t have enough sugar, and your blondies will taste more like bread than candy. These small tricks are things most blogs skip, but they really help you win at baking. Everyone will wonder how you made them so good!
Perfect Pan Pointers
- Pan Material: Metal pans bake faster and give crispier edges. Glass pans take longer but bake more evenly.
- Cooling Time: Wait at least one hour before cutting. This lets the butterscotch flavor set.
- Double the Batch: If you use a 9×13 inch pan, you can double the ingredients to feed a large crowd.
Fun Ways to Change the Flavor

Once you know how to make the basic recipe, you can get creative! I love adding a pinch of sea salt on top right after they come out of the oven. The salt makes the sweet butterscotch taste even stronger. You can also mix in half a cup of chopped pecans or walnuts if you like a crunch. If you are a fan of chocolate, try using half butterscotch chips and half dark chocolate chips. It creates a great balance. Some people even like to add a spoonful of peanut butter into the batter for a salty twist.
For a birthday party, you can add colorful sprinkles to the top before baking. This makes them look very festive. Another idea is to serve them warm with a scoop of vanilla ice cream. The heat from the blondie melts the ice cream, creating a delicious sauce. FYI, these bars are also great if you brown the butter first. This means cooking the butter in a pan until it turns brown and smells like nuts. It adds a whole new level of flavor that is very popular right now. Give it a try if you feel brave!
How to Store Your Treats

If you have any leftovers, you need to store them the right way. Keep them in a container with a tight lid. They will stay fresh on your counter for about three to four days. If you want them to last longer, you can put them in the fridge. Cold blondies are actually very tasty because they get even chewier! They can stay in the fridge for up to a week. Just make sure the container is sealed so they do not soak up any smells from other food in there.
You can also freeze these blondies. Wrap each square in plastic wrap and then put them all in a big freezer bag. They can stay in the freezer for two months. When you want a snack, just take one out and let it sit on the counter for thirty minutes. It will taste just as good as the day you baked it. This is a great way to have treats ready if friends come over unexpectedly. I always keep a few in my freezer just in case I have a bad day and need a quick sugar fix.
Your Questions Answered
Can I use white sugar instead of brown sugar?
You can, but they will not be as chewy. Brown sugar has molasses which gives the blondies their soft texture and deep butterscotch flavor. White sugar makes them more like a crisp cookie.
Why did my blondies come out dry?
This usually happens if they stay in the oven too long. Next time, try taking them out a few minutes early. They should still be a little soft in the center when you pull them out.
Do I have to use butterscotch chips?
No, you do not! You can use chocolate chips, white chocolate, or even leave them plain. The batter itself has a great butterscotch taste even without the extra chips.
Can I make this recipe gluten-free?
Yes! You can use a gluten-free flour blend. Just make sure it is a “1-to-1” blend that replaces regular flour easily. The texture might be slightly different but still very yummy.
How do I get clean edges when cutting?
Wait until the bars are completely cold. You can even put the pan in the fridge for 30 minutes before cutting. Use a sharp knife and wipe it clean between each cut for the best look.
Happy Baking Everyone
I hope you enjoy making these butterscotch blondies as much as I do. They are the perfect simple treat for any day of the week. Remember to keep an eye on the oven and have fun with your favorite mix-ins. Enjoy every bite!