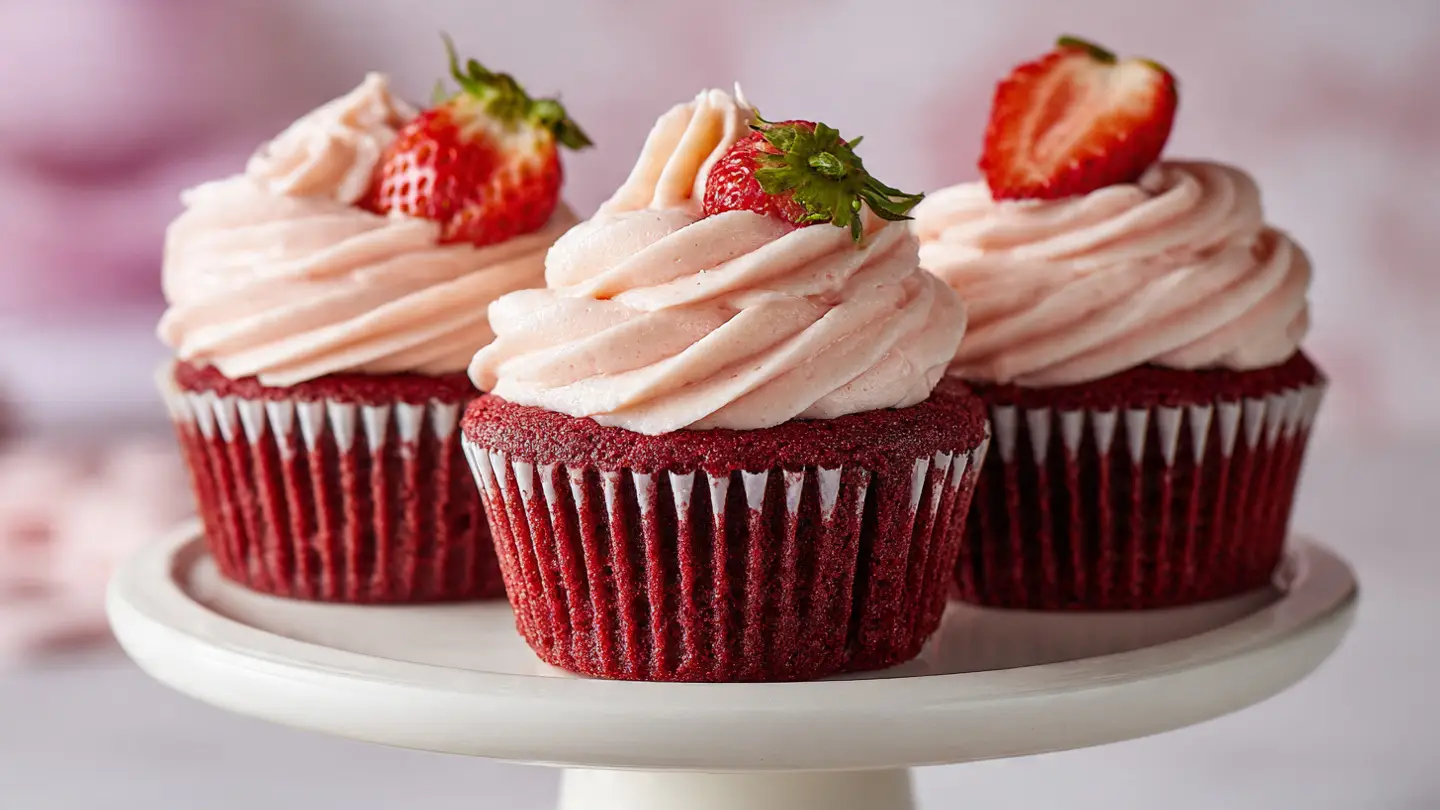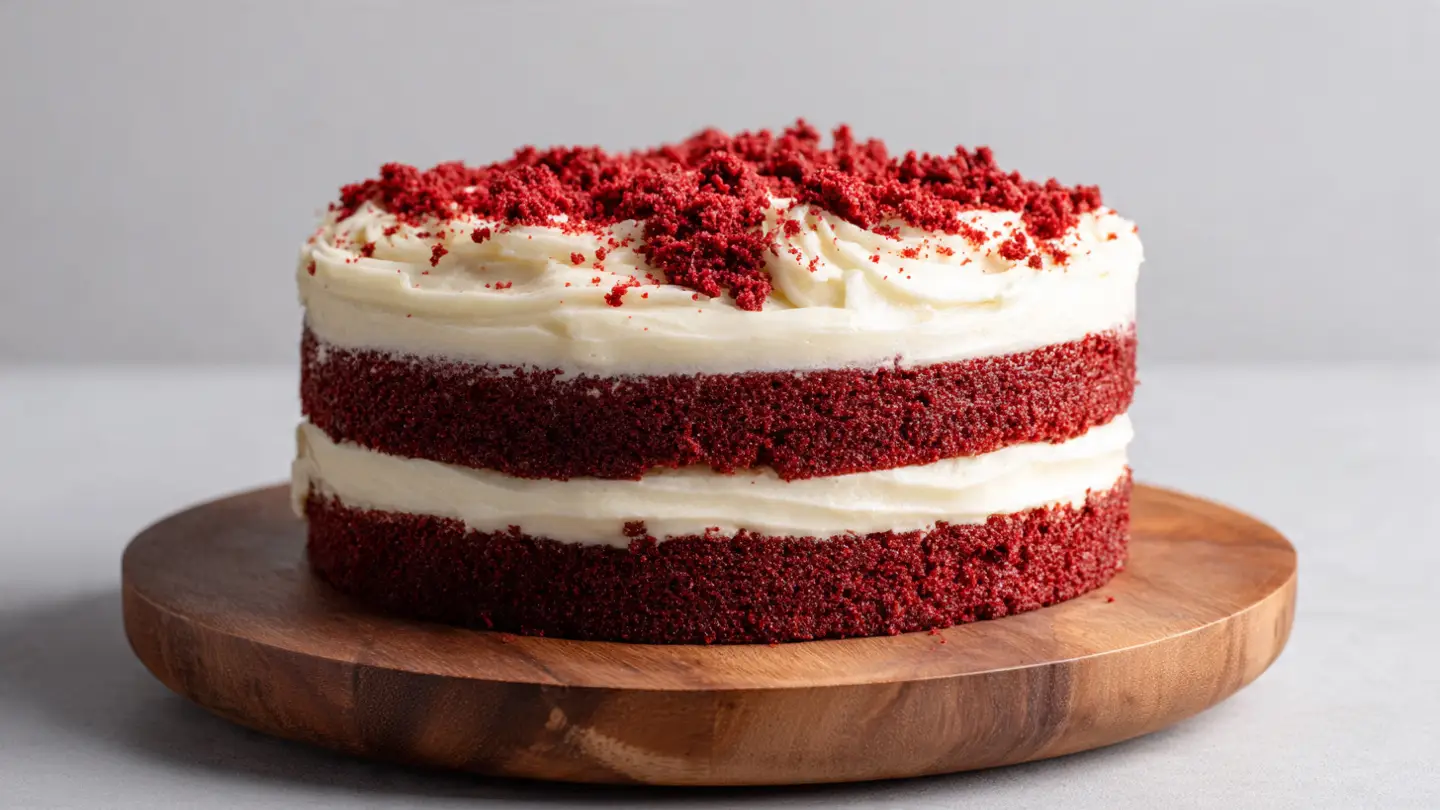
Velvety Red Velvet Cake with Tangy Cream Cheese Frosting
Making a red velvet cake is like making a bit of magic in your kitchen. I remember the first time I tried to bake one. I thought it was just a chocolate cake with red food dye, but I was very wrong. It has a special taste that is not quite chocolate and not quite vanilla. It is something in the middle that feels very fancy.
In this guide, I will show you how to get that perfect soft texture. You will learn how to mix the batter so it stays light and fluffy every single time. We are going to make a cake that looks bright red and tastes even better. By the time you finish reading, you will be ready to bake a cake that looks like it came from a professional shop.
Check out the steps below to start your baking adventure!
Why This Red Velvet Cake Works So Well
Red velvet cake is famous for its color, but the texture is the real secret. It is called velvet for a reason. The crumb is very fine and soft. This happens because of a cool chemical reaction between the cocoa powder, the vinegar, and the buttermilk. These things work together to keep the cake moist and tender.
Most cakes use butter for flavor or oil for moisture. I like to use both. Using only butter can make the cake feel dry once it cools down in the fridge. Using only oil can make it feel a bit greasy. My recipe uses a mix so you get the best of both worlds. It tastes rich like butter but stays soft like an oil cake. FYI, this is the secret most big bakeries use but never tell you!
Gather Your Cake Ingredients

You need a few specific things to make this cake right. Most of these items are likely in your pantry already. You will need all-purpose flour, granulated sugar, and a little bit of unsweetened cocoa powder. Do not use too much cocoa. If you add too much, the red color will look muddy and dark instead of bright. You also need baking soda and a pinch of salt.
- 2.5 cups all-purpose flour
- 1.5 cups white sugar
- 1 teaspoon baking soda
- 1 teaspoon salt
- 1 teaspoon cocoa powder
- 1 cup buttermilk (room temperature)
- 2 large eggs (room temperature)
- 1.5 cups vegetable oil
- 1 teaspoon white distilled vinegar
- 1 teaspoon vanilla extract
- 2 ounces red food coloring
Make sure your buttermilk and eggs are at room temperature. If they are cold, they will not mix well with the oil. This can make your cake lumpy. I learned this the hard way when I once ended up with a cake that had weird holes in it. It still tasted okay, but it looked very strange! Using room temperature ingredients makes the batter smooth and silky.
The Tools You Will Need

You do not need a lot of fancy gear to bake this. A good stand mixer or a hand mixer will make your life much easier. You will also need two 9-inch round cake pans. I highly suggest using parchment paper. Cutting circles out of paper and putting them in the bottom of the pans is a lifesaver. It ensures the cake never sticks to the bottom.
You also need a couple of large mixing bowls and a whisk. A rubber spatula is great for scraping the sides of the bowl. You want to make sure every bit of flour gets mixed in. If you leave dry spots, you will find white clumps in your red cake later. That is not a fun surprise for your guests!
Mixing the Dry and Wet Ingredients

First, grab a medium bowl and whisk your flour, sugar, baking soda, salt, and cocoa powder together. Make sure there are no big lumps of cocoa. In a separate large bowl, or your mixer bowl, beat the oil, buttermilk, eggs, food coloring, vinegar, and vanilla. It will look very bright red at this stage. Don’t be scared by how red it is! It will look perfect once the flour is added.
Slowly add the dry mix into the wet mix. I like to do this in three parts. Mix it on low speed until it is just combined. Do not overmix the batter. If you mix it too much, the cake will be tough like bread instead of soft like a cloud. Stop as soon as you stop seeing streaks of white flour. This is a very important rule for any cake baker.
Baking the Cake Layers

Divide your batter evenly between the two pans. You can use a kitchen scale if you want to be perfect, but eyeing it works too. Place them in an oven heated to 350 degrees. They usually take about 30 to 35 minutes to bake. You will know they are done when you poke a toothpick in the middle and it comes out clean. If there is wet batter on the toothpick, give it 5 more minutes.
Let the cakes sit in the pans for about 10 minutes after you take them out. Then, flip them onto a wire rack to cool completely. This part is hard because the house smells amazing, but you must wait. If you try to frost a warm cake, the frosting will melt and turn into a messy puddle. I once tried to hurry and ended up with a cake slide. It was a disaster!
Baking Quick Info
- Prep Time: 20 minutes
- Cook Time: 35 minutes
- Servings: 12 slices
- Difficulty: Medium
Making the Cream Cheese Frosting

Red velvet is nothing without cream cheese frosting. It provides a tangy taste that cuts through the sweetness of the cake. For this, you need softened cream cheese and softened butter. If they are cold, you will get tiny lumps of cheese in your frosting. Nobody wants that! Use a mixer to beat them together until the mix looks very pale and fluffy.
- 16 ounces cream cheese (2 blocks)
- 1 cup unsalted butter (2 sticks)
- 4 cups powdered sugar
- 1 teaspoon vanilla extract
- A tiny pinch of salt
Add the powdered sugar one cup at a time. Start the mixer on low speed, or you will end up in a cloud of white dust. Once it is mostly mixed, turn the speed up high. Beat it for about 3 minutes. It should look like a thick, white cloud. This frosting is very stable and holds its shape well, making it easy to spread on the cake.
How to Frost Your Cake Like a Pro

First, use a serrated knife to cut off the domed tops of your cakes. This makes them flat so they stack easily. Save those red crumbs! You can crumble them up to decorate the top later. Place the first layer on your plate and put a big scoop of frosting on top. Spread it out to the edges with a flat knife or a spatula.
Place the second layer upside down on top of the frosting. This gives you a very flat top surface to work with. Cover the whole cake in a thin layer of frosting first. This is called a crumb coat. It traps all the red crumbs so they don’t get into your final white layer. Put the cake in the fridge for 20 minutes to let that thin layer get firm. Then, put on the rest of the frosting. It will look clean and beautiful.
Tips for the Best Results

One big tip is to use gel food coloring instead of the liquid kind if you can find it. Gel is much stronger, so you only need a little bit. If you use the liquid kind, make sure it is high quality. Also, don’t skip the vinegar. It might sound weird to put vinegar in a cake, but it reacts with the baking soda to make the cake rise. It also helps keep the red color bright during baking.
IMO, the best way to eat this cake is the day after you make it. When it sits in the fridge overnight, the flavors soak into the layers. The cream cheese frosting gets a bit more firm, and the whole thing becomes easier to slice. Just make sure to take it out of the fridge about 30 minutes before you want to eat it. It tastes best when it is not ice cold.
Success Secrets
- Measuring Flour: Use a spoon to put flour into your measuring cup. Don’t scoop it directly or you will pack it down and get too much.
- Buttermilk Substitute: If you don’t have buttermilk, add 1 tablespoon of lemon juice to 1 cup of regular milk. Let it sit for 5 minutes.
- Frosting Tip: If your frosting feels too soft, put it in the fridge for 15 minutes before spreading.
Serving and Storing Your Cake

When you are ready to serve, use a sharp knife dipped in hot water. Wipe the knife after every cut. This gives you those clean, perfect slices you see in pictures. This cake is very rich, so you can feed a lot of people with just one 9-inch cake. It goes great with a glass of cold milk or a hot cup of coffee.
Because of the cream cheese in the frosting, you must keep this cake in the fridge. It will stay fresh for about 4 to 5 days if you cover it well. You can also freeze the cake layers before you frost them. Just wrap them tightly in plastic wrap. They will stay good in the freezer for up to a month. This is great if you want to bake the cake ahead of time for a big party.
Common Questions About Red Velvet
People often ask me why the cake is red or if they can leave out certain items. Baking is a science, so changing things can be tricky. Here are the most common things people wonder about when they start their red velvet journey.
Is red velvet cake just chocolate cake?
No. It only has a tiny bit of cocoa. The main flavor comes from the buttermilk, vinegar, and vanilla. It is much lighter than a standard chocolate cake.
Can I use natural food coloring?
You can use beet powder, but the color will be more brown than bright red. It will still taste good, but it won’t have that classic look.
Why did my cake turn out dry?
You likely baked it for too long or used too much flour. Always check the cake 5 minutes before the timer goes off to be safe.
Do I have to use buttermilk?
Yes, buttermilk is vital. It reacts with the baking soda to make the cake fluffy. Without it, the cake will be flat and dense.
Can I make these into cupcakes?
Yes! This batter makes about 24 cupcakes. Bake them for about 18 to 22 minutes at the same temperature.
Happy Baking Everyone!
You now have all the tools and tips to make a stunning red velvet cake. It is a showstopper that always makes people smile. Just remember to take your time and follow the steps. You will be very proud when you take that first bite of soft, velvety cake. Enjoy every slice!