Festive Peppermint Cheesecakes for the Holidays
The holidays are finally here. This time of year always makes me want to bake something special. I love the smell of peppermint and chocolate filling my kitchen. It reminds me of being a kid and waiting for snow to fall. These mini cheesecakes are the best way to share that feeling with your friends and family.
You will learn how to make a crunchy chocolate crust and a smooth minty filling. I will show you how to get that perfect pink color and the best way to crush candy canes without making a huge mess. These treats are small, so they are perfect for parties or as a sweet gift for your neighbors.
Try making these today to bring some extra joy to your dinner table!
Why You Will Love Making These Mini Treats
I like making mini cheesecakes more than big ones. They cook much faster. You do not have to worry about the middle being raw while the edges get too brown. Plus, you do not need a fancy water bath to keep them from cracking. They are very easy to handle and serve to a big group of people.
Every bite has a mix of cool mint and rich cream cheese. The chocolate bottom adds a nice crunch that balances the soft top. I have made these for many years, and people always ask for the recipe. It is a fun project to do with kids because they love helping with the decorations.
The Simple Ingredients You Need

You only need a few basic things to start. Most of these might already be in your pantry. For the base, I use chocolate sandwich cookies. You can use the ones with the cream in the middle. Just crush them all up together. You will also need some melted butter to hold the crumbs in place so the crust stays firm.
For the creamy part, you need full-fat cream cheese. Please do not use the kind that comes in a tub or is labeled as low-fat. It will not set correctly, and your cheesecakes might be runny. You also need sugar, a couple of eggs, and some sour cream. The sour cream makes the texture very silky and nice. Peppermint extract gives it that holiday punch, and a tiny drop of red food dye makes them look festive. Don’t forget the candy canes for the top!
Preparing Your Baking Pan and Crust

First, you need to get your muffin tin ready. I always use paper liners. If you don’t use them, the cheesecakes will stick to the metal, and you will have a hard time getting them out. It becomes a big mess, and nobody wants that. I learned that lesson the hard way once when I forgot the liners and had to eat the cheesecake with a spoon straight from the pan!
Mix your cookie crumbs and melted butter in a bowl. It should look like wet sand. Put a big spoonful into each paper liner. Use the bottom of a small glass or even your thumb to press the crumbs down hard. You want a tight, flat layer. Bake these for just five minutes. This helps the crust stay crunchy instead of getting soggy once you add the wet filling later on.
How to Mix the Perfect Cheesecake Filling

This is the most important part. Your cream cheese must be soft. If it is cold, you will get tiny lumps in your batter. These lumps do not go away in the oven. I usually leave my cream cheese on the counter for at least two hours before I start. If you are in a rush, you can put the wrapped blocks in a bowl of warm water for ten minutes. This works like a charm every time.
Beat the cream cheese and sugar until it looks like clouds. Then, add the eggs one at a time. Here is a big tip: do not mix too much after adding the eggs. If you whip too much air into the eggs, the cheesecakes will puff up like balloons in the oven and then sink or crack when they cool down. Keep your mixer on a low speed. Stir in the peppermint and the food coloring last. I like a light pink color, so I only use one or two small drops.
Baking and Cooling Your Holiday Desserts

Spoon the pink batter into your muffin tins. Fill them almost to the top. These do not rise much like cupcakes do. Bake them at a low heat. Low and slow is the secret to good cheesecake. If the oven is too hot, the tops will get brown, and we want them to stay pretty and pink. It usually takes about 18 to 22 minutes depending on your oven.
You will know they are done when the edges look firm, but the very center still jiggles a little bit when you shake the pan. Turn off the oven and leave the door open just a crack for ten minutes. Then, move them to the counter. The hardest part is waiting. You must let them cool completely and then put them in the fridge for at least four hours. Overnight is even better. This time in the cold makes the flavor much stronger and the texture firm.
Recipe Quick Info
- Prep Time: 20 minutes
- Cook Time: 22 minutes
- Servings: 12 mini cheesecakes
- Difficulty: Easy
Easy Steps for Decorating and Garnishing

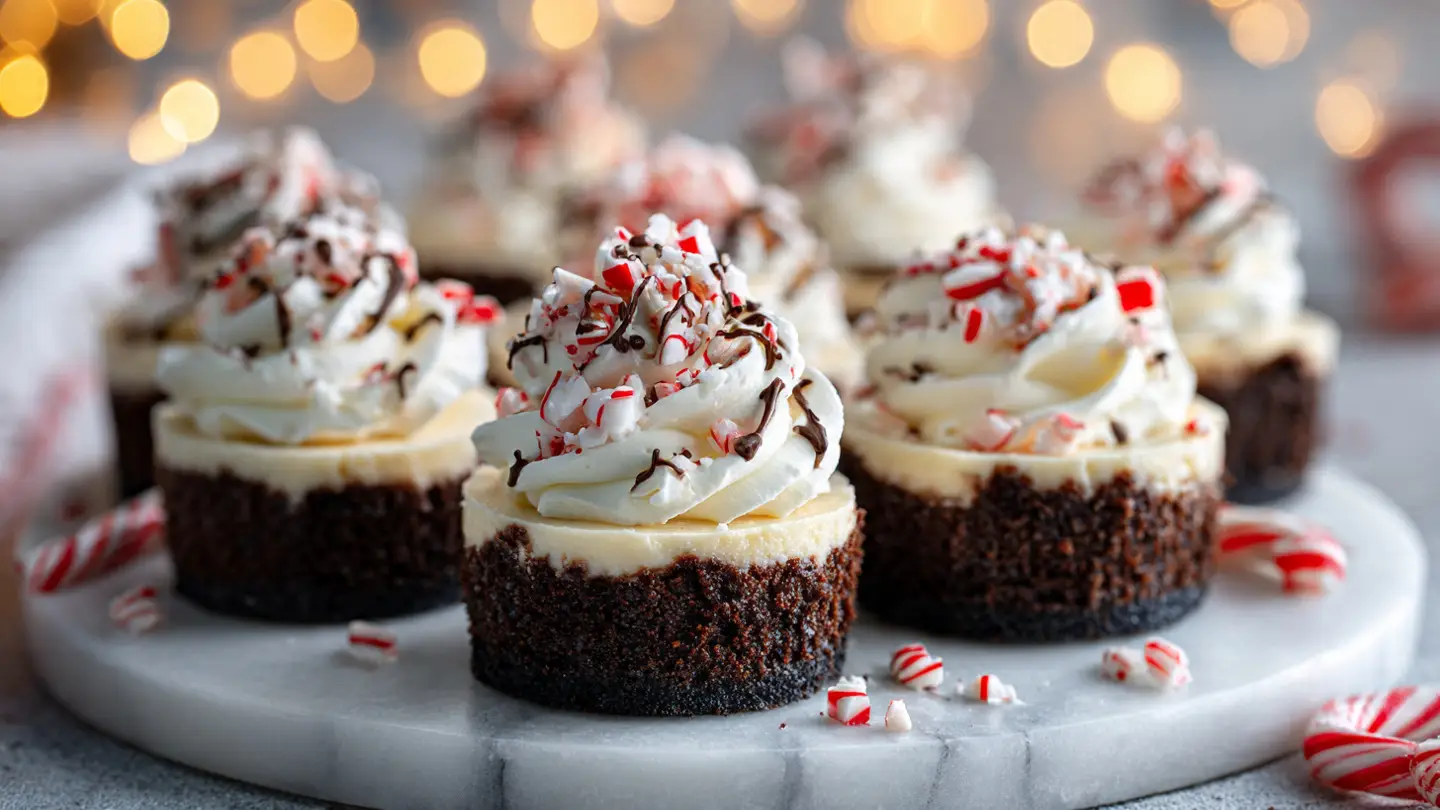
Once the cheesecakes are cold, you can make them look beautiful. I like to use a big swirl of whipped cream on top. You can buy the stuff in a can, but homemade whipped cream tastes much better. Just beat some heavy cream with a little sugar until it is stiff. It only takes a minute or two. IMO, the extra effort is totally worth it for the taste.
Crush your candy canes by putting them in a plastic bag and hitting them with a rolling pin. This is a great way to get out any holiday stress! Sprinkle the red and white bits over the whipped cream. Do this right before you serve them. If you put the candy on too early, the sugar starts to melt into the cream, and it can look a bit messy. The red color will bleed and turn the white cream pink.
Variations and Special Tips for Success

You can change this recipe to fit your own taste. If you do not like chocolate, you can use vanilla wafers or graham crackers for the crust instead. You can also leave out the pink food coloring if you want a snowy white look. Some people like to put a whole mini peppermint patty at the bottom of each cup before adding the batter. This gives a surprise chocolate mint center that everyone loves.
One limitation of this recipe is the humidity. If your kitchen is very steamy, the crust might not stay as crisp. Try to bake these on a day when you aren’t boiling a big pot of soup! Also, make sure your eggs are at room temperature. Cold eggs can make the softened cream cheese turn firm again while you are mixing. If that happens, just keep mixing slowly until it smooths out again.
Serving Suggestions for Your Holiday Party

These look great on a big white plate. I like to add some fresh mint leaves around the cheesecakes to add some green color. It makes the red and pink pop. These are very rich, so one per person is usually enough. They go great with a hot cup of cocoa or a dark coffee. Since they are small, guests can eat them while standing and talking without needing a fork and a big plate.
If you are taking these to a party, keep them in a cold box. Cheesecake softens quickly if it sits in a warm room for too long. I usually bring them out right when it is time for dessert. People love the individual portions because they feel like a special gift made just for them. It is much easier than cutting a messy cake in front of everyone!
Storage and Make-Ahead Tips
- Fridge: Store in an airtight container for up to 5 days.
- Freezer: These freeze great! Wrap them well without the topping for up to 2 months.
- Make-Ahead: Bake these 2 days early to save time on the big holiday.
Common Questions About Holiday Baking
Can I use peppermint oil instead of extract?
Peppermint oil is much stronger than extract. Use only a tiny drop or two if you use oil. Extract is safer for this recipe.
Why did my cheesecakes sink in the middle?
This usually happens if you beat too much air into the eggs. It can also happen if you open the oven door too much while they bake.
Do I have to use food coloring?
No, you do not. The cheesecakes will be a pretty white color. They will still taste just as good with the peppermint flavor.
How do I get the cheesecakes out of the liners?
Make sure they are very cold. If they are warm, they will stick. Peel the paper back slowly and carefully while the cake is firm.
Happy Holiday Baking to You
Making these peppermint cheesecakes is a wonderful way to celebrate the season. They are simple, pretty, and taste like a winter dream. Just remember to use room temperature ingredients and have fun with the decorations. Your friends will love them!