Creamy Banana Icebox Cake with Graham Crackers
I love desserts that do not need an oven. When the sun is hot, the last thing I want to do is turn on the stove. This banana icebox cake is one of my favorite things to make. It is cool, sweet, and very soft. You only need a few simple things from the store to put it together. It feels like magic because the crackers turn into a soft cake overnight.
Today, you will learn how to build this cake layer by layer. I will show you the best way to slice the fruit so it stays fresh. We will also talk about how to make the cream filling extra thick and fluffy. This recipe is great for kids to help with because there is no heat involved. It is a fun project for a weekend afternoon.
Get your square pan ready and let’s get started on this easy treat!
Why You Will Love This No-Bake Dessert
This cake is a total crowd-pleaser for any party or family dinner. Most people grew up eating some version of an icebox cake. It tastes like a mix of banana pudding and a fancy cream cake. The best part is that you make it a day before you need it. This means you have no stress on the day of your event. Just take it out of the fridge and serve it up!
Gather Your Simple Ingredients

The list of things you need is very short. I like to use full-size graham crackers because they fit perfectly in a square pan. You will also need heavy whipping cream or a whipped topping. If you use heavy cream, you will need some sugar to make it sweet. Vanilla pudding mix is the secret to making the filling taste like a dream. It gives it a nice yellow color and a thick texture that holds up well.
- 2 boxes of honey graham crackers
- 5 large yellow bananas
- 2 small boxes of instant vanilla pudding mix
- 3 cups of cold whole milk
- 1 tub of whipped topping or 2 cups of heavy cream
- 1 teaspoon of vanilla extract
- A pinch of salt to balance the sugar
Preparing the Creamy Filling

First, you need to mix the pudding. Put the dry pudding mix and the cold milk into a large bowl. Use a whisk to stir it fast for about two minutes. You will feel it get thick as you stir. This is the base of your cake. If it stays runny, you might need to let it sit in the fridge for five minutes. FYI, using cold milk is the most important part of this step.
Once the pudding is set, I gently fold in the whipped topping. Folding means you do not stir fast. You move the spoon in a big circle to keep the air inside. This makes the filling light and fluffy like a cloud. If you stir too hard, the cream will get flat and watery. I learned this the hard way when I first started baking. My first cake was a puddle because I was too fast with the spoon!
Recipe Quick Info
- Prep Time: 20 minutes
- Cook Time: 0 minutes
- Servings: 12 people
- Difficulty: Very Easy
Slicing the Bananas the Right Way

Bananas are the star of the show here. You want bananas that are yellow with just a few brown spots. If they are too green, they will taste bitter and be too hard. If they are too black, they will turn into mush inside the cake. I like to peel them and slice them into thin coins. Try to make every slice the same thickness so the cake stays level.
One trick I always use is a little bit of lemon juice. If you toss the banana slices in a tiny bit of juice, they will stay bright. Without it, they might turn brown after a few hours. It does not change the taste of the cake, but it makes it look much better. IMO, a bright yellow cake looks much more tasty than a brown one. Just a small splash is all you need.
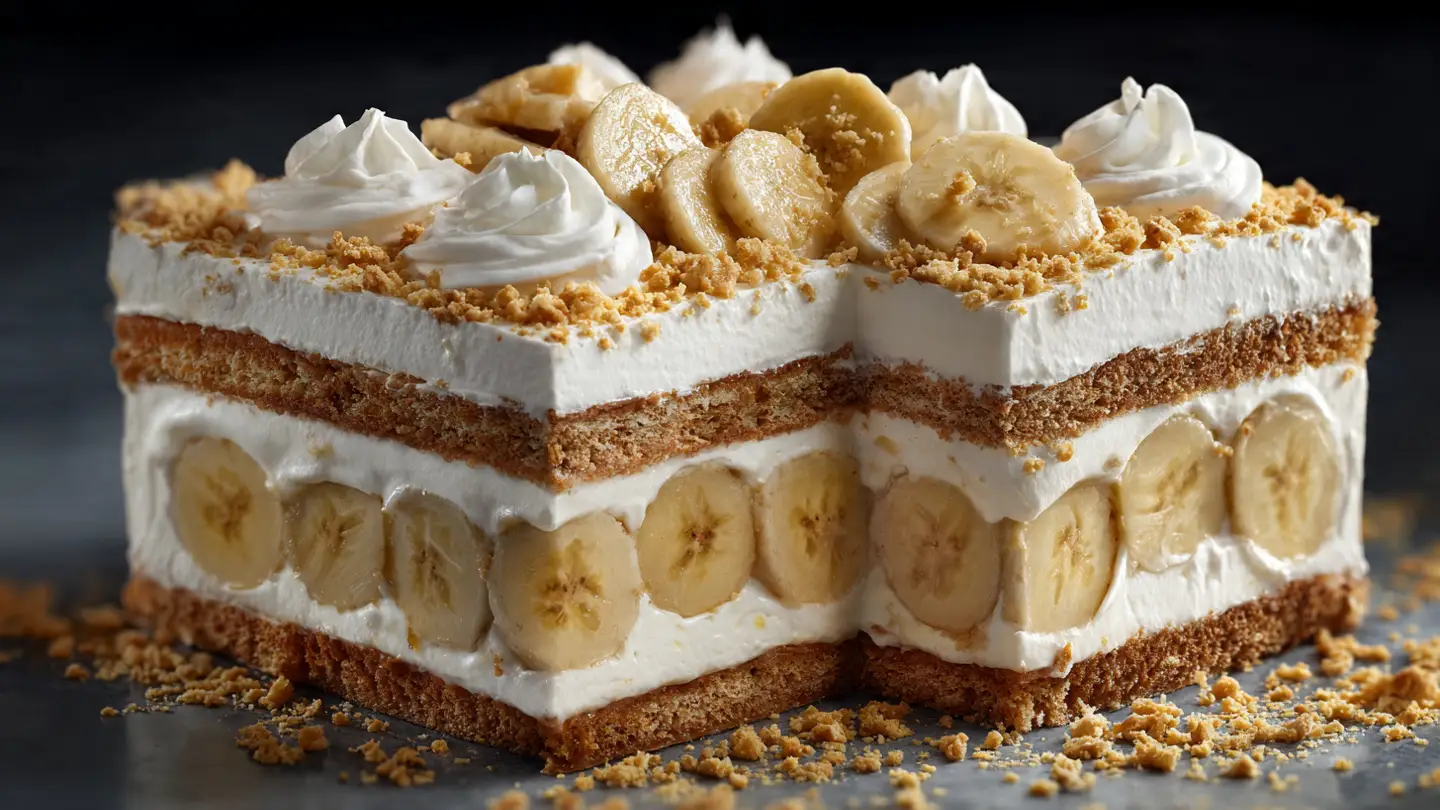
How to Layer the Cake Perfectly

Now comes the fun part where we build the cake. Start by putting a tiny bit of cream on the bottom of your pan. This acts like glue to keep the crackers from sliding around. Place a single layer of graham crackers over the cream. You might need to break a few crackers to fill in the gaps at the edges. It is okay if they are not perfect!
Spread a thick layer of the pudding mix over the crackers. Next, lay down a solid layer of banana slices. Press them down just a little bit so they stick. Then, do it all over again. I usually do three layers of crackers and three layers of fruit. End with a layer of the white cream on the very top. This top layer should be smooth and pretty since everyone will see it.
Why the Fridge is Your Best Friend

You cannot eat this cake right away. If you try to cut it now, the crackers will still be hard and crunchy. The magic of an icebox cake happens when it sits in the cold. The crackers soak up the moisture from the pudding and the bananas. This turns them into a soft, cake-like texture. It is a slow process that takes at least four hours, but overnight is much better.
I always cover the pan with plastic wrap before putting it in the fridge. This keeps the cake from smelling like other food in there. It also keeps the top layer from getting a weird skin on it. This is a great lesson in patience! I once tried to eat it after only one hour, and it was a mess. The crackers were still snapping in my teeth. Give it time to rest, and you will be much happier with the result.
Garnishing Before You Serve

Before you serve the cake, you can make it look like it came from a bakery. I like to take two extra graham crackers and crush them into crumbs. You can put them in a small bag and hit them with a spoon. Sprinkle the crumbs all over the top of the cake. This adds a little bit of crunch that feels good against the soft cream.
You can also add fresh banana slices on top right before you put it on the table. Do not put the top bananas on too early, or they will get soft. If you want to be extra fancy, you can drizzle some caramel sauce over the top. It tastes like a banoffee pie when you add caramel! This cake is very sweet, so a little bit of salt in the crumbs can also be a nice touch.
Expert Tips for Success
- Cold Ingredients: Always use cold milk and cold cream so the pudding sets fast.
- Double Wrap: Use two layers of plastic wrap to keep the banana scent inside the cake pan.
- Square Pan: A 9×9 inch pan is the best size for the shape of graham crackers.
Storing and Keeping Leftovers

If you have any cake left, you must keep it in the fridge. It will stay good for about two to three days. After three days, the bananas might start to get a bit watery. The crackers will also get very soft. It still tastes good, but it might look a little messy. I do not recommend freezing this cake because the bananas change texture when they thaw.
When you take a slice out, use a sharp knife and a flat spatula. The first slice is always the hardest to get out neatly. Do not worry if it falls apart a little bit. It will still taste like a dream! If you are taking this to a party, keep it in a cooler with ice until you are ready to eat. It melts quickly if it sits out on a warm table for too long.
Your Questions Answered
I know you might have some questions about making this at home. Here are the things people ask me most often when I share this recipe. These tips will help you make the best cake ever!
Can I use low-fat milk for the pudding?
It is best to use whole milk. Low-fat milk can make the pudding too thin, and the cake might not hold its shape when you cut it.
What if I cannot find graham crackers?
You can use vanilla wafers or digestive biscuits instead. They work the same way and soak up the cream nicely.
Can I make this cake vegan?
Yes! Use dairy-free milk, vegan pudding mix, and a coconut-based whipped cream. It still tastes great.
How do I stop the bananas from turning brown?
Toss your slices in a little lemon or lime juice. The acid keeps them looking yellow and fresh for a longer time.
Time to Enjoy Your Cake
This banana icebox cake is the best way to end a summer day. It is easy to make and everyone loves it. I hope you have fun building your layers and sharing this with your friends. Enjoy every sweet and creamy bite of your hard work!