Lemon Meltaway Cookies: Soft and Zesty
I love cookies that feel like a cloud. These lemon meltaway cookies are exactly like that. They are not crunchy or hard. Instead, they are very soft and light. When you take a bite, the cookie almost disappears on your tongue. That is why people call them meltaways! They have a bright taste because of the fresh lemons. It is the perfect treat for a sunny afternoon or a bake sale.
In this guide, I will show you how to make these cookies from start to finish. You do not need to be a pro baker to get this right. I will talk about the best ingredients to use and how to mix them. We will also look at how to make a sweet lemon glaze. This glaze goes on top and adds extra flavor. By the end, you will have a big batch of cookies that your friends and family will love.
Get your apron ready and let us start baking these zesty treats!
Check out the full list of what you need below.
Everything You Need to Get Started
Before you start mixing, you need to gather all your tools and food. Making cookies is much easier when everything is ready on the counter. You will need a big bowl, a whisk, and some measuring cups. It is also good to have a citrus zester. This tool helps you get the yellow part of the lemon skin. That skin has all the yummy lemon oil that makes the cookies smell great. If you do not have a zester, a small cheese grater works too.
I remember the first time I made these. I forgot to take the butter out of the fridge. Cold butter is very hard to mix with sugar. I tried to use it anyway, but the dough stayed lumpy. Now, I always make sure my butter is soft before I start. This is a very important step for a smooth cookie. You should also check your cornstarch. Cornstarch is the secret ingredient that makes these cookies so soft. Without it, they would just be regular butter cookies.
The Short List of Ingredients

To make these cookies, you need simple things from your kitchen. Most of these items are probably in your pantry right now. You do not need eggs for this recipe. That is one reason why the texture is so light. The main fat comes from the butter. Make sure you use real butter and not margarine. Real butter tastes much better and helps the cookie melt correctly. You will also need some sugar, but we use powdered sugar instead of the grainy kind.
- 1 cup of unsalted butter (make sure it is soft)
- 1/2 cup of powdered sugar (also called confectioners sugar)
- 1 and 1/2 cups of all-purpose flour
- 1/2 cup of cornstarch
- 2 tablespoons of fresh lemon zest
- 1 tablespoon of fresh lemon juice
- 1/4 teaspoon of salt
The cornstarch is what gives the cookie that special feel. It breaks up the proteins in the flour. This keeps the cookies from getting tough. If you only used flour, the cookies would be more like a biscuit. The salt is also important. Even though these are sweet, a little salt makes the lemon flavor pop. I always use fresh lemons because bottled juice just does not taste the same. Fresh is always better here!
Gathering Your Baking Tools

You do not need fancy machines for this recipe. A hand mixer is nice, but you can even do it with a wooden spoon if your arms are strong! You will definitely need a baking sheet. I like to line mine with parchment paper. This prevents the cookies from sticking to the metal. It also makes cleaning up very fast. If you do not have paper, you can use a silicon mat or just grease the pan with a little butter.
Another tool I love is a small cookie scoop. This helps every cookie stay the same size. When they are all the same size, they cook at the same time. If some are big and some are small, the small ones might burn while the big ones stay raw. If you do not have a scoop, you can use a tablespoon. Just try to keep them even. You will also need a wire rack to let the cookies cool down after they come out of the oven.
Recipe Quick Info
- Prep Time: 15 minutes
- Cook Time: 12 minutes
- Servings: 24 cookies
- Difficulty: Easy
The Best Way to Make the Dough
Now it is time to mix everything together. This part is fun! The goal is to make a dough that is soft but not sticky. You want it to hold its shape when you roll it into a ball. If the dough feels too wet, the cookies will spread out too much in the oven. If it feels too dry, they might crack. But do not worry! Most of the time, this recipe comes out perfectly if you follow the measurements. It is like a science project that you can eat later.
One mistake I used to make was over-mixing. Once you add the flour, you should stop mixing as soon as you do not see white streaks anymore. If you mix too much, the cookies will get hard. We want them to melt, not to be crunchy. Think of it like a gentle hug for the dough. Just stir until it comes together. I also suggest tasting a tiny bit of the dough. It should taste bright and sweet. If it is not lemony enough, you can add a tiny bit more zest before you bake them.
Mixing the Butter and Sugar

Start by putting your soft butter and powdered sugar in a bowl. Use your mixer or spoon to cream them together. This means you mix them until they look like smooth frosting. Since we use powdered sugar, this happens very fast. Powdered sugar is much finer than regular sugar. It blends into the butter perfectly. This is another secret to the smooth texture. IMO, this is the most satisfying part of the whole process.
Once the butter and sugar are happy together, add the lemon zest and lemon juice. The smell will be amazing right now! The lemon zest has oils that come out when you stir. It makes the whole kitchen smell like a lemon grove. Make sure you scrape the sides of the bowl with a spatula. You want every bit of butter to have some lemon in it. If you skip the zest and only use juice, the flavor will be very weak. The zest is where the real power is!
Adding the Dry Ingredients

Now you need to add the flour, cornstarch, and salt. I like to whisk these three things in a separate small bowl first. This ensures the salt and cornstarch are spread out evenly. Then, pour the dry mix into the butter mix. Turn your mixer to a low speed. If you go too fast, a cloud of flour will fly into your face! That is a mess no one wants to clean up. Stir slowly until the dough forms a soft ball.
The dough should feel a bit like play-dough. It should be soft but stay together. If it feels very sticky, you can put it in the fridge for 20 minutes. This makes it easier to roll. But usually, you can roll them right away. This is a great time to preheat your oven to 350 degrees. While the oven gets hot, you can start making the cookie balls. I find this part very relaxing. It is like a little craft project for your hands.
Baking to Perfection

Roll the dough into small balls. They should be about one inch wide. Place them on your baking sheet. Leave about two inches between each ball. These cookies do not spread a lot, but they still need some room to breathe. Put them in the oven and bake for 10 to 12 minutes. You have to watch them closely! These cookies should stay pale. You do not want them to turn brown. If the edges are brown, they are overcooked.
When you touch the top of a finished cookie, it should feel set. It will still be very soft, so do not try to pick it up yet. Let them sit on the hot baking sheet for 5 minutes. This helps the bottom finish cooking without getting too dark. After 5 minutes, carefully move them to a wire rack. They need to be completely cool before you add the glaze. If the cookies are hot, the glaze will just melt and run off. Patience is key here!
Making the Sweet Lemon Glaze
The glaze is the “cherry on top” for these cookies. It adds an extra punch of sweetness and more lemon flavor. It also makes the cookies look very pretty. A plain cookie is fine, but a glazed cookie looks like it came from a fancy bakery. The glaze is very easy to make. It only has three ingredients. You can make it while the cookies are cooling down on the rack. It only takes a minute of stirring.
I once tried to use milk instead of lemon juice for the glaze. It was okay, but it lacked that “zing.” The lemon juice makes the glaze tart, which balances out the sugar. If you like things very sour, you can add more juice. If you like them very sweet, use more sugar. That is the great thing about baking at home. You can change things to fit what you like best! Just make sure the glaze is thick enough to stay on the cookie but thin enough to dip.
Mixing the Glaze Ingredients

For the glaze, you will need 1 cup of powdered sugar. Mix it with 2 tablespoons of fresh lemon juice. Stir in 1 teaspoon of lemon zest too. You can also use a tiny bit of vanilla extract if you like. Vanilla goes very well with lemon. Stir it with a fork until there are no lumps left. If the glaze is too thick to drizzle, add a tiny bit more lemon juice. If it is too thin, add more sugar. It should be like heavy cream.
When your cookies are cold, you can dip the tops into the glaze. Some people like to use a spoon and drizzle it in a zigzag pattern. Both ways look great! I like to dip them because it covers the whole cookie. Then, you get a little bit of glaze in every single bite. After you glaze them, let them sit on the counter for 30 minutes. This allows the glaze to dry and become a soft shell. FYI, this makes them much easier to stack in a jar.
Adding Finishing Touches

If you want to make these cookies look extra fancy, you can add more zest on top. While the glaze is still wet, sprinkle a little bit of fresh lemon skin over them. It adds a bright pop of color! You could also use yellow sprinkles if you are making them for a party. These are small cookies, so they are great for kids. They fit perfectly in little hands. Just make sure the glaze is dry before you give them out!
Another idea is to add a tiny pinch of coarse sugar on top. This adds a nice crunch to a very soft cookie. It is a fun surprise for anyone who takes a bite. I like to serve these with a cup of hot tea or a cold glass of milk. They are perfect for dipping into tea because they soak up the liquid so well. Just do not dip them for too long or they might break off in your cup. That has happened to me more than once!
Pro Baking Tips
- Sifting: Sift the powdered sugar if it looks lumpy. This keeps the glaze and dough very smooth.
- Citrus Choice: Use Meyer lemons if you want a sweeter, less tart cookie.
- Storage: Keep them in a sealed container so they do not get dry and hard.
The Best Ways to Serve and Store
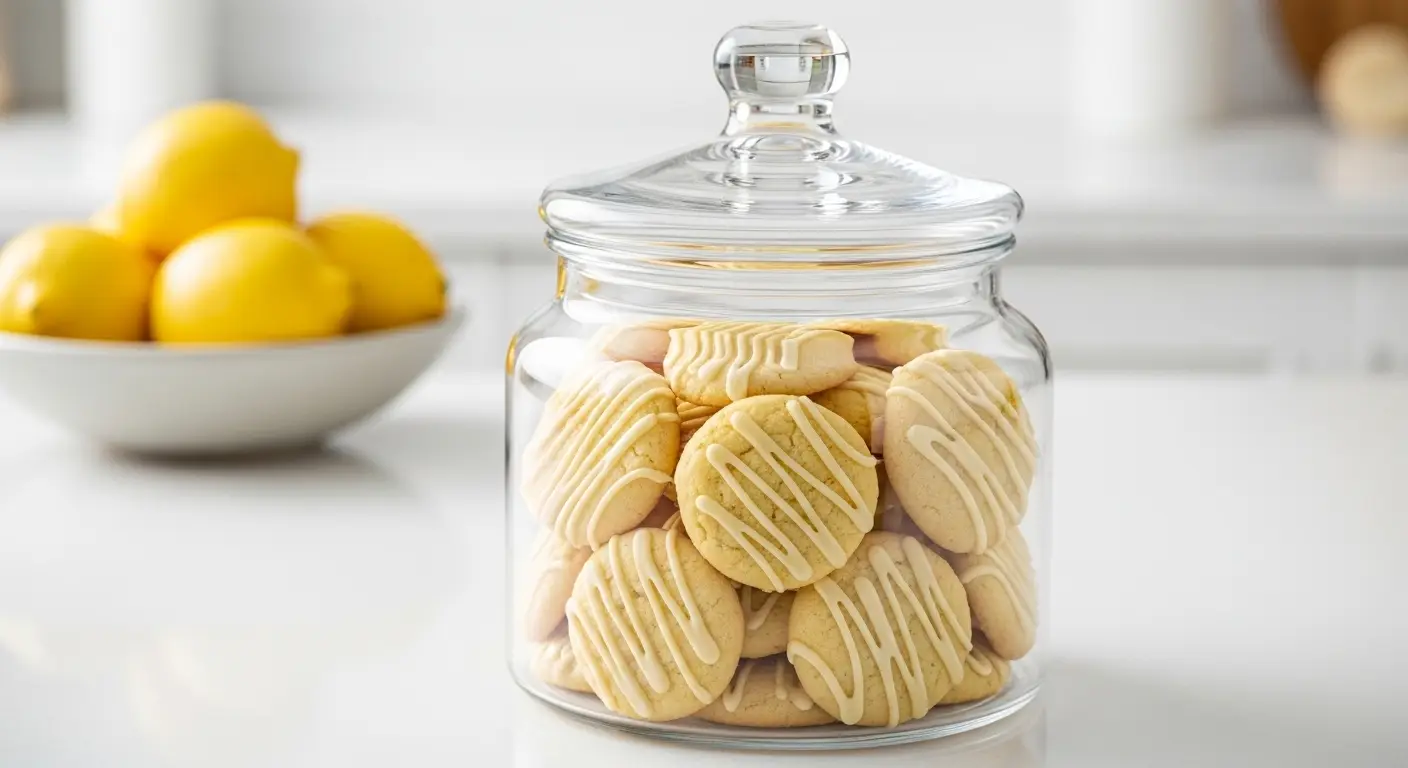
These cookies are great for many things. You can take them to a potluck or give them as a gift. They look very pretty in a glass jar or a small box with a ribbon. Since they are small, people can eat two or three without feeling too full. They are also good for afternoon snacks. I like to keep a few in a container on my kitchen counter. They are a nice little pick-me-up when I am busy.
Storing them the right way is very important. Since they are so soft, they can dry out if you leave them in the air. You should keep them in a container that seals tight. If you store them well, they will stay soft for about five days. You can also freeze them if you want to save some for later. Just put them in a freezer bag and take them out when you are ready to eat. They thaw very quickly at room temperature. They still taste fresh after being frozen!
Arranging a Cookie Platter

When you are ready to serve them, you can put them on a pretty plate. I like to use a wooden board or a white ceramic dish. It makes the yellow and white colors of the cookies stand out. You can add some fresh lemon slices to the plate for decoration. This tells everyone what flavor they are before they even take a bite. Mint leaves also look very nice next to the cookies. It makes the plate look fresh and spring-like.
These are also great for a “tea party” vibe. If you have kids, they will love playing tea party with these tiny treats. They are very delicate, so handle them with care. If you stack them, make sure the glaze is very dry. Otherwise, they might stick together. If you are worried about sticking, you can put a small piece of parchment paper between the layers. This keeps the glaze looking perfect and shiny for your guests.
Storing Your Leftovers

Most people will eat these fast, but if you have leftovers, put them in a container. A plastic tub or a glass jar works best. Keep them at room temperature in a cool, dry place. Do not put them in the sun or near the oven. The heat could make the glaze melt. If your house is very warm, you can put them in the fridge. They taste good cold too! Just let them sit out for a few minutes before eating for the best texture.
If you want to freeze them, do it before you add the glaze. Bake the cookies, let them cool, and freeze them in a bag. When you want to eat them, let them thaw and then make a fresh glaze. This keeps the glaze from getting sticky in the freezer. It is a great way to prep for a big party. You can bake the cookies days ahead of time and finish them on the day of the event. It saves a lot of time and stress!
Common Questions About Lemon Cookies
Baking can sometimes be tricky. You might have questions about why your cookies look a certain way. Maybe they spread out too much, or they are too hard. Do not worry! Most baking problems have an easy fix. Here are some of the most common things people ask about lemon meltaway cookies. I have included my best advice to help you get the best results every time you bake.
Why did my cookies spread out too much?
This usually happens if the butter was too warm or if you did not use enough cornstarch. Try chilling the dough for 30 minutes before baking next time.
Can I use regular granulated sugar instead?
It is best to use powdered sugar. Regular sugar will make the cookies crunchy instead of soft. Powdered sugar is what makes them melt in your mouth.
What if I don’t have fresh lemons?
You can use bottled lemon juice, but the flavor won’t be as strong. You really need the lemon zest from a fresh lemon for the best taste and smell.
How do I know when the cookies are done?
The cookies are done when the tops look dry and set. They should still be very pale. If the edges turn brown, you have cooked them for too long.
Can I make these cookies gluten-free?
Yes! You can use a gluten-free flour blend in place of the regular flour. Just make sure it is a 1-to-1 swap meant for baking.
Enjoy Your Homemade Lemon Treats
Lemon meltaway cookies are a wonderful treat that anyone can make. They are soft, sweet, and tangy all at once. By following these steps, you will have a perfect batch of cookies to share. They are sure to be a hit with everyone you know!