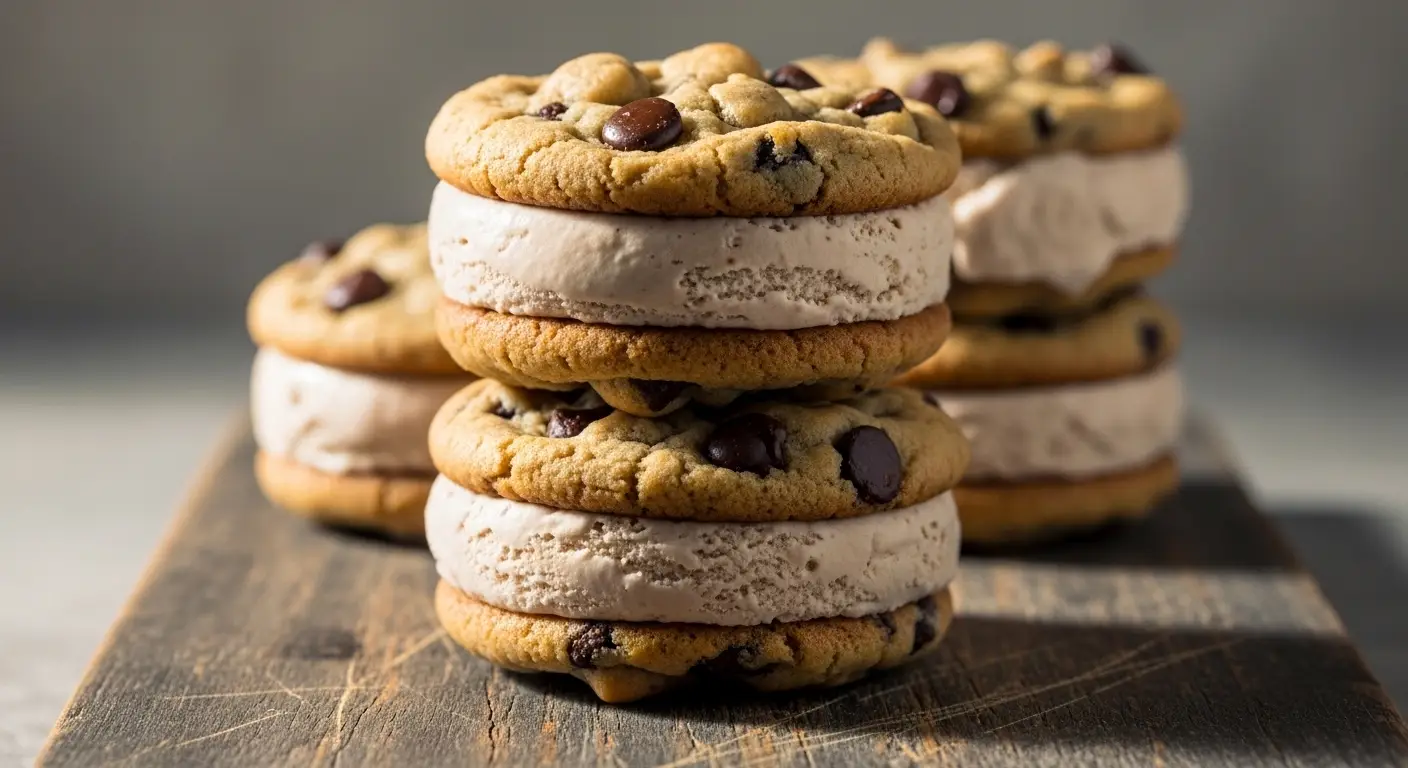
Cookie Dough Vegan Ice Cream Sandwiches
Making a great dessert at home is a lot of fun. Today, I want to show you how to make something very special. We are going to make cookie dough vegan ice cream sandwiches. These treats are cold, sweet, and soft. They use real plant-based ingredients that taste just like the classic treats you love. You do not need an oven for the dough, and you do not need to be a pro chef to get this right.
I have tried many ways to make these. Some were too hard to bite into. Others melted way too fast. After many tries in my own kitchen, I found the best way to keep the cookie dough soft even when it is frozen. This recipe is great for kids and adults alike. It is also a safe way to eat cookie dough because we do not use raw eggs or raw flour. Let’s get started on this sweet project together.
Check out the steps below to make your own batch of frozen goodness!
Why You Will Love This Frozen Treat
This recipe is a winner because it solves a big problem. Usually, cookies get very hard in the freezer. When you try to bite an ice cream sandwich, the middle squishes out the sides. My recipe uses a special dough that stays flexible. It feels like eating a cloud of chocolate chips. Plus, it is totally vegan, so your friends who do not eat dairy can enjoy it too. It is a great way to cool down on a hot afternoon.
I remember the first time I made these for a birthday party. I forgot to heat the flour first, and I had to start all over again. It was a big mess, but it taught me a lot. Now, I always make sure to follow every step so the food is safe and tasty. You will find that making things from scratch feels much better than buying them at the store. You know exactly what is inside your food.
The Main Ingredients You Need

To make these sandwiches, you need a few simple things. Most of these are likely in your pantry right now. You will need heat-treated all-purpose flour or almond flour. Almond flour is great because it tastes nutty and is safe to eat raw. You also need a liquid sweetener like maple syrup. This keeps the dough sticky and sweet without using grainy white sugar. Coconut oil or vegan butter helps the dough stay soft when it gets cold. This is the secret to a good bite.
Do not forget the vanilla extract and a pinch of salt. Salt might sound weird for a sweet treat, but it actually makes the chocolate taste better. Speaking of chocolate, grab a bag of vegan mini chocolate chips. Mini chips are better than big ones because they spread out more. This way, you get a bit of chocolate in every single bite you take. If you use big chunks, the dough might break apart when you try to shape it.
How to Prepare the Edible Cookie Dough

First, you must make sure your flour is safe. If you use regular flour, put it on a tray and bake it at 350 degrees for five minutes. This kills any germs. If you use almond flour, you can skip this part! Next, put your flour in a big bowl. Add your melted coconut oil and maple syrup. Stir it until it looks like thick paste. It should smell like a fresh bakery in your kitchen by now. This is my favorite part of the process.
Once the base is mixed, fold in your chocolate chips. Use a spatula to move the dough from the bottom to the top. This makes sure the chips are everywhere. If the dough feels too dry, add a tiny splash of almond milk. If it is too sticky, add another spoonful of flour. The goal is a dough that you can roll into a ball without it sticking to your fingers. It should feel just like play-dough. Put it in the fridge for ten minutes to let it firm up before the next step.
Recipe Quick Info
- Prep Time: 20 minutes
- Cook Time: 0 minutes (No-bake!)
- Servings: 8 sandwiches
- Difficulty: Easy
Rolling and Shaping the Sandwiches

Now we need to make the ‘bread’ for our sandwiches. Take the dough out of the fridge. Place it between two pieces of parchment paper. This stops the dough from sticking to your rolling pin. Roll it out until it is about half an inch thick. You do not want it too thin, or it will snap. You do not want it too thick, or you won’t be able to fit it in your mouth! Take a round cookie cutter or a drinking glass to cut out circles.
I like to make small sandwiches because they are easier to eat. Once you have your circles, put them on a tray lined with paper. You should have an even number of circles. If you have any extra dough, just roll it back up and cut more. Put the tray in the freezer for about 30 minutes. They need to be very cold and stiff before we add the ice cream. If they are warm, the ice cream will melt the moment it touches the dough, and you will have a soup instead of a sandwich.
Choosing the Best Vegan Ice Cream

The middle of the sandwich is just as important as the outside. You can use any vegan ice cream you like from the store. Some are made with coconut milk, which is very creamy. Others use oat milk, which has a very neutral taste. Vanilla is the classic choice for cookie dough. However, I think mint chocolate chip or even coffee flavor tastes amazing too. Pick something that you really love to eat on its own.
One thing to remember is that vegan ice cream can be very hard right out of the freezer. Let the pint sit on the counter for five minutes before you try to scoop it. You want it to be soft enough to spread but not so soft that it runs away. IMO, oat milk ice cream works best because it does not have a strong flavor that fights with the cookie dough. It lets the vanilla and chocolate in the dough shine. Make sure you have your scoop ready and your dough circles out of the freezer.
Putting the Sandwiches Together

This is the part where you have to move fast. Take one circle of cookie dough. Put a big scoop of ice cream right in the center. Take a second circle and press it down gently on top. You want the ice cream to reach the edges of the dough. If it looks a little messy, that is okay! You can use a butter knife to smooth the ice cream around the sides. This makes them look like they came from a fancy shop.
After you build a sandwich, put it back in the freezer right away. Do not wait until you finish all of them. Build one, freeze one. This keeps them from melting while you work on the others. Once they are all in the freezer, let them stay there for at least two hours. This makes sure the whole sandwich is one solid piece. It makes it much easier to hold and eat without getting ice cream all over your shirt. FYI, wearing an apron is still a good idea!
Fun Ways to Decorate Your Treats

You can make these sandwiches look even better with a few extra steps. Before you put them in the freezer for the final time, roll the edges in toppings. You can use extra chocolate chips, colorful sprinkles, or crushed nuts. These stick to the soft ice cream on the sides. It adds a nice crunch and looks very pretty. I once used crushed pretzels on the edges, and the salty taste with the sweet ice cream was incredible.
Another idea is to dip half of the finished sandwich into melted vegan chocolate. This creates a hard shell that snaps when you bite it. If you do this, make sure the sandwich is very cold first. Just melt some chocolate in the microwave, dip the sandwich halfway, and put it back on the parchment paper. It looks very professional. Your friends will not believe you made these at home. It is a simple way to take a basic recipe and make it feel like a party treat.
Pro Tips for Success
- Softness: Use more coconut oil if your dough feels too crumbly.
- Safety: Always bake your flour if it is not almond or oat flour.
- Storage: Wrap each sandwich in plastic wrap to stop freezer burn.
Serving and Storing Your Sandwiches

When you are ready to eat, take a sandwich out of the freezer. Let it sit for just one or two minutes. This makes the dough perfectly soft again. If you eat it right away, it might be a bit firm. These are great for summer BBQs or as a late-night snack. Since they are already in single portions, you don’t have to worry about scooping ice cream for a crowd. Just hand them out and watch everyone smile.
If you have leftovers, you need to store them carefully. Do not just leave them on a plate in the freezer. They will get ice crystals on them and taste funny. Wrap each one tightly in plastic wrap or foil. Then, put them all in a large freezer bag or a box with a lid. They will stay fresh and tasty for up to two weeks. I doubt they will last that long, though! In my house, they usually disappear in two or three days. They are just too good to leave alone.
Common Questions About Vegan Sandwiches
Can I use gluten-free flour for this?
Yes! Almond flour is already gluten-free. You can also use a 1-to-1 gluten-free flour blend. Just make sure to heat-treat it first to keep it safe.
What if I don’t have a cookie cutter?
No problem! You can use the top of a clean glass or even just shape the dough into circles with your hands. They will still taste great even if they aren’t perfect circles.
Why is my cookie dough crumbling?
It might be too dry. Add a teaspoon of almond milk or water at a time. Mix it until the dough stays together when you squeeze it in your hand.
Can I use real butter instead of vegan?
You can, but then the recipe will not be vegan. If you don’t mind dairy, regular butter works fine. Just keep it at room temperature so it mixes well.
How long do these take to freeze?
The final freeze takes about two hours. This ensures the ice cream is solid enough so it won’t squish out when you take your first bite.
Time to Enjoy Your Cold Treat
You now know how to make the best vegan ice cream sandwiches ever. These are soft, sweet, and better than the store-bought kind. I hope you have a blast making these and sharing them with your family. Remember to keep them cold and enjoy every bite! It is the perfect way to treat yourself after a long day.