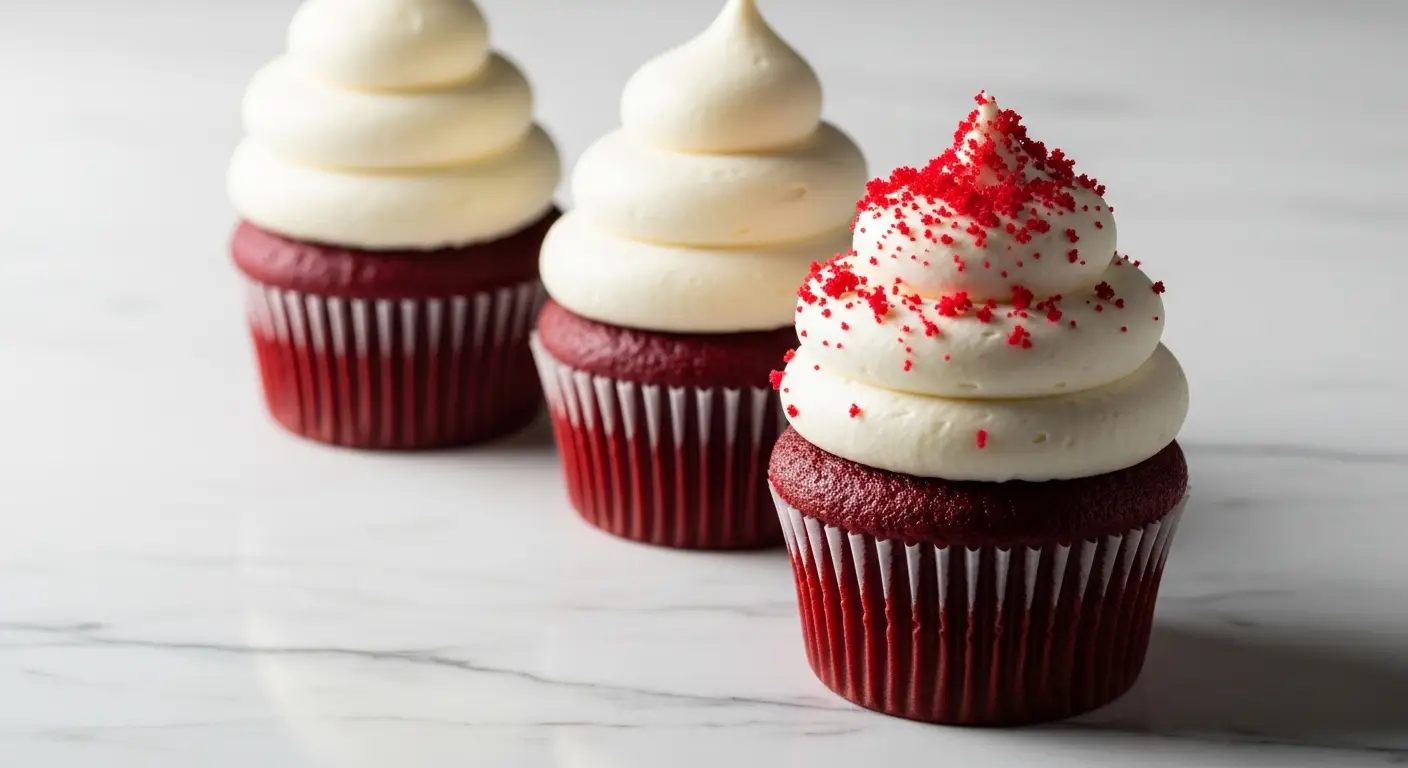
Best Ever Red Velvet Cupcakes with Tangy Cream Cheese Frosting
Red velvet cupcakes are more than just chocolate cake with red dye. They have a special taste that is a little bit tangy and very soft. I used to think they were hard to make until I tried this recipe at home. Now, these are my favorite treats to bake for birthdays or school parties because everyone loves the bright color and the sweet frosting. You will learn how to get that perfect velvet texture and how to make frosting that stays tall on top of the cake.
Many people get confused about what red velvet actually is. It is a mix of vanilla and a tiny bit of cocoa powder. The magic happens when we add buttermilk and vinegar. These ingredients make the cake very moist and help the red color look even better. I will show you every step so your cupcakes come out looking like they came from a fancy bakery. Grab your apron and let us get started on these delicious red cakes.
Would you like to see the full list of what you need to buy at the store?
Getting Your Kitchen Ready for Success
Before you start mixing, you need to make sure your tools and ingredients are ready. Baking is like a science project where the temperature of your food matters a lot. If your butter is too cold, your cake will be lumpy. If your eggs are straight from the fridge, the batter might not mix well. I always set my ingredients out on the counter an hour before I want to bake. This small step makes a huge difference in how the cupcakes feel when you bite into them.
I also like to line my muffin pans with paper liners first. It saves time later and keeps the batter from sitting out too long. If you do not have liners, you can use butter and flour to coat the holes, but liners make cleanup much easier. Make sure your oven is hot before the pans go in. Most ovens take about ten to fifteen minutes to reach the right heat. A hot oven helps the cupcakes rise up high instead of staying flat and heavy.
The Magic Ingredients List

To make these cupcakes, you need some basic things from your pantry and a few special items. The cocoa powder is important, but do not use too much. We only want a hint of chocolate flavor. The buttermilk is the secret to the soft texture. If you do not have buttermilk, you can make your own by adding a spoonful of lemon juice to regular milk and letting it sit for five minutes. It works just as well and saves a trip to the store.
- 2 1/2 cups all-purpose flour
- 1 1/2 cups granulated sugar
- 1 teaspoon baking soda
- 1 teaspoon salt
- 1 teaspoon cocoa powder
- 1 1/2 cups vegetable oil
- 1 cup buttermilk (room temperature)
- 2 large eggs (room temperature)
- 2 tablespoons red food coloring
- 1 teaspoon white vinegar
- 1 teaspoon vanilla extract
Step by Step Mixing Instructions

- Turn your oven on to 350 degrees. Put paper liners into two muffin pans. This recipe makes about 22 to 24 cupcakes.
- In a large bowl, whisk the flour, sugar, baking soda, salt, and cocoa powder together. Make sure there are no big lumps of cocoa.
- In a different bowl, beat the oil, buttermilk, eggs, food coloring, vinegar, and vanilla. Use a whisk or a fork to mix them until the color is solid red.
- Slowly pour the wet red mix into the dry flour mix. Use a big spoon or a mixer on low speed. Stop mixing as soon as you do not see any more white flour. If you mix too much, the cake will be tough like bread.
- Scoop the batter into the liners. Only fill them about halfway or a little more. If you fill them to the top, they will spill over in the oven and make a mess.
- Bake for 18 to 21 minutes. You can check if they are done by poking a toothpick into the middle. If it comes out clean, they are ready.
Making the Tangy Cream Cheese Frosting

This frosting is the best part of the whole cupcake. It is thick, sweet, and a little bit sour from the cheese. To make it, you need 16 ounces of full-fat cream cheese and 1 cup of softened butter. Beat them together until they look like a cloud. Then, add 4 cups of powdered sugar and a splash of vanilla. I learned a hard lesson once: never use cold cream cheese. It will leave tiny white dots in your frosting that look like cottage cheese. Always wait until it is soft to the touch.
If your kitchen is very warm, the frosting might get too runny. If that happens, just put the bowl in the fridge for twenty minutes. This helps it firm up so you can pipe pretty swirls on your cupcakes. I like to use a big star-shaped metal tip for my frosting, but you can also just use a knife to spread it on thick. There is no such thing as too much frosting on a red velvet cupcake. IMO, the frosting is why we eat the cake in the first place!
Secrets for the Softest Texture

The word velvet is in the name for a reason. These cupcakes should feel like silk when you eat them. One trick I use is adding a tiny bit of extra oil instead of butter in the cake batter. Oil stays liquid at room temperature, which keeps the cake from drying out. Even after two days, these cupcakes stay very moist. Another secret is the vinegar. It reacts with the baking soda to create tiny bubbles. These bubbles lift the cake and make it light instead of dense and heavy.
I once tried to make these without the vinegar because I ran out. The cupcakes tasted okay, but they were flat and a bit chewy. It taught me that even small amounts of an ingredient matter. Also, make sure your buttermilk is not cold. Cold milk can make the oil clump up. If you forget to take it out of the fridge, you can put the carton in a bowl of warm water for a few minutes. This warms it up fast so you can start baking right away.
Recipe Quick Info
- Prep Time: 20 minutes
- Cook Time: 20 minutes
- Servings: 24 cupcakes
- Difficulty: Easy
How to Decorate Like a Pro

You do not need to be an artist to make these look good. The contrast of the bright red cake and the snowy white frosting is already beautiful. One easy trick is to save one cupcake and crumble it up into tiny red dust. After you frost the other cupcakes, sprinkle the red crumbs on top. It looks very fancy and covers up any mistakes you made with the frosting. It is an easy way to make them look like they cost five dollars each at a shop.
If you want to use a piping bag, start in the middle of the cupcake. Squeeze the bag and move in a circle toward the edge, then spiral back up to the center. Pull the bag away quickly at the very top to get a nice point. If you do not have a piping bag, you can use a plastic storage bag. Just fill it with frosting and snip off one corner with scissors. It works great for simple swirls. Just be sure to let the cupcakes cool down all the way before you start. If they are even a little warm, the frosting will melt and slide right off.
Storage and Make Ahead Tips

Since these have cream cheese in the frosting, you have to keep them in the fridge. They will stay fresh for about four or five days if you put them in a container with a lid. I think they actually taste better on the second day because the flavors have time to mix. Just remember to take them out of the fridge about thirty minutes before you eat them. This lets the frosting soften up so it melts in your mouth. No one likes biting into a brick of cold butter and cheese.
You can also make the cake part ahead of time and freeze them. Wrap the plain cupcakes in plastic wrap and put them in a freezer bag. They will stay good for two months. When you are ready for a party, just thaw them and make fresh frosting. This is a great way to save time if you are busy. I often bake a big batch and keep half in the freezer for when I have a surprise craving for something sweet. FYI, these are great for midnight snacks!
Better Baking for Everyone
Baking can be tricky, but it is also a lot of fun. I have made many mistakes in my kitchen, like forgetting the sugar or burning the edges of my pans. Each time I mess up, I learn something new. For these cupcakes, the biggest lesson is patience. You have to wait for things to cool and wait for ingredients to reach room temperature. If you follow the steps and take your time, you will have the best cupcakes on the block. You do not need expensive tools to be a great baker.
These cupcakes are also easy to change if you need to. You can use gluten-free flour if your stomach does not like wheat. You can use less food coloring if you want a lighter pink color. The base of the recipe is very strong, so it handles small changes well. I hope you enjoy sharing these with your friends and family as much as I do. There is something very special about giving someone a bright red treat that you made with your own hands.
Pro Baking Tips
- Don’t Overmix: Stop stirring as soon as the flour disappears to keep them fluffy.
- Room Temp: Use warm eggs and milk so the batter stays smooth and creamy.
- Fill Level: Only fill liners halfway so the cupcakes don’t overflow and stick.
Serving and Party Ideas

Red velvet cupcakes are perfect for many different times of the year. For Valentine’s Day, you can add little heart candies on top. For Christmas, the red and white colors fit right in with the holiday theme. I like to serve them on a big white plate to make the red color pop. They are quite rich, so you might want to serve them with a cold glass of milk or some hot coffee. The bitterness of coffee goes perfectly with the sweet cream cheese.
If you are taking them to a party, make sure the box is tall enough. You do not want the lid to squash your beautiful frosting swirls. I once used a flat box and ruined twelve cupcakes by accident. It was a sad day! If you have a cupcake carrier with holes for each cake, use that. It keeps them from sliding around in the car. If you don’t have one, you can put a little dab of frosting on the bottom of each liner to “glue” it to the plate or box. It works like a charm.
Your Red Velvet Questions Answered
Why is my cake brown instead of red?
You might have used too much cocoa powder or not enough food coloring. Make sure to use at least two tablespoons of red dye for that bright look.
Can I use butter instead of oil in the cake?
Yes, but the cake will be a bit more firm. Oil makes them much softer and keeps them moist for a longer time.
What if I do not have a piping bag for frosting?
Just use a butter knife or a small spatula. Spread a big dollop on top and make a little swirl with the back of a spoon. It looks rustic and cute.
Can I make these into a big cake instead?
Yes! This batter works for two 8-inch round cake pans. You will need to bake them for about 30 to 35 minutes instead of 20.
Do I have to use buttermilk?
It is best to use it for the flavor and soft texture. If you have none, mix 1 cup of milk with 1 tablespoon of vinegar or lemon juice.
Time to Enjoy Your Treats
You now have everything you need to make the best red velvet cupcakes ever. They are soft, bright, and topped with the creamiest frosting you can imagine. Go share them with someone special and enjoy every single bite of your hard work!