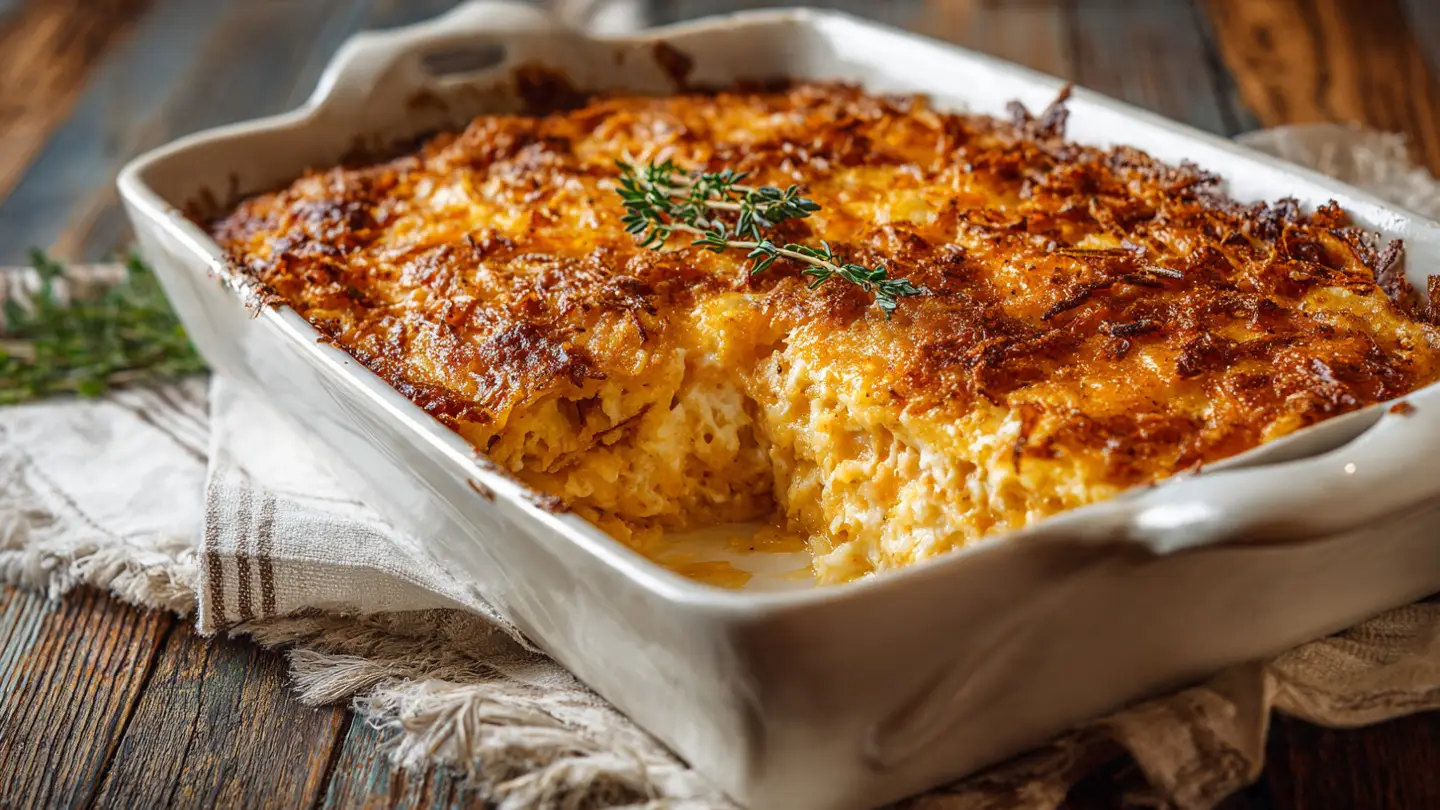
Chicken Hashbrown Casserole
Making dinner every night can be hard. I often feel tired after a long day of work and chores. One night, I needed something fast and filling for my family. I looked in my freezer and saw a bag of frozen potatoes. I also had some cooked chicken in the fridge. That was the start of my favorite meal.
This chicken hashbrown casserole is the best comfort food. It is creamy, cheesy, and has a nice crunch on top. You do not need to be a pro chef to make this. It uses simple items you probably already have in your kitchen. In this post, you will learn how to mix the base, choose the best cheese, and get that perfect golden crust.
Read on to see how to make this easy dish for your next family dinner.
Check out the steps below to start cooking!
Getting Everything Ready for Your Casserole
Preparation is the secret to a great meal. Before I start cooking, I like to clear my counter. This helps me stay calm while I work. You will need a large bowl for mixing and a baking dish. Most people use a 9×13 inch pan. This size fits the whole recipe perfectly and ensures every bite gets cooked well.
I once tried to make this in a pan that was too small. The middle stayed cold while the edges got too dark. It was a big mess! Now, I always make sure my dish is big enough. You also want to preheat your oven to 350 degrees. This ensures the oven is hot enough to melt the cheese as soon as the pan goes inside. FYI, a hot oven makes the potatoes much tastier.
Choosing Your Main Ingredients

The base of this dish is frozen hashbrowns. I like the shredded kind best. They soak up the creamy sauce better than the little cubes. You can buy them at any grocery store. Make sure you let them thaw a little bit before you mix them. If they are a giant frozen block, it is hard to stir them with the other items.
For the chicken, you have a few choices. I usually use a rotisserie chicken from the store. It saves so much time! You just pull the meat off the bones and shred it with your fingers. If you have leftover chicken from last night, that works great too. Just make sure it is cut into bite-sized pieces so it is easy to eat.
Picking the Best Creamy Sauce

The sauce holds everything together. Most people use cream of chicken soup. It is thick and adds a lot of salt and flavor. I also add a big scoop of sour cream. The sour cream adds a little tang that cuts through the heavy cheese. It makes the dish feel a bit more fresh and homemade.
If you do not like cream of chicken soup, you can use cream of mushroom. It works just as well. Some people even use cream of celery. The goal is to have a thick liquid that coats every piece of potato. IMO, the cream of chicken gives the most classic flavor that kids really enjoy.
Quick Flavor Boosters
- Garlic Powder: Add half a teaspoon for a savory kick.
- Onion Flakes: These add a nice smell without chopping onions.
- Black Pepper: Use fresh ground pepper for better taste.
Selecting the Right Cheese

Cheese is the most important part for me. I love a sharp cheddar. It has a strong taste that stands out. You can buy the bags of shredded cheese, but shredding your own block is better. The bags have a dusty powder on the cheese to keep it from sticking. That powder can make your sauce a little grainy.
If you want a different taste, try mixing cheeses. Pepper jack adds a tiny bit of heat. Mozzarella makes it very stretchy and fun to eat. I usually use about two cups of cheese. Half goes inside the mix, and the other half goes on top. This way, you get cheesy goodness in every single bite.
How to Assemble and Bake
Now comes the fun part where everything comes together. Mixing the ingredients is very satisfying. You just dump everything into your big bowl. I use a big rubber spatula to fold it all together. You want to be gentle so you do not break the potato shreds too much. Once it looks like one big creamy mass, you are ready to move it to the pan.
Don’t forget to grease your pan! I use a little bit of butter or cooking spray. If you skip this, the cheese will stick to the sides and be hard to wash off later. Spread the mixture out flat so it cooks evenly. If one side is higher than the other, the thin side might get too crunchy before the thick side is hot. This is a simple mistake that is easy to avoid.
Adding the Crunchy Topping

A casserole needs a crunch. Without it, the texture is just soft. Many people use crushed cornflakes mixed with melted butter. It sounds strange if you have never tried it, but it is delicious. The butter makes the flakes turn golden brown and very crisp. It is my favorite part of the whole meal.
If you do not have cornflakes, you can use Ritz crackers. Just crush them up in a plastic bag and mix them with butter. Some people even use potato chips! This is a great way to use up the crumbs at the bottom of a chip bag. Whatever you choose, make sure the topping covers the whole dish so every person gets some crunch.
Setting the Right Bake Time

Patience is key when baking. This dish usually takes about 45 to 50 minutes. You want to see bubbles around the edges. The cheese on top should be melted and starting to turn brown. If you take it out too early, the potatoes in the middle might still be a little hard. Nobody wants a crunchy potato that is supposed to be soft!
I check mine at the 40-minute mark. If the top is getting too dark but the middle isn’t bubbling, I put a piece of foil over it. This stops the top from burning while the heat keeps cooking the inside. This is a pro tip that helps with almost any casserole you make.
Letting the Dish Rest

This is the hardest part. When the timer goes off, the smell is amazing. You will want to scoop it out right away. But if you do, the sauce will be very runny. It needs about 10 minutes to sit on the counter. During this time, the sauce thickens up and grabs onto the potatoes.
This resting time also makes it easier to serve. You can cut nice squares instead of having a messy pile on the plate. Use this time to set the table or pour some drinks. By the time everyone is seated, the food will be at the perfect temperature to eat without burning your tongue.
Tips for the Best Results
I have made this many times, and I learn something new every time. For example, do not use low-fat sour cream. It can sometimes break apart in the oven and look watery. Stick to the full-fat kind for the creamiest result. Also, make sure your chicken is seasoned. Even if it is pre-cooked, a little extra salt or pepper helps.
This meal is great for leftovers too. You can keep it in the fridge for about three days. To reheat it, I like to use the oven again for a few minutes. It keeps the topping crunchy. The microwave is faster, but the topping will get soft. If you are in a rush, the microwave is fine, but the oven is better if you have time.
Making it a Full Meal

This casserole is very heavy. It has lots of starch, fat, and protein. To balance it out, I always serve it with something green. Steamed broccoli or green beans work very well. The bright color looks nice next to the golden potatoes. It also makes me feel a bit better about eating all that cheese!
A simple side salad is another great choice. Use a light dressing like lemon and oil. The acid in the dressing helps clean your palate between bites of the rich casserole. If you are serving this to kids, they usually like corn on the cob or peas. It makes the dinner feel like a complete, balanced plate.
Customizing for Your Family

You can change this recipe to fit what your family likes. My husband loves spicy food, so sometimes I add chopped jalapenos to his half. My kids love bacon, so I sprinkle cooked bacon bits on top with the cheese. It is a very flexible recipe that is hard to mess up.
If you want to hide some veggies, you can add finely chopped spinach or grated zucchini. The cheese and sauce hide them pretty well. This is a sneaky way to get more vitamins into a meal that feels like a treat. Just make sure to squeeze the water out of the veggies first so the casserole does not get soggy.
Preparing Ahead of Time

One of the best things about this dish is that you can make it ahead. I often put it all together on a Sunday afternoon. I cover the dish tightly with plastic wrap and put it in the fridge. Then, on a busy Monday night, I just have to take it out and pop it in the oven. You may need to add 5 or 10 minutes to the bake time if it is cold from the fridge.
You can even freeze this! If you do, do not add the crunchy topping until you are ready to bake it. Frozen topping can get mushy. This is perfect for when a friend has a new baby or someone is sick. I just give them the frozen pan with a bag of cornflakes and instructions. It is a very helpful gift that everyone appreciates.
Common Questions About Chicken Hashbrown Casserole
Can I use fresh potatoes instead of frozen?
Yes, but you must grate them and squeeze out all the water. Frozen ones are easier because they are already dry and ready to go.
Can I use raw chicken in this recipe?
No, the chicken must be cooked first. Raw chicken will release too much juice and make the casserole watery and unsafe to eat.
How do I keep the topping from burning?
If the top looks too brown, cover it with aluminum foil. This lets the inside keep cooking without burning the crust.
Is this recipe gluten-free?
Not usually. Most canned soups have flour. You would need to use gluten-free soup and crackers to make it safe for a gluten-free diet.
Can I add vegetables to the mix?
Absolutely! Peas, carrots, or broccoli work great. Just make sure they are cut small so they cook through at the same time.
Wrapping Up Your Cooking Journey
This chicken hashbrown casserole is a classic for a reason. It is easy to make and makes everyone happy. You now know how to pick the best ingredients and get that perfect crunch. I hope this meal brings your family together at the table. Enjoy every cheesy bite of your hard work!