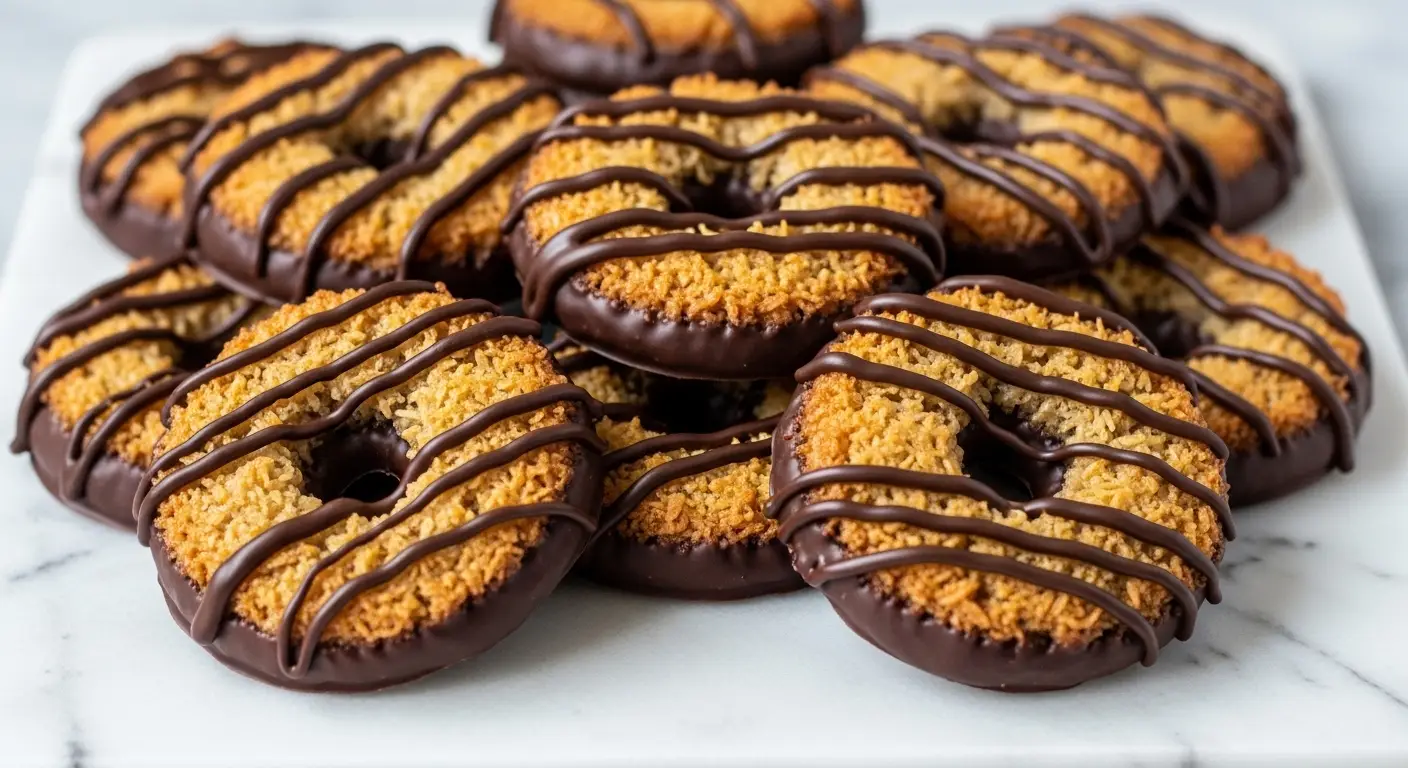
Homemade Samoas Cookies: A Girl Scout Copycat
We all know that time of year when the colorful boxes show up. Those purple boxes of Samoas are hard to resist. They have a crunchy cookie base, gooey caramel, toasted coconut, and dark chocolate. It is a perfect mix of flavors and textures. I have spent a lot of time in my kitchen trying to get this recipe just right so you can have them any time you want.
Making these at home is actually very fun. You get to control how much coconut goes on top and how thick the chocolate layer is. This recipe will show you every step to make a cookie that tastes even better than the boxed version. You do not need to be a professional baker to do this. Just follow along and you will have a tray of beautiful, striped cookies in no time.
Ready to bake the best cookies ever? Let’s get started on this sweet project together.
The Simple Ingredients You Will Need
Before we start baking, we need to gather our supplies. Most of these items are probably in your pantry right now. Using fresh ingredients makes a big difference in the final taste. For example, using a good quality butter will make the shortbread base taste much richer. I like to use salted butter because it helps balance all the sugar in the caramel.
You will also need to choose your coconut carefully. I prefer sweetened shredded coconut for that classic Girl Scout taste. If you want them less sweet, you can use unsweetened, but the texture might be a little different. The chocolate is another big part. I suggest dark chocolate melting wafers because they stay shiny and snap when you bite them. Here is the full list of what you need to grab from the store.
The Cookie Base Ingredients

The bottom of a Samoa is a crisp shortbread cookie. To make this, you will need 1 cup of softened butter. Make sure it is not melted, just soft enough to poke with your finger. You also need 1/2 cup of white sugar to make it sweet. These two get whipped together until they look fluffy and light.
- 1 cup salted butter, softened
- 1/2 cup granulated sugar
- 2 cups all-purpose flour
- 1/4 teaspoon baking powder
- 1/2 teaspoon salt
- 1/2 teaspoon vanilla extract
- 2 tablespoons milk
The flour provides the structure. If you use too much flour, the cookie will be dry and crumbly. I learned this the hard way when I didn’t measure correctly! Now I always spoon my flour into the measuring cup instead of scooping it directly. This keeps the flour light and prevents the cookie from being too hard.
The Topping and Chocolate Coating

The topping is what makes a Samoa a Samoa. You need 3 cups of shredded coconut. We are going to toast this until it smells amazing. You also need a lot of caramel. I use a 11-ounce bag of soft caramels because they melt smoothly. You will mix these with a little bit of milk or cream to keep the caramel soft even after it cools down.
- 3 cups sweetened shredded coconut
- 11 ounces soft caramel candies (unwrapped)
- 2 tablespoons heavy cream or milk
- 1/4 teaspoon salt (to make the caramel pop)
- 12 ounces dark chocolate melting wafers or chocolate chips
For the chocolate, melting wafers are the easiest choice. They are made to melt and harden quickly. If you use chocolate chips, you might want to add a tiny bit of coconut oil to help them stay smooth. Dark chocolate is best because it cuts through the sweetness of the caramel, but milk chocolate works too if you have a big sweet tooth.
Step-by-Step Instructions to Cookie Heaven
Now that we have everything, it is time to bake. This process has three main parts: baking the cookie, making the coconut topping, and dipping the cookies in chocolate. It might seem like a lot of steps, but it goes fast once you get moving. I like to do this on a Saturday afternoon when I have plenty of time to enjoy the process. It is a great way to relax.
The trick to great Samoas is patience. You have to let the cookies cool before you add the caramel. If the cookie is hot, the caramel will just slide right off. I usually put my cookies in the fridge for ten minutes to speed things up. Let’s walk through the steps one by one so you don’t miss anything important.
Mixing and Baking the Shortbread

First, heat your oven to 350 degrees. In a big bowl, cream the butter and sugar together. Use a hand mixer or a big spoon. Add the vanilla and milk, then slowly stir in the flour, baking powder, and salt. The dough will be a little stiff, but that is okay. It needs to hold its shape when you cut it into circles.
- Roll the dough out between two pieces of parchment paper until it is about 1/4 inch thick.
- Use a round cookie cutter to make circles.
- Use a smaller circle (like the end of a piping tip) to poke a hole in the middle of each cookie.
- Bake for 10 to 12 minutes until the edges are just barely brown.
- Let them cool completely on a wire rack.
IMO, the hole in the middle is the most important part! It makes them look just like the real thing. If the dough gets too soft while you are working, just pop it in the freezer for 5 minutes. Cold dough is much easier to cut and move to the baking sheet without breaking the circles.
Toasting the Coconut Perfectly

Toasting the coconut is a very important step. Raw coconut is chewy and sweet, but toasted coconut is crunchy and nutty. Spread the coconut on a large baking sheet. Put it in the oven at 300 degrees. You need to stay close and watch it! Coconut burns very fast. I once walked away to answer the phone and ended up with a tray of black charcoal. Don’t be like me.
Every 2 or 3 minutes, use a spatula to stir the coconut around. This helps it brown evenly. You want it to look like toasted marshmallow—some white bits mixed with lots of golden brown bits. Once it looks and smells toasted, take it out and let it cool in a bowl. This should take about 10 to 15 minutes total. The smell will fill your whole house and it is wonderful.
Melting the Caramel and Mixing

Next, we make the gooey topping. Put your unwrapped caramels in a microwave-safe bowl with the cream and a pinch of salt. Microwave them in 30-second bursts. Stir after each time until the mixture is smooth and liquid. If you don’t have a microwave, you can do this in a small pot on the stove over low heat. Just keep stirring so the bottom doesn’t burn.
Now, take about 1/4 cup of the plain melted caramel and set it aside. Pour the rest of the caramel over your toasted coconut. Use a spoon to mix it all together until every piece of coconut is coated in sticky caramel. This mixture will be thick and warm. It is very hard not to eat a spoonful right now, but try to wait! You need it for the cookies.
Assembling the Topping

Take your cooled cookies and the caramel coconut mixture. Remember that 1/4 cup of plain caramel we saved? Use a knife to spread a very thin layer of it on top of each cookie. This acts like glue. It helps the coconut pile stay stuck to the shortbread. If you skip this, the coconut might fall off later when you are eating.
Take a big spoonful of the coconut mixture and press it onto the top of the cookie. Use your fingers to smooth it out into a ring shape. Try to keep the hole in the center open. If the mixture gets too stiff and hard to work with, just put the bowl in the microwave for 10 seconds to soften it up again. Work your way through all the cookies until they all have a thick, bumpy crown of coconut.
Dipping and Striping the Chocolate

This is the best part! Melt your chocolate in a small bowl. Take one cookie and dip the bottom into the chocolate. Scrape off the extra chocolate on the edge of the bowl and place the cookie on a piece of parchment paper. The chocolate will act as a base. Once the bottom is done, it is time for the famous stripes. It wouldn’t be a Samoa without them.
Dip a fork or a spoon into the melted chocolate. Wave it back and forth over the cookies to create thin lines. I like to do this quickly so the lines look professional. If you want perfect lines, you can put the chocolate in a plastic bag and snip off a tiny corner. Let the cookies sit for at least an hour until the chocolate is hard. If you are in a rush, put the tray in the fridge for 15 minutes.
Recipe Quick Info
- Prep Time: 45 minutes
- Cook Time: 12 minutes
- Servings: 24 cookies
- Difficulty: Medium
Success Tips and Storage Secrets
Making copycat cookies is an art. These taste so much better than the ones in the box because they are fresh. The shortbread is more buttery and the coconut is crunchier. However, because we use real ingredients, they can behave differently than factory cookies. You want to make sure you keep them in a cool place so the chocolate doesn’t melt on your fingers when you pick them up.
If you want to try something different, you can change the chocolate. Some people love white chocolate or even butterscotch stripes. You can also add a little bit of orange zest to the shortbread dough for a bright flavor. Cooking is all about having fun and making it your own. Here are some extra tips to help you get the best results every single time you bake these.
How to Store Your Cookies

These cookies stay fresh for a long time if you keep them right. Put them in an airtight container with a piece of parchment paper between the layers. This stops them from sticking together. They will last on the counter for about 5 days. If your kitchen is warm, the caramel and chocolate might get soft. In that case, the fridge is your best friend. They actually taste really good when they are cold and snappy!
You can also freeze these cookies for up to 3 months. Just pull one out whenever you have a craving. It is like having a secret stash of Girl Scout cookies all year long. I always make a double batch just so I can put some in the freezer for later. FYI, they don’t even need to thaw; they are delicious straight from the freezer.
Common Troubleshooting Tips

Is your caramel too hard? This usually happens if you cook it too long or don’t add enough cream. If the topping feels like a rock, you can gently heat the cookies in the oven for a minute to soften them before eating. Next time, add an extra teaspoon of milk to the caramel. If your cookies are spreading too much in the oven, your butter was likely too hot. Try chilling the dough for 30 minutes before you bake it.
Expert Baking Tips
- Uniform Size: Use a kitchen scale to weigh your dough pieces for identical cookies.
- Parchment Paper: Always use parchment or a silicone mat so the caramel doesn’t stick to the pan.
- The Dip: Use a fork to lift the cookie out of the chocolate to let the excess drip off easily.
Answers to Your Cookie Questions
Can I use store-bought caramel sauce?
No, caramel sauce for ice cream is too thin. It will not hold the coconut on the cookie. Use soft caramel candies or thick caramel bits meant for melting.
Do I have to toast the coconut?
Toasting adds the signature crunch and nutty flavor. While you can use raw coconut, the cookies will be very chewy and will not taste like the real Girl Scout version.
Why did my chocolate turn white?
This is called bloom. It happens when chocolate gets too hot or old. It is still safe to eat! Using high-quality melting wafers usually prevents this from happening.
Can I make these gluten-free?
Yes! Swap the all-purpose flour for a 1-to-1 gluten-free baking blend. The caramel and coconut are naturally gluten-free, but always check your labels to be sure.
How do I get perfect chocolate stripes?
Use a small plastic bag with a tiny hole snipped in the corner. Move your hand in a fast zig-zag motion over the cookies without stopping.
The Final Batch
Making your own Samoas is a great way to bring a little joy into your kitchen. These cookies are crunchy, chewy, and full of rich flavors that everyone loves. Once you taste the fresh shortbread and toasted coconut, you might never go back to the box. Enjoy sharing these treats with your friends and family!