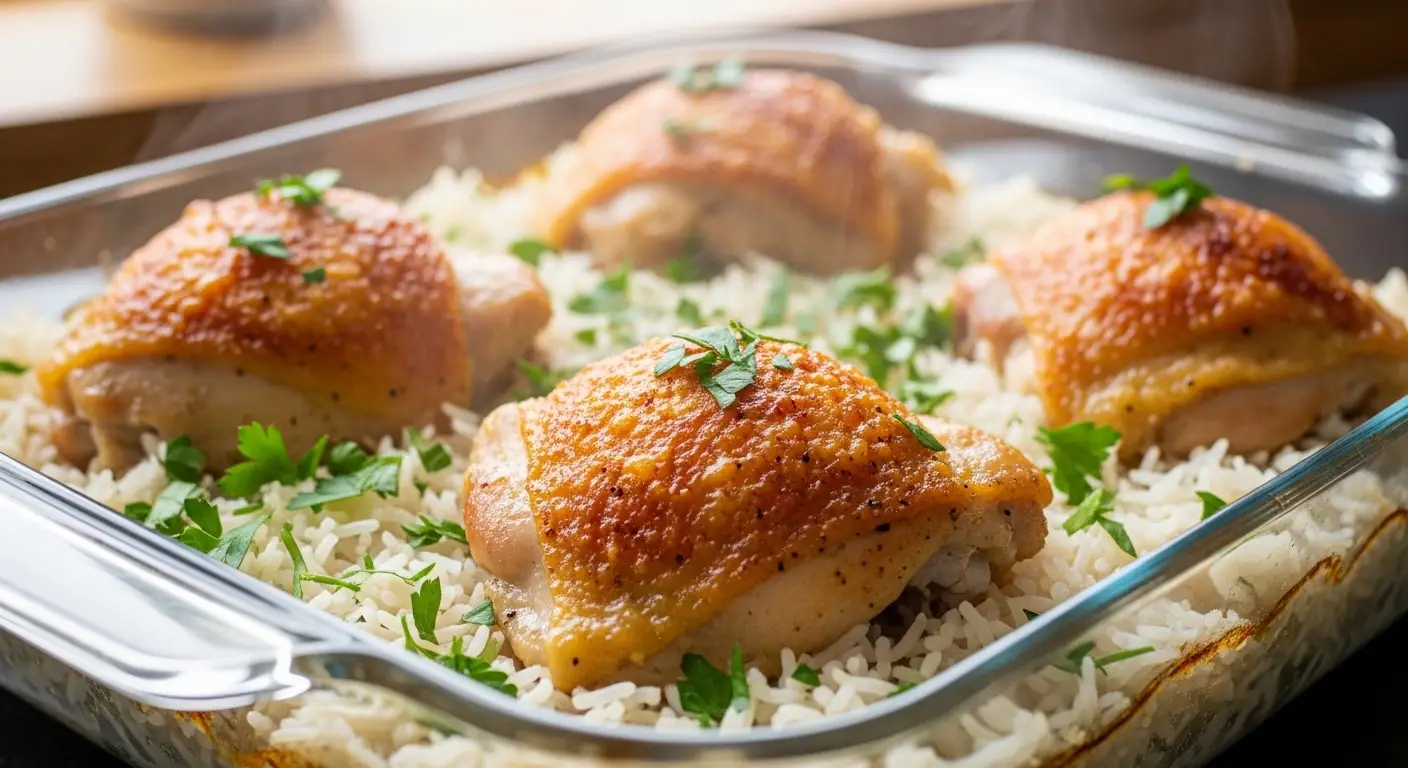
Oven Baked Chicken and Rice
I love a meal that cooks itself while I relax. This oven baked chicken and rice is exactly that kind of recipe. You put everything in one big dish, slide it into the oven, and wait for the magic to happen. It is perfect for those busy nights when you do not want to stand over a hot stove for an hour. My kids always ask for seconds when I make this, and I bet your family will too.
Today, you will learn how to make a complete meal in just one pan. I will show you how to get the rice fluffy and the chicken juicy every single time. We are using simple stuff you likely already have in your pantry. No fancy tricks or hard techniques are needed here. Just good, honest food that tastes like a warm hug on a plate.
Ready to get started? Let’s look at what we need to make this happen.
Getting Your Kitchen Ready
Before we start throwing things in the pan, we need to talk about why this dish works so well. The secret is the steam. When you cover the dish tightly, the rice soaks up all the flavor from the chicken and the broth. It turns into a savory, buttery side dish that cooks right under the meat. I used to think rice only belonged in a pot on the stove, but the oven actually does a better job of cooking it evenly.
One time, I tried to make this without covering the pan. That was a big mistake! The rice on top stayed hard as little rocks, while the rice on the bottom was mushy. I learned my lesson that day. You need a good seal with foil or a heavy lid to keep the moisture inside. This keeps the chicken from getting dry too. Now, I always double-check that my foil is tucked in tight around the edges.
The Simple Ingredients You Need

You do not need a long shopping list for this meal. Most of these items are basics. I like using chicken thighs because they stay juicy in the high heat of the oven. You can use breasts if you want, but they can get dry if you are not careful. For the rice, long-grain white rice is the best choice. It stays separate and does not turn into a big sticky clump like some other types do.
- 2 pounds of chicken thighs (skin-on or skinless)
- 1.5 cups of long-grain white rice (uncooked)
- 3 cups of chicken broth
- 2 tablespoons of melted butter
- 1 teaspoon of garlic powder
- 1 teaspoon of onion powder
- Salt and black pepper to taste
- A little bit of dried parsley for color
Using broth instead of plain water makes a huge difference. Water just makes the rice wet, but broth makes it taste rich. If you are watching your salt, use a low-sodium broth. You can always add more salt later, but you cannot take it out! IMO, the butter is also a must-have because it gives the rice a silky texture that feels fancy even though it is very simple.
Setting Up Your Baking Dish

Choosing the right pan is the first step to success. A 9×13 inch baking dish is the perfect size for this amount of food. If the pan is too small, the rice will be too deep and won’t cook right. If it is too big, the liquid might evaporate too fast and leave you with crunchy rice. I usually use a glass dish so I can see if the liquid is all gone at the end.
Start by greasing your dish. You can use a little bit of oil or a cooking spray. This keeps the rice from sticking to the bottom. There is nothing worse than scrubbing burnt rice off a pan for twenty minutes! Once the dish is ready, go ahead and preheat your oven to 375 degrees Fahrenheit. It needs to be nice and hot so the cooking starts the moment the pan goes inside.
How to Season the Chicken

We want the chicken to have flavor on both sides. I like to mix my garlic powder, onion powder, salt, and pepper in a small bowl first. This way, I do not get chicken juices on my spice jars. Rub the spices all over the chicken. Do not be shy! If you like a little kick, you can add a tiny bit of paprika or even a pinch of chili powder. I usually stick to the basics so my kids do not complain about it being spicy.
If you have time, let the chicken sit with the spices for ten minutes. This helps the salt get into the meat. But if you are in a rush, just season it and move on. It will still taste great because it simmers in the broth later. FYI, if you use skin-on thighs, make sure the skin side is facing up in the pan. This helps the skin get a little bit of color while it bakes.
Recipe Quick Info
- Prep Time: 10 minutes
- Cook Time: 50 minutes
- Servings: 4-6 people
- Difficulty: Very Easy
Putting It All Together
Now comes the fun part where everything joins up in the dish. This part is very fast. You are basically just assembling a puzzle. The main thing to remember is that the rice goes on the bottom. It needs to be submerged in the liquid to soften up. The chicken sits on top like it is resting on a bed. As the chicken cooks, its juices drip down into the rice, making it taste even better than rice cooked on the stove.
I have seen some people try to brown the chicken in a skillet first. You can do that if you want extra crispy skin, but honestly, I usually skip it. The goal here is an easy one-pan meal. If I start washing extra skillets, it defeats the purpose! The oven does a fine job on its own. Just make sure your broth is at room temperature or slightly warm so it doesn’t slow down the cooking process in the oven.
Mixing the Rice and Liquid

Pour your dry rice into the greased baking dish. Spread it out so it covers the whole bottom in an even layer. Then, pour your chicken broth over the rice. Give it a tiny stir just to make sure no rice is stuck in the corners. This is also when you add that melted butter and maybe a little extra pinch of salt into the water. The rice will drink up all that goodness.
If you want to add some veggies, this is the time. I sometimes toss in a handful of frozen peas or small carrot bits. They cook perfectly with the rice. Just don’t add too many, or they might release too much water and make the rice soggy. Stick to about half a cup of small veggies if you want to try it. It is a great way to sneak some greens into a kid’s meal!
Placing the Chicken Just Right

Lay your seasoned chicken pieces on top of the rice and broth. Try to space them out so they are not overlapping. If they are all piled on top of each other, the heat won’t reach the middle of the pile very well. You want the heat to circle around each piece of chicken. This ensures every bite is cooked safely and stays tender.
The chicken should be partially sitting in the liquid, but the tops should be dry. This lets the bottom of the chicken stay moist while the top gets a nice roasted finish. If you find that your chicken is totally covered by broth, your pan might be too small. You want the tops of the chicken to peek out like little islands in a sea of rice and broth. This is the secret to getting that perfect texture on the meat.
Sealing the Pan for the Oven

This is the most important step. Take a large piece of aluminum foil and cover the dish. Press it down hard around the edges. You want to trap all that steam inside. If steam escapes, your rice will stay hard and your chicken will be tough. I usually use two layers of foil just to be safe. It acts like a little pressure cooker inside your oven.
Slide the dish into the center of your preheated oven. Let it bake for about 45 minutes without opening the door. I know it is tempting to peek, but every time you open the door, you lose heat and steam. Just set a timer and go do something else for a while. Your house will start to smell amazing after about twenty minutes. That is how you know the flavors are coming together!
Expert Cooking Tips
- Check the Seal: If you hear whistling, steam is escaping. Press the foil tighter.
- Rice Type: Do not use “Instant” rice. It will turn to mush in this recipe.
- Crispy Finish: Take the foil off for the last 5-10 minutes if you want the chicken skin browner.
The Final Golden Touch

After the 45 minutes are up, take the dish out. Be very careful when you peel back the foil because the steam will be very hot. Check a piece of rice from the center of the pan. If it is soft, you are done! If it still feels a little bit firm, put the foil back on and give it another five or ten minutes. Every oven is a little bit different, so it is okay if yours takes a tiny bit longer.
I like to let the dish sit for five minutes after taking it out of the oven. This is called “resting.” It lets the rice finish soaking up any tiny bits of liquid left on the bottom. It also makes the chicken easier to slice. Sprinkle a little bit of fresh or dried parsley on top to make it look pretty. It looks like a meal from a restaurant, but you made it right in your own kitchen with almost no work.
Perfect Pairs and Storage
This dish is a full meal on its own, but sometimes you want a little something extra. Since the oven is already hot, I often throw a tray of broccoli or asparagus in there during the last fifteen minutes. It makes the plate look colorful and healthy. You could also serve it with a simple side salad with a lemon dressing. The brightness of the lemon cuts through the rich, buttery flavor of the rice very nicely.
If you have leftovers, you are in luck. This meal actually tastes even better the next day. The rice has more time to drink in the chicken flavor. Just make sure you store it the right way so it stays fresh. Rice can get dry in the fridge, so I have a little trick for reheating it that I will share with you. It involves just a tiny bit of extra water to bring the life back into the grains.
What to Serve on the Side

I think green veggies are the best partner for this dish. Since the chicken and rice are quite soft and savory, something with a crunch is great. Roasted carrots are also a big hit at my house. You can season them with the same garlic and onion powder you used for the chicken. This keeps all the flavors in the same family so nothing clashes on your plate.
Another idea is a nice piece of crusty bread. You can use it to scoop up any extra rice or juices. If you are feeling extra, a little bit of gravy on top of the chicken is delicious, though the dish is moist enough that you don’t really need it. This recipe is very flexible, so feel free to serve it with whatever your family likes most. It is hard to go wrong with such a classic flavor profile.
How to Store and Reheat

Put your leftovers in a container that closes tightly. It will stay good in the fridge for about three to four days. If you want to keep it longer, you can actually freeze this! It freezes very well. Just make sure it is completely cool before you put it in the freezer. It can stay frozen for about two months. When you are ready to eat it, let it thaw in the fridge overnight.
When you reheat it in the microwave, add a teaspoon of water over the rice first. This creates a little bit of steam and keeps the rice from getting hard. Cover the plate with a damp paper towel too. Heat it in one-minute bursts until it is hot all the way through. The chicken stays surprisingly juicy this way. I often bring this for lunch at work because it is so easy to warm up in the break room.
Answers to Common Questions
People often ask me about different types of rice or meat. Here are the most common things I hear when friends try this recipe for the first time.
Can I use brown rice instead?
Brown rice takes much longer to cook and needs more liquid. If you use it, you will need to add about 20 minutes to the cook time and another half cup of broth.
What if my rice is still crunchy?
This usually happens if the foil wasn’t tight. Add a splash of broth, reseal it well, and put it back in the oven for 10-15 more minutes. It should soften up.
Can I use frozen chicken?
It is best to thaw the chicken first. Using frozen chicken will release too much water and make the rice mushy. It also changes the cooking time a lot.
Is this recipe gluten-free?
Yes! As long as your chicken broth is certified gluten-free, this entire meal is safe for people who cannot eat gluten. Rice is naturally gluten-free.
Can I use chicken breasts?
You can, but watch them closely. Breasts cook faster than thighs and can dry out. Try to use thick breasts and check them at the 35-minute mark.
Time to Enjoy Your Meal
This oven baked chicken and rice is a winner because it is simple, cheap, and delicious. You get a hearty meal with very little cleaning to do afterward. I hope this becomes a regular favorite in your home like it is in mine. Just remember to seal that foil tight and let the oven do its work. Happy cooking and enjoy every bite of your homemade dinner!