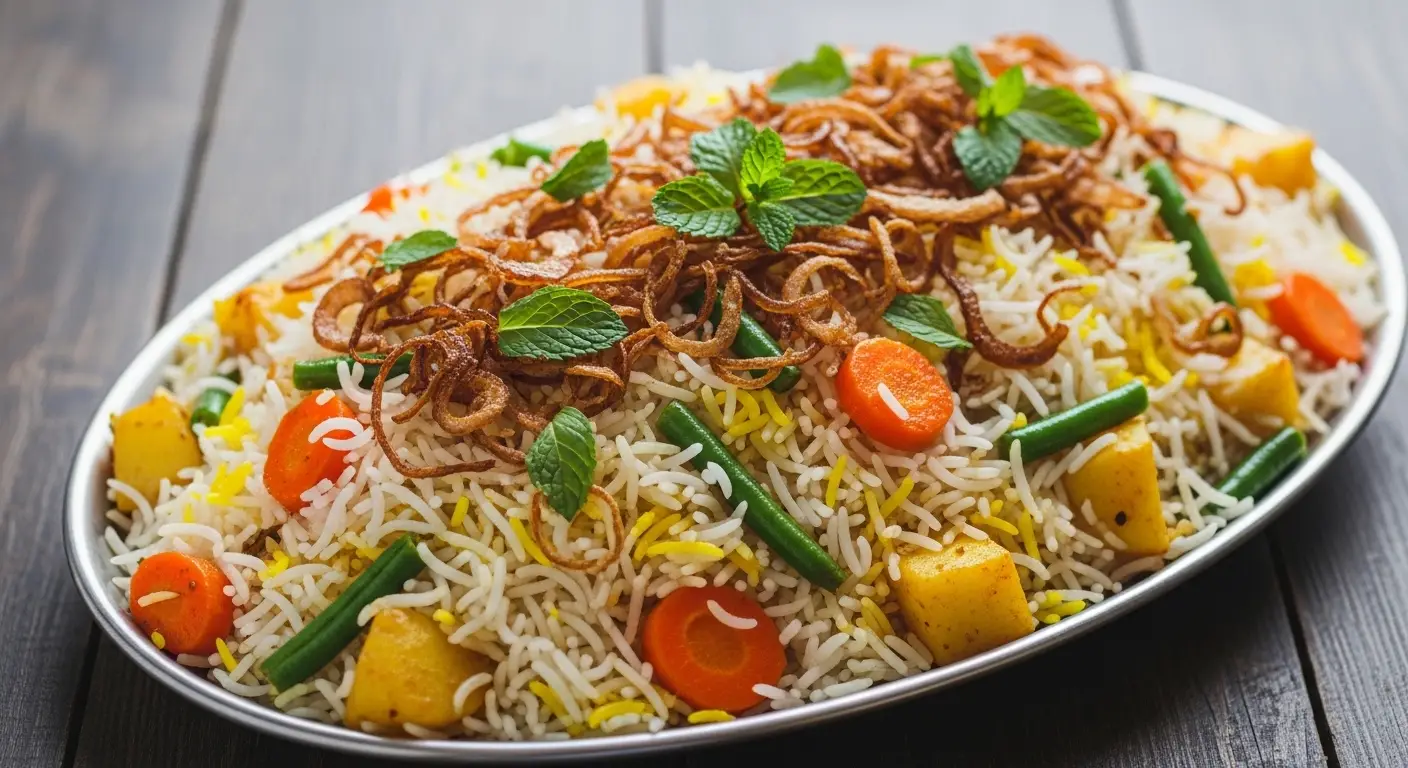
Restaurant Style Vegetable Biryani
Making a great vegetable biryani at home can feel like a big challenge. I remember the first time I tried it, and the rice turned into a sticky mush that looked more like porridge than a fancy meal. It was a sad day for my dinner guests, but it taught me a huge lesson about patience and timing. Today, I am going to show you how to get those long, separate grains of rice and that deep, spicy flavor you usually only find at a good Indian restaurant.
You will learn the secrets to layering the rice, how to cook the vegetables so they stay firm, and which spices make the whole house smell amazing. This recipe takes a bit of work, but the result is worth every minute. Once you master this, you won’t need to order takeout ever again. It is a hearty, healthy, and beautiful dish that works for big parties or a special Sunday lunch.
Check out the full guide below to start your cooking adventure!
The Secrets to a Perfect Pot of Biryani
Before we jump into the steps, we need to talk about why some biryanis taste better than others. The main difference is the quality of the rice and how you treat the onions. In a restaurant, they spend a lot of time frying onions until they are brown and crispy. These are called ‘biryanis’ and they add a sweet, smoky taste that you just can’t get from raw onions. If you skip this part, your biryani will taste flat and boring.
Another big secret is the way we cook the rice. We don’t cook it all the way in the water. We boil it until it is about 70 percent done. This means the rice still has a little bite in the middle. The rest of the cooking happens when we stack everything in layers and trap the steam inside the pot. This method is called ‘Dum’ cooking. It allows all the vegetable juices and spices to soak into the rice without making it soggy. It takes a little practice to get the timing right, but I will help you through it.
Gather Your Ingredients

To make this dish, you need high-quality ingredients. The star of the show is basmati rice. Look for ‘extra long grain’ or ‘aged’ rice if you can find it. Aged rice is better because it stays firm and doesn’t break easily. For the vegetables, I like to use a mix of carrots, green beans, potatoes, and cauliflower. You can also add green peas or even paneer cubes if you want extra protein. Fresh ginger and garlic are a must, so please don’t use the stuff from a jar if you can help it.
- 2 cups of long-grain basmati rice
- 3 cups of mixed vegetables (carrots, beans, potatoes, cauliflower)
- 2 large onions, thinly sliced
- 1 cup of thick yogurt (curd)
- 1/4 cup of fresh mint leaves
- 1/4 cup of fresh coriander (cilantro)
- 4 tablespoons of ghee or oil
- Whole spices: 1 bay leaf, 4 cloves, 2 green cardamoms, 1 inch cinnamon stick
- Powdered spices: 1 teaspoon turmeric, 1 tablespoon biryani masala, 1 teaspoon red chili powder
- A pinch of saffron soaked in 2 tablespoons of warm milk
Prepping the Rice and Vegetables

Preparation is half the battle in biryani making. Start by washing your rice at least three times. You want the water to run clear. This removes the extra starch that makes rice sticky. After washing, let the rice soak in water for 30 minutes. While the rice soaks, chop your vegetables into medium-sized pieces. If you cut them too small, they will turn into mush during the steaming process. If they are too big, they might stay raw in the middle.
I once made the mistake of cutting the potatoes too big. The rice was perfect, but the potatoes were like rocks! Now I make sure the potatoes are about one inch big. Also, thinly slice your onions. Try to make them all the same thickness so they fry evenly. This part takes time, but it is the foundation of the flavor. If you have a mandoline slicer, use it to get those perfect thin rings without crying too much.
Recipe Quick Info
- Prep Time: 40 minutes
- Cook Time: 45 minutes
- Servings: 4 people
- Difficulty: Medium
Frying the Onions to Gold

This is my favorite part because the smell is incredible. Heat a good amount of oil or ghee in a pan. Add your sliced onions and fry them on medium heat. Don’t walk away! Onions go from golden to burnt in a few seconds. Stir them constantly. Once they are a deep caramel brown, scoop them out and spread them on a paper towel. They will get even crispier as they cool down.
These onions are the secret weapon. We will use half of them in the vegetable gravy and the other half for the topping. If you find this step too hard, you can buy ‘fried onions’ from an Asian grocery store. But honestly, the ones you make at home taste way better. Just remember to keep the heat steady. If the oil is too hot, the outside burns while the inside stays soft. We want them crispy all the way through like little onion chips.
Making the Vegetable Base

Now we build the flavor. In the same pan you used for the onions, leave a little oil. Add your whole spices like the bay leaf and cinnamon. Once they sizzle, add the ginger-garlic paste. Then toss in your vegetables. Sauté them for a few minutes until they get a little color. Now, turn the heat to low and add the yogurt and powdered spices. Using low heat prevents the yogurt from curdling, which is a mistake I made many times when I was learning.
Mix everything well so the vegetables are coated in the spicy yogurt sauce. Cover the pot and cook for about 8 to 10 minutes. You want the vegetables to be 80 percent cooked. They should be tender but still have a firm shape. Add half of your fried onions and some chopped coriander and mint. These herbs are really important because they give the biryani that fresh and aromatic smell you love.
The Art of Boiling Rice

While your vegetable base is cooking, you should boil the rice. Use a large pot with plenty of water. It is just like cooking pasta! Salt the water well because this is the only chance you get to flavor the rice. Add a few green cardamoms and cloves to the water to make it extra fragrant. Bring the water to a rolling boil before adding the soaked and drained rice.
Don’t cook it for more than 7 to 8 minutes. It should be firm when you bite it. If you can smash it easily with your fingers, it’s too soft. Drain the water quickly once it’s done. I like to spread the cooked rice on a flat tray so it cools down and doesn’t keep cooking in its own steam. This is the trick to those long, separate grains of rice you see at fancy restaurants. My friend once overcooked the rice and the biryani looked like a huge cake!
Layering and Dum Cooking

Layering is the most satisfying part of the process. In a heavy-bottomed pot, spread half of the vegetable gravy at the bottom. Then add a layer of the parboiled rice. Top the rice with some of the fried onions, mint leaves, and coriander leaves. Drizzle a little saffron milk over the top for those beautiful orange and yellow colors. Repeat the layers until you use everything up.
Now we need to trap the steam. You can seal the pot with a piece of aluminum foil or a thick damp cloth. Some traditional cooks use dough to seal the lid. Place the pot on a very low flame for about 15 to 20 minutes. If your pot has a thin bottom, place it on top of a flat tawa or griddle first. This prevents the vegetables at the bottom from burning. This slow steaming is what makes everything blend together into one delicious meal.
Cooking Success Tips
- Don’t Stir: When the biryani is steaming, leave it alone! Stirring will break the long rice grains and ruin the texture.
- Pot Choice: Always use a heavy-bottomed pot. A thin pot will burn your spices and vegetables before the rice is ready.
- Resting Time: Let the biryani sit for 10 minutes after you turn off the heat. This helps the moisture distribute evenly.
Serving and Side Dishes

When you open the lid, you should get a big puff of aromatic steam. Use a flat spoon or a fork to gently fluff the rice from the sides. Try not to mix it too much because you want to see the white and colored grains separately. This makes the dish look like a piece of art. Serve it hot on a large platter and garnish with more fried onions and fresh mint.
The best companion for biryani is a simple raita. Raita is just yogurt mixed with chopped cucumbers, onions, and a little salt. The cool yogurt balances the spicy heat of the biryani perfectly. You can also serve it with some roasted papad and a wedge of lemon. I think a squeeze of fresh lemon juice right before eating makes all the flavors pop even more. Enjoy your homemade restaurant-style feast!
My Frequently Asked Questions
Can I use brown rice instead?
Yes, but you will need to soak brown rice for much longer. It takes more time to cook and the texture will be chewy. It is a healthy choice, but the taste will be different.
What if I don’t have saffron?
No problem! Saffron is expensive. You can use a pinch of turmeric powder mixed with milk. It gives the same yellow color, though it lacks the saffron scent.
Can I make this in an Instant Pot?
Yes, but the layering style is different. You cook everything together under pressure. It is faster, but the rice might not be as fluffy as the traditional dum method.
How do I store leftovers?
Store leftovers in an airtight container in the fridge for up to 3 days. Reheat it in a pan with a splash of water to keep the rice from getting dry.
Is this biryani very spicy?
It has a medium spice level. You can make it milder by using less chili powder or more yogurt. The yogurt really helps to cool things down.
Happy Cooking Everyone
I hope you have a great time making this restaurant-style vegetable biryani. It is a labor of love, but once you taste that first bite, you will feel like a master chef. Just remember to be patient with the onions and gentle with the rice. Your kitchen is going to smell amazing for the rest of the day!