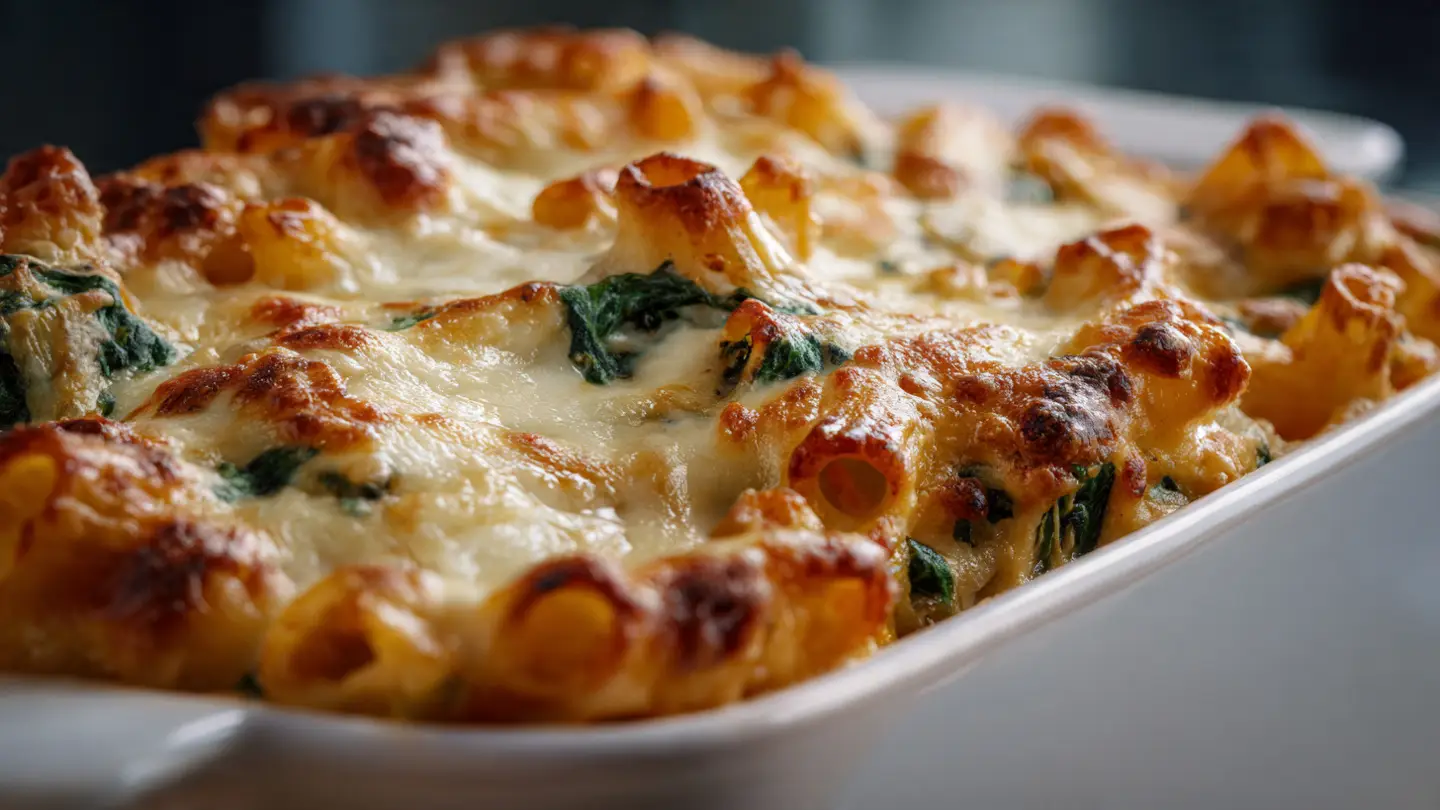
Savory Baked Ziti with Ricotta and Fresh Spinach Leaves
I love a big bowl of pasta. It feels like a warm hug on a cold day. Baked ziti is one of those meals that makes everyone at the table happy. It has melty cheese, tangy tomato sauce, and soft noodles. But sometimes, pasta can feel a bit heavy. That is why I started adding fresh spinach leaves and lots of ricotta cheese to my recipe. It makes the dish taste lighter and looks very pretty too.
In this article, you will learn how to make the best savory baked ziti ever. I will show you which pasta to buy and how to cook the spinach so it does not get watery. You will also learn my secret for making the ricotta cheese extra creamy. By the end, you will have a meal that looks like it came from a fancy shop but was made right in your own kitchen.
Check out the steps below to start cooking your new favorite dinner!
Getting the Best Ingredients Together
Before you turn on the stove, you need to have the right stuff. The quality of your food depends on what you put into it. I always look for the freshest spinach I can find. If the leaves are wilted, they will not taste good in the pasta. You also want a good brand of ziti. Some cheap pasta gets mushy when you bake it, and nobody likes mushy noodles. It is better to spend a few extra cents on the good kind.
Cheese is the most important part for me. You need a mix of textures. Ricotta is soft and milky. Mozzarella is stretchy and salty. Parmesan adds a little bite at the end. When these three melt together with the tomato sauce, something magical happens. I also like to use a simple red sauce. You can buy it in a jar or make your own. Just make sure it is not too sweet. We want this dish to be savory, not sugary.
Picking the Right Pasta Shape

Ziti is a long tube. It is smooth on the outside most of the time. This shape is perfect because the sauce goes inside the tube. When you take a bite, the sauce pops out. It is like a little surprise in every mouthful. If you cannot find ziti, you can use penne. Penne has ridges that hold sauce on the outside. Both work well, but ziti is the classic choice for a reason.
I once made this with tiny elbow noodles because I was out of ziti. It tasted okay, but it felt like Mac and Cheese with red sauce. It did not have the right fancy feeling. The long tubes of ziti make the dish look much more professional. It also helps the layers stay separated so you can see the white cheese and green spinach clearly. Choosing the right shape really does change how the meal feels in your mouth.
Fresh Spinach Versus Frozen Spinach

I always use fresh baby spinach for this recipe. Fresh leaves have a bright taste that frozen spinach just lacks. When you cook fresh spinach, it wilts down into small, soft pieces. It adds color and a little bit of earthy flavor. It makes me feel better about eating a big plate of cheesy pasta because there is something green in there! Plus, fresh spinach does not have that metallic taste you sometimes get from a bag in the freezer.
If you have to use frozen spinach, you must squeeze all the water out. Use a clean kitchen towel and push as hard as you can. If you don’t, your pasta will turn into a soggy soup. This may not work if you leave the spinach too wet. I learned this the hard way when my first ziti came out grey and watery. Stick to fresh leaves if you can. They are easier to handle and taste much better when they bake under the cheese.
IMO, the texture of fresh leaves is the best part. They get nestled in between the noodles and soak up the garlic and oil. It makes every bite feel balanced. You get a bit of dough, a bit of cheese, and a bit of fresh vegetable. It is a great way to sneak greens into a meal for kids too. They usually don’t mind the spinach when it is covered in melty mozzarella.
Quick Prep Tips Salt the Water: Make the pasta water taste like the sea so the noodles have flavor. Garlic Check: Use fresh garlic instead of the powder for a much stronger smell.
How to Build Your Pasta Layers
Making baked ziti is like building a house. You need a strong base and good layers to keep it together. If you just throw everything in a bowl and stir, it will taste fine, but it won’t be special. I like to see the different colors when I scoop it out of the pan. Putting the ricotta in the middle creates a creamy layer that stays soft while the top gets crispy. It is the best part of the whole meal.
Start with a little sauce on the bottom of the pan. This stops the noodles from sticking. Then you add your cooked pasta mixed with more sauce. Next comes the spinach and the big scoops of ricotta. I don’t stir the ricotta in all the way. I leave it in big clumps. This way, you get a warm pocket of cheese when you eat. It feels much more fancy than just a mixed-up mess. Finally, cover the whole thing with a thick blanket of mozzarella cheese.
Cooking the Pasta Just Right

Most people cook their pasta for too long. For baked ziti, you should cook the noodles for two minutes less than the box says. This is called “al dente.” The noodles should still have a little bite to them. Why? Because they will keep cooking in the oven! If they are soft when they leave the pot, they will turn into mush after 30 minutes in the hot oven. I want my pasta to hold its shape when I cut into it.
Drain the pasta well and let it cool for just a minute. I usually add a tiny bit of olive oil so they don’t stick together while I get the sauce ready. This is a practical tip most blogs skip, but it saves a lot of frustration. If your noodles turn into one big ball, it is hard to mix them with the sauce later. Keep them loose and ready to go. This makes the assembly part much faster and cleaner.
Mixing the Ricotta Mixture

Do not just use plain ricotta out of the tub. It can be a little dry or grainy. I mix mine with a little bit of salt, pepper, and one egg. The egg helps the cheese stay fluffy and set up in the oven. It makes the texture feel like a cloud. I also add a handful of grated Parmesan to the mix. It adds a salty kick that the mild ricotta needs. Sometimes I add some lemon zest if I want it to taste very fresh.
I remember one time I forgot the egg. The cheese just melted into the sauce and disappeared. It still tasted good, but I missed those big white bites of ricotta. Now I never forget the egg. It is a small step that makes a huge difference. You can also mix some of the fresh spinach directly into this cheese mix. This ensures every bite has a bit of green and a bit of cream. It looks very professional when you serve it to guests.
The Importance of the Top Layer

The top of the ziti is the first thing people see. It needs to be perfect. Use a lot of mozzarella. I mean a lot. You want a thick layer that covers every single noodle. If a noodle sticks out, it will get hard and crunchy in the oven. That can be okay for some, but I like my pasta soft. A full cheese cover keeps the moisture inside the dish. It acts like a lid that tastes like heaven.
For a nice golden color, I turn on the broiler for the last two minutes. Watch it like a hawk! It can go from perfect to burnt in ten seconds. I once ruined a whole pan because I went to check my phone. FYI, burnt cheese does not taste like a smoky treat. It just tastes bitter. When the cheese has brown bubbles on top, take it out. Let it sit for ten minutes before you cut it. This lets the layers stay together instead of sliding apart.
The Best Ways to Serve and Save Your Ziti
Once the ziti comes out of the oven, the smell will fill your whole house. It smells like garlic, toasted cheese, and warm tomatoes. It is hard to wait, but waiting is key. If you dive in right away, the cheese will be too runny. Let the dish rest on the counter. This lets the sauce soak into the noodles a bit more. It makes the flavor much deeper. While you wait, you can set the table and get your side dishes ready.
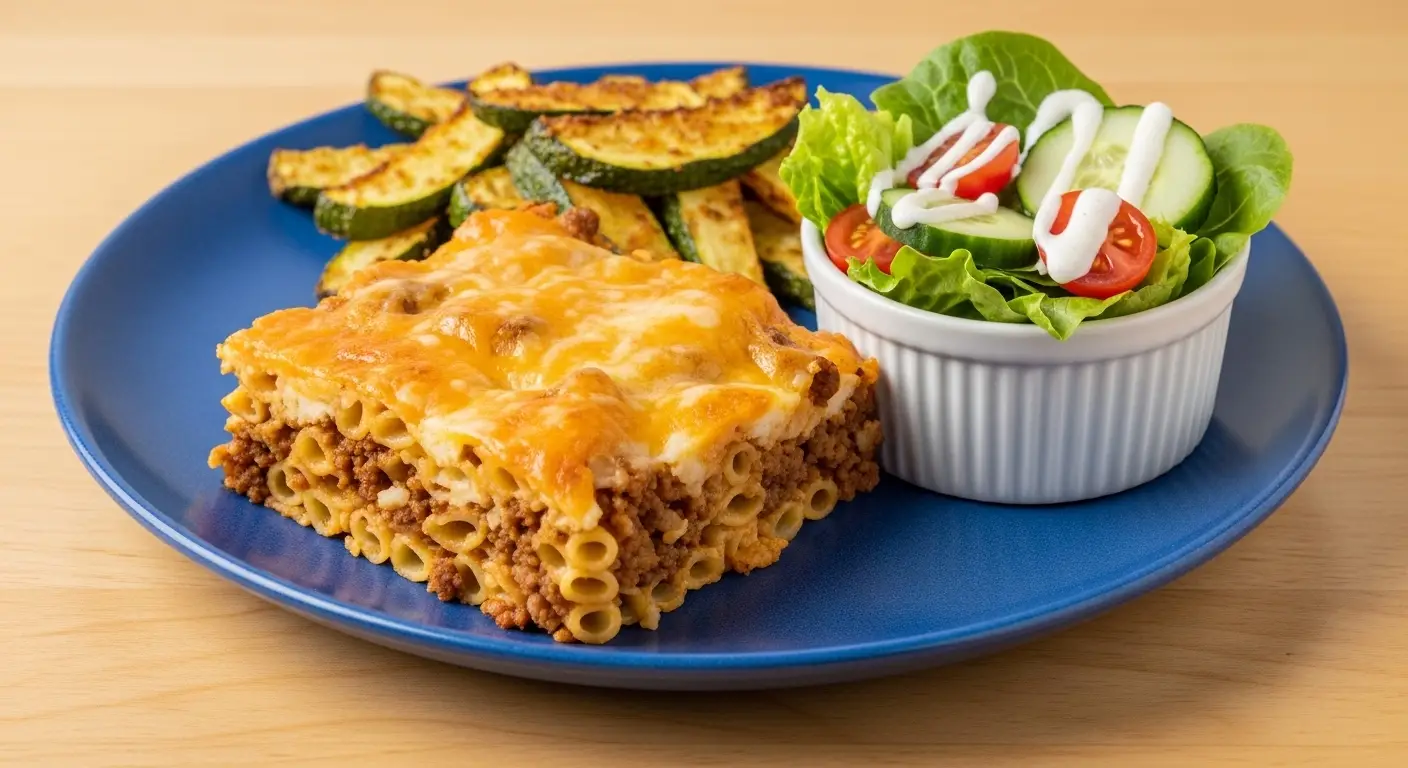
I think baked ziti is a full meal on its own, but a nice side can make it even better. A simple green salad with a sharp vinegar dressing is great. The sour dressing cuts through all that heavy cheese. Garlic bread is also a classic choice. You can use the bread to scoop up any extra sauce or ricotta left on your plate. It is a very filling dinner that usually leaves people wanting seconds. Make sure you have enough for everyone!
Choosing the Right Side Dishes

Since this ziti is very rich, you want something light on the side. I usually go for a salad with cucumbers and tomatoes. It adds a nice crunch that the soft pasta does not have. If you want something warm, roasted broccoli or green beans work well too. Just keep the flavors simple. You don’t want the side dish to fight with the pasta for attention. The ziti is the star of the show.
For a different twist, you could serve it with a fruit salad. This is great for kids who might find the savory flavors a bit strong. A bowl of grapes or apple slices can be a nice palate cleanser. Personally, I stick to the garlic bread. There is something so good about dipping toasted bread into melted mozzarella. It is comfort food at its best. Just don’t fill up on bread before you get to the main course!
How to Reheat Leftovers Safely

Baked ziti is one of those rare foods that might taste better the next day. The flavors have more time to mingle. However, reheating it can be tricky. If you use the microwave, the edges can get hard. I like to put a little splash of water or extra sauce on top before I heat it up. This creates steam and keeps the pasta moist. Cover the bowl with a damp paper towel for the best results.
If you have a lot left over, use the oven again. Put the ziti in a small dish and cover it with foil. Bake it at a low heat until the middle is hot. This keeps the cheese from getting rubbery. I usually make a double batch just so I have lunch for the whole week. It saves me so much time. Just remember to keep it in a sealed container in the fridge so it stays fresh. It will stay good for about three to four days.
Freezing Ziti for Later

You can actually freeze baked ziti before or after you bake it. If you are a busy person, this is a lifesaver. I like to make two pans at once. I bake one for dinner and freeze the other one raw. When I need a quick meal, I just take it out and put it in the oven. It takes longer to cook from frozen, but it still tastes fresh. It is much better than buying a frozen dinner from the grocery store.
Make sure you wrap it very well. Use plastic wrap first, then a layer of heavy foil. This stops freezer burn. Label the top with the date so you don’t forget how long it has been in there. It can stay in the freezer for about two months. To cook it, you can let it thaw in the fridge overnight or bake it straight from the freezer. Just add about twenty minutes to the bake time if it is still frozen. It is a great way to always have a home-cooked meal ready to go.
Serving Ideas Fresh Herbs: Sprinkle fresh basil or parsley on top after baking for a pop of color. Red Pepper Flakes: If you like a little heat, shake some spicy flakes over your bowl.
Common Questions About Baked Ziti
Can I use different cheeses? Yes! You can add provolone for a sharper taste or fontina for more melt. Just keep the ricotta for that creamy texture in the middle.
What if I do not have a baking dish? You can use a large oven-safe skillet or even a deep cake pan. Just make sure it can handle high heat and holds all the pasta.
Is there a way to make this meatier? You can brown some ground beef or Italian sausage and mix it into the red sauce. It makes the dish very heavy and filling.
How do I keep the spinach from being slimy? Don’t overcook the spinach before baking. Just toss it with the warm pasta so it wilts slightly. The oven will do the rest of the work.
Can I use whole wheat pasta? You can, but it has a stronger flavor and a grainier texture. You might need extra sauce since whole wheat pasta soaks up more liquid.
Enjoy Your Homemade Pasta Feast
Making this baked ziti is a great way to show love to your family and friends. It is simple, cheap, and tastes amazing. You get a perfect mix of cheese, pasta, and healthy spinach in every bite. Once you master the layers and the al dente noodles, you will want to make this every single week. Enjoy your warm, cheesy meal!