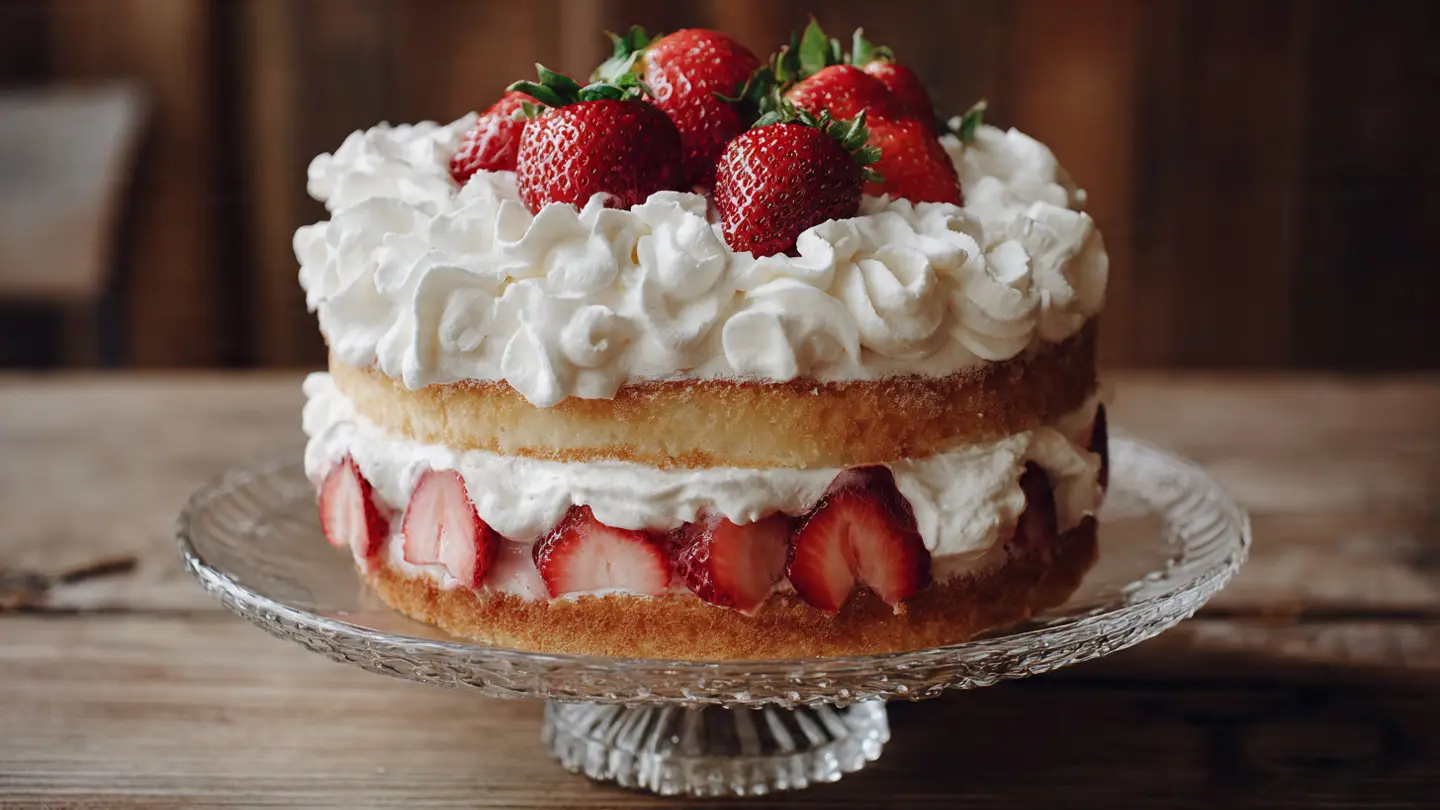
Strawberry Cream Cake
Making a cake should be fun and easy for everyone. I love baking because it makes my whole house smell like sugar and vanilla. Today I want to show you how to make my favorite Strawberry Cream Cake. It is light, fluffy, and full of bright red berries. This is the kind of cake that makes people smile at birthday parties or family dinners.
You do not need to be a pro to get this right. I have made many mistakes in my kitchen over the years. Once, I even forgot the sugar in a batch of cookies! They tasted like cardboard. But those mistakes taught me exactly how to explain things so you do not have to worry. We will go through every step together so your cake turns out great on the first try.
If you want a dessert that looks fancy but feels simple to eat, this is the one. Grab your apron and let us get started. I promise your friends will ask for the recipe after they take their first bite.
Check out the steps below to make your own masterpiece.
The Basics of a Great Fruit Cake
A good cake starts with the right base. For a strawberry cream cake, you want something that can hold up the heavy fruit and cream. Some cakes are too soft and fall apart. Others are too dry like a sponge. I like a mix that stays moist but has enough strength to stay in one piece when you cut it. It feels like a hug in food form.
Freshness is the secret key here. I always look for the brightest berries at the store. If they look dull or mushy, the cake will not taste as good. Taking the time to pick good food makes the final result so much better. You are building something special, so the parts you use matter a lot. Let us look at what you need to gather in your kitchen.
What You Need to Buy

You will need a few simple things from the grocery store. Most of these might already be in your pantry. You need all-purpose flour, granulated sugar, and baking powder. For the wet parts, get some unsalted butter, large eggs, and whole milk. Do not forget the vanilla extract! It makes everything smell like a dream. IMO, using real vanilla is much better than the fake kind. It gives a deeper flavor that you can really notice in the sponge.
The most important part is the fruit. I use two pounds of fresh strawberries. Look for ones that are red all the way to the top. If they have a lot of white or green near the stem, they will be sour. You also need heavy whipping cream for the top. Make sure it is very cold before you use it. Cold cream bubbles up better and stays stiff so it does not slide off your cake while you are eating.
Getting Your Tools Ready

Before you start mixing, you need to have your tools ready. I use two 9-inch round cake pans for this recipe. You will also need a big mixing bowl and a whisk or an electric hand mixer. Having everything out on the counter makes the job much faster. I hate searching for a spoon when my hands are covered in flour! It makes a big mess that is hard to clean up later.
You should also grab some parchment paper. This is a special paper that keeps the cake from sticking to the pan. I learned this the hard way after a cake stuck so badly I had to eat it with a spoon from the pan! It was still tasty, but it did not look pretty. Using paper makes the cake pop right out perfectly. It saves a lot of stress and keeps your cake looking like it came from a bakery.
How to Bake the Perfect Sponge
The sponge is the heart of the cake. It needs to be sweet but not too heavy. When I bake, I like to think about how the air gets into the batter. That air is what makes the cake fluffy instead of flat. We want a cake that feels like a cloud when you bite into it. Following the order of the steps is the best way to make sure that happens every time.
Temperature is a big deal in baking. I always take my eggs and butter out of the fridge an hour before I start. This lets them get to room temperature. If the butter is cold, it will not mix well with the sugar. You will end up with little yellow lumps in your batter. Room temperature ingredients blend together smoothly and create a much better texture for your mouth to enjoy.
Recipe Quick Info
- Prep Time: 30 minutes
- Cook Time: 25 minutes
- Servings: 10 people
- Difficulty: Easy
Mixing the Batter Steps

- Heat your oven to 350 degrees. Grease your pans with butter and put the parchment paper on the bottom.
- Cream the soft butter and sugar together in a big bowl. Do this until it looks pale and feels fluffy.
- Add the eggs one at a time. Mix well after each egg so the batter stays smooth.
- Stir in the vanilla. Then, add the flour and baking powder. Switch between adding a little flour and a little milk until it is all gone.
- Pour the batter into your two pans. Use a spoon to make the tops flat so they bake evenly.
Try not to over-mix the batter once you add the flour. If you stir too much, the cake can become tough like bread. I just stir until I don’t see any more white streaks of flour. This keeps the cake tender. It is a simple trick that makes a huge difference in how the cake feels when you eat it. Soft and light is always the goal for a cream cake.
Baking and Cooling Time

Put your pans in the middle of the oven. They usually take about 25 to 30 minutes to cook. You will know they are done when the tops turn a light golden brown. I also use the toothpick test. Stick a small wooden stick into the center. If it comes out clean, the cake is ready. If it has wet batter on it, give it five more minutes. Checking early prevents the cake from burning or getting too dry.
Once they are done, let them sit in the pans for ten minutes. Then, move them to a wire rack to cool all the way down. This is the hardest part because the house smells so good! But you must wait. If the cake is even a little bit warm, the whipped cream will melt and turn into a milky puddle. I once tried to frost a warm cake because I was in a rush. It was a disaster! The cream slid right off onto the table. Patience is very important here.
Adding the Berries and Cream
Now comes the best part of the whole process. Putting the cake together is like making art. You get to layer the white cream and the red berries. It looks so beautiful when you are finished. I find this part very relaxing. There is no right or wrong way to decorate it as long as it has plenty of fruit and cream on every single slice.
Whipped cream is very simple but you have to be careful. If you whip it too long, it turns into butter! Keep a close eye on it. As soon as it looks thick and holds its shape on the whisk, stop. You want it to look like a soft white blanket. Adding a little bit of powdered sugar makes it stable and sweet. This helps the cream stay pretty even after you cut the cake into pieces for your guests.
Pro Baker Secret
- Cold Bowl: Put your metal mixing bowl in the freezer for 10 minutes before whipping the cream. This helps the cream stay cold and fluff up much faster. It is a total lifesaver in the summer!
Prepping the Strawberry Filling

Wash your berries and take off the green tops. Slice most of them into thin circles. I save the prettiest whole berries to put on the very top of the cake. Put the sliced berries in a bowl with a spoonful of sugar. Let them sit for ten minutes. This makes them release their juice. That juice will soak into the cake and make it taste like fruit through and through. It adds so much moisture to the dessert.
If your berries are very sour, you might need a little extra sugar. Taste one first to check! This is the part of cooking where you get to use your senses. Sometimes nature gives us very sweet berries, and sometimes they need a little help. FYI, you can also add a tiny squeeze of lemon juice to the berries. It makes the red color pop and balances out the sweet sugar. It is a tiny step that makes a big impact.
Building the Layers

Place one cake layer on a plate. Spread a thick layer of whipped cream over the top. Then, pile on those juicy strawberry slices. Do not be shy with the fruit! You want berries in every bite. Place the second cake layer on top of the fruit. Press down very gently just to make sure it stays in place. If you press too hard, the cream will squish out the sides and look messy.
Cover the top and the sides with the rest of the cream. You can make it look smooth or leave it with swirls for a homey look. I like the swirls because they hold the whole berries better. Put those saved whole berries on top in a circle or a big pile in the middle. It looks like something from a fancy magazine! Everyone will be so impressed that you made it yourself from scratch. It really is a beautiful sight to see on the table.
Serving and Storage Tips

This cake is best when eaten the same day you make it. The cream is freshest and the cake is softest. If you have leftovers, keep them in the fridge. Use a cake cover or a large bowl to cover it so it does not pick up any smells from other food. It will stay good for about two days. After that, the berries might get a little soft, but it will still taste yummy for a quick snack.
When you go to cut the cake, use a sharp knife. You can dip the knife in warm water and wipe it dry between cuts. This keeps the cream from sticking to the knife. It gives you those perfect, clean slices where you can see all the layers clearly. It makes the cake look just as good on the plate as it did on the stand. Serving it with a glass of cold milk or a cup of tea is a great way to end a meal.
Common Questions About This Cake
Can I use frozen strawberries?
I do not recommend frozen ones. They release too much water when they melt. This makes the cream runny and the cake soggy. Fresh is always best for this specific recipe.
What if I do not have parchment paper?
You can butter the pan and then shake some flour inside. Tap out the extra flour. This creates a thin wall that helps the cake come out, but parchment paper is still the safest choice.
Can I make the cake layers a day early?
Yes! Bake the sponge layers and wrap them in plastic wrap once they are cool. Keep them at room temperature. Add the cream and berries right before you want to serve the cake.
Why did my whipped cream turn watery?
This usually happens if the cream or the bowl was too warm. Always use heavy cream straight from the fridge. If it is already watery, you cannot fix it, so start over with cold cream.
Can I use a different fruit?
Sure! Raspberries or peaches work great too. Just make sure the fruit is ripe and not too wet. The steps for the sponge and the cream stay exactly the same.
Time to Enjoy Your Cake
You now have all the tools to make a perfect Strawberry Cream Cake. It is a simple joy that brings people together. I hope you have as much fun baking it as I do. Remember to take your time and enjoy the sweet smells. Happy baking!