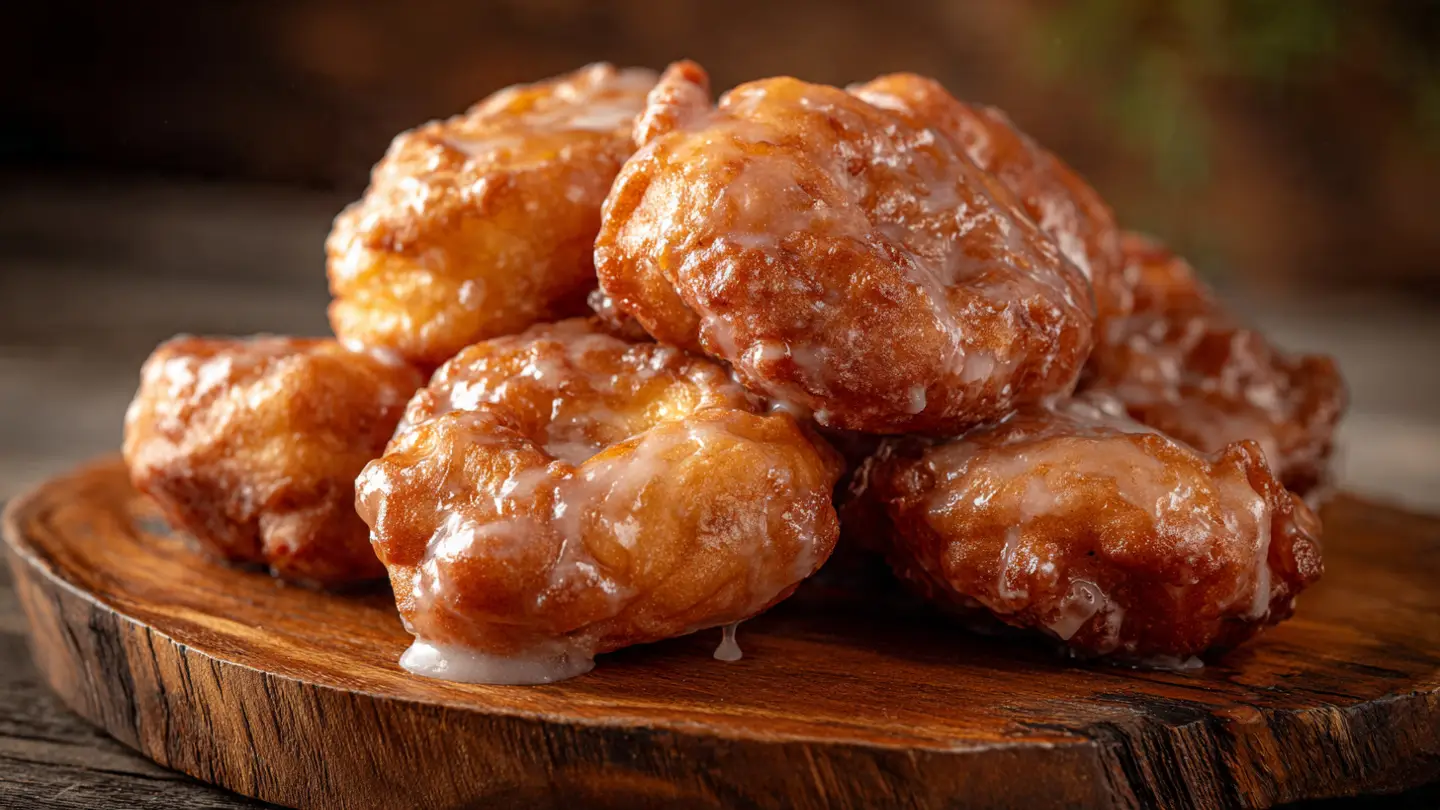
Warm Baked Apple Fritters for Cozy Mornings
I love the smell of cinnamon and apples in the kitchen. It makes the whole house feel warm and happy. Today, I want to show you how to make baked apple fritters that taste like a dream. These are not fried in heavy oil, so they are much easier to clean up after. You will learn how to pick the right apples and mix a dough that stays soft and light.
Making these treats is a great way to start a slow weekend. My family always runs to the kitchen when they smell these in the oven. It is a simple recipe that anyone can try, even if you do not bake very often. Grab your apron and let us get started on these tasty bites.
Check out the steps below to make your morning extra special.
Why Baking Fritters is Better than Frying
Most people think fritters have to be dropped into a big pot of hot oil. That can be messy and a bit scary if you are not used to it. I once tried to fry dough and ended up with oil splashes all over my favorite shirt. It was a big mess! Baking them in the oven is much calmer and keeps your kitchen clean. You still get that golden crust and soft middle without the greasy feeling on your fingers.
Baked fritters are also great because you can cook a whole bunch at once on a tray. When you fry them, you have to stand over the stove and do a few at a time. This oven method lets you sit down and drink your coffee while the heat does the work. They are perfect for people who want a sweet treat that feels a little lighter but still hits the spot. IMO, the texture is more like a soft muffin top mixed with a donut, which is the best of both worlds.
The Simple Ingredients You Need

To make these fritters, you do not need anything fancy. Most of these items are likely in your pantry right now. You will need all-purpose flour, sugar, baking powder, and a pinch of salt for the dry base. For the wet parts, gather some milk, one large egg, and a little bit of melted butter. The butter helps the fritters stay moist and gives them a rich flavor that oil just cannot match.
The stars of the show are the apples and the spices. I like to use ground cinnamon and a tiny bit of nutmeg. For the apples, I usually grab two or three medium ones. You want them to be firm so they do not turn into mush when they get hot. Here is a quick list of everything to get ready:
- 2 cups all-purpose flour
- 1/3 cup granulated sugar
- 1 tablespoon baking powder
- 1 teaspoon ground cinnamon
- 1/2 teaspoon salt
- 3/4 cup whole milk
- 2 large eggs
- 2 tablespoons melted butter
- 2 cups peeled and chopped apples
Choosing the Best Apples for Baking

Not all apples act the same way when you cook them. Some apples are soft and sweet, like Red Delicious. If you use those, they might disappear into the dough and become watery. I learned this the hard way when I made a batch that felt soggy. For the best bite, you want an apple that stays a little bit crunchy even after it leaves the oven. It makes the texture much more interesting.
Granny Smith apples are my top choice because they are tart. That sour taste balances out the sweet sugar in the dough perfectly. Honeycrisp or Fuji apples also work very well because they are firm and juicy. If you have a mix of apples in your bowl, feel free to use a combo! Using two different kinds of apples can give your fritters a deep flavor that surprises everyone who tries them. Just make sure to peel them first so you do not have tough skin in your soft bread.
How to Prep Your Apples Correctly

The way you cut your apples matters more than you might think. If the pieces are too big, they will weigh down the dough and might not cook all the way through. If they are too small, they might melt away. I find that dicing them into small cubes about the size of a pea is just right. This ensures that every single bite of your fritter has a little piece of fruit in it. It also helps the fritters hold their shape on the baking sheet.
One trick I always use is to toss the chopped apples with a tiny bit of flour before adding them to the batter. This keeps them from sinking to the bottom of the bowl. It also helps the dough stick to the fruit better. It only takes an extra ten seconds, but it makes a big difference in how the fritters look. Make sure your pieces are even so they all soften up at the exact same time in the heat.
Mixing the Perfect Fritter Dough

Mixing the dough is the part where you have to be careful. You want to stir the dry and wet ingredients together until they just barely combine. If you stir too much, the flour will get tough. This results in a fritter that is hard like a rock instead of soft like a cloud. I always tell people to stop stirring as soon as the white streaks of flour disappear. It is okay if there are a few small lumps in there!
The batter should be thick. It should not run off your spoon like water. It should be thick enough to hold its shape when you drop a scoop onto the pan. If it feels too thin, add one more spoonful of flour. If it is way too thick to stir, add a tiny splash of milk. Getting the feel of the dough takes a little practice, but you will know it is right when it looks like heavy muffin batter. This thickness is what gives the fritter its rustic, bumpy look that we all love.
Step by Step Baking Instructions

Now it is time to turn on the heat. Set your oven to 400 degrees Fahrenheit. While that warms up, line a large baking sheet with parchment paper. This is my favorite tip because it means the fritters will never stick, and you don’t have to scrub the pan later. Use a large spoon or an ice cream scoop to put mounds of dough onto the paper. Space them out about two inches apart because they will spread a little bit as they bake.
- Heat oven to 400°F and prep your tray.
- Whisk flour, sugar, powder, cinnamon, and salt in a big bowl.
- In a smaller bowl, beat the eggs and stir in milk and butter.
- Pour wet into dry and stir gently.
- Fold in your diced apples until spread evenly.
- Drop big spoonfuls onto the tray.
- Bake for 12 to 15 minutes until the tops are golden brown.
Check them at the 12-minute mark. You can poke the middle with a toothpick. If it comes out clean, they are done! Let them cool on the pan for just a minute before moving them to a wire rack. They need to be a little warm when you add the glaze so it can soak in just a tiny bit.
Recipe Quick Info
- Prep Time: 15 minutes
- Cook Time: 15 minutes
- Servings: 12 fritters
- Difficulty: Easy
Making the Sweet Vanilla Glaze

A fritter is not really finished until it has a shiny glaze on top. This is what makes it taste like it came from a fancy bakery. To make the glaze, you only need powdered sugar, a little milk, and vanilla. Whisk them together in a small bowl until the mixture is smooth and runny. If it is too thick to drizzle, add a half teaspoon of milk. If it is too thin, add more sugar. It is very easy to fix!
I like to dip the tops of the fritters directly into the bowl while they are still warm. This creates a thin, even coat that hardens into a sweet shell. Some people prefer to drizzle it with a fork for a messy look. Both ways taste great! Just make sure you have a piece of paper or a tray under your cooling rack to catch the drips. It makes cleanup much faster. FYI, adding a pinch of salt to your glaze makes the apple flavor pop even more.
Tips for the Best Results

One mistake I made a lot when I started was using cold eggs. If your eggs and milk are cold, the melted butter might clump up when you mix them. Try to let them sit on the counter for a few minutes first. Also, do not skip the baking powder! That is what makes them puff up. If your baking powder is old, the fritters will stay flat and heavy. You can check if it is fresh by putting a tiny bit in hot water. If it bubbles, it is good to go.
Another tip is to watch the color. You want a deep golden brown. If they look pale, they might taste like raw flour in the middle. If they get too dark, the apples might get a bit bitter. Aim for that perfect toasted look. If you want a bit of crunch, you can sprinkle a little cinnamon sugar on top of the glaze before it dries. It adds a nice texture that feels very cozy.
Pro Baking Tips
- Fresh Powder: Always use baking powder less than six months old for the best rise.
- Uniform Cuts: Cut apples the same size so they cook evenly through the dough.
- Gentle Mixing: Use a spatula instead of a whisk for the final mix to avoid overworking.
Serving Suggestions for Your Fritters

These are definitely best when they are fresh and warm. I love serving them with a big mug of hot coffee or a glass of cold milk. If you are having friends over, you can put them on a big wooden board with some extra apple slices and honey. They look very pretty when stacked up in a pile. They are great for a holiday breakfast or just a random Tuesday when you need a smile.
If you want to be extra fancy, you can serve them with a scoop of vanilla ice cream for dessert. The warm apple and cinnamon go so well with the cold cream. You could even drizzle a little caramel sauce over the top if you are feeling wild. These fritters are very flexible. You can eat them with your hands like a donut or use a fork if they are extra gooey with glaze. No matter how you eat them, they will be gone fast!
How to Store and Reheat Leftovers

If you somehow have leftovers, you can keep them for a couple of days. Put them in a container that shuts tight so they do not get dry. I find they stay best at room temperature for about two days. If you keep them longer, the glaze might get a little sticky or wet because of the moisture in the apples. That is okay, they still taste good, but they look a little different.
To make them taste fresh again, put them in a toaster oven for a few minutes. This helps the outside get a little crisp again. Avoid the microwave if you can, because it can make the bread part a bit chewy. A quick warm-up in the oven makes the house smell like apples all over again! You can even freeze them for a month. Just wrap them well and warm them up when you are ready for a treat.
Common Questions About Fritters
Can I use whole wheat flour instead?
Yes, but use half whole wheat and half white flour. All whole wheat can make them too heavy and dry. Adding a little extra milk helps too.
What if I don’t have a baking sheet?
You can use a muffin tin! They will look more like muffins than fritters, but they will still taste delicious. Grease the tin well first.
Can I add nuts to the batter?
Absolutely. Chopped walnuts or pecans add a great crunch. Add about half a cup of nuts when you fold in the apples.
Do I have to peel the apples?
I suggest peeling them because the skin can get tough in the oven. If you use organic apples with thin skin, you can leave it on if you prefer.
How do I keep them from being soggy?
Make sure your oven is hot before putting them in. Baking at 400°F creates a crust quickly, which stops the apple juice from making the dough wet.
Enjoy Your Warm Apple Treats
Baked apple fritters are the perfect way to bring joy to your morning. They are easy to make, smell amazing, and taste even better. I hope you enjoy making these for yourself and your loved ones. Happy baking and stay cozy!