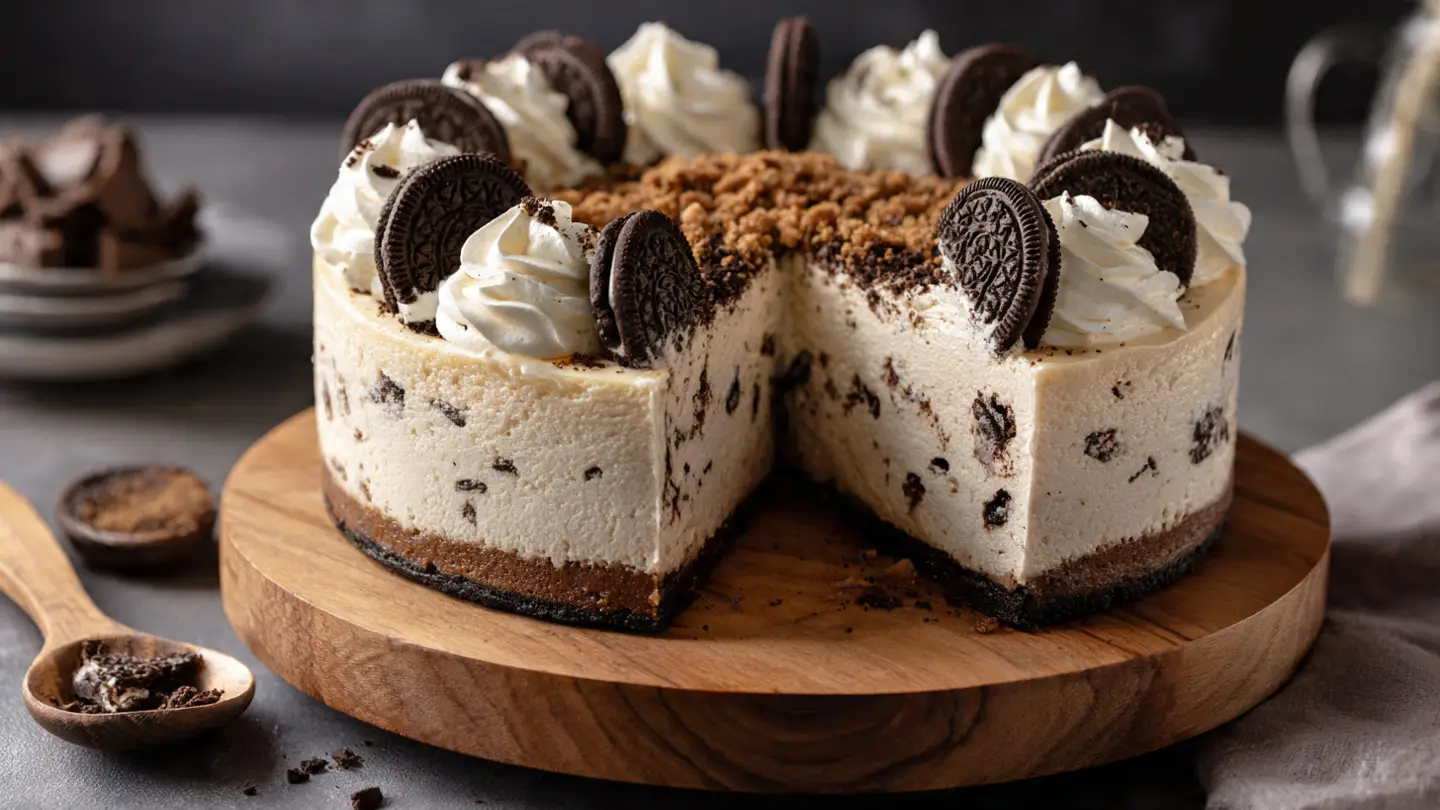
Decadent Oreo Cheesecake with a Cookie Crust
I love cookies and cream. It is the best flavor for any dessert. When I first tried making a cheesecake with Oreos, I was a bit scared. It seemed like a lot of work for one person. But after my first bite, I knew I had to share this with everyone. This cake is very thick and smooth. It tastes just like the middle of the cookie but much better.
You will learn how to bake a perfect cheesecake today. I will show you every step. We are going to use a lot of cookies. We will put them in the bottom and in the middle. You do not need to be a professional chef to do this. I made many mistakes so you do not have to. My goal is to help you make a dessert that looks like it came from a fancy shop.
Grab your apron and your favorite mixing bowl. We are going to make something special. Check out the ingredients below to get started on this sweet treat!
Recipe Quick Info
- Prep Time: 30 minutes
- Cook Time: 60 minutes
- Servings: 12 slices
- Difficulty: Medium
Getting Ready for Baking Success
Before we start mixing, we need to talk about the tools. A good pan is very important for cheesecake. You need a springform pan. This is a pan where the sides come off. If you use a regular cake pan, you will never get the cake out in one piece. I learned that the hard way. One time, I tried to flip a cheesecake onto a plate. It turned into a giant pile of mush. It still tasted good, but it looked terrible.
You also need all your food at room temperature. This is the most important rule. If your cream cheese is cold, you will have tiny white lumps. No one likes lumpy cake. Take your eggs and cheese out of the fridge at least two hours before you start. This makes the batter very smooth and easy to mix. Soft cheese mixes better with sugar and cream.
The Magic Ingredients List

You need a few basic things to make this cake. First, you need 36 Oreo cookies. You can use the store brand too. They work just as well. You will also need 4 packages of cream cheese. Make sure they are the full-fat kind. Low-fat cheese does not set as well and might make the cake runny. You want that rich feeling in every bite. IMO, the full-fat stuff is always worth it for a special dessert.
- 36 chocolate sandwich cookies (like Oreos)
- 5 tablespoons of melted butter
- 32 ounces of soft cream cheese
- 1 cup of white sugar
- 1 cup of sour cream
- 1 tablespoon of vanilla extract
- 4 large eggs
- 10 more cookies for the top
Making the Perfect Cookie Crust

The crust is the foundation of our cake. You need to crush the cookies until they look like sand. I use a plastic bag and a rolling pin. It is fun to smash them! You can also use a food processor if you have one. Just make sure there are no big chunks left. If the chunks are too big, the crust will fall apart when you cut the cake. Mix the crumbs with melted butter until it feels like wet sand.
Press the mix into your pan very hard. Use the bottom of a flat glass to push it down. You want it to be even and firm. I like to bake my crust for 10 minutes before I add the filling. This makes it stay crunchy even after the cake sits in the fridge. FYI, a soggy crust is the worst thing that can happen to a cheesecake. This extra step fixes that problem completely.
Mixing and Baking Your Masterpiece
Now we get to the fun part of the process. Mixing the batter feels like science. You have to be careful not to mix too fast. If you beat it too much, you put air into the cheese. Air makes the cake rise like a balloon and then crash. When it crashes, it gets big cracks on top. We want a flat, pretty top. Keep your mixer on a low speed the whole time to keep the air out.
Baking is also about patience. You cannot rush a cheesecake. It needs a slow oven and a gentle cooling period. Many people take the cake out as soon as the timer dings. Do not do that! If the cake cools too fast, it will pull away from the sides and crack. I once took a cake out and put it near an open window. The cold air made it split right down the middle like a canyon. It was a sad day for my kitchen.
Step by Step Baking Guide

Follow these steps closely for the best results. Start by heating your oven to 325 degrees. This is a low heat that cooks the eggs gently. While the oven heats, work on your batter. Mix the cream cheese and sugar first. Use a low speed on your mixer. Once it is smooth, add the sour cream and vanilla. The sour cream adds a little tang that cuts through the heavy sugar. It makes the flavor much more balanced and interesting.
- Beat the cream cheese and sugar until smooth.
- Mix in the sour cream and vanilla extract.
- Add eggs one at a time. Mix just until the yellow disappears.
- Stir in 10 crushed cookies by hand with a spoon.
- Pour the mix over your baked crust.
- Bake for 55 to 60 minutes. The edges should be set, but the middle should still jiggle a little.
Using a Water Bath for Safety

A water bath sounds scary, but it is actually very easy. It just means putting your cake pan inside a bigger pan filled with water. The water keeps the oven moist. It also keeps the heat very steady. This is the secret to a cake with no cracks. Before you put the pan in the water, wrap the bottom in foil. Use big pieces of foil so no water leaks into your crust. I once used cheap foil and ended up with a soggy Oreo mess.
If you really hate water baths, you can put a pan of water on the rack below the cake. It is not as good, but it helps. However, I always suggest the real water bath for the best look. The steam from the water keeps the top of the cake soft. Soft tops do not crack as easily. It is worth the five minutes of extra work to have a beautiful cake. You will feel like a pro when you see the results.
Common Mistakes to Avoid
- Cold Cheese: This causes lumps that never go away. Always use room temperature cheese.
- Overmixing: Stop mixing as soon as the eggs are gone to prevent cracks.
- Opening the Door: Do not open the oven door while baking. This lets the heat out.
- Wrong Pan: Use a springform pan so you can remove the cake safely.
Cooling the Cake Down Slowly

Cooling is the most important step for texture. When the timer goes off, turn the oven off. Leave the cake inside and crack the door open just a little. Let it sit there for one hour. This lets the cake slowly get used to the cooler air. If you take it out right away, the shock will break it. This is when the cake finishes setting up. It will still look a little soft in the middle, but that is okay.
After the hour in the oven, take it out and put it on the counter. Let it get to room temperature. Only then can you put it in the fridge. A cheesecake needs to stay in the fridge for at least six hours. I prefer to leave mine overnight. The cold makes the cheese firm and easy to slice. It also makes the flavors blend together. A cake that is still warm will taste too much like eggs. Cold cake tastes like heaven.
Finishing Touches and Serving
Now that your cake is cold and firm, it is time to make it pretty. You can serve it plain, but Oreos look better with toppings. I like to use whipped cream and more cookie pieces. You can also drizzle chocolate sauce over the top. This makes it look like it cost fifty dollars at a bakery. Serving a beautiful cake makes me feel so proud of my work. It is the best part of baking.
When you are ready to cut the cake, use a hot knife. Run your knife under hot water and then wipe it dry. This helps the knife slide through the thick cheese. Clean the knife after every single cut. This gives you those perfect, sharp edges you see in pictures. It takes a little more time, but your guests will be very impressed. It is a small trick that makes a big difference in how the plate looks.
Topping Your Oreo Cheesecake

You can get very creative with the toppings. Some people like to crush extra cookies and sprinkle them all over the top. I like to make little swirls of whipped cream around the edge. You can use a piping bag for this if you want to be fancy. If you do not have a piping bag, just use a spoon to drop little clouds of cream. Add a whole cookie to each slice for a fun look. It tells everyone exactly what is inside the cake.
Another great idea is a chocolate ganache. You can melt chocolate chips with a little heavy cream. Pour this over the cold cake and let it drip down the sides. It creates a dark, shiny coat that looks amazing. If you choose this, let the ganache set in the fridge for 30 minutes before you cut the cake. It adds a whole new level of chocolate flavor to the dessert. My family loves when I do the extra chocolate topping!
How to Store Your Leftovers

If you have any cake left, you must keep it in the fridge. Cheesecake has a lot of dairy and will spoil if it stays on the counter. Wrap the pan tightly with plastic wrap. This keeps the cake from tasting like other things in your fridge. No one wants an Oreo cake that tastes like onions or leftovers! It will stay good for about five days. I think it actually tastes better on the second or third day because the crust gets a little softer.
You can also freeze this cake. Cut it into slices first. Wrap each slice in plastic and then put them in a freezer bag. This is great for when you want a quick treat later. When you want a piece, just let it sit on the counter for 30 minutes. It will be ready to eat and taste just as fresh as the day you made it. It is a great way to make the joy of baking last a long time.
Frequently Asked Questions
Can I use different cookies for the crust?
Yes! You can use chocolate chip cookies or peanut butter cookies. Just make sure to crush them well and mix with butter.
Why did my cheesecake crack on top?
Cracks usually happen from overmixing or cooling too fast. Use low speed and let the cake cool in the oven with the door open.
What if I do not have a springform pan?
You can use a regular pan lined with parchment paper. Leave extra paper hanging over the sides to lift the cake out gently.
Is sour cream really necessary for this?
It helps with the creamy texture and adds a nice tang. You can use Greek yogurt instead if you do not have sour cream.
Can I make this recipe gluten-free?
Yes! Use gluten-free chocolate cookies for the crust and filling. Most cream cheese and sugar are already gluten-free.
Final Thoughts on This Sweet Treat
Making an Oreo cheesecake is a great way to show love to your friends and family. It takes time, but the steps are simple if you follow them. Just remember to use soft cheese and cool it slowly. You will have a creamy, chocolatey dessert that everyone will talk about for weeks. Happy baking!