Best Ever Homemade Biscoff Protein Balls
Do you love the taste of spicy ginger cookies? If so, you probably love Biscoff. This cookie butter is famous all over the world for its deep caramel flavor. It tastes like a warm hug in a jar. But usually, cookies are not very healthy. They have lots of sugar and not much power for your muscles. That is why I made this recipe. I wanted something that tastes like a treat but helps my body stay strong. These Biscoff protein balls are the perfect answer for anyone who wants a snack that feels like dessert.
Making these snacks is very easy. You do not even need to turn on your oven. I have spent a lot of time trying to get the mix just right. Sometimes they were too dry. Other times they were too sticky to pick up. After many tries in my small kitchen, I found the magic balance. You get the crunch of the cookies and the smooth feel of the protein powder all in one bite. It is a great way to eat more protein without feeling like you are eating a chalky bar from the store.
In this guide, you will learn exactly how to mix, roll, and store these tasty treats. I will show you the simple steps to make them look like they came from a fancy shop. You can make a big batch on Sunday and have snacks for the whole week. These are great for after gym time or just when you need a little sweet pick-up in the afternoon. Let us get started on making these yummy bites!
Check out the full list of what you need below to start your snack prep.
Recipe Quick Info
- Prep Time: 15 minutes
- Cook Time: 0 minutes
- Servings: 12 balls
- Difficulty: Very Easy
The Best Ingredients for Your Biscoff Bites
Before you start mixing, you need to gather your items. Using the right stuff makes a big difference in how they taste. I always tell people to pick a protein powder they already like. If you do not like the taste of your powder in a shake, you will not like it in these balls. The cookie butter is the star here, so make sure it is fresh and easy to stir. You do not want the hard bits from the bottom of an old jar.
The Simple Shopping List

You only need a few things to make these. Most of these might be in your pantry right now. I like to use vanilla protein because it goes well with the spice of the cookies. You can also use unflavored powder if you want the Biscoff taste to be even stronger. Here is what you should grab from the store:
- 1 cup of rolled oats: These give the balls a good shape and keep you full.
- 1/2 cup of vanilla protein powder: This adds the muscle-building power.
- 1/2 cup of Biscoff cookie butter: Use the smooth kind for the best texture.
- 2 tablespoons of honey or maple syrup: This helps everything stick together.
- 1/4 cup of crushed Biscoff cookies: These add a nice crunch to the outside.
- 1 tablespoon of water or almond milk: Use this only if the dough feels too dry.
Choosing Your Protein Powder

Not all powders are the same. I once tried to use a very cheap chocolate powder, and it ruined the whole batch. It tasted very fake and hid the cookie flavor. For this recipe, whey protein works great because it makes the balls soft. If you are vegan, you can use pea protein. Just know that plant powders soak up more liquid. You might need to add a tiny bit more honey or water if you go that route. IMO, vanilla is the safest bet for flavor.
Why Cookie Butter Matters

Biscoff spread is made from crushed cookies. It has a very special taste of cinnamon and brown sugar. It acts as the glue for our protein balls. If you cannot find the Biscoff brand, you can use any speculoos spread. They taste almost the same. I have tried using peanut butter instead, but it changes the flavor too much. It is still good, but it won’t be a “Biscoff” ball anymore. If you have a nut allergy, this spread is usually safe because it is made from wheat, but always check the label first!
How to Make Your Protein Balls Step by Step
Now that you have your ingredients, it is time to get messy. This is the fun part! You do not need any fancy tools like a blender or a food processor. A big bowl and a sturdy spoon are all you need. I like to use my hands at the end to make sure everything is mixed well. It feels like playing with playdough, which is pretty fun no matter how old you are. Just make sure your hands are very clean before you start.
Mixing the Base Ingredients

Start by putting your dry items in the bowl. That means the oats and the protein powder go in first. Give them a quick stir so there are no big lumps of powder. Next, add the cookie butter and the honey. This is where it gets tough to stir. The mixture will be very thick. That is a good sign! If it is too runny, the balls will just turn into flat pancakes on your plate. Keep stirring until you don’t see any white powder left. It should look like a dark, thick dough.
Rolling the Perfect Balls

Once the dough is ready, take a small piece about the size of a golf ball. Roll it between your palms until it is a smooth circle. If the dough sticks to your hands, you can put a little bit of water on your skin. This helps the ball stay together without sticking to you. I usually get about 12 balls from this recipe. Try to make them all the same size so they look pretty. This is a great task for kids to help with too! My little cousin loves helping me roll these, even if he eats half the dough while we work.
Adding the Crunchy Coating

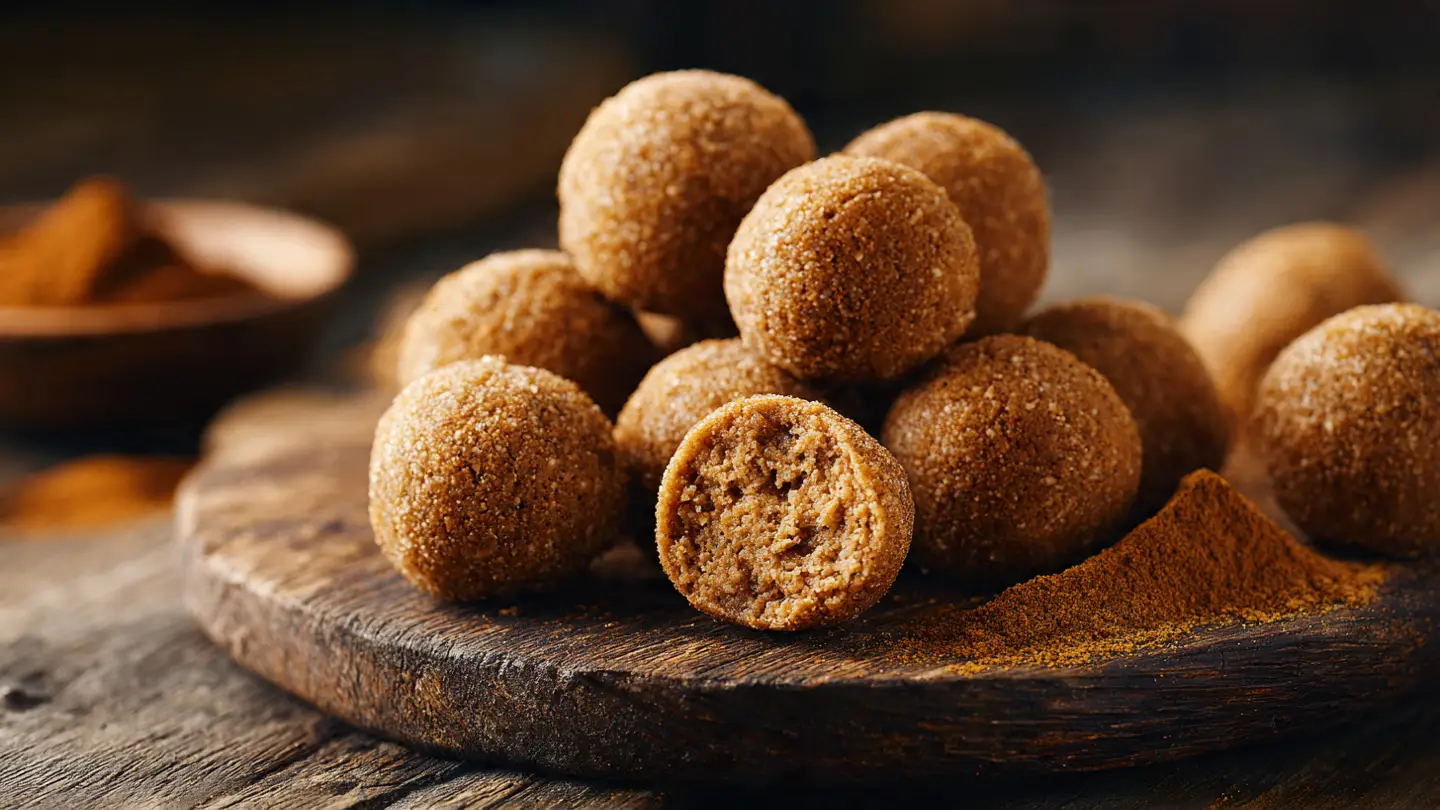
To make these look like they came from a bakery, we add a coating. Take your extra cookies and crush them into tiny bits. You can put them in a bag and hit them with a spoon to do this. Put the crumbs in a small bowl. Take each ball and roll it in the crumbs. Press down a little bit so the pieces stay stuck. This adds a really nice crunch when you take a bite. It also stops the balls from sticking to each other when you put them in a container. It is a small step, but it makes a huge difference.
Pro Tips for Success
- Wet Hands: If the dough is too sticky, slightly damp hands make rolling much easier.
- Chill Time: If the mix is too soft, put the bowl in the fridge for 10 minutes before rolling.
- Oat Texture: If you hate chunky oats, pulse them in a blender for 5 seconds to make them smaller.
Chilling for the Best Texture

You can eat these right away, but they taste better cold. I like to put mine in the fridge for at least 30 minutes. This helps the oats soak up the moisture and makes the balls firm. When they are cold, the cookie butter gets a bit harder, which gives them a great chew. I usually put mine in a glass container with a lid. They will stay fresh in the fridge for about a week. FYI, you can also freeze them if you want them to last a whole month. Just let them thaw for five minutes before you eat one.
Tips to Make These Even Better
I have made these many times, and I have learned some cool tricks. You can change the recipe to fit what you like. Some people like them sweeter, and some like them more salty. You can play around with the flavors once you get the hang of the basic steps. Don’t be afraid to try something new! Cooking is all about testing things out to see what tastes best to you.
Variations to Try at Home

If you want to change things up, try adding a few chocolate chips to the dough. White chocolate goes really well with Biscoff. You could also add a tiny pinch of sea salt on top. The salt makes the caramel flavor of the cookies pop. Another idea is to melt a little bit of cookie butter and drizzle it over the top of the balls after they are rolled. This makes them look very fancy, like something you would buy at a high-end health food store. It is a simple way to make your snacks feel like a real treat.
Serving Suggestions for Snacks

These are great on their own, but they are also good with a drink. I love having one with my morning coffee. The warm coffee melts the cookie butter just a little bit as you eat it. They are also a perfect side for a bowl of Greek yogurt. You can crumble a ball over the top of your yogurt for a high-protein breakfast. If you are going for a hike or a long walk, put three or four in a small bag. They are the perfect fuel to keep you moving without feeling too heavy in your stomach.
How to Fix Common Mistakes

One mistake I made early on was adding too much liquid. My balls turned into a messy pile of goo. If this happens to you, just add a tablespoon more of oats. Mix it in and wait a minute. The oats will drink up the extra liquid. If your balls are too dry and won’t stay in a circle, add a tiny splash of milk. Go very slow! You only need a tiny bit to change the texture. Another tip: make sure your protein powder isn’t old. Old powder can taste bitter, and no amount of Biscoff can hide that.
Keeping Your Snacks Fresh
Storing your snacks the right way is key. Since these have no preservatives, they won’t last forever on the counter. I always keep mine tucked away so I don’t eat them all at once! They are so good that it is easy to grab one every time you walk past the kitchen. Having a plan for storage helps you keep your healthy goals on track.
Storage and Freezing Guide

The best place for these is in an airtight container in the fridge. This keeps them from drying out. They will stay good for up to 7 days. If you make a double batch, you can put some in the freezer. Put them on a tray first so they don’t stick together. Once they are frozen solid, move them into a freezer bag. They will stay good for up to 3 months. When you want one, just take it out. By the time you finish your workout or get to work, it will be soft enough to eat.
Your New Favorite Snack Questions
You might still have a few questions about these treats. I have answered the most common ones here to help you out.
Can I use quick oats instead of rolled oats?
Yes! Quick oats work fine. They are smaller, so your balls will have a smoother texture. They soak up liquid faster too.
Is this recipe vegan?
Biscoff spread is usually vegan! Just use a plant-based protein powder and maple syrup instead of honey to make it 100% vegan.
What if I don’t have honey?
You can use maple syrup, agave, or even a little bit of extra melted cookie butter. Any sticky liquid sweetener will work.
Why are my protein balls falling apart?
They are likely too dry. Add a teaspoon of water or milk and mix again. The dough should feel like thick cookie dough.
Can I add nuts to this recipe?
Sure! Crushed pecans or walnuts would taste great. Just swap out some of the oats for the nuts so the balance stays right.
Happy Snacking
I hope you love these Biscoff protein balls as much as I do. They are a simple, tasty way to get more protein into your day. Remember to keep them cold and share them with friends if you are feeling nice. These are proof that healthy eating can still taste like your favorite cookies. Enjoy your homemade treats!