Best Ever Toaster Oven S’mores for a Nostalgic Treat
Everyone loves the smell of a campfire and the taste of a toasted marshmallow. But sometimes you do not want to go outside or build a big fire just for a snack. You might live in a city or it might be raining outside. That is why I love making s’mores in my toaster oven. It is fast, easy, and you get that same gooey crunch every single time.
In this guide, I will show you how to get the perfect brown top on your marshmallow without burning it. You will learn the best way to stack your graham crackers so they do not slide around. I will also share some fun ways to change up the flavor if you want something different than the classic milk chocolate. It is a simple treat that makes any night feel like a party.
Want to see how easy it is to bring the campfire inside your kitchen?
The Magic of the Toaster Oven
Using a toaster oven is much better than using a microwave for s’mores. When you use a microwave, the marshmallow puffs up big but then gets tough and chewy. It does not get that pretty golden color on top. The toaster oven uses dry heat, which makes the outside of the marshmallow crispy while the inside stays soft and melty. It also warms up the chocolate just right so it starts to run.
I started making these because I missed camping trips with my family. One night, I really wanted a sweet snack but it was freezing cold outside. I looked at my small toaster oven and wondered if it would work. After a few tries, I found the secret to making them taste just as good as the ones made over real logs. Now, I make them whenever I want a little bit of comfort food after a long day.
The Short List of Ingredients

You do not need a lot of stuff to make a great s’more. The most important thing is the quality of what you buy. I always look for fresh marshmallows because old ones do not melt as well. They can get a bit grainy if they have been sitting in the pantry for months. For the chocolate, a standard milk chocolate bar is the classic choice, but you can use dark chocolate if you like things less sweet.
Graham crackers come in a few flavors now. You can get the plain ones, honey ones, or even cinnamon ones. I think the honey flavor goes best with the toasted sugar of the marshmallow. Make sure your crackers are crisp. If the box has been open for a while, they might be soft. You can actually put the crackers in the toaster oven for one minute alone to crisp them back up if they feel a bit stale. FYI, this little trick saves a lot of snacks!
- Honey graham crackers (broken into squares)
- Large puffy marshmallows (not the tiny ones)
- Milk chocolate bars (broken to fit the cracker)
- A pinch of sea salt (optional but very good)
Tools for S’more Success

The main tool is your toaster oven, of course. You do not need a fancy one with lots of buttons. Even a basic one with a dial will do the job perfectly. You also need a small baking sheet that fits inside. I always line my tray with parchment paper or aluminum foil. Marshmallows are very sticky. If one falls over and melts onto your tray, it is a pain to scrub off later. Save yourself the work and use a liner.
One mistake I made when I first started was putting the s’mores directly on the wire rack. The chocolate melted and dripped down onto the heating element. It smelled like burnt sugar for a week! Always use a tray. You might also want a small spatula to lift the hot s’mores off the tray. They are very soft when they first come out, and your fingers will get burned if you try to grab them too soon. A pair of tongs can also help if you are careful not to squish the fluffy tops.
Step 1: Building the Base

First, break your graham crackers in half to make squares. Lay them out on your lined tray. I usually make two or three at a time because they taste best when they are hot. Once you have your crackers down, put your chocolate on top. I like to use two small rectangles of chocolate so it covers most of the cracker. If you put too much chocolate, it will spill over the sides and make a mess.
Next, place one large marshmallow right in the center of the chocolate. Stand it up on its flat end. If you lay it on its side, it might roll off while the tray is moving. Standing it up also gives it more height, which helps it get closer to the top heater in your oven. This is how you get that perfect brown top. It looks like a little snowy mountain sitting on a chocolate hill. This part is fun to do with kids because it is like building blocks.
Recipe Quick Info
- Prep Time: 2 minutes
- Cook Time: 2-3 minutes
- Servings: 1-4 people
- Difficulty: Very Easy
Step 2: The Perfect Toast
Slide your tray into the toaster oven. You want the tray to be in the middle or top slot. If it is too low, the chocolate will melt before the marshmallow gets brown. Set your oven to “Toast” or “Broil.” I prefer the broil setting because it is fast. You must stay right there and watch them! Marshmallows go from perfect to on fire in about five seconds. Do not walk away to check your phone.
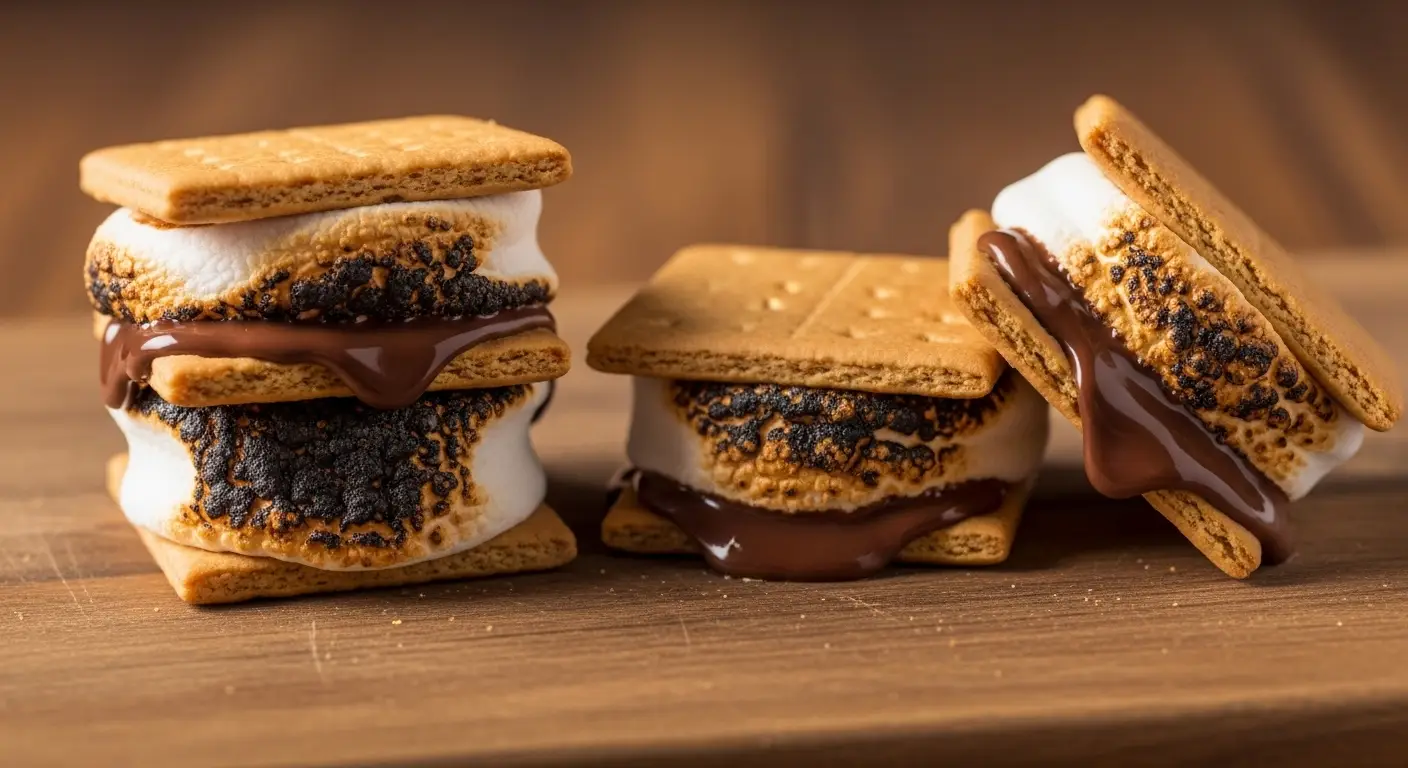
Watch through the glass. You will see the marshmallow start to swell up and get bigger. Then, the top will turn light tan, then golden brown. Some people like them a bit charred. If you do, let them go a few seconds longer until they are dark brown. As soon as they look the way you like, turn off the oven and pull the tray out. The heat from the marshmallow will finish melting the chocolate underneath while it sits for a moment. This is the best part of the whole process.
- Preheat toaster oven to broil or medium toast.
- Place s’more bases on the tray.
- Slide tray into the top rack.
- Watch for 1 to 3 minutes until golden.
- Remove carefully using oven mitts.
Step 3: The Big Squish

Now comes the most satisfying part of the whole recipe. Take another graham cracker square and place it on top of the hot, toasted marshmallow. Press down very gently. You want the marshmallow to spread out to the edges of the cracker, but you do not want to break the cracker. If you press too hard, the cracker will snap into pieces and you will have sticky fingers. This “squish” mixes the hot marshmallow with the chocolate.
Let the s’more sit for about thirty seconds. I know it is hard to wait when it smells so good! But if you bite into it right away, the sugar in the marshmallow can be very hot and burn your mouth. Letting it sit also lets the chocolate finish melting into a smooth sauce. This creates that classic texture where the cracker is crunchy, the chocolate is silky, and the marshmallow is stretchy. It is a perfect bite of food. IMO, the wait makes it taste even better.
Fun Flavor Variations

Once you know the basic way to make them, you can get creative. One of my favorite things to do is add a thin layer of peanut butter to the bottom cracker before adding the chocolate. It tastes like a peanut butter cup s’more! You can also use different kinds of candy bars. Instead of plain chocolate, try a bar with almonds or caramel inside. Just make sure the candy bar is flat so the marshmallow does not fall off.
For a fruitier version, you can put a thin slice of strawberry or banana on top of the chocolate. This makes the s’more feel a bit more fancy. Another great tip is to sprinkle a tiny bit of flaky sea salt on the chocolate. The salt cuts through all that sugar and makes the flavor pop. You can even use chocolate graham crackers for a double-chocolate treat. There are no rules here, so use whatever you have in your pantry and see what tastes best to you.
Pro Toaster Tips
- Don’t Overcrowd: Leave space between s’mores so they don’t stick together.
- Watch the Height: If your marshmallow is too tall, it might touch the heater and catch fire.
- Use Foil: Lined trays make cleanup take zero seconds.
Serving and Sharing

S’mores are best served on a big plate while they are still warm. If you are making them for a group, you can line up a whole tray of eight or ten at once. It is a great way to end a movie night or a small dinner party. I like to serve them with a cold glass of milk. The milk helps wash down the sweet chocolate and cleans your palate for the next bite. It is the ultimate nostalgic pairing.
If you have leftovers, they do not stay great for long. The cracker will get soggy from the moisture in the marshmallow. It is best to only make what you are going to eat right then. However, if you do have one left over, you can put it back in the toaster oven for thirty seconds to soften it back up. It won’t be quite as crunchy as the first time, but it is still a tasty snack. These are meant to be eaten with your hands, so make sure you have some napkins nearby!
Common Questions About Toaster S’mores
Can I use a regular oven if I do not have a toaster oven?
Yes! Use the broiler setting in your big oven. Place the tray on the top rack and watch closely. It works the same way but might be faster.
Why did my marshmallow catch on fire?
Marshmallows have a lot of sugar. If they get too close to the hot coils, they can ignite. Keep them an inch away from the heat and watch them.
Can I use the small mini marshmallows?
You can, but you need a pile of them. They melt very fast and can run off the cracker. Large ones work much better for staying in place.
How do I keep the chocolate from being too hard?
The heat from the marshmallow usually melts it. If yours is still cold, leave the s’more in the turned-off oven for 1 minute to soften the bar.
Can I make these vegan or gluten-free?
Sure! Use gluten-free graham crackers and vegan marshmallows. Many stores sell these now, and they toast just like the regular kind.
Enjoy Your Indoor Campfire
Making s’mores in a toaster oven is a simple way to bring a little joy into your day. It takes less than five minutes and uses only three main items. Whether you are sharing them with friends or eating one by yourself, it is a sweet treat that always hits the spot. Just remember to watch that marshmallow closely so it stays golden and delicious!