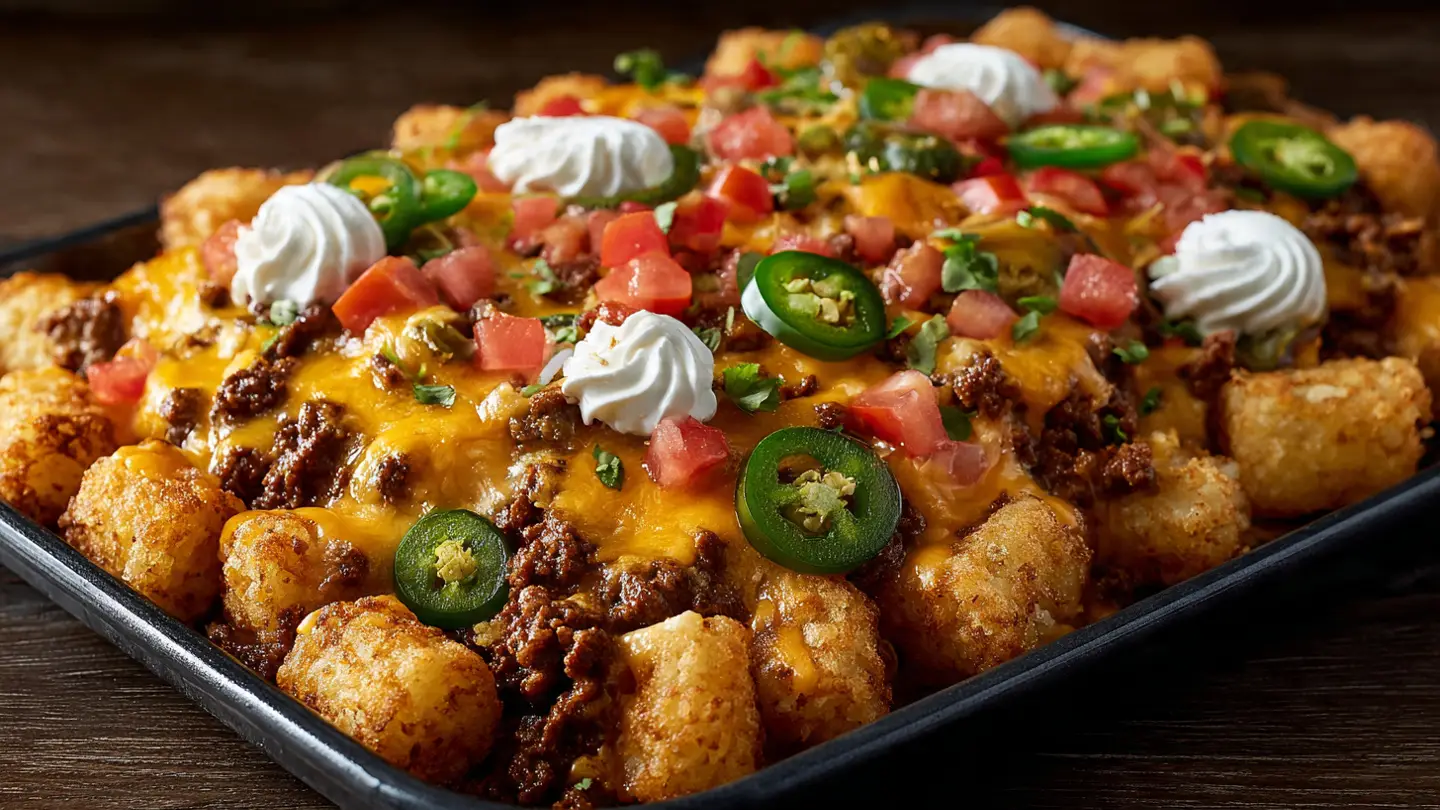
Tater Tot Nachos (Totchos)
Are you looking for a snack that is fun and tastes great? I have the best idea for you. Today, I am going to show you how to make Tater Tot Nachos. Most people call them totchos. These are just like regular nachos, but we use crispy potato tots instead of chips. They are crunchy on the outside and soft on the inside. Every bite is full of cheese and flavor. I love making these for my friends because everyone always asks for the recipe.
In this post, you will learn exactly how to bake the tots so they stay firm. I will also tell you about the best toppings to use. You do not need to be a chef to make this meal. It is simple enough for kids to help, but it tastes like something from a fancy restaurant. Get your baking sheet ready because we are about to make something delicious together.
Check out my tips below to make the best batch ever!
Recipe Quick Info
- Prep Time: 10 minutes
- Cook Time: 30 minutes
- Servings: 4 people
- Difficulty: Very Easy
What You Need for Your Totchos
Before you start cooking, you need to gather all your food. I like to put everything on the counter so I do not forget anything. You only need a few simple things from the grocery store. Most of these items are probably in your kitchen right now. Choosing the right ingredients makes a big difference in how the meal turns out. I always look for the bags of tots that say extra crispy on the label.
The Main Ingredients List

You will need a few basic things to get started. First, get a large bag of frozen tater tots. One bag is usually enough for four people. You also need a lot of cheese. I like to use cheddar or a Mexican blend. It is better to shred the cheese yourself. The bagged cheese has a powder on it that stops it from melting well. I learned that the hard way when my cheese stayed in little strips instead of getting gooey!
- One 32-ounce bag of frozen tater tots
- Two cups of shredded cheddar or monterey jack cheese
- One pound of ground beef or ground turkey
- One packet of taco seasoning
- Half a cup of water for the meat
These are the core parts of the dish. You can also add black beans or corn if you want more veggies. I find that the beef makes it a full meal rather than just a snack. If you do not eat meat, you can skip the beef and use more beans instead. It still tastes great because the tots carry most of the flavor anyway.
Cool Toppings to Add Freshness

Toppings make the totchos look pretty and taste fresh. Since the tots and cheese are heavy, fresh veggies help balance the meal. I always use green onions and tomatoes. They add a nice crunch and a bit of juice. Sliced jalapeños are good if you like things spicy. If you are serving this to kids, you might want to keep the spicy peppers on the side so they don’t get a surprise burn.
I also love adding a big scoop of sour cream right at the end. It makes everything creamy. Guacamole is another favorite at my house. If you don’t have time to make guacamole, just dice up a fresh avocado with a little salt and lime juice. It works just as well. FYI, adding lime juice to your avocado keeps it from turning brown while you eat.
How to Make the Perfect Totchos
Cooking these is all about the timing. You want the tots to be very hot and the cheese to be perfectly melted. If you rush it, the potatoes might be mushy. Nobody likes a soggy tot! I have spent a long time practicing this to get the crunch just right. Follow these steps closely to make sure your snack is a winner. The secret is in how you layer the ingredients on the pan.
Step 1: Get the Tots Crispy

- Heat your oven to 425 degrees. A hot oven is key for crunch.
- Spread the tots in a single layer on a big baking sheet.
- Do not let the tots touch too much. They need air to get crispy.
- Bake them for 20 to 25 minutes.
- Flip them halfway through so both sides get brown.
While the tots are in the oven, you can cook your meat. I use a frying pan over medium heat. Brown the beef until there is no pink left. Drain the fat out of the pan. Then, stir in your taco seasoning and water. Let it simmer for a few minutes until the sauce is thick. This meat will be the first layer of flavor we put on top of our potatoes.
Step 2: Layering the Cheese and Meat

Once the tots are crispy, take the tray out of the oven. Do not turn the oven off yet! Move the tots closer together so they form a thick bed of potatoes. Now, spoon your hot meat all over the tots. After the meat is on, sprinkle the shredded cheese over everything. Use a lot of cheese! You want every single tot to have a bit of cheesy goodness attached to it.
Put the tray back in the oven for about 5 minutes. You are waiting for the cheese to melt and start to bubble. Watch it closely so the cheese does not burn. One lesson I learned is that different cheeses melt at different speeds. Pepper jack melts very fast, while sharp cheddar takes a bit longer. Once it looks gooey and delicious, take it out. This is the base of your totchos.
Step 3: Finishing with Fresh Toppings

Now comes the fun part. It is time to decorate your food. While the pan is still hot, start adding your cold toppings. I like to start with the tomatoes and onions. Then I add the jalapeños. I usually finish with a drizzle of sour cream. You can put the sour cream in a small plastic bag and snip the corner to make pretty lines. It makes the dish look like it came from a professional kitchen!
Serve these right away. Totchos are best when the potatoes are still hot and the cheese is stretchy. If you let them sit too long, the steam from the meat can make the tots soft. I usually put the whole baking sheet on a wooden board in the middle of the table. Everyone can just grab what they want. It is a very social way to eat dinner.
Tips for the Best Results
I have made these many times for parties and family nights. I have found a few tricks that make them even better. Not all tots are the same, and not all ovens heat the same way. You might need to change things a little bit based on what you have in your kitchen. Here are some things I always keep in mind to make sure my meal is perfect every single time.
Use a Large Baking Sheet

One big mistake people make is using a small pan. If the tots are piled on top of each other while they bake, they will steam instead of fry. They will come out soft and limp. You want them to have space so the hot air can touch every side. If you are making a double batch, use two separate pans. It is better to have more dishes to wash than to have bad food! IMO, the extra cleaning is worth the crunch.
Also, I suggest using parchment paper or a silicone mat on your pan. This stops the cheese from sticking to the metal. It makes cleaning up much faster. I hate scrubbing burnt cheese off a pan, so this tip saves me a lot of time. If you don’t have paper, just spray the pan with a little bit of oil before you put the tots down. This helps the bottoms get extra brown and crispy too.
Try Different Meat Options

You do not have to use ground beef. I often use leftover shredded chicken from a grocery store rotisserie bird. It is very fast because you don’t have to cook it first. Just toss the chicken with some buffalo sauce or BBQ sauce for a different flavor. If you want a vegetarian option, use a can of black beans or pinto beans. Just make sure to wash and drain the beans first so they don’t add too much liquid to the pan.
Pulled pork is another great choice. If you have leftovers from a BBQ, put them on your tots! The sweet sauce goes really well with the salty potatoes. There are no rules here. You can use whatever protein you like. Just remember that the meat should be warm before you put it on the tots so the cheese melts easily. Cold meat might keep the cheese from getting gooey in the oven.
Serving Suggestions and Sides

These totchos are very filling, but you can serve them with other things. I usually put out a bowl of fresh salsa and some extra chips on the side. A simple green salad is also a good idea. The salad helps your stomach feel better after eating a lot of cheese and fried potatoes. If you are having a party, you can set up a “totcho bar.” Put the plain cheesy tots in the middle and let everyone add their own toppings from small bowls.
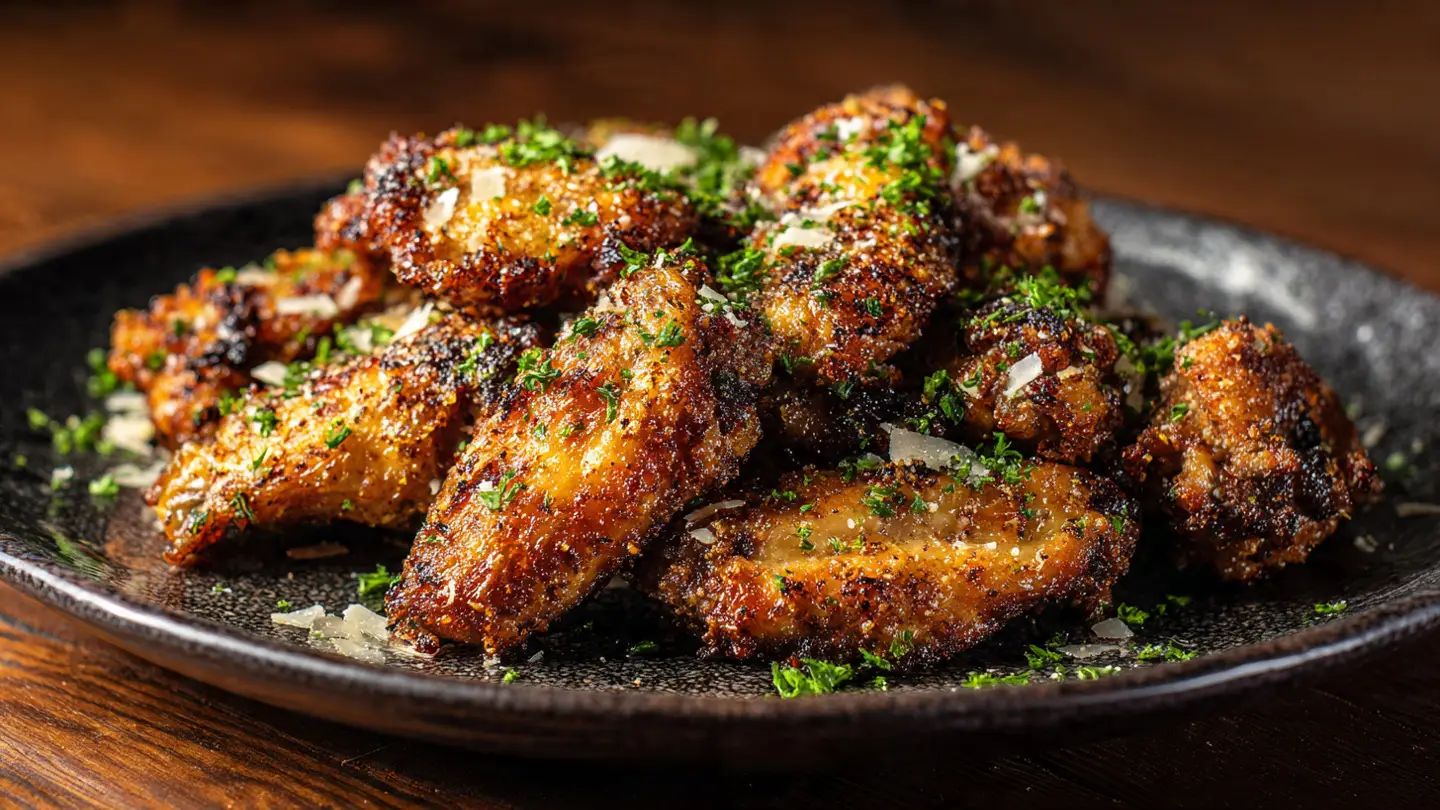
For drinks, I like something cold and bubbly. A lemon-lime soda or cold water with a lot of ice works best. Since the food is salty and a little bit heavy, you want a drink that feels light. If you are making these for a football game, they go perfectly with wings or celery sticks. Everyone loves a good snack spread. Just make sure you have plenty of napkins because things can get a little messy!
Pro Kitchen Secret
- Preheat the Pan: Put your empty baking sheet in the oven while it heats up. When you drop the frozen tots onto a hot pan, they start sizzling right away. This gives you the best crust on the bottom of the potato!
Questions People Often Ask
Can I make these in an air fryer?
Yes! Cook the tots at 400 degrees for 15 minutes. Add toppings and cheese for the last 2 minutes. It makes them very crunchy and uses less energy than the oven.
How do I keep the tots from getting soggy?
Make sure to bake them until they are very dark golden brown before adding toppings. Also, do not put watery toppings like salsa on until you are ready to eat.
Can I save the leftovers for later?
You can, but they are not as good. The tots will get soft in the fridge. If you must reheat them, use an oven or air fryer. Avoid the microwave because it makes them mushy.
What is the best cheese to use?
Freshly shredded cheddar is the best. It melts well and has a strong flavor. You can also mix in some monterey jack for extra stretchiness and creaminess.
Are totchos gluten free?
Most tater tots are gluten free, but you must check the bag. Some brands use flour to keep them from sticking. Check your taco seasoning too, as it can have hidden wheat.
Time to Eat Your Totchos
You now know everything you need to make the best Tater Tot Nachos at home. They are crispy, cheesy, and so easy to customize. Whether you use beef, chicken, or just beans, your friends and family will love this fun twist on a classic snack. Just remember to bake those tots until they are extra crunchy before you add the cheese. Grab your favorite toppings and start cooking today!